Posted on Leave a comment

Goat Bunks and Pools

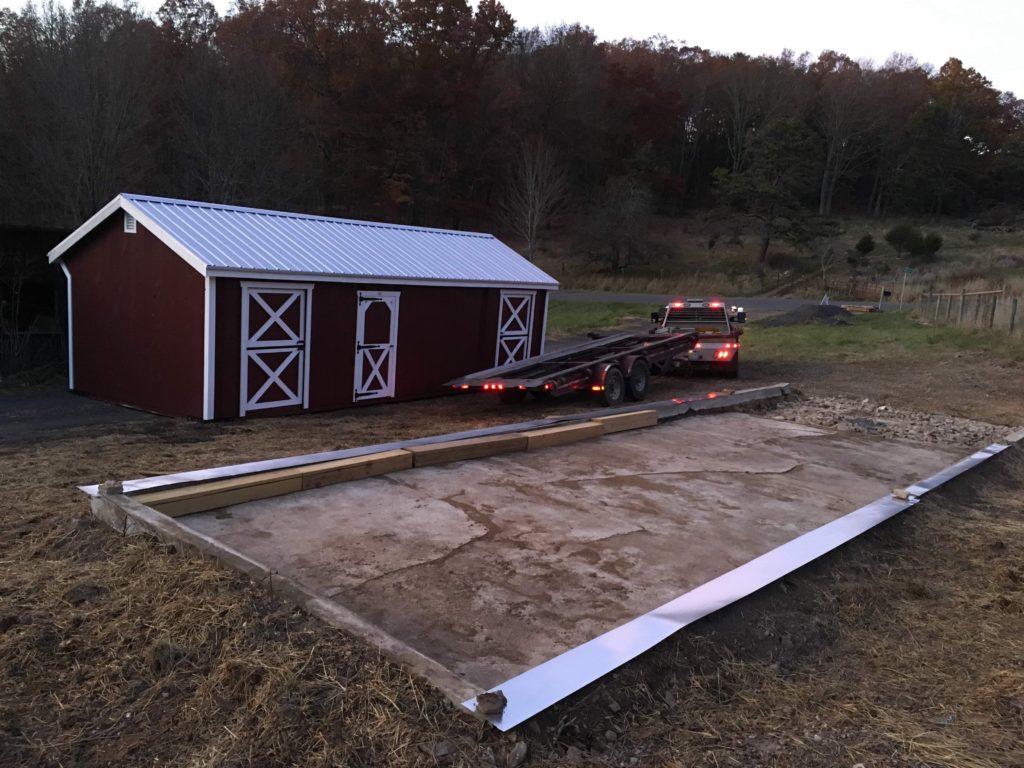
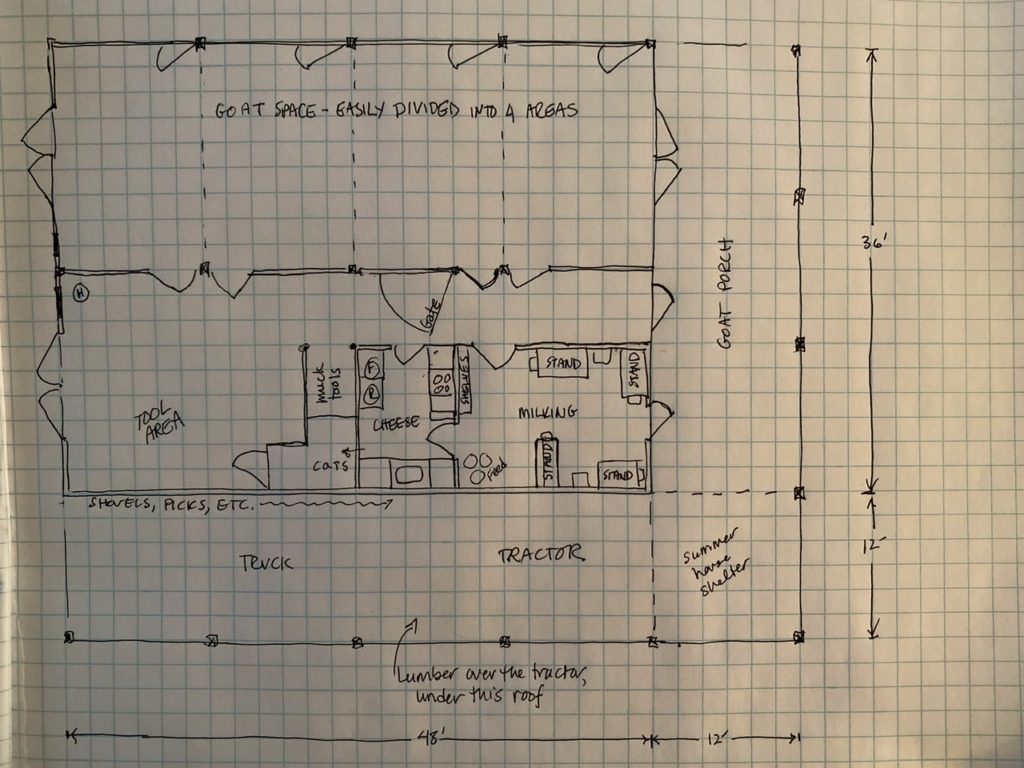
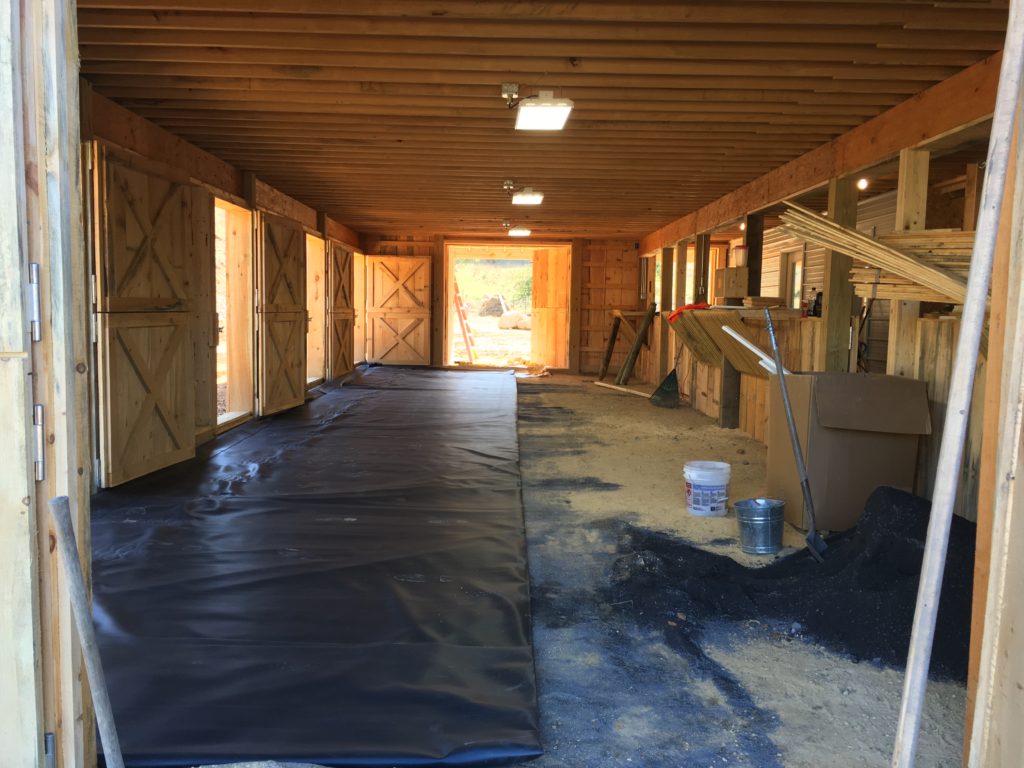
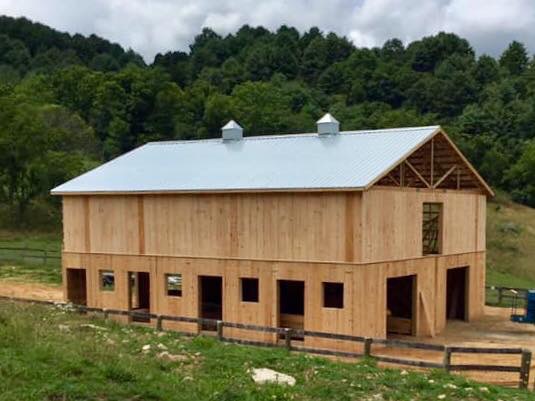
In an earlier post, I described the rubber flooring that we chose to put down in our new goat barn. We love, love, love this flooring for so many reasons (sanitation, easy to clean daily, etc.) but one problem we had for winter was that rubber on earth is cold. Almost all barn floors need some augmentation in winter for goats, so that they’ll stay warm and dry. We had a large area, and bedding is expensive, so we hit upon a compromise that is working great for us, and I decided this was the time to share.

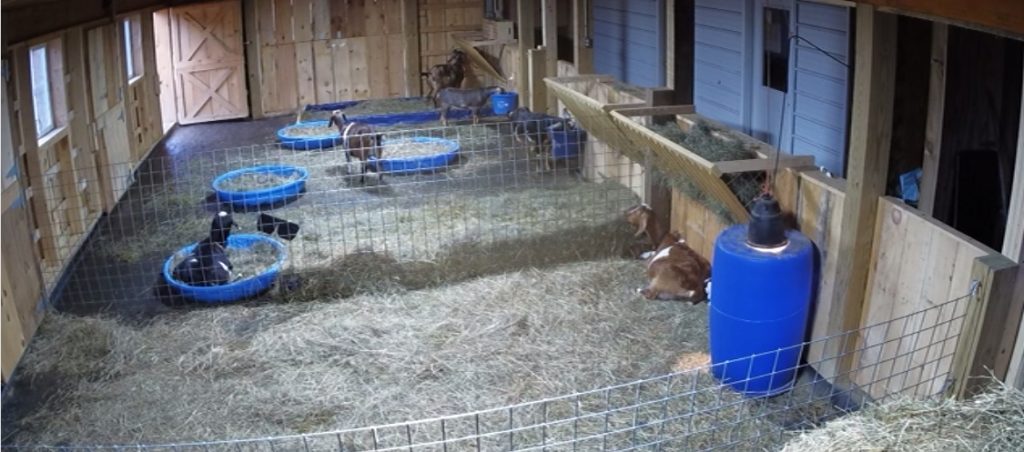
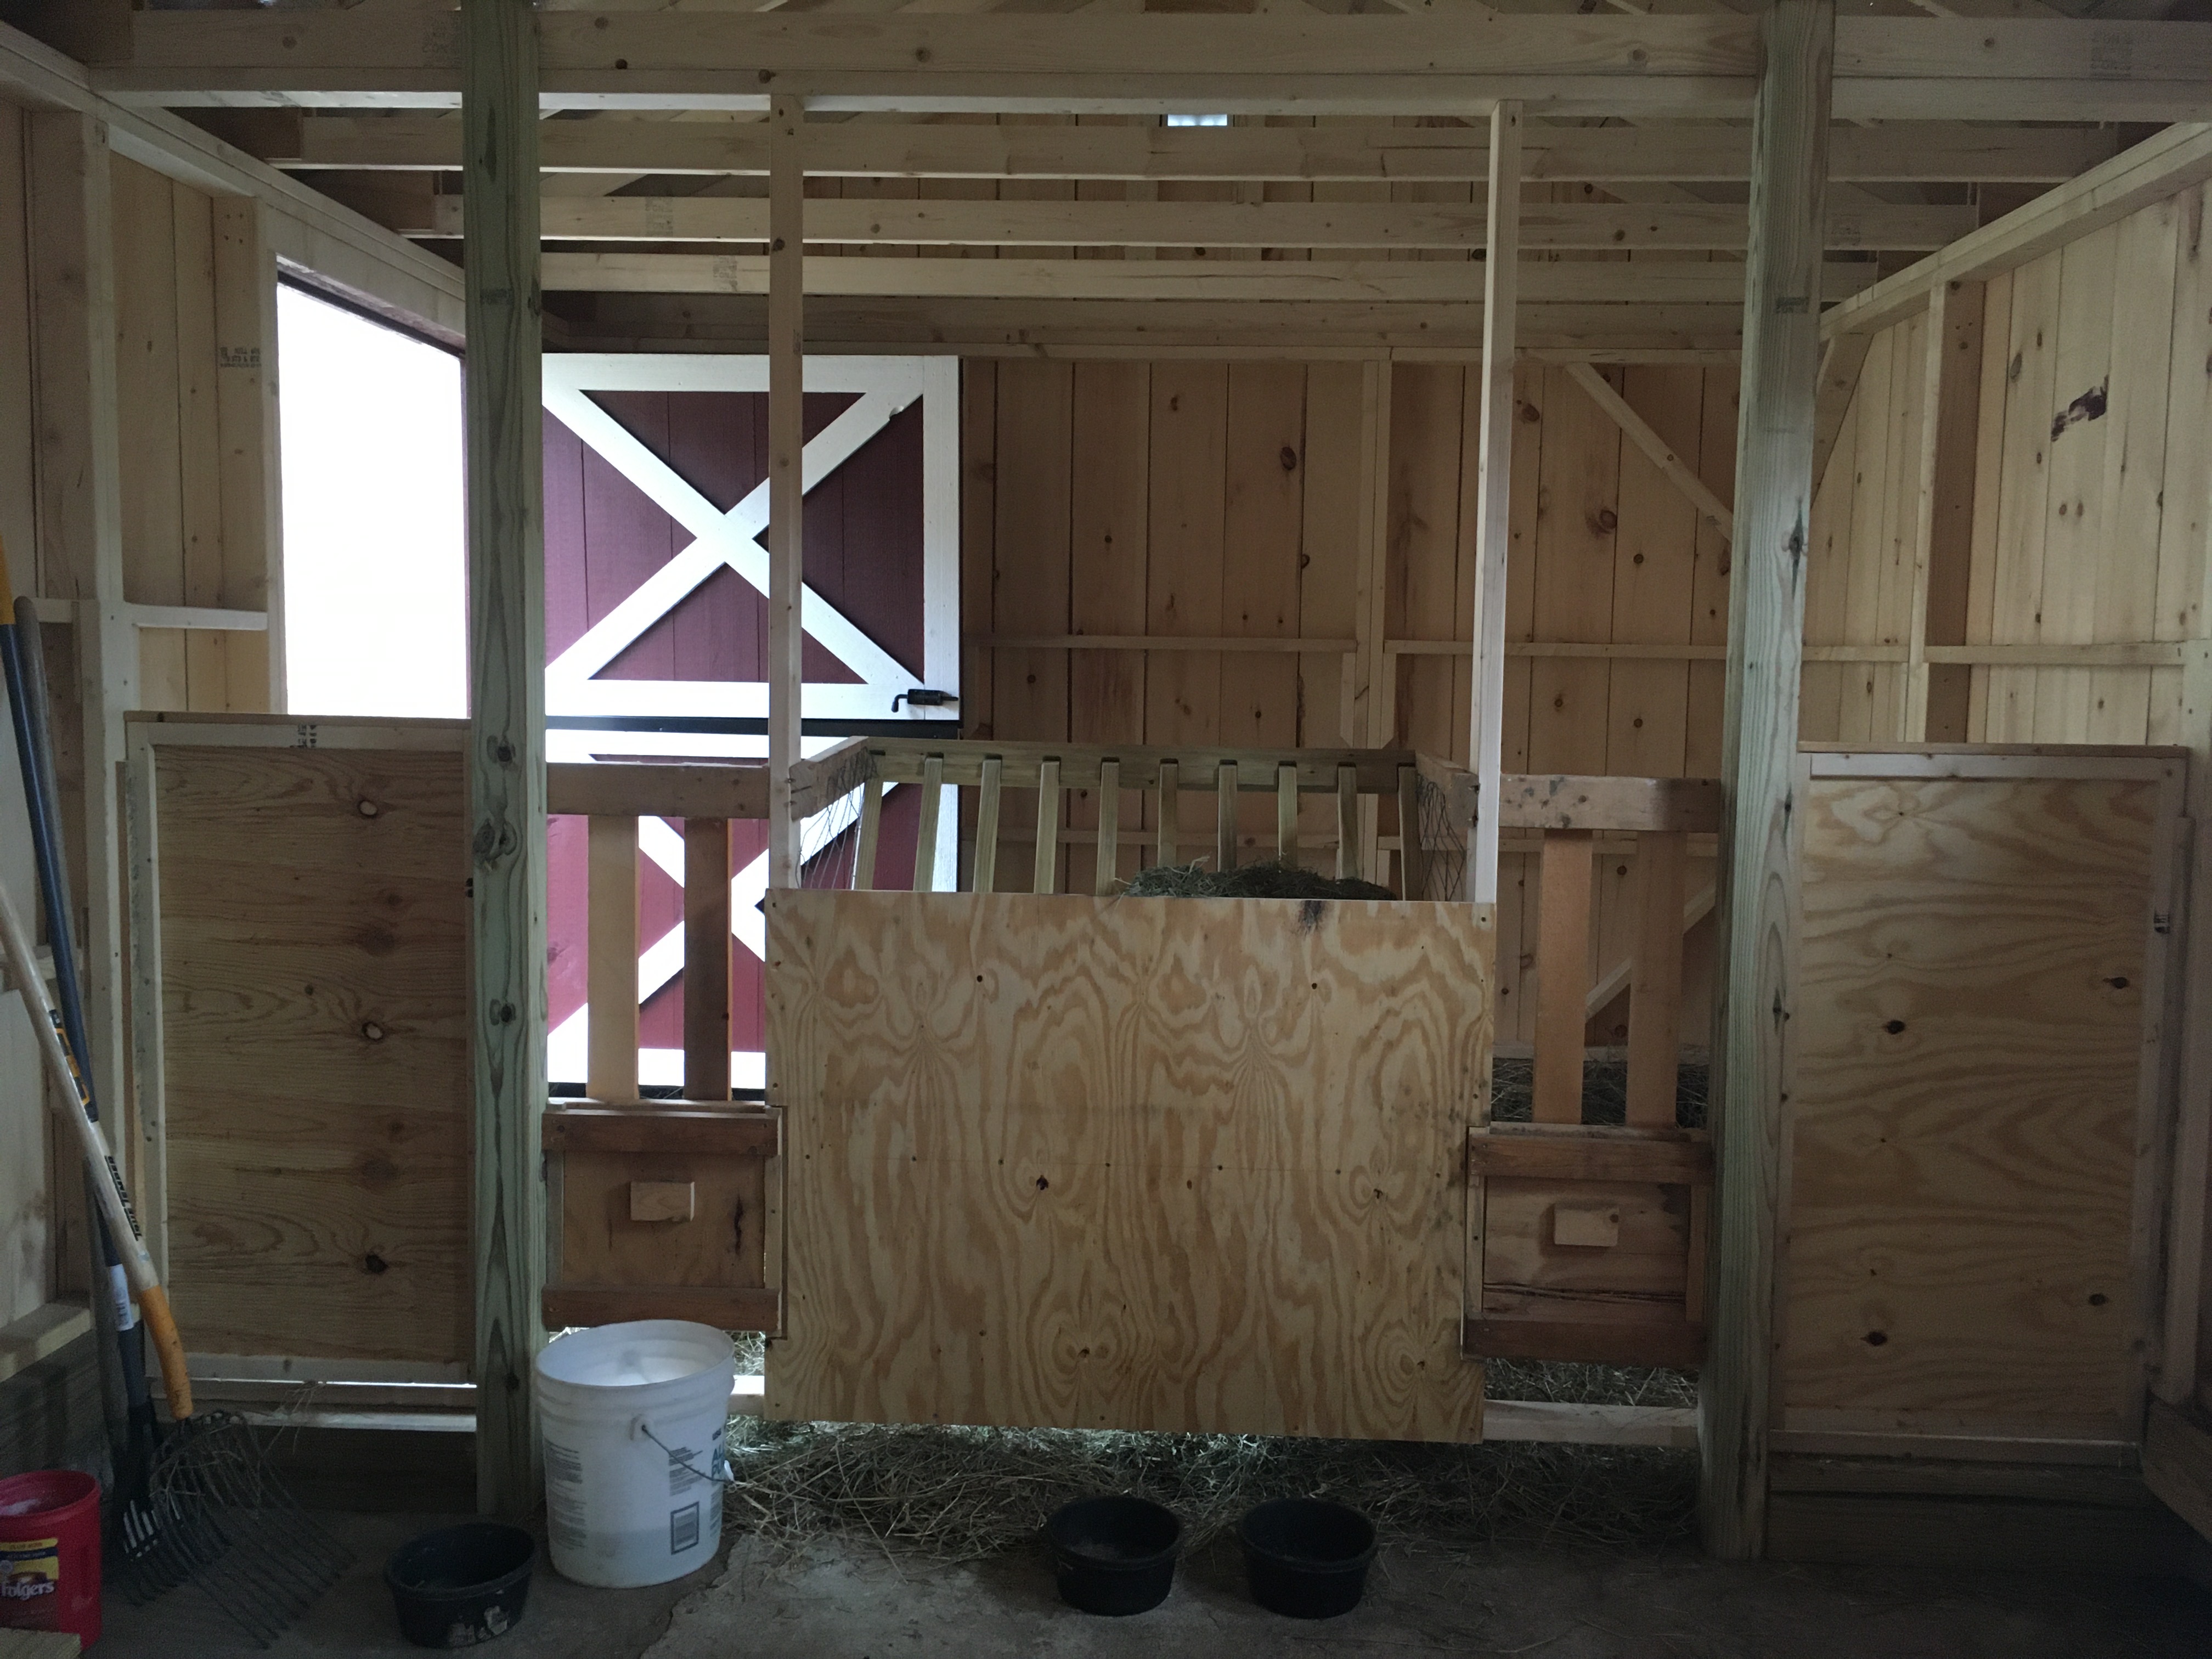
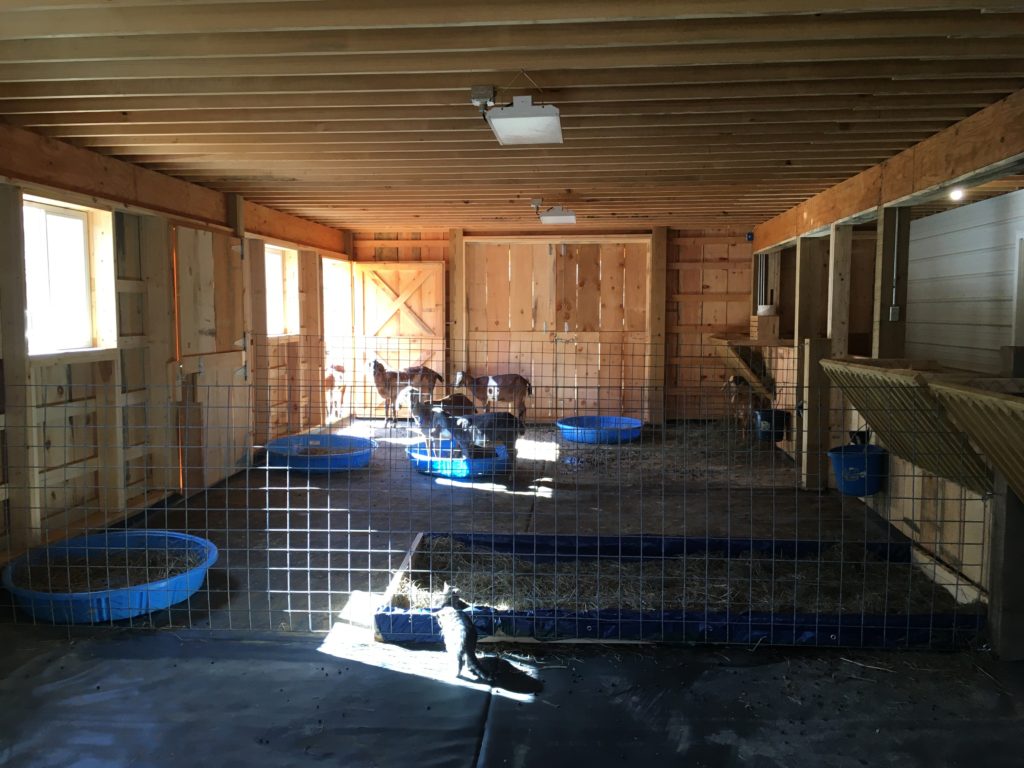
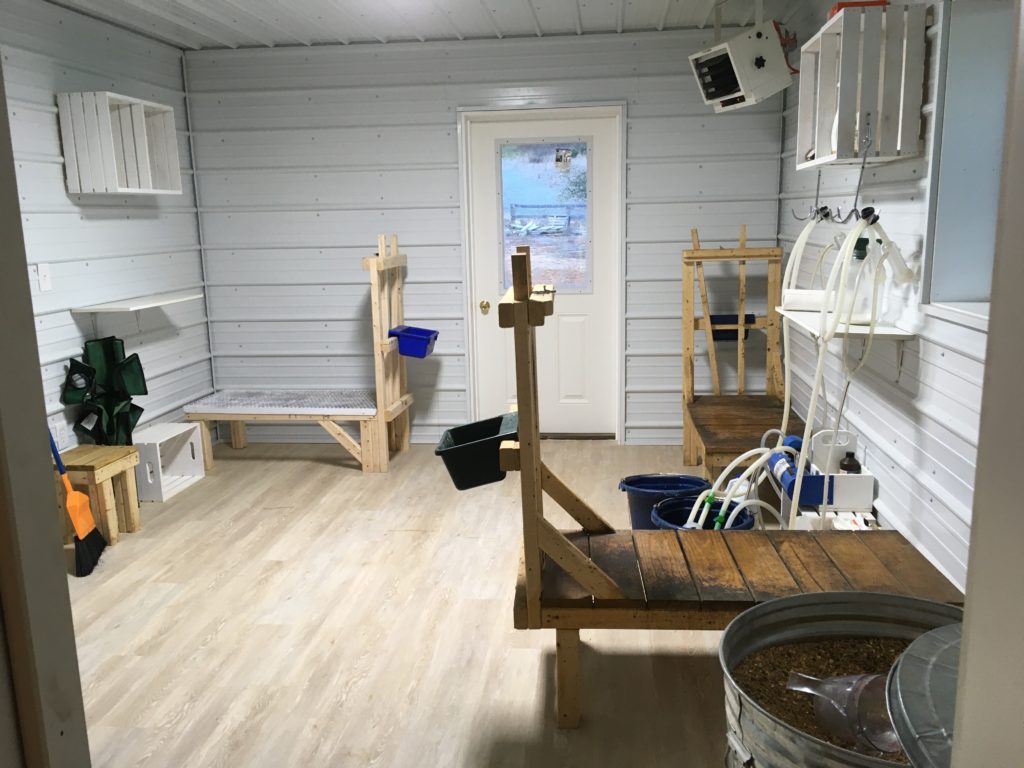
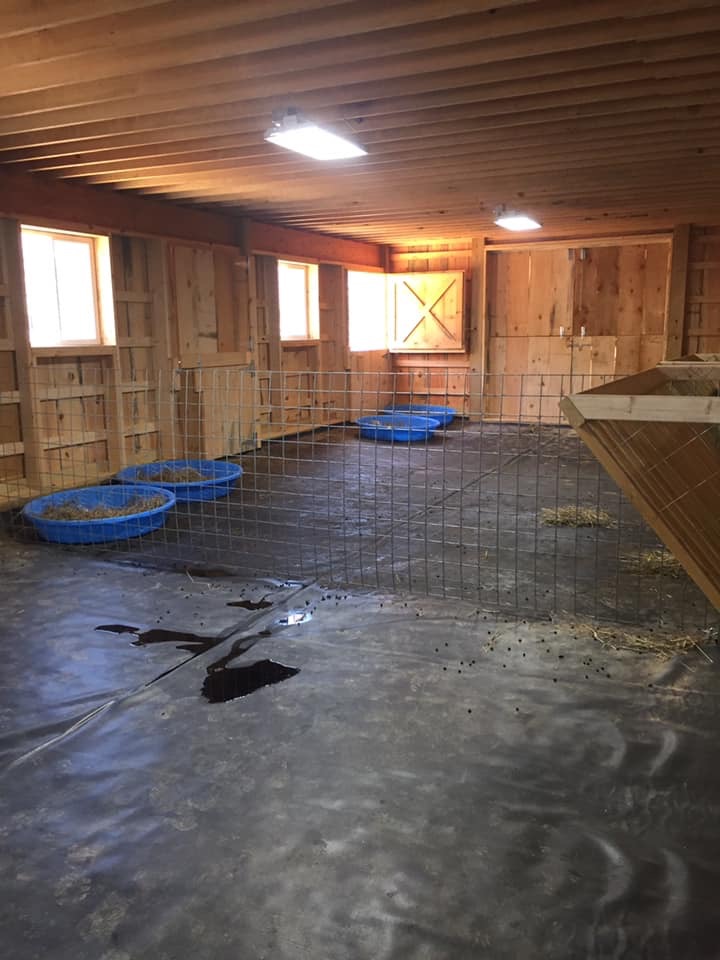
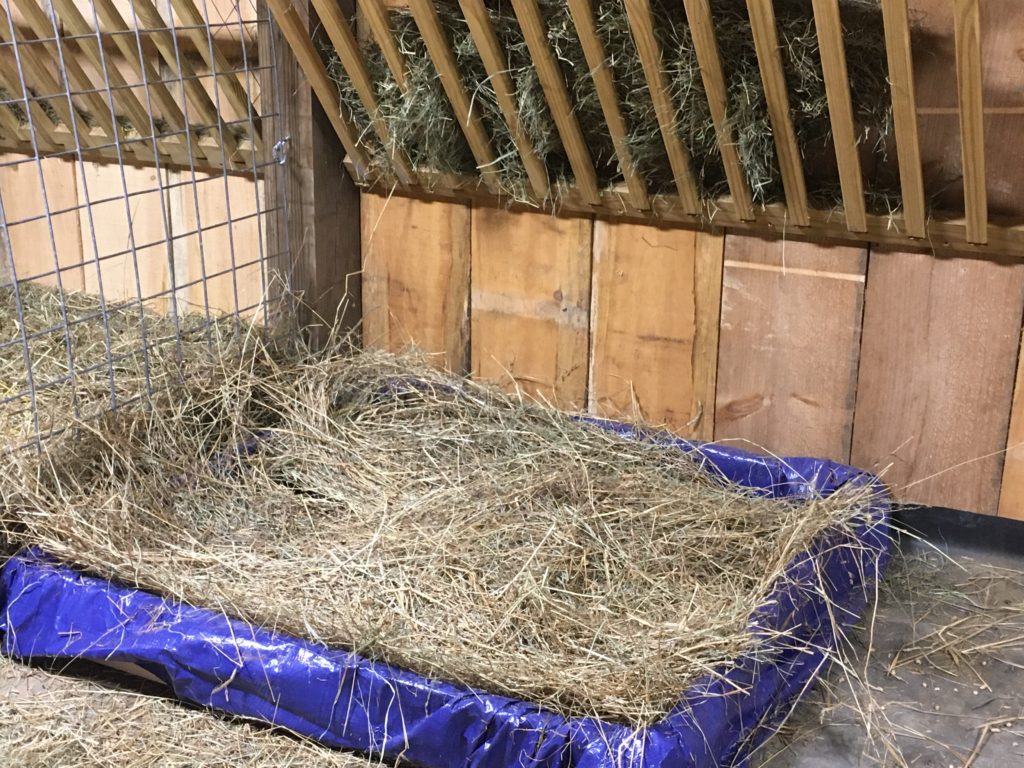
Pictured at the right, you can see an assortment of $3 kiddie swimming pools that are 5’ in diameter, and two rectangular bunks in the far double bay. The one at the extreme end was just mucked last week. The one closer to the camera is getting too full and needs mucked soon. (It’s been about 9 weeks since I mucked it.)

These offer sleeping accommodations to 13 does. This post shows and tells how I make (and maintain) these pools and bunks.

Steps to Construction

Step 1: For a pool, buy a kiddie pool (they go on sale for a song in the fall, but they’re never expensive).

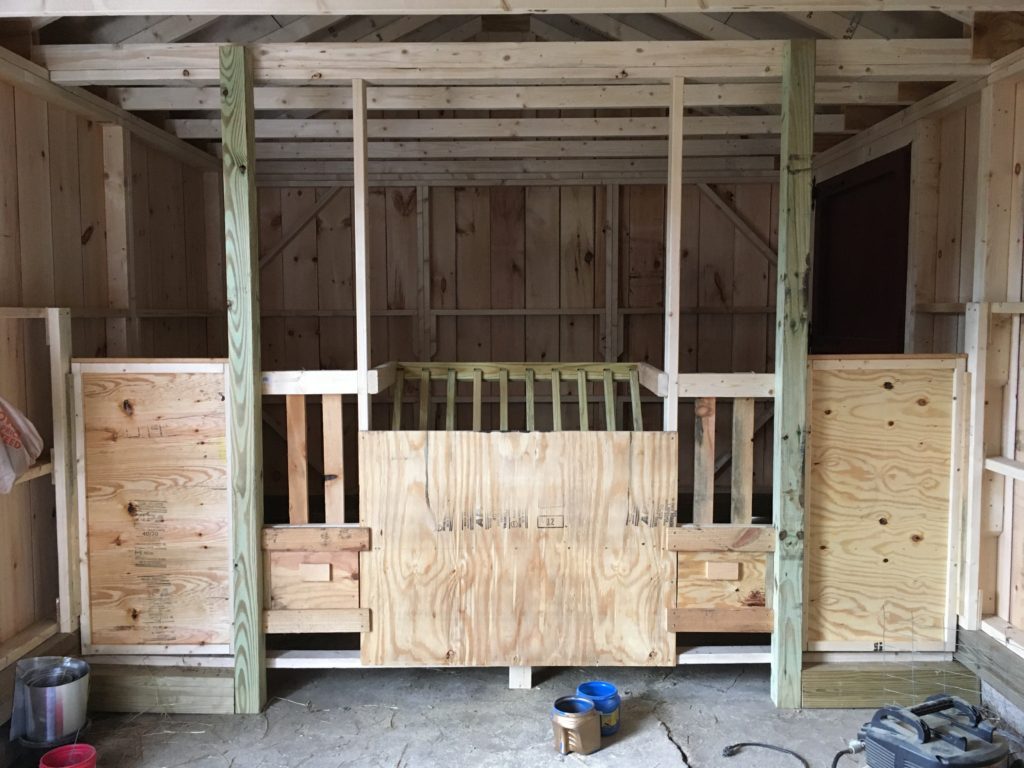
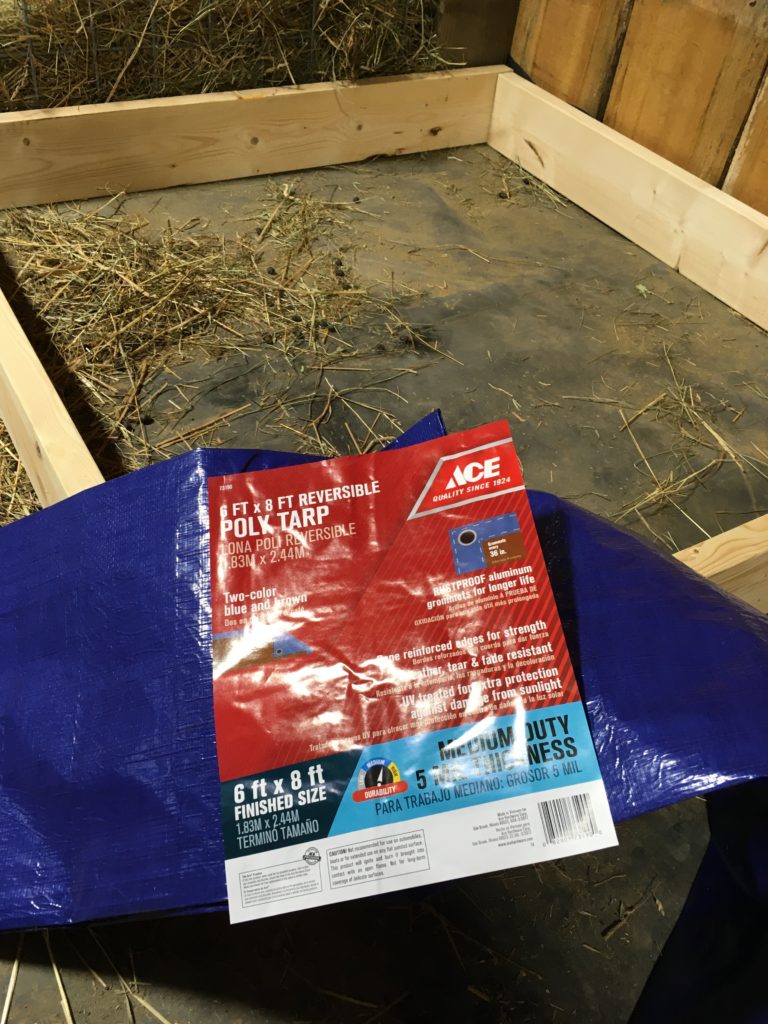
For a bunk, buy some untreated 2x6s. The bunk pictured here is 4’ X 4’. The ones in the picture above are 4’ X 10’.

You will also need one tarp per bunk that is oversized for the bunk size you want to create.

Step 2 for the bunk is to screw together your 2x6s to make a square. Then unwrap your tarp.

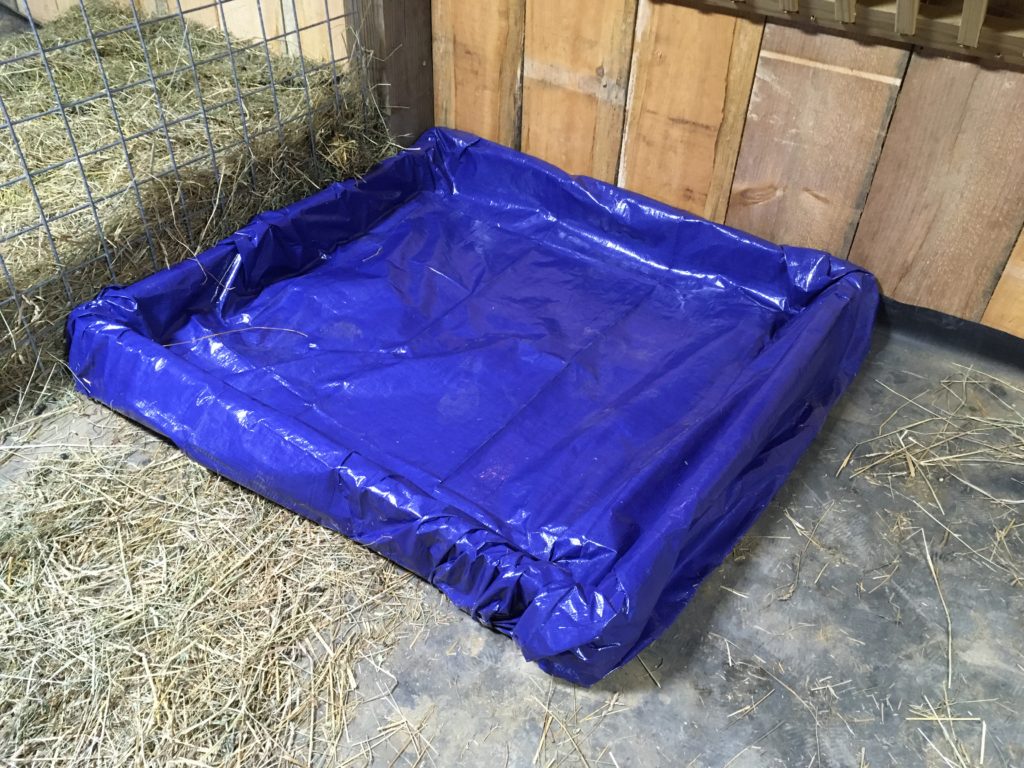
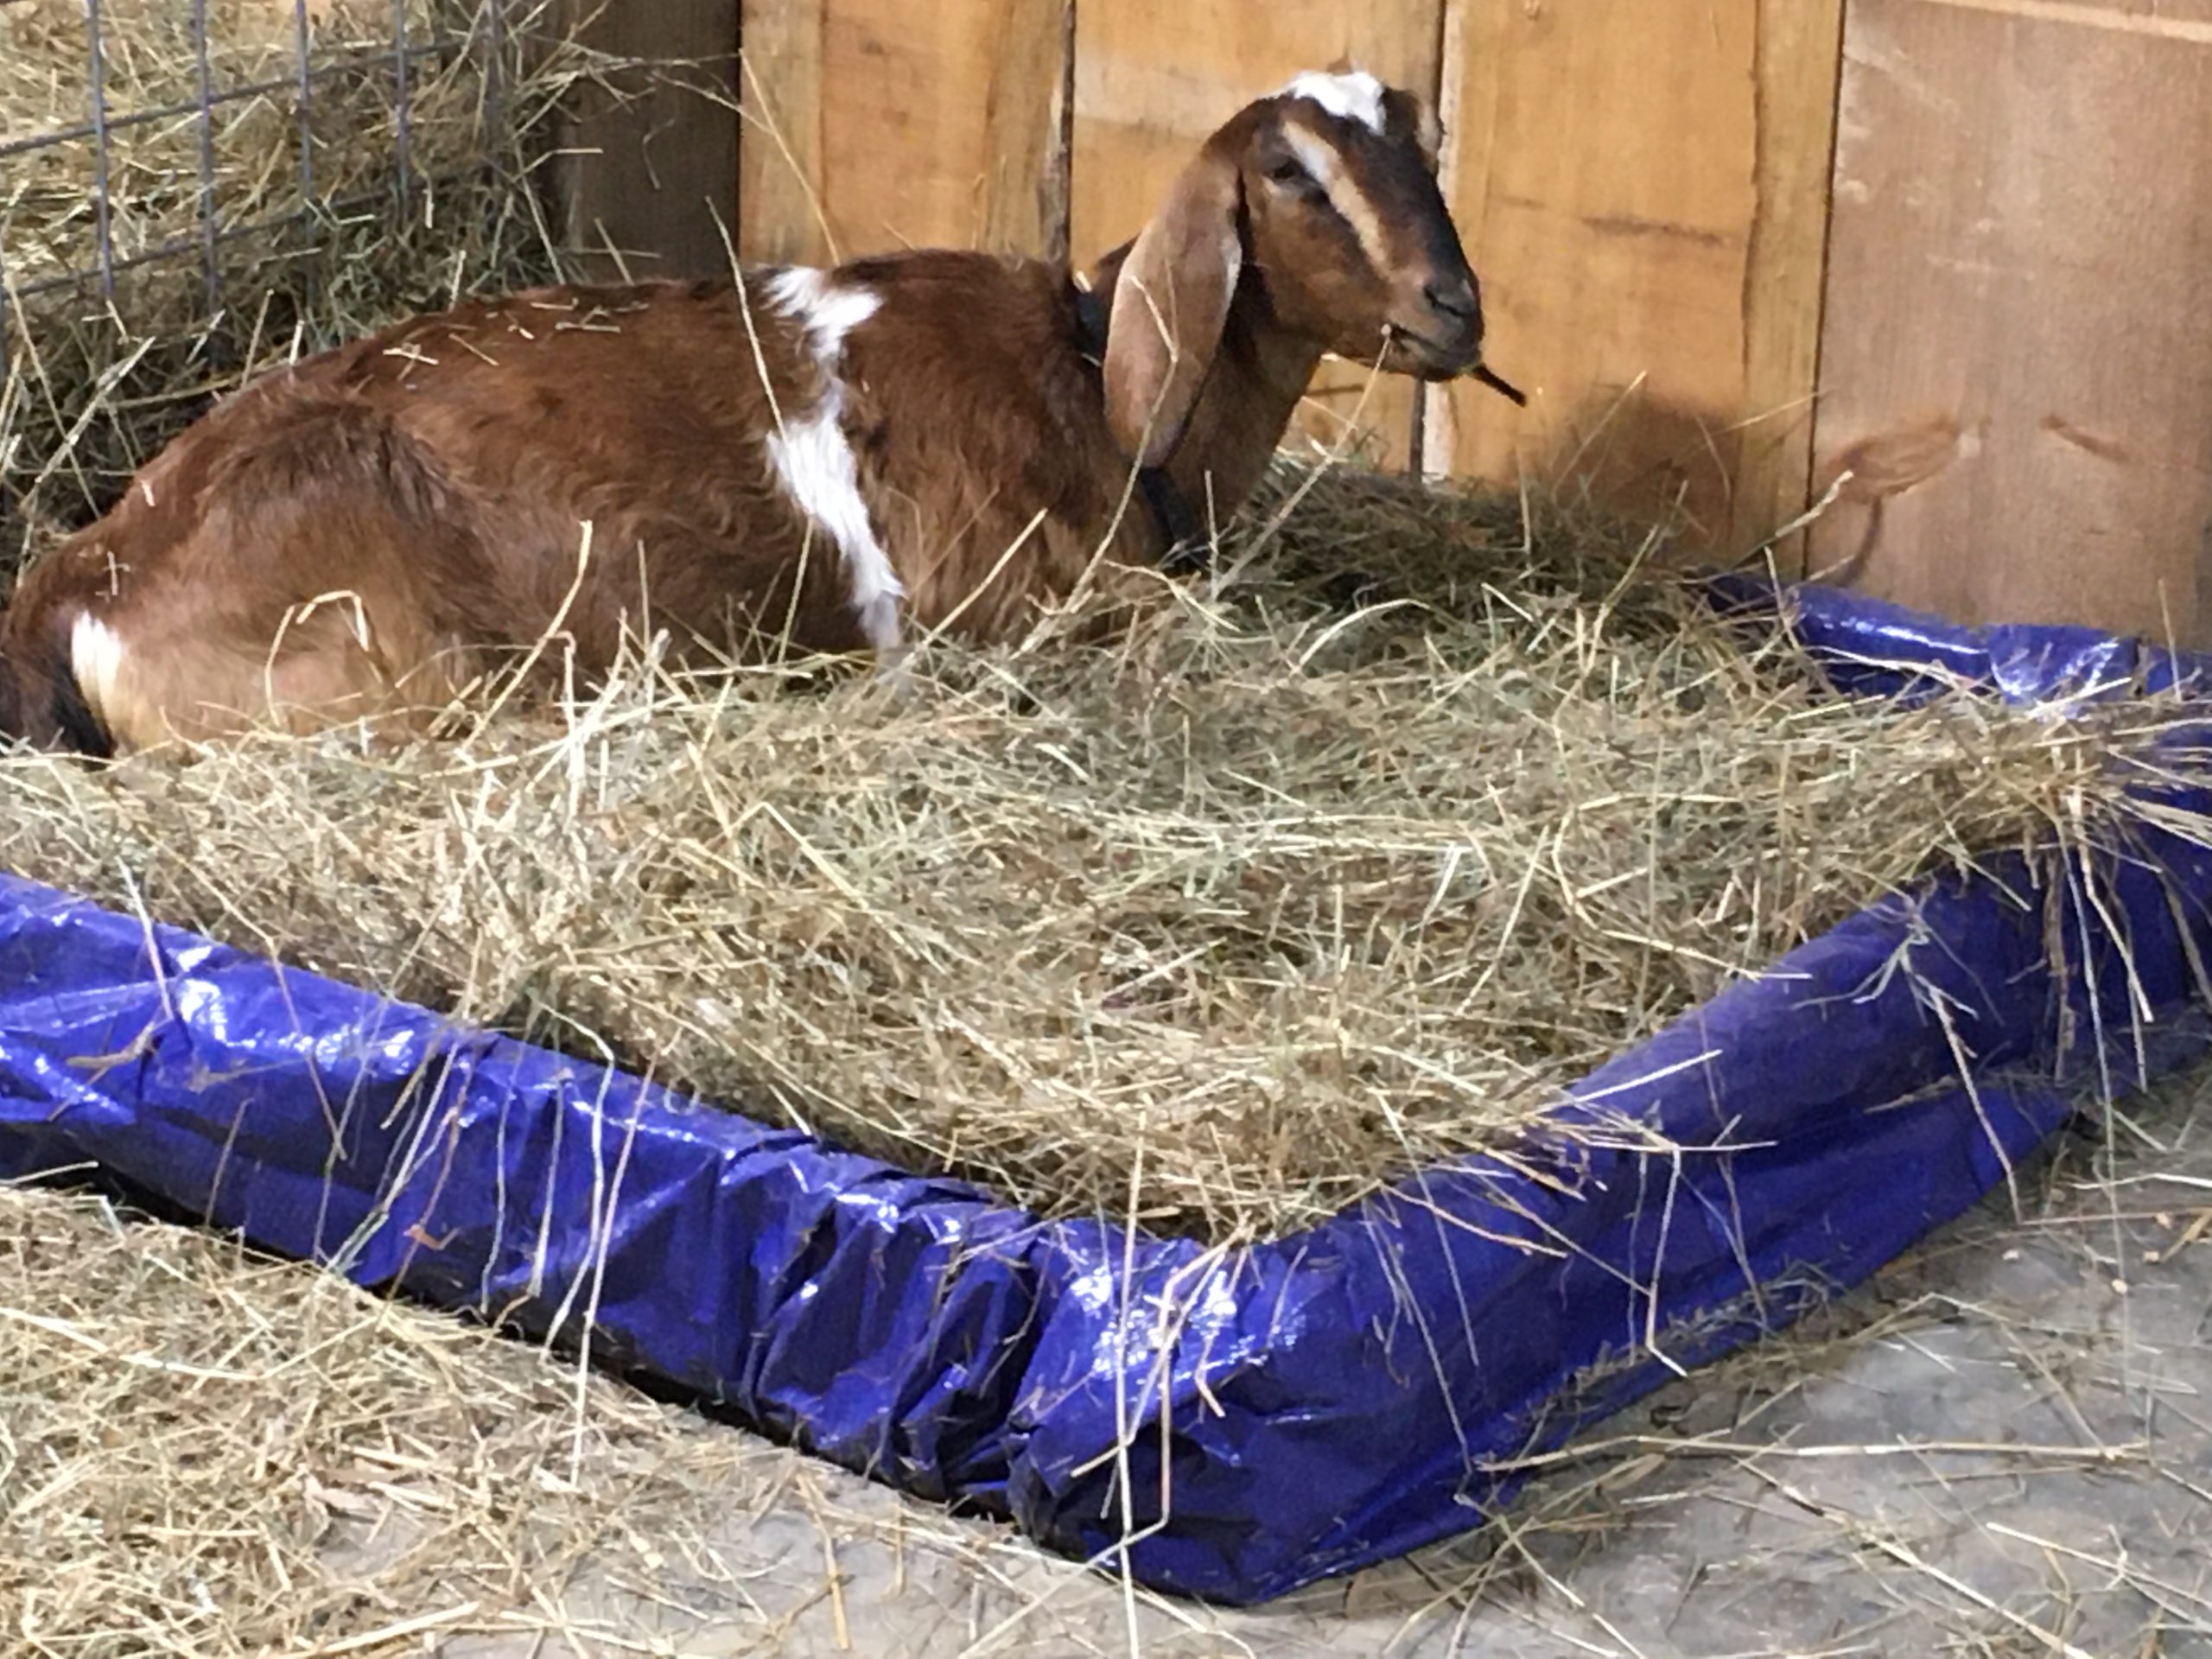
Step 3 for a bunk: Drape the tarp over the frame, and then wrap the excess around the frame. Make sure to push the tarp down so that you can fill it and the weight of the fill won’t break the tarp, or cause it to become unwrapped from the frame.

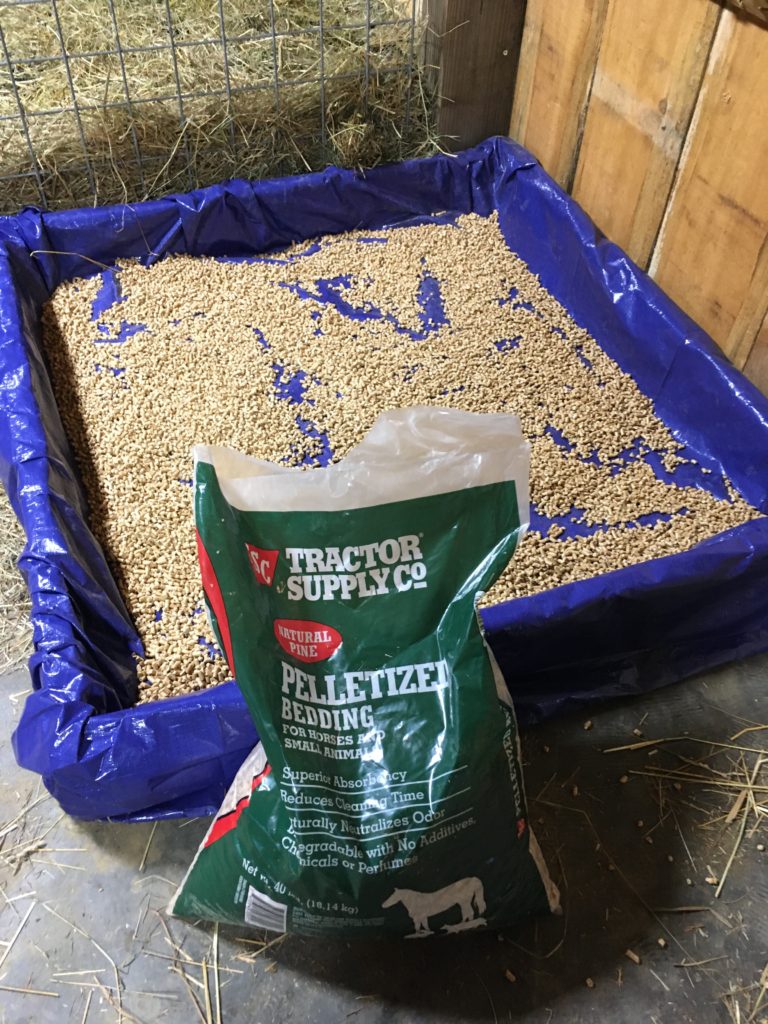
Step 4: (For either pool or bunk) put down a thin layer of equine horse bedding pellets. These are super absorbent. They will hold a lot of urine before it will start to puddle at all.

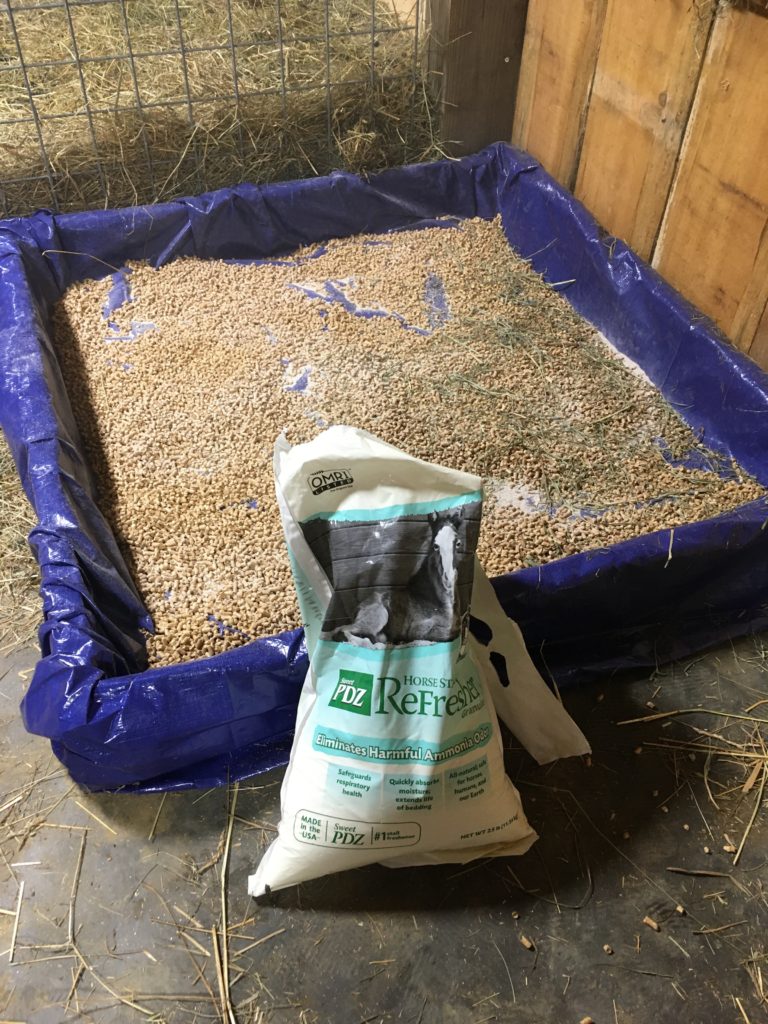
Step 5: Add some PDZ powder to your pellets. (Word to the wise: do all this with no goats watching. They think that the pellets and PDZ are feed!)

The purpose for the PDZ is to counteract ammonia odors (which are unhealthy for the animals to breathe) for as long as possible. I buy mine at Tractor Supply Co.

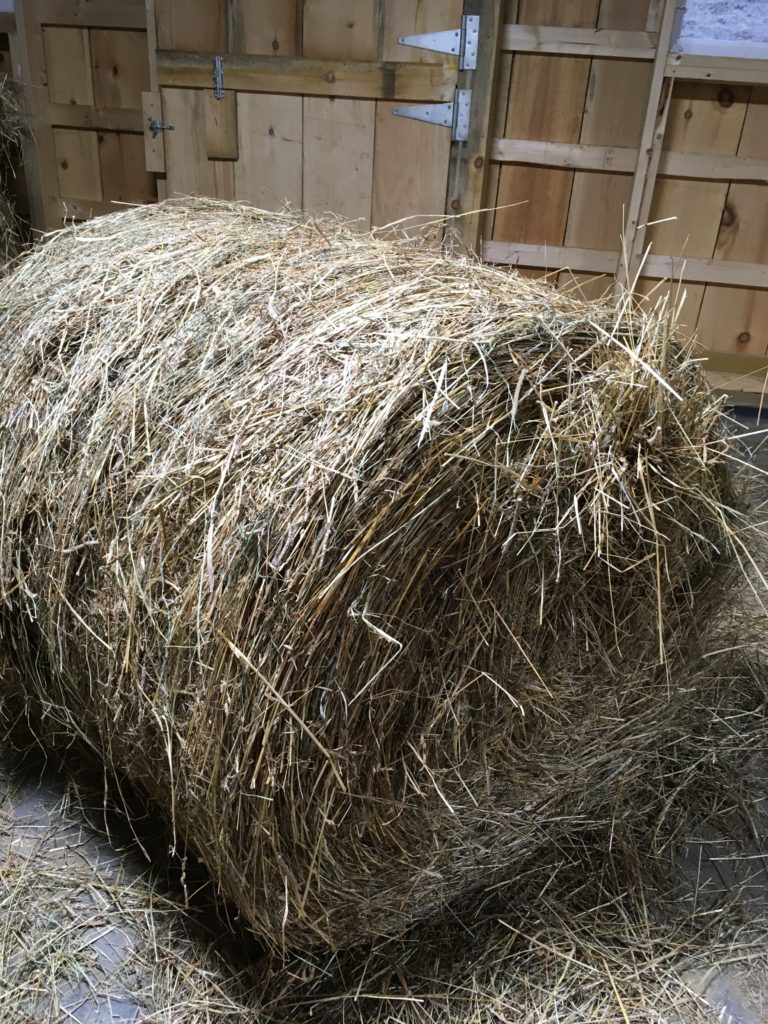
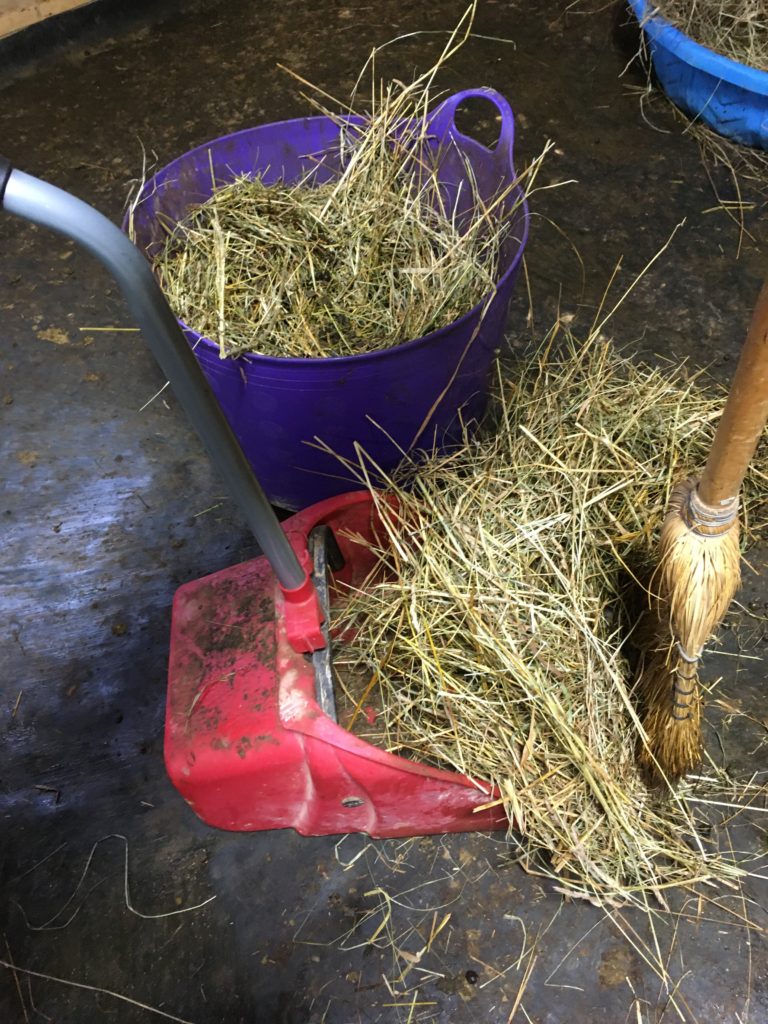
Now you are ready for the initial bedding layer. What you want to use is hay that is full of sticks—the kind you would’t buy for your goats. (Some people use straw.)

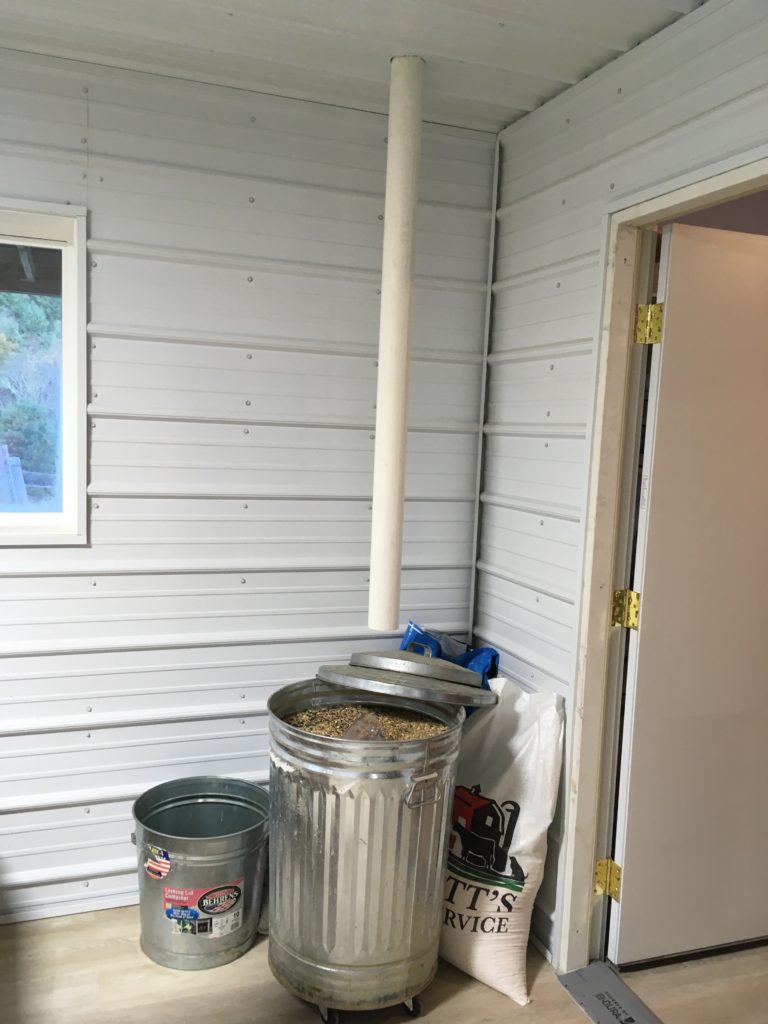
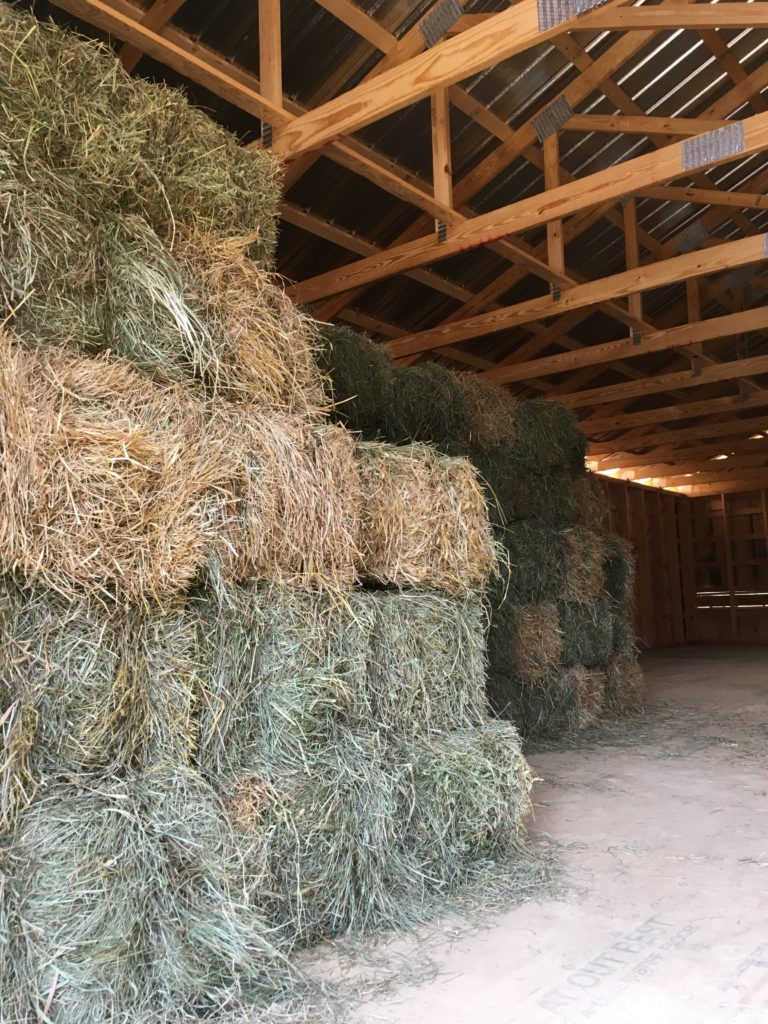
The idea is that you want urine to trickle down through it. I was able to buy large round bales locally for $35/bale, and a bale lasts over a month for all my bunks and pools combined.

When you put in your first layer of hay or straw, just make it about 3-5” thick; nowhere near the top edge of the bunk or pool.

The goats will lie in it, crushing it down, peeing and pooing. Each day, sprinkle just the lightest layer of loose hay (or straw) over the poo and pee stains. You really do not need much.

Again, the goats will come and lay on it, mashing it down. At first, the goats will stay dry because the loose layer of hay (or straw) will separate them from the horse pellet bedding that will absorb urine like a sponge. By the time the pellets are saturated, you’ll have been sprinkling new layers of hay for a week or more.

Benefits of Pools and Bunks

In case you haven’t recognized it yet, this process of bedding the bunks (or pools) is called “deep bedding.” There are a couple of major benefits to deep bedding.

First, in winter you don’t have to muck often. I dump the pools about every two weeks or so (and I could go longer, but they get heavy with congealed pee). I muck the bunks only every two months, and again, I could go longer but they get high and the goats start to stand on them to reach things I don’t want them to, so I empty them and start over.

Second, because the urine travels down through the loose hay and because I layer it each day, my does stay dry and clean, which in winter translates to warm and clean.

Third, the combination of pee, poo, and hay actually makes heat! Basically, these elements create a chemical reaction akin to composting. This adds to the animals’ overall comfort, and actually helps heat the barn overall.

Mucking the bunks is relatively easy. Let’s say that the bunk has gotten about 8”-10” high. I take a pitchfork to it on a relatively warm day, and can fork down about 8” before I hit the heavy, brown layer of congealed pee plus hay. Thus, I strip the entire bunk of the top 8” and then get some help to simply drag the tarp filled with the heavy stuff out the stall door. (In our case, we are spreading it nearby; if I was hauling it far, I’d use a wheelbarrow for the bottom layer, too.

If the day is nice enough, I spread the tarp in the sun to dry, and then finish the job later in the day. I sweep off all the dried bits of horse pellets, bring the tarp back to the bunk frame, and re-bed it as described above.

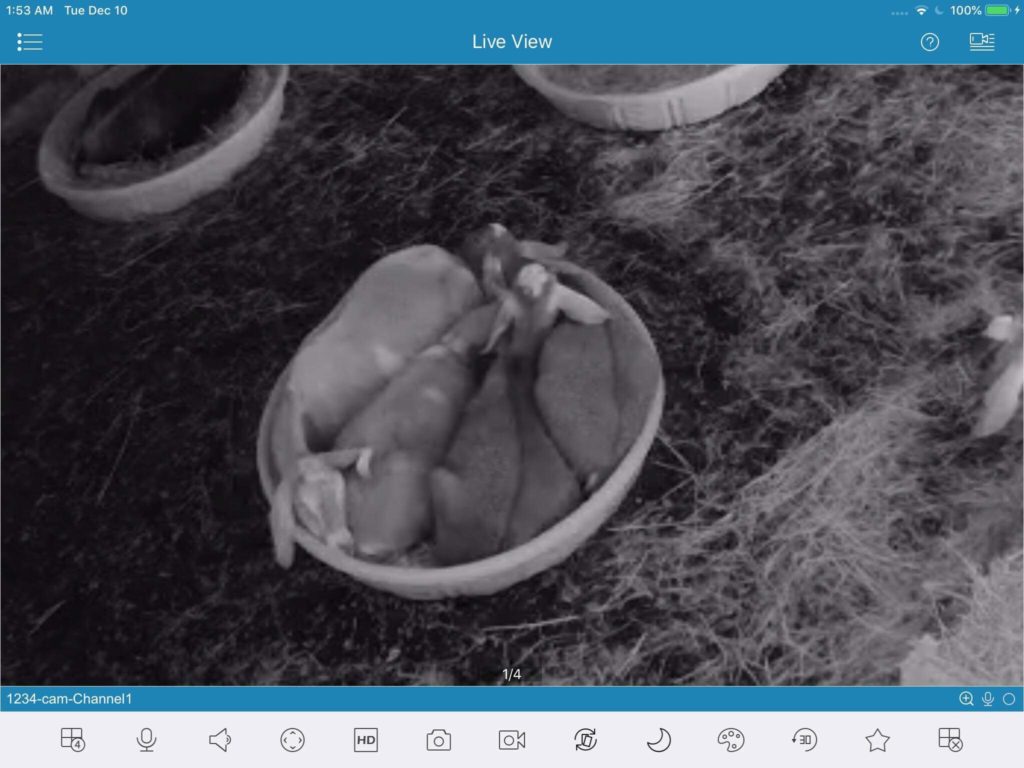
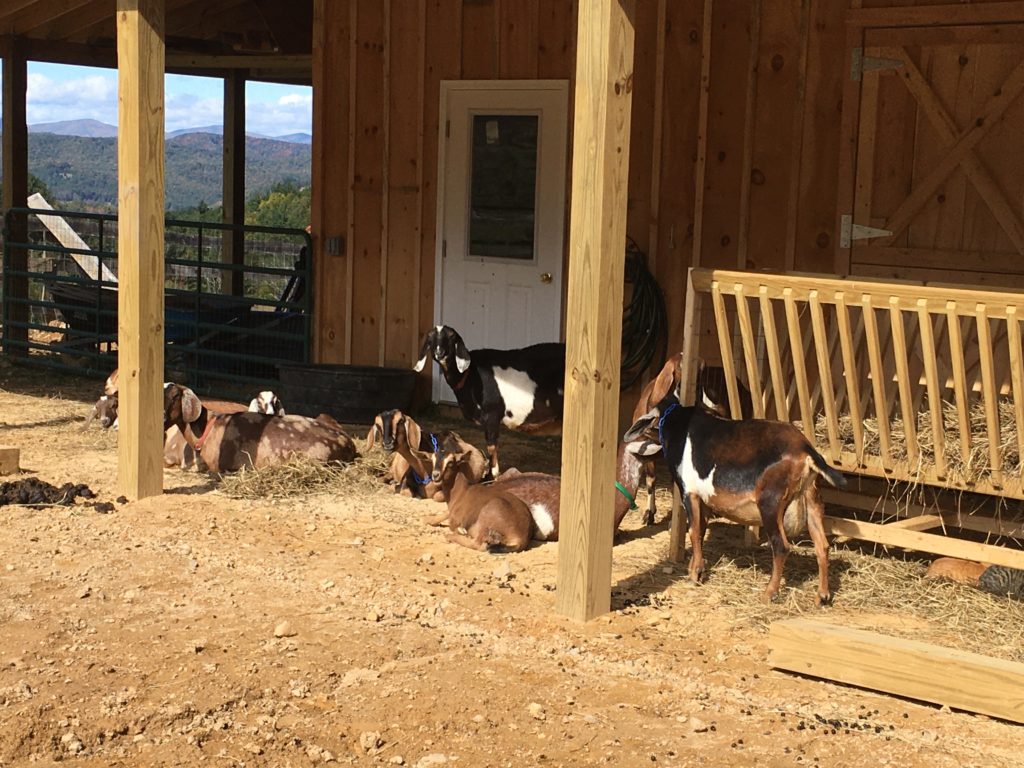
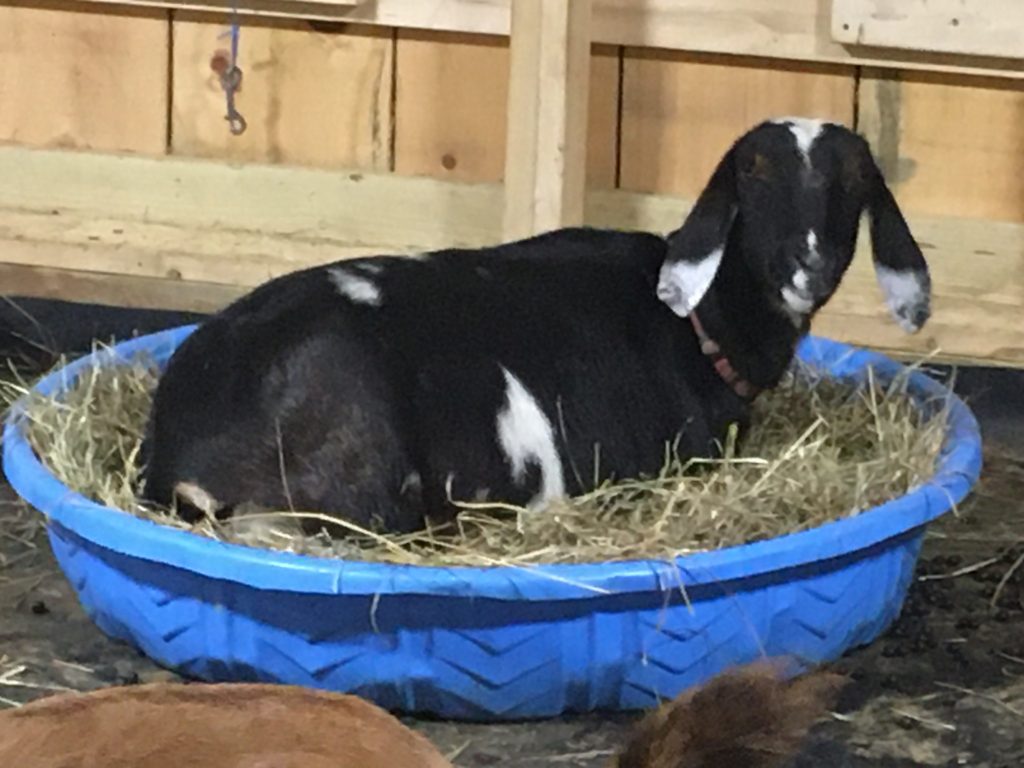
My goats love this system. Some choose to sleep in the bunks, and some choose individual pools. Occasionally, when scanning the barn late at night by barn cam, I see funny things like this picture.

This is Buttercup with her three almost-adult, 10-month old doelings, all snuggled up together in one 5’ kiddie pool!

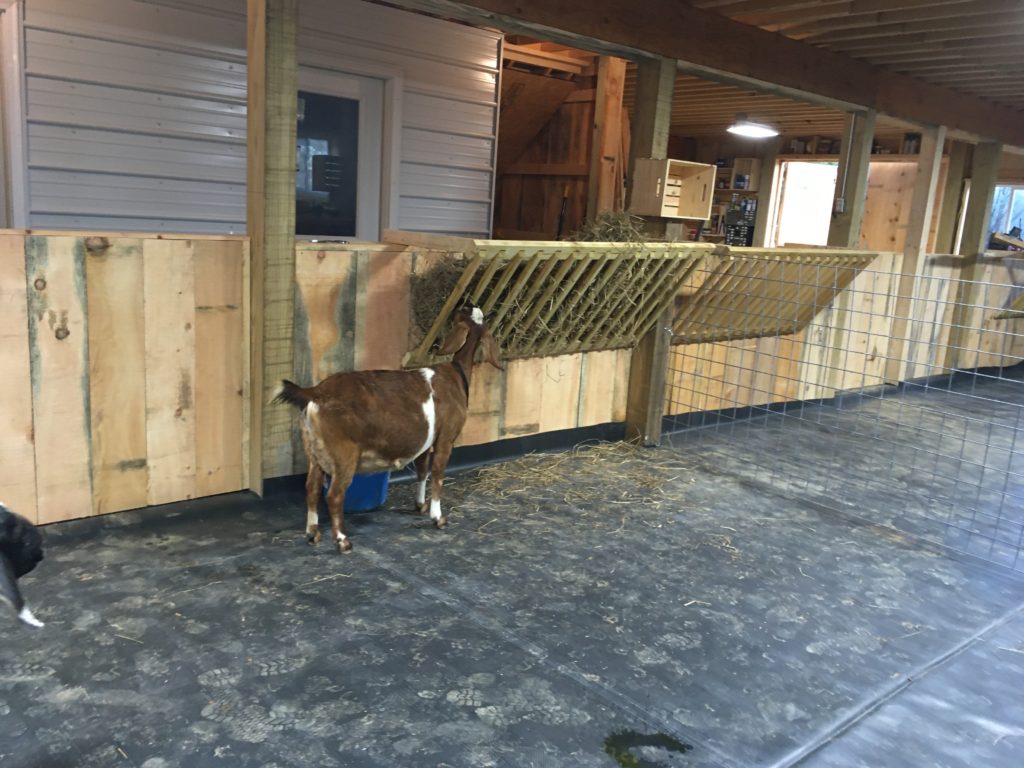
Note that the girls do not pee and poo in just the pools or bunks. If you look at this picture closely, you can see that they also litter the rubber flooring. But, that’s a matter of 20 minutes’ work each morning to sweep up the berries, urine, and scattered hay with a broom into a muck bucket. Easy peasy, and I love how fresh smelling everything stays.

I am thinking that in summer I’ll be taking out all the pools and bunks and allowing them to either sleep inside or outside on ground with scattered hay. They won’t need the warmth then, and it’ll be less work for me.

Posted on Leave a comment

The Bucks Stop Here

To complete our momentous year of building out our farm, we tore down our sixty-year-old shed and imported a pre-fab building to place on its foundation. This post shares the details of the new Buck House, inside and out!

This is the old shed. It was here in pretty much this same condition when we bought the property in 2011 (eight and a half years before this post). The roof leaked, the wood was rotted through, and it was ugly. We called it the Lesser Eyesore –because it sat next to a building in similar shape and three times its size, called (naturally enough) the Greater Eyesore.

In mid-October, Charlie came and knocked it down in about two hours with his excavator.

After Charlie finished, we were left with a cement foundation which, though not perfectly square or plumb, was good enough to support a new building.

Our bucks had been staying in this shed until recently. So, there was plenty of leftover bedding to remove from the foundation.

We had Jonathan come in with his ‘dozer and scoop dirt out from behind the foundation so that water would drain away from it instead of into it.

Then we examined it and figured out how to get the new building on it. Finally, on November 4, here came the building (late) at dusk.

In this shot, you see the back of the building. It has two dutch doors on either side, and one man door offset in the middle.

We had to set the building in the dark, but when we awoke the next morning, there it was, next to the Greater Eyesore (which is soon to be torn down as well).

Though the foundation was 40′ long, we elected to only replace it with a 30′ building. It is 12′ wide, just as the old one was.

We seeded around it, re-attached the steps up to the front door, and began to go to work on the interior.

The building was only a shell when it came. Our friend Kenny implemented my design for the interior. He did a great job. Let me explain to you what you’re looking at in the next shots.

We currently are at capacity for bucks. We have two pairs: a younger set and an older set. They will be rotated through as our herd becomes saturated with their genes.

The buck house is designed to house four bucks, either in pairs or singly, depending on their ages and health needs. Above is pictured the floor plan; at the right is a picture of the left side as you face the buck house.

Stall Features

Each of the end stalls are 9′ x 12′. Each cozily houses two full grown Mini Nubian bucks each. The bucks go in and out of the dutch door at the back of the building.

In between these stalls, inside, is the human area that we call “the Lobby.” This 12′ x 14′ area is where we keep feed, minerals, mucking equipment, tools, meds, a milk stand for hoof trimming or restraining a buck, and hay. Daily, I can feed, give minerals/baking soda, and hay without entering the stalls at all. To give water, I open one of the doors inwards, and it becomes a shield of sorts between me and the animal within as I give water. This is very handy for when the boys are in rut!

These two end stalls each have a central manger, flanked by two mineral dish inserts (lower) and panels above for viewing (we can see in; they can see out). Then, on either side, there are doors that open in.

If desired, because of fighting or health issues, or unequal sizes of animals, we want to divide them further, we can split the above stalls from front to back down the middle of the manger, creating two separate stalls on each end: four in all. The split stall pictured on the up top would let the buck on the right directly into the field, but the buck on the left would need to come through the Lobby and out into his field.

Thus, this house gives us 2-4 stalls, depending on our needs. We have no power out in this shed, so I purchased some rechargeable, batter operated, LED closet lights that are motion activated for winter feeding in dark hours. So far, we are loving this new Buck House!

Posted on Leave a comment

New Barn is Done!

Part 2: Cheese Room and Milking Parlor

As I explained in more detail in Part 1, the ground floor is divided exactly in half. 18′ x 48′ is dedicated to space for the goats. As I explained in a previous post, that space is modular: there are four stall doors to the outside (as you see in the picture above) and four stall doors on the interior ally. We divide the goat stall space using goat/sheep panels that can easily be installed or removed.

18′ x 48′ of goat stall space

On the right of the picture above, you can see mangers built between the doors. If you look closely, you can also see white-painted steel roofing material mounted on the wall. That same steel roofing shows in the picture on the left. It sheathes the milking parlor and cheese making room. These take up about a quarter of the entire barn’s downstairs space.

Cheese Making Room

If you enter that door pictured above, you will be in the cheese making room. It is quite small: 12′ x 8′. It is a one-person space that opens into the milking parlor as well. It is designed as a clean, heated space where one may make cheeses and store goat’s milk.

We will work clockwise around the cheese room, noting features.

First, the door to the barn’s interior has glass so people can watch cheese being made if they stop by, and so that we can communicate easily. The cabinets and counters were found at Lowe’s. The stove was bought off Craig’s List for $50. And the crates that we use here and in the milk parlor were bought on sale for $6 each, delivered free, from Michael’s.

Continuing around, you see the door opened to the milking parlor beyond. Note the door from the milking parlor to the outside (for orientation later). Also note the floor: it is luxury vinyl (not because goats need luxury, but because it is waterproof and has a commercial durability rating. It looks like wood, too, which means it is textured. It’s easy to sweep and wash, which we do twice daily after milking. It is in both the milking parlor and the cheese making room.

Now, if you close that door to the milking parlor above, you see the sink area. The view out the window is of the mountains–so beautiful!

I designed lots of space for keeping oversized pots and pans below in this area, and again, crates replace upper cabinets.

Now, I have pivoted again. You see the jar of milk, and the door we came in by, and I am standing in the milking parlor door.

You can see an empty space where we place our cheese presses, our current small refrigerator (we are looking for a full sized one on Craig’s List now), and our upright freezer that was a Craig’s List find.

Notice the small stool down low on the left…

We love our 8 barn cats, all of whom are feral, and were born in our barns. They are great mousers! But, we have had two problems since acquiring goats. Problem 1) They were always in our old milking parlor–startling or annoying goats while milking and making things unsanitary. Problem 2) When it is zero degrees outside, I am too softhearted to leave them to the elements, so I bring them inside to my bathroom. They make a MESS of it, since they’re not trained to the litter box.

For these two reasons, it was important to me when designing this barn, to solve these problems. The milk room backs up to the staircase, so I decided to create a “cat lair” under the stairs. I had the most interior, low portion partitioned off, and created a cat flap exit into the barn from that space for them to use.

Inside my nice, clean cheese room, next to that stool and near the floor, is the cat feeding flap.

This flap, when opened reveals the cats’ food/water dish that slides out into the room. This way, if we want to give the cats some milk or whey, we can, without them entering this clean space or bothering the goats while milking.

Above the cat flap is the room’s heater, and above that (not pictured) is a switch on the wall that solves the second of my two cat problems: what to do when it’s really cold out. The switch operates and outlet inside the cat lair. I plug a heating pad into it–the kind that doesn’t have an automatic shutoff that we use in our chicken house for MHP brooders–and when it’s cold, we can flip the switch and the pad will be on for cats to pile onto and stay warm. (I will sleep soundly knowing my cats are comfy.)

Milking Parlor

Our milking parlor is designed with cleanliness in mind first and foremost. It is sealed off from the barn and the outside, and insulated top, bottom, and sides. Up in the corner at the end on the right in this picture, you can see a shop heater that keeps the room above freezing.

We have room for four milk stands and two milking machines in this room. We are currently transitioning to from wooden stands that you see pictured here to wood/metal stands that we are making.

Other features to note: we again use crates (painted white so we can see when to clean them, and so that dirt can’t sink into them as readily). The room is (obviously) lined with metal roofing painted white. This is a highly durable finish that we can wipe clean with a rag, and that the goats cannot damage.

Also note the door to the outside. There’s a door to the left (like the cheese room one), which is where the goats enter. They are milked, and exit to the yard (under a roofed overhang) when they are done.

In the foreground of the picture above, note that there is a feed bucket on the right and a black shelf unit on the left. (You’ll see them again in the next picture, where I move to the opposite angle.)

Okay, so now you see the bookshelf units. This is where I get to store all my animal medications that I’ve always had to store in the house in winters (a LONG walk from the animals).

You now also see on the right the door to the interior barn ally where the goats enter this room, and that’s the door back into the cheese room on the left.

Just a few more features to note and then I’m done. The PVC pipe that you see comes through the ceiling of the milking parlor. This is because we store our grain in a caged, mouse resistant (is anything mouse proof???) room. After we mix it up there, rather than carrying it down, we position the grain can under this chute, and pour it down, saving lots of effort.

The grain cans are on rolling plant stands, so during milking, we move them closer to the feed dishes on the goats’ stands.

We are loving the relative peace and cleanliness of our new milking parlor. Our next post will be about how we are upgrading our milk stands to be easier to clean and more sanitary. If you’d like to become part of the Storybook Farm community and receive monthly newsletters, sign up below!

[mailerlite_form form_id=1]
Posted on Leave a comment

Goat Math

We are entering our final months of our first year with goats, and I have learned SO MUCH. From nutrition to illnesses to FAMACHA scores, to birthing our first kids, to teaching newcomer goats that, yes, they really can safely go out into our big scary pastures–it’s all been a trip! But in a good way.

Looking back, it’s kind of funny how we grew. I’ve been keeping chickens for years, and because they’re so easy to hatch, house, and raise, we’ve ended up each year with more than we intended! People often call it “chicken math.” You say you’ll have a small flock of four birds “just for eggs” and then end up with way more–and having to explain to your husband how this all came to be.

With goats, though, things were gonna be different. I planned to start small: two does in milk. See how it goes. But… I found (and this is fair warning for newbies!) that goat math is like chicken math. So here’s how it went for us…

After reading a lot about goat conformation and the best blood lines available in the Mini Nubian world, I found my first two does in milk early last (offered in response to a post in a Mini Nubian goat breeders’ group) in November. Mimzie and Twyla were both pregnant in MI (10 hours away from me), and I agreed to get them after they kidded in the late spring. One was due in late April and the other in the first week of May. All fine and dandy. I was happy to wait until warmer weather.

The plan was to milk these two through the fall of this year, and then breed them for kids to be born in the spring of 2020. This would give us a nice easy ramp up into goat keeping, to make sure we liked it and could keep up with an every-day, twice-a-day milking schedule. For breeding we had heard that people often do “driveway breeding” — where you take your doe in heat to a neighbor and they “do it” in the driveway, then you take your doe home. Seemed like a great idea to me!

But THEN, I got an offer that I just couldn’t refuse to buy a nice, pregnant doe due in April. Buttercup was only four hours away. Yay! But, you might already know that you shouldn’t move pregnant does in the last six weeks of their gestation, because they can abort from stress. Yeah; so now I was getting goats in mid-February 2019, not late spring. Hmmm.

In the end, snagging Buttercup was one of the best ever decisions, because Buttercup’s seller was a big-hearted lady who has mentored me and become a dear friend over the last year of goat keeping. I don’t know what I would have done without Jen Crawford! Also (spoiler alert) Buttercup gave birth to three doelings on April 2, so that was like winning the lottery!

The decision to buy Buttercup led to the need for her to have a companion in mid-February. (Goats are herd animals and should absolutely never be kept solo.) Those Michigan does weren’t ready to come for months. So, I found a nearby farm with great quality “new blood” lines, and contracted to purchase a small, somewhat wild, doeling by the name of Milky Way (Milcah, for short). Just after I agreed to buy her, in January, she came into heat and her owner bred her. So, now I was getting two pregnant does in February, and two does in milk in late spring. Milcah was due in early June. And she did deliver (spoiler alert) doe/buck twins, right on time.

At this point, I found out that “driveway breeding” has become somewhat a thing of the past, due to bio security concerns. Plus, those who invest in really nice bucks understandably don’t share them for a song. SO, we decided that since we were all in, we might as well buy a buckling from the premier breeding barn in the country, Green Gables Mini Nubians (in WI).

The logic here is that, if you’re going to breed goats, genetically speaking, your buck is half your herd, since a single buck can become the father of all the kids on your farm in a given year. But many people don’t want to keep a buck around for 10 months, so they look for inexpensive ones to breed and then move on, one way or another. So, generally, backyard-bred bucklings don’t sell for much. Some are wethered (castrated) and sold as pets, but many head off to the auction block as meat. Sad, but true.

In top goat bloodlines, however, young doelings and bucklings sell for the same price. Again, the reasoning is that the buckling can grow up to service all the ladies, whereas if you buy an expensive girl, she’ll just be one in the herd of girls. So, we decided to invest the highest dollars in a Green Gables buckling, and as God would have it, we were first in line to choose our boy, Asher!

Then, of course, you can’t keep boys and girls together (because a buckling can breed a doeling as early as 12 weeks old!). So, we had to plan to keep him separate. We could have chosen to keep a wethered boy, but there’s no gain in that for us (you feed, house, and vet a wether, but can’t breed him. So, I bought another high-priced, blue-eyed buckling (Rigel), also from outstanding bloodlines, to keep him company. So now we had six goats contracted or bought. And (as it turned out) five on the way in utero.

And then my husband saw how little of a dent our two does (that were eating in our pastures by mid-March) made in our 35 acres, so I got to buy a few more does. Hurlburt Farms was having to downsize, and sold me Claire and Dorothy — along with Pete, a mature buck, who is polled. The does were Green Gables lines, so dovetailed well with my existing herd. All told, we ended up purchasing three bucks (and birthing one) and nine does (and birthing four). So, that’s goat math for ya!

And now I’ll act like your mother and say, “Do as I say, don’t do as I do.” Unless your husband is a amazing as mine is, you really do want to start slow: just look for a doe in milk, or a pregnant doe, and start small! You’ll be less crazy than I was that way!

It’s been challenging and fun at the same time to try to figure out which does are in heat, and which bucks will improve features of which does. (This is for me, who has three bucks to choose from, and 12 does of various ages. If you’re going to be doing a mini farm you won’t have so many options.)

How did you go about gathering your herd? Have you fallen pray to goat math??? Comment and let me know, or continue the conversation via email. Just sign up using the form below. Until then, blessings on you and your farming endeavors.

[mailerlite_form form_id=1]
Posted on Leave a comment

Our New Barn is Done!

Part 1: The Rubber Flooring

Well, we started in the second week of July, and we moved our does into their new space on Saturday evening. They’ve now slept in their space for three nights, and already we’re making tweaks and modifications. But, as my son Mike is fond of saying, “no plan survives first contact.” This post is mostly about the animal part of the barn.

Let me share some pictures of what we now have, and explain as I go what we plan to modify. This is PART 1. If you want to see our milking parlor and cheese making room, click HERE.

NOTE: I do all this in the hopes that some of the ideas that I’ve had will inspire you with ways you can maybe solve problems or improve your own setup. As goatherds, we’re always learning, right?

Below is the floor plan of our barn, just to orient you. This post is about the Goat Space, near the top of the drawing.

Barn Floor Plan

Choosing, Prepping For, and Installing the Floor

I have had goats on dirt floors, and it’s not my preference. I don’t like how much pee gets into the dirt, and how stinky it gets, and how ruts form that become veritable ponds of pee. So, I opted for a single sheet of rubber roofing that covers the entire goat space: 17′ x 47′. No pee gets thru!

Rubber roofing is WAY cheaper than horse mats. Goats are WAY lighter than horses! So, we opted for the heaviest duty roofing material that we could find. It is only about 1/4″ thick, but it seems to be plenty thick for our little goats (non of whom is more than 120 lbs.).

The first step was moving the roll of rubber roofing. It was NO JOKE. This 50′ x 20′ roll (doubled in half so the roll was 10′ x 50′, weighed at least 800 lbs. I brought it home in a pickup truck from the roofing company, but from there, it took three strong men to muscle it from the truck to the rollers, as you see in the first photo below.

Then, we had to prepare the underlayment. Scott spent about two days doing this. We first raked the entire area with a garden rake, removing stones and carting them off. Then he began to level it with a 2 x 3 board from front to back on the left side (in front of the roll). I meanwhile drove our tractor with 5-6 loads of black sand. We used it to continue to level the area, filling in divots and smooting the area over and over.

Finally, (last picture) we unrolled and (with the help of visiting friends) we all got into those four doorways and PULLED together to properly position the left half of the entire piece.

We then did the same exact process on the right half of the area.

Bring in the Does!

Here is a shot of the does exploring their new space for the first time on Saturday evening (10/12/19). In this first shot, I’m standing on the right side of the space, looking towards the exterior walls.

What you also see here, if you look closely, on the left, is a goat panel divider. More on this later.

In the picture below, I’ve reversed direction to be looking towards the interior of the barn. Same space. Obviously, we have built in mangers and water buckets. There are four doors here as well. They all lead into the center aisle beyond that half wall.

Here again, you see that same goat panel. It is heavy duty, like a calf panel, and it is removable, secured to the walls by means of large eye hooks and carabiners. Obviously, this panel divides the space. We can thus have four “stalls,” using three dividers in all. This proves to be economical and modular, and also keeps the whole space open. This means that we can see everything, and the goats can see one another when we need to separate them.

Pros and Cons on the Flooring

So far, I have things I like and don’t like about this flooring.

What I LOVE is the ease with which it cleans up, and the fact that no pee is seeping into the dirt underneath. Each morning, we feed and milk our does, and kick them out for the day (while the weather stays warm.) I sweep up the pee and goat berries with a straw broom, and then transfer them to my muck bucket by means of a terrific scoop that I bought at Tractor Supply.

What I haven’t loved so much is that the pee pools during the night, so that (without any bedding) the goats lie in berries and pee at night. (Everybody say “yuck”!)

However, each day, the does also drop hay under the manger that stays clean and dry. I’ve found that it’s easy to sprinkle some on the pee puddles, step on it for good measure, and then sweep it into my shovel scoop.

For the most part, my girls choose to sleep in those kiddie pools, especially in winter or, in summer, outside.

NOTE: A year later, we did some terraforming, where we peeled back the rubber and ditched the center of the barn to an outside drain. It took some trial and error, but we love how our floor drains now, and how easy it is to muck.

Read details on this upgrade HERE.

In the summer, a bare floor at night is fine, but we’re also preparing all of our barns for winter now, and so we decided to address two concerns (staying dry and staying warm) with one solution.

Here in the foreground (which is in the second stall), you see the new “bunk” we made. It’s just 2×6’s screwed together and then a tarp over them. I put down a layer of horse pellet bedding, PDZ, and then hay over top. I will use the deep bedding method in this bunk, and the rest of the floor can be dry. So far, it’s working perfectly.

For details on using bunks and pools, click HERE.

To see an even more recent approach, check out or goat table bunks, HERE.

So, that’s it for the floor. I love the large, open, sunny space (the picture right above this is taken at about 10 AM, and you can see the sun pouring in). We allow the does into the first stall during cold or blustery weather so that they can get in out of the wind. The rest of the time, they can choose pasture or hang out on the back porch…

Just hanging out and gossiping on the porch…

Feel free to tour our milking parlor and cheese-making room! And we love to read comments, especially if you’ll share what you do about bedding in your barn, and how you like it!

We also have other posts that detail modifications and additions that we’ve made. I link them here for quick clicking.

And, if you’d like to join our Storybook Farm community, please fill in the form below!

[mailerlite_form form_id=1]
Posted on Leave a comment

New Barn Comin’

We are breaking ground on our new barn starting Monday. I am beyond excited. It’s going to be a two-story pole barn: 48’ x 36’, with a 48’ x 12’ shed on one side where we plan to park our tractor and truck.

We are building it inside our existing riding ring, that we excavated years ago for horseback riding. With my age and osteoporosis, I don’t ride much any more. But, if the notion takes me, I can ride around this new barn. Meanwhile, the goats will enjoy a large indoor space, a larger outdoor flat space, an incredible view of the mountains, and 30 acres of fields, brush, woods, and terrain. What’s not to love?

In these first pictures in this post are mostly of stuff you’ll never notice when the building is done: my contractor’s copy of our floor plan above, the excavating that we did to make the site level for building (also above), the improvements to the road up to the ring that we had to make so delivery trucks can make it to the site (that’s what all the slate is for), below.

Shale: 10 dump truck loads
MORE shale, heading up past our chicken coops to the building site above.

And last (but not least) a picture of a very hot husband who was trying to get a cool drink on a break from putting up temporary fencing to keep the animals out of the construction zone for the summer… but somebody got to his pitcher of water as he was telling me about his progress!

After all the prep work, it was early July when the lumber arrived and things starting looking like there really was a new barn coming! The following pictures summarize the construction, but don’t capture our gratitude for all the skill, craftsmanship, and sweat put in by Chris Lambert.