Part 2: Cheese Room and Milking Parlor
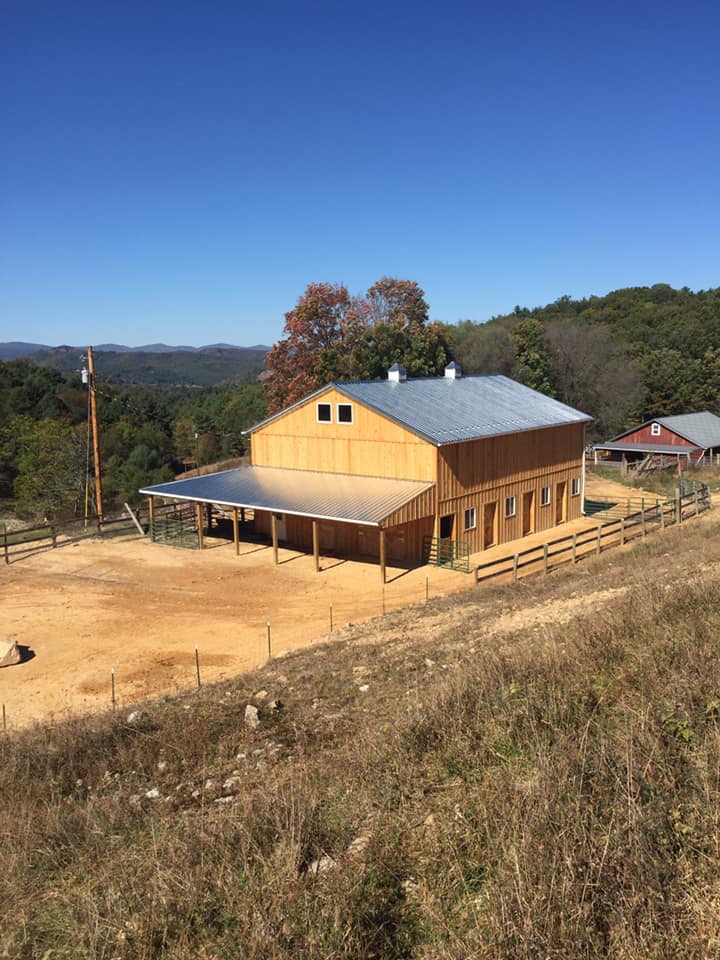
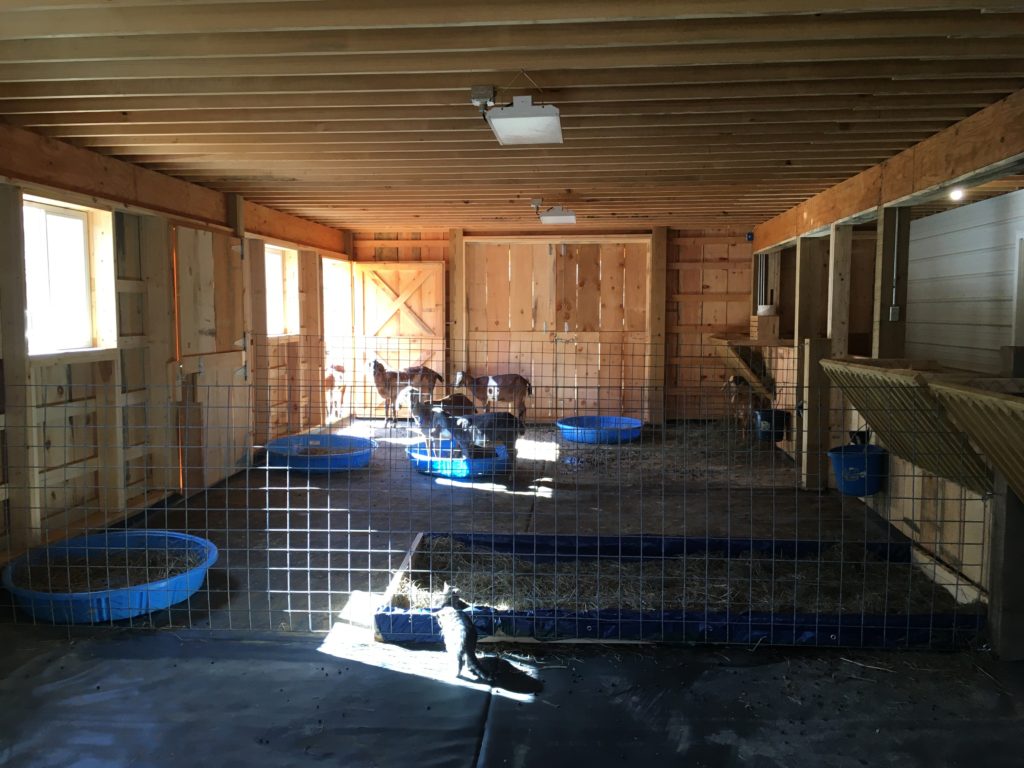
As I explained in more detail in Part 1, the ground floor is divided exactly in half. 18′ x 48′ is dedicated to space for the goats. As I explained in a previous post, that space is modular: there are four stall doors to the outside (as you see in the picture above) and four stall doors on the interior ally. We divide the goat stall space using goat/sheep panels that can easily be installed or removed.
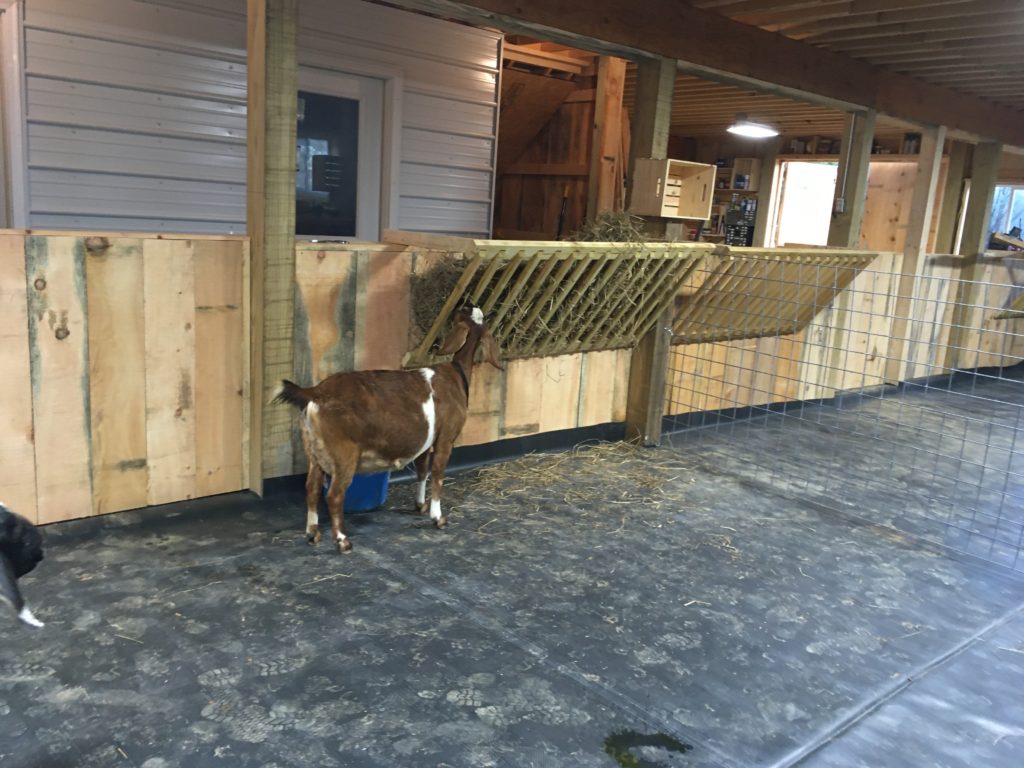
On the right of the picture above, you can see mangers built between the doors. If you look closely, you can also see white-painted steel roofing material mounted on the wall. That same steel roofing shows in the picture on the left. It sheathes the milking parlor and cheese making room. These take up about a quarter of the entire barn’s downstairs space.
Cheese Making Room
If you enter that door pictured above, you will be in the cheese making room. It is quite small: 12′ x 8′. It is a one-person space that opens into the milking parlor as well. It is designed as a clean, heated space where one may make cheeses and store goat’s milk.
We will work clockwise around the cheese room, noting features.
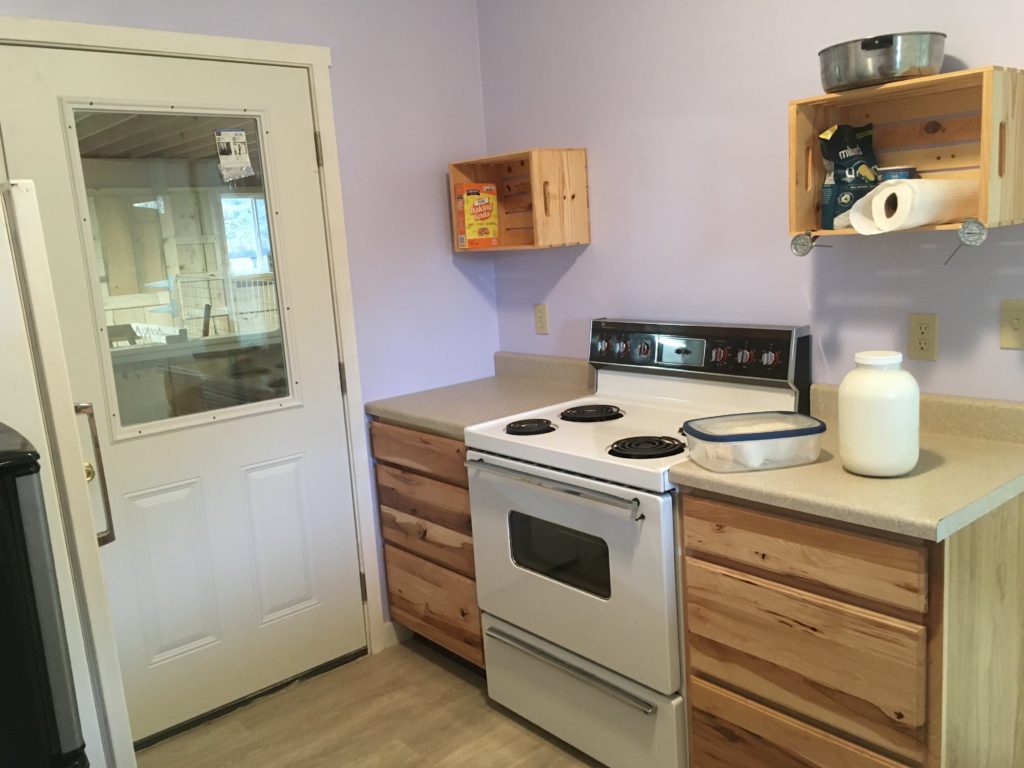
First, the door to the barn’s interior has glass so people can watch cheese being made if they stop by, and so that we can communicate easily. The cabinets and counters were found at Lowe’s. The stove was bought off Craig’s List for $50. And the crates that we use here and in the milk parlor were bought on sale for $6 each, delivered free, from Michael’s.

Continuing around, you see the door opened to the milking parlor beyond. Note the door from the milking parlor to the outside (for orientation later). Also note the floor: it is luxury vinyl (not because goats need luxury, but because it is waterproof and has a commercial durability rating. It looks like wood, too, which means it is textured. It’s easy to sweep and wash, which we do twice daily after milking. It is in both the milking parlor and the cheese making room.
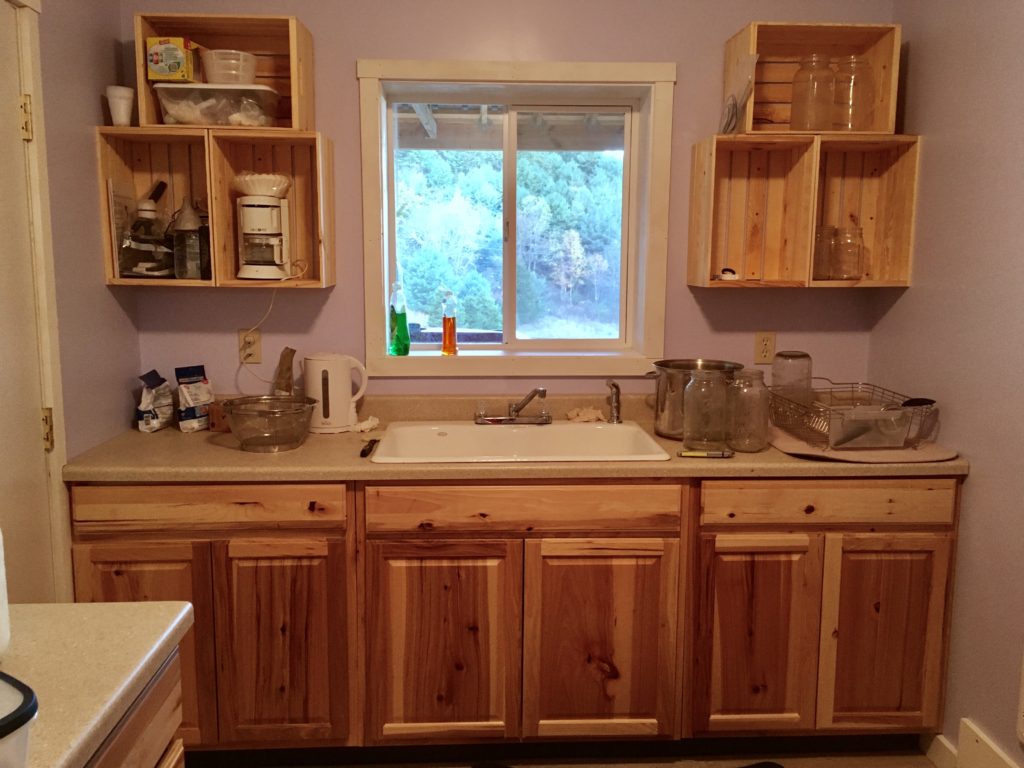
Now, if you close that door to the milking parlor above, you see the sink area. The view out the window is of the mountains–so beautiful!
I designed lots of space for keeping oversized pots and pans below in this area, and again, crates replace upper cabinets.
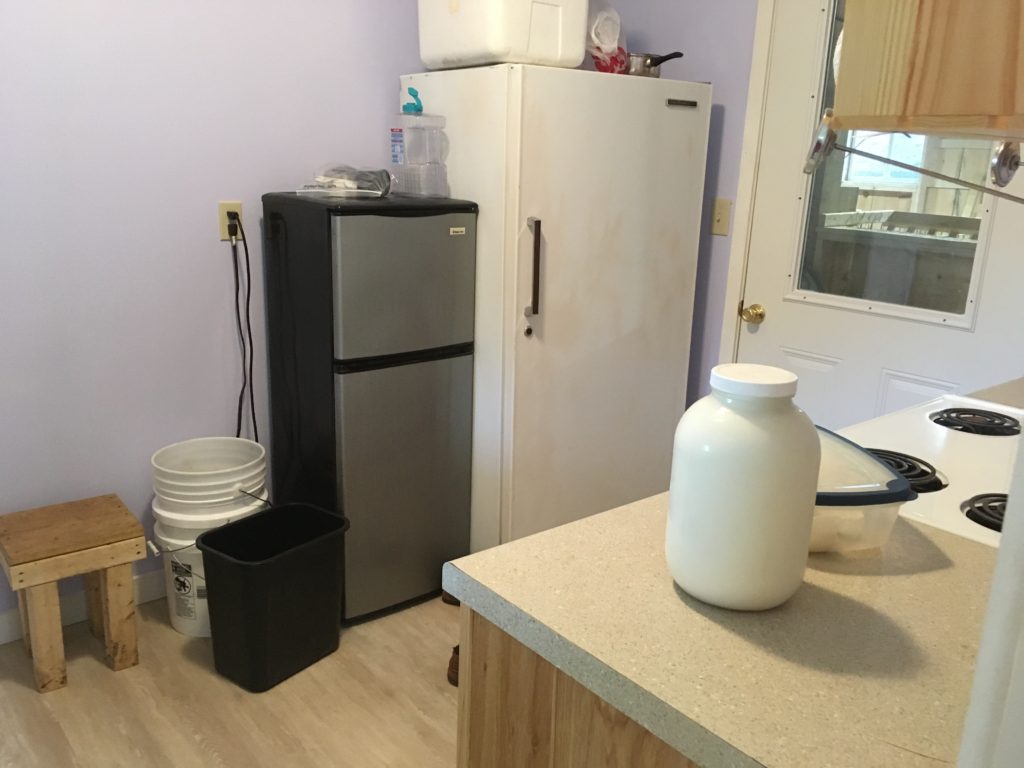
Now, I have pivoted again. You see the jar of milk, and the door we came in by, and I am standing in the milking parlor door.
You can see an empty space where we place our cheese presses, our current small refrigerator (we are looking for a full sized one on Craig’s List now), and our upright freezer that was a Craig’s List find.
Notice the small stool down low on the left…
We love our 8 barn cats, all of whom are feral, and were born in our barns. They are great mousers! But, we have had two problems since acquiring goats. Problem 1) They were always in our old milking parlor–startling or annoying goats while milking and making things unsanitary. Problem 2) When it is zero degrees outside, I am too softhearted to leave them to the elements, so I bring them inside to my bathroom. They make a MESS of it, since they’re not trained to the litter box.
For these two reasons, it was important to me when designing this barn, to solve these problems. The milk room backs up to the staircase, so I decided to create a “cat lair” under the stairs. I had the most interior, low portion partitioned off, and created a cat flap exit into the barn from that space for them to use.
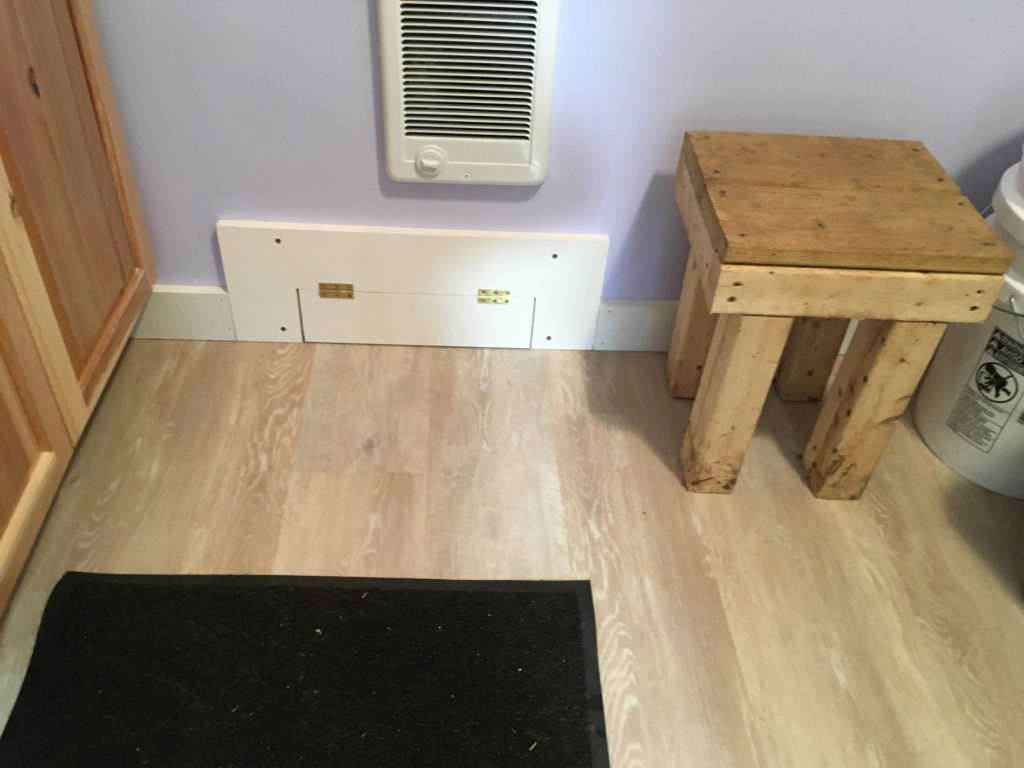
Inside my nice, clean cheese room, next to that stool and near the floor, is the cat feeding flap.
This flap, when opened reveals the cats’ food/water dish that slides out into the room. This way, if we want to give the cats some milk or whey, we can, without them entering this clean space or bothering the goats while milking.
Above the cat flap is the room’s heater, and above that (not pictured) is a switch on the wall that solves the second of my two cat problems: what to do when it’s really cold out. The switch operates and outlet inside the cat lair. I plug a heating pad into it–the kind that doesn’t have an automatic shutoff that we use in our chicken house for MHP brooders–and when it’s cold, we can flip the switch and the pad will be on for cats to pile onto and stay warm. (I will sleep soundly knowing my cats are comfy.)
Milking Parlor
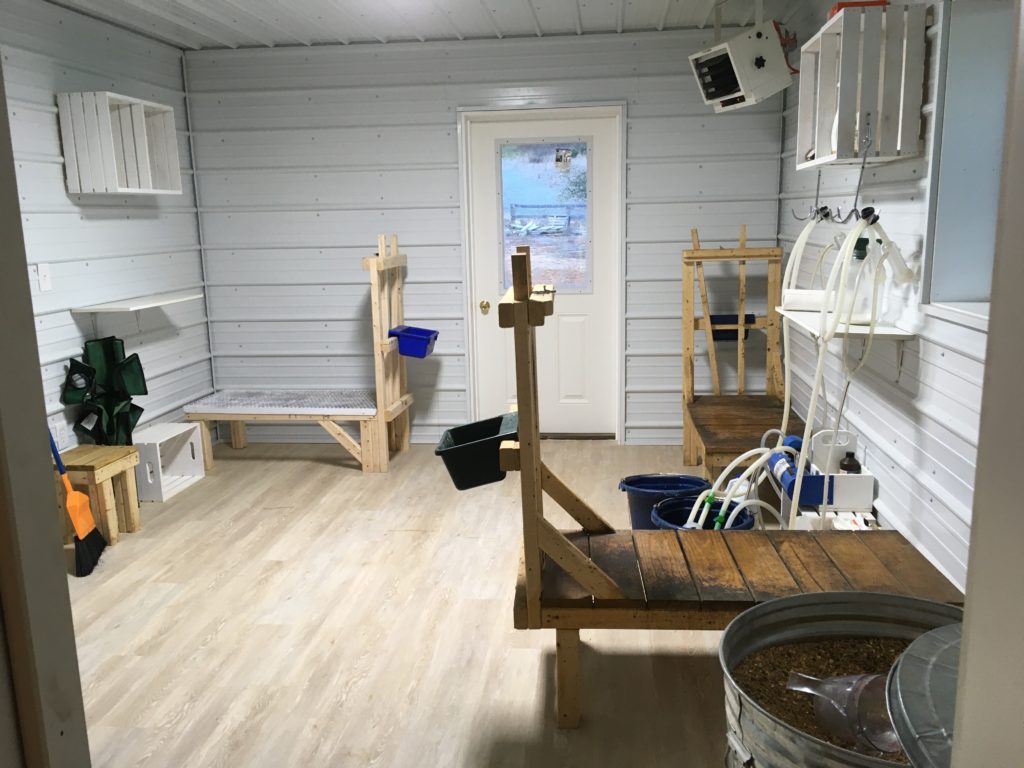
Our milking parlor is designed with cleanliness in mind first and foremost. It is sealed off from the barn and the outside, and insulated top, bottom, and sides. Up in the corner at the end on the right in this picture, you can see a shop heater that keeps the room above freezing.
We have room for four milk stands and two milking machines in this room. We are currently transitioning to from wooden stands that you see pictured here to wood/metal stands that we are making.
Other features to note: we again use crates (painted white so we can see when to clean them, and so that dirt can’t sink into them as readily). The room is (obviously) lined with metal roofing painted white. This is a highly durable finish that we can wipe clean with a rag, and that the goats cannot damage.
Also note the door to the outside. There’s a door to the left (like the cheese room one), which is where the goats enter. They are milked, and exit to the yard (under a roofed overhang) when they are done.
In the foreground of the picture above, note that there is a feed bucket on the right and a black shelf unit on the left. (You’ll see them again in the next picture, where I move to the opposite angle.)

Okay, so now you see the bookshelf units. This is where I get to store all my animal medications that I’ve always had to store in the house in winters (a LONG walk from the animals).
You now also see on the right the door to the interior barn ally where the goats enter this room, and that’s the door back into the cheese room on the left.
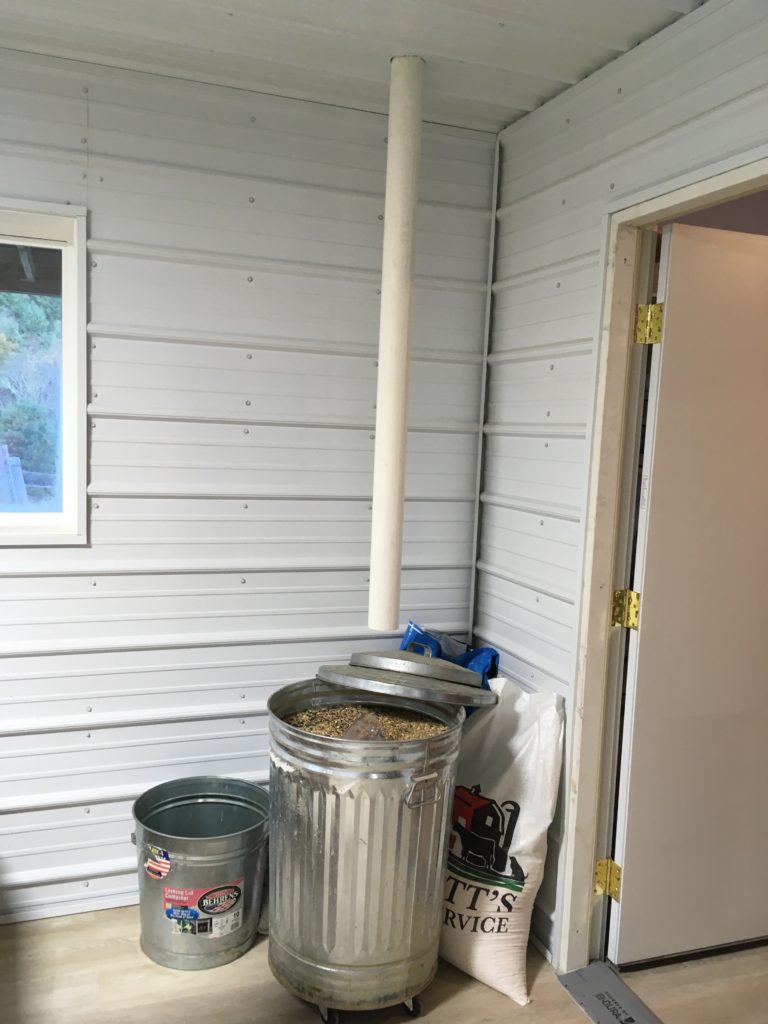
Just a few more features to note and then I’m done. The PVC pipe that you see comes through the ceiling of the milking parlor. This is because we store our grain in a caged, mouse resistant (is anything mouse proof???) room. After we mix it up there, rather than carrying it down, we position the grain can under this chute, and pour it down, saving lots of effort.
The grain cans are on rolling plant stands, so during milking, we move them closer to the feed dishes on the goats’ stands.
We are loving the relative peace and cleanliness of our new milking parlor. Our next post will be about how we are upgrading our milk stands to be easier to clean and more sanitary. If you’d like to become part of the Storybook Farm community and receive monthly newsletters, sign up below!
[mailerlite_form form_id=1]