Posted on Leave a comment

Kidding 101: Part 2

Part 2: Normal Labor and Delivery

This series is not meant to be comprehensive, but I hope that it’s helpful, especially to those facing pregnant mommas with no experience. I wish I had had such a webpage series when I was where you are now!

Part 2 focuses in on the basic steps and signs of normal labors and deliveries, which a vast majority of deliveries are. Part 3 focuses on delivering with more difficult kid positions and gives a few ideas of how to help distressed kids.

Follow this link to see other article in this series: Part 1: Preparing for Kids

I always pray for my animals when they are pregnant, and especially so during delivery. God is very gracious to help our animals and us through deliveries. He loves the animals that He has created (see Numbers 18: 14-17) and redeemed. I have done some of my deepest spiritual growth during stressful labors. Turning to the only One Who can really help is natural to me, and I highly recommend it as a normal practice for you!

Is She OK?

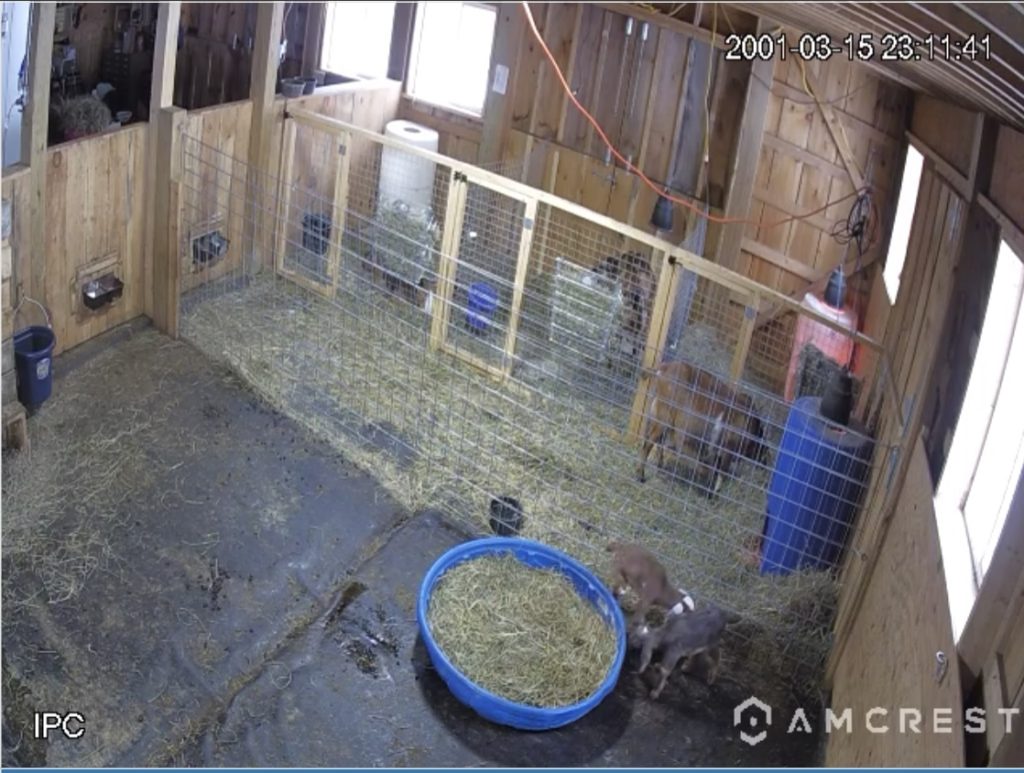
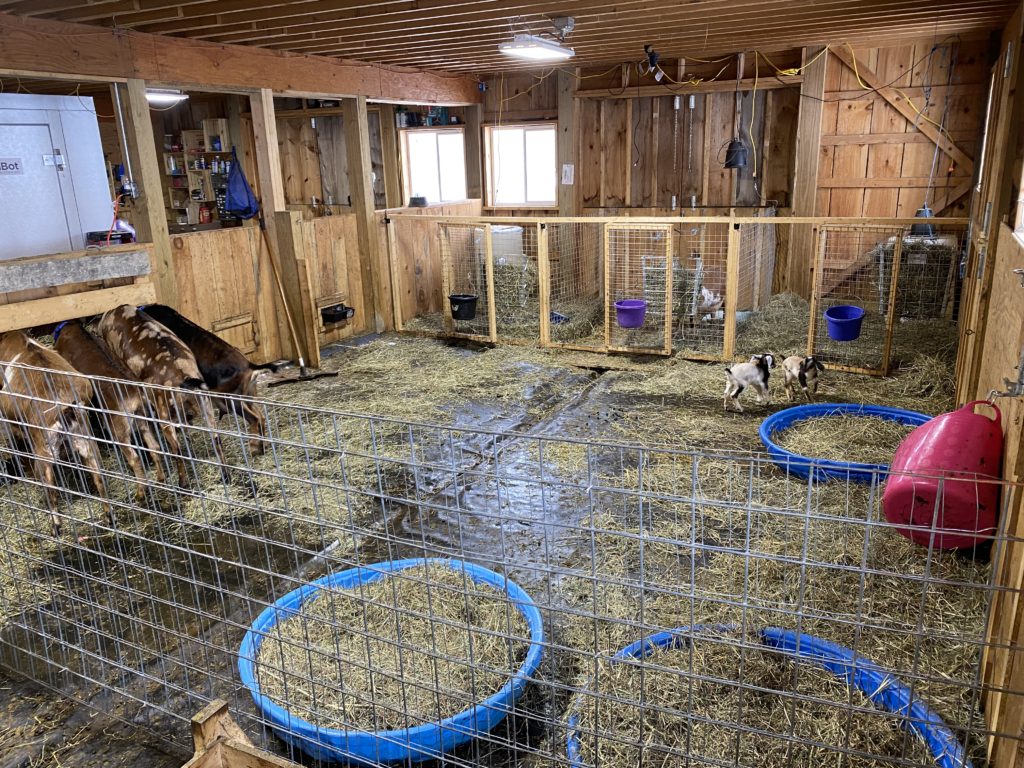
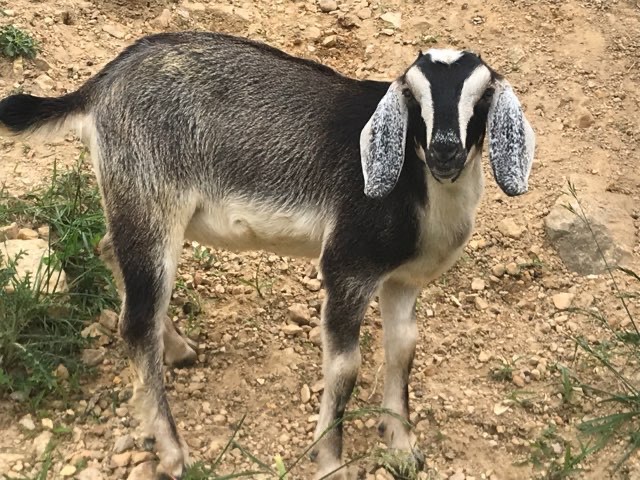
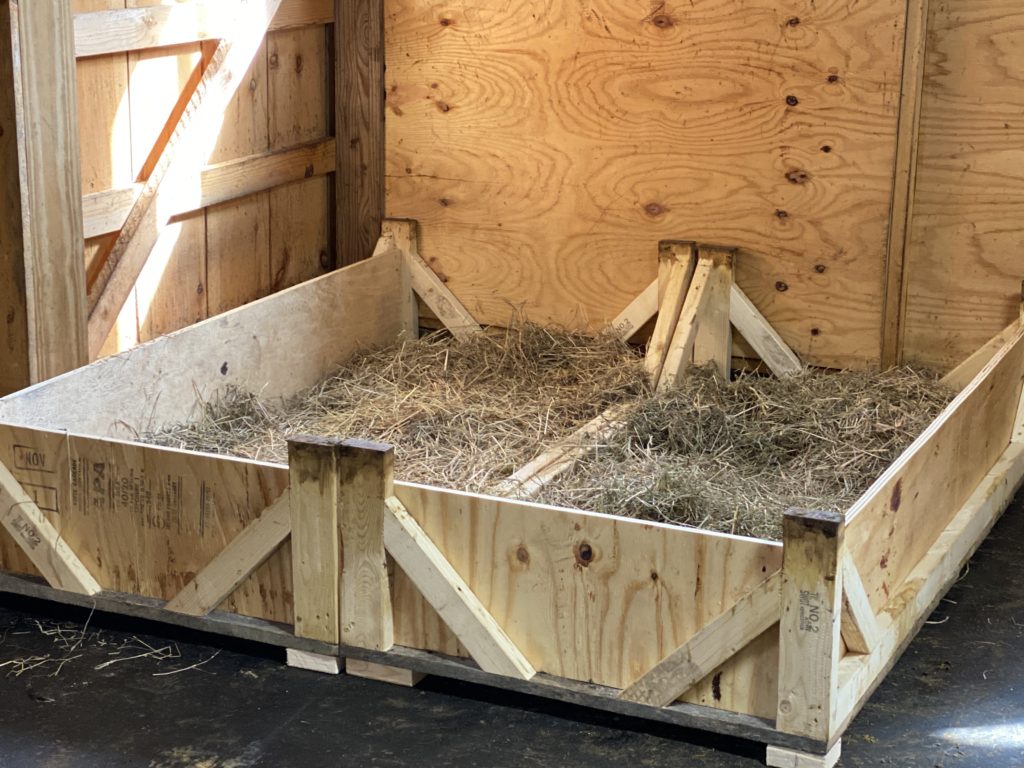
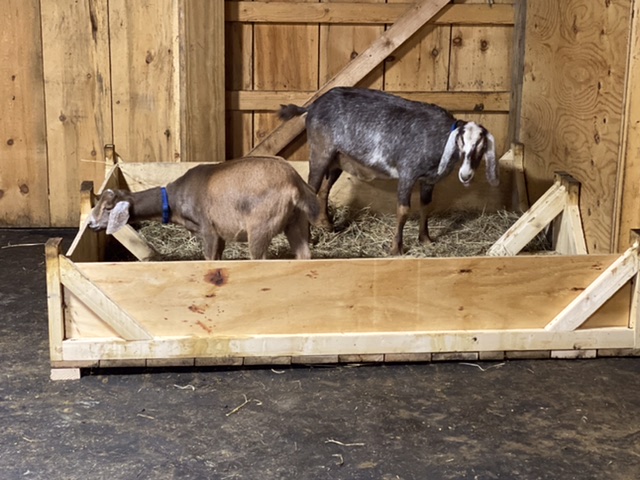
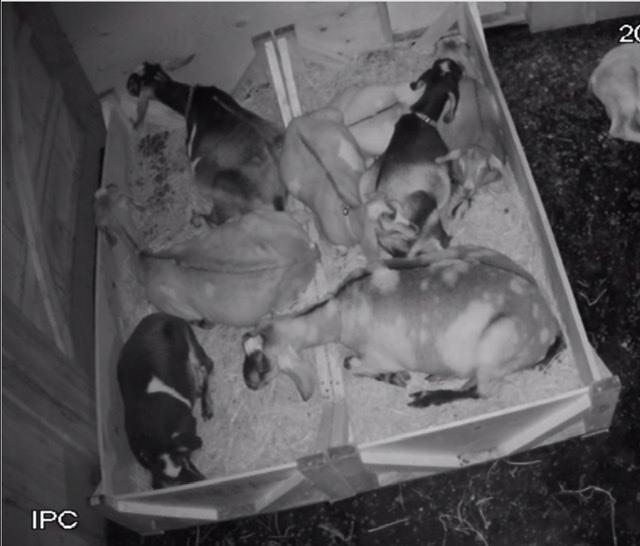
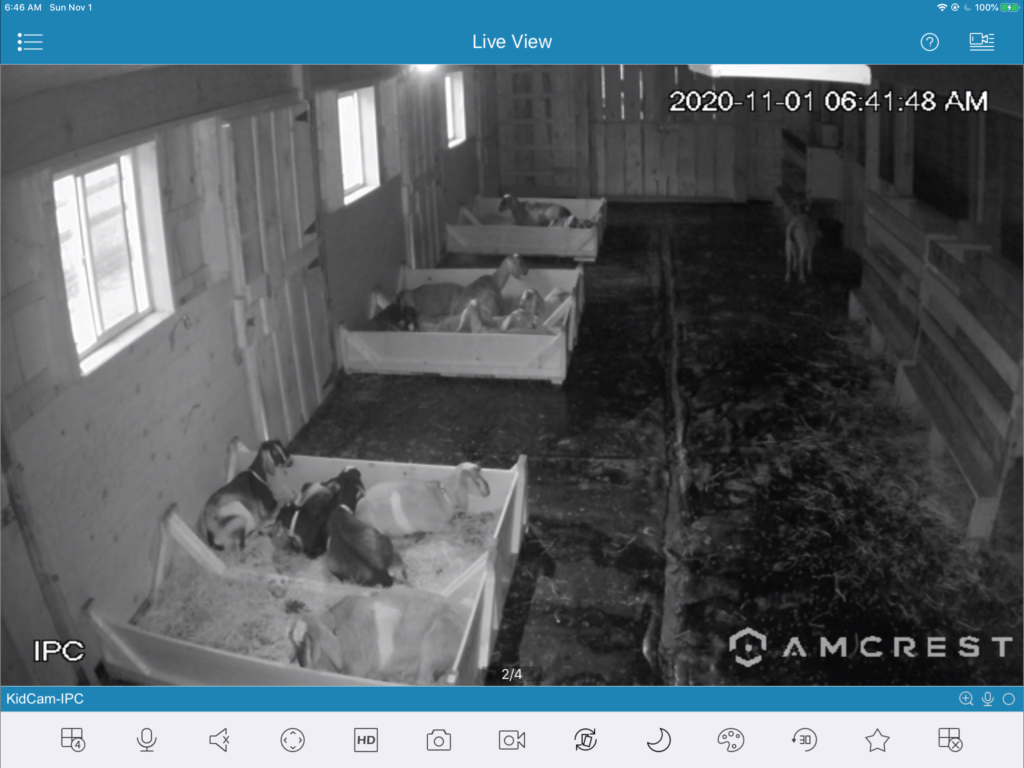
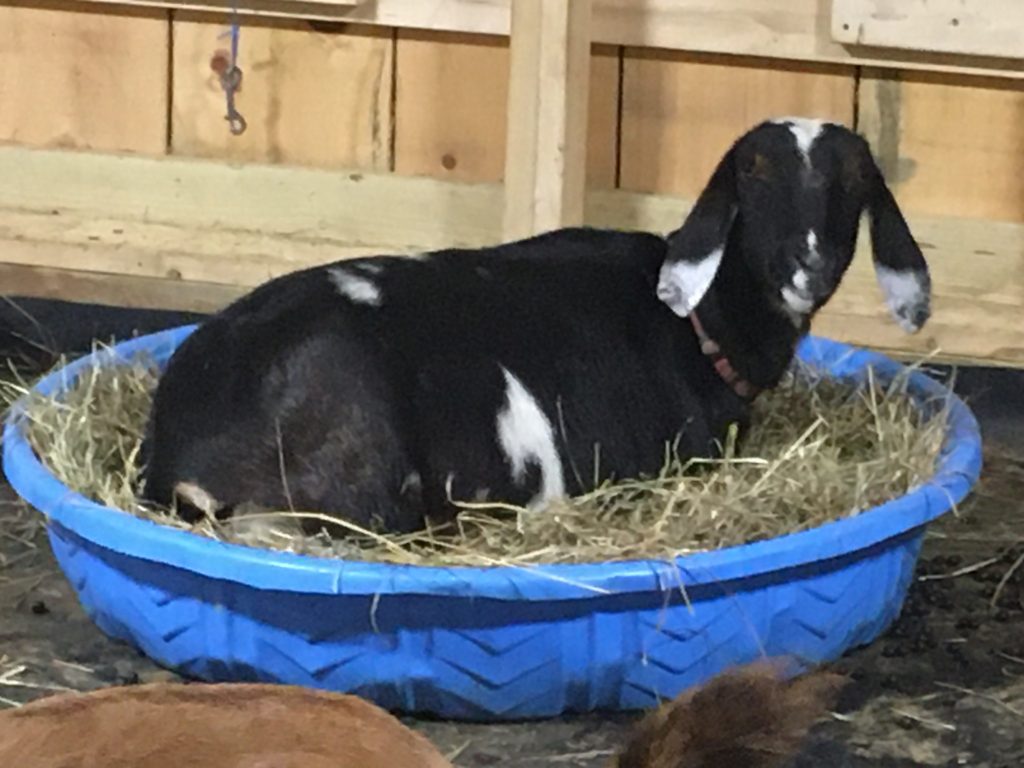
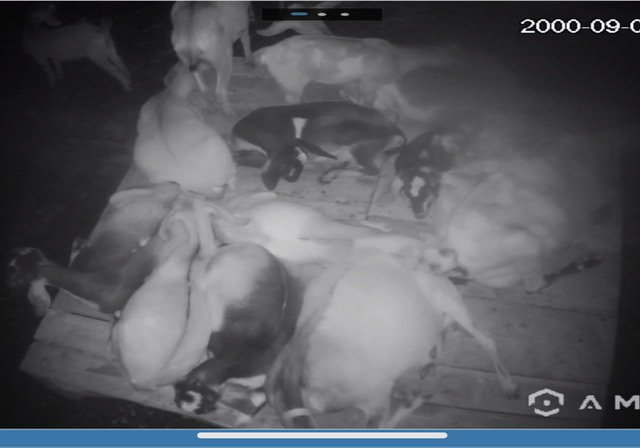
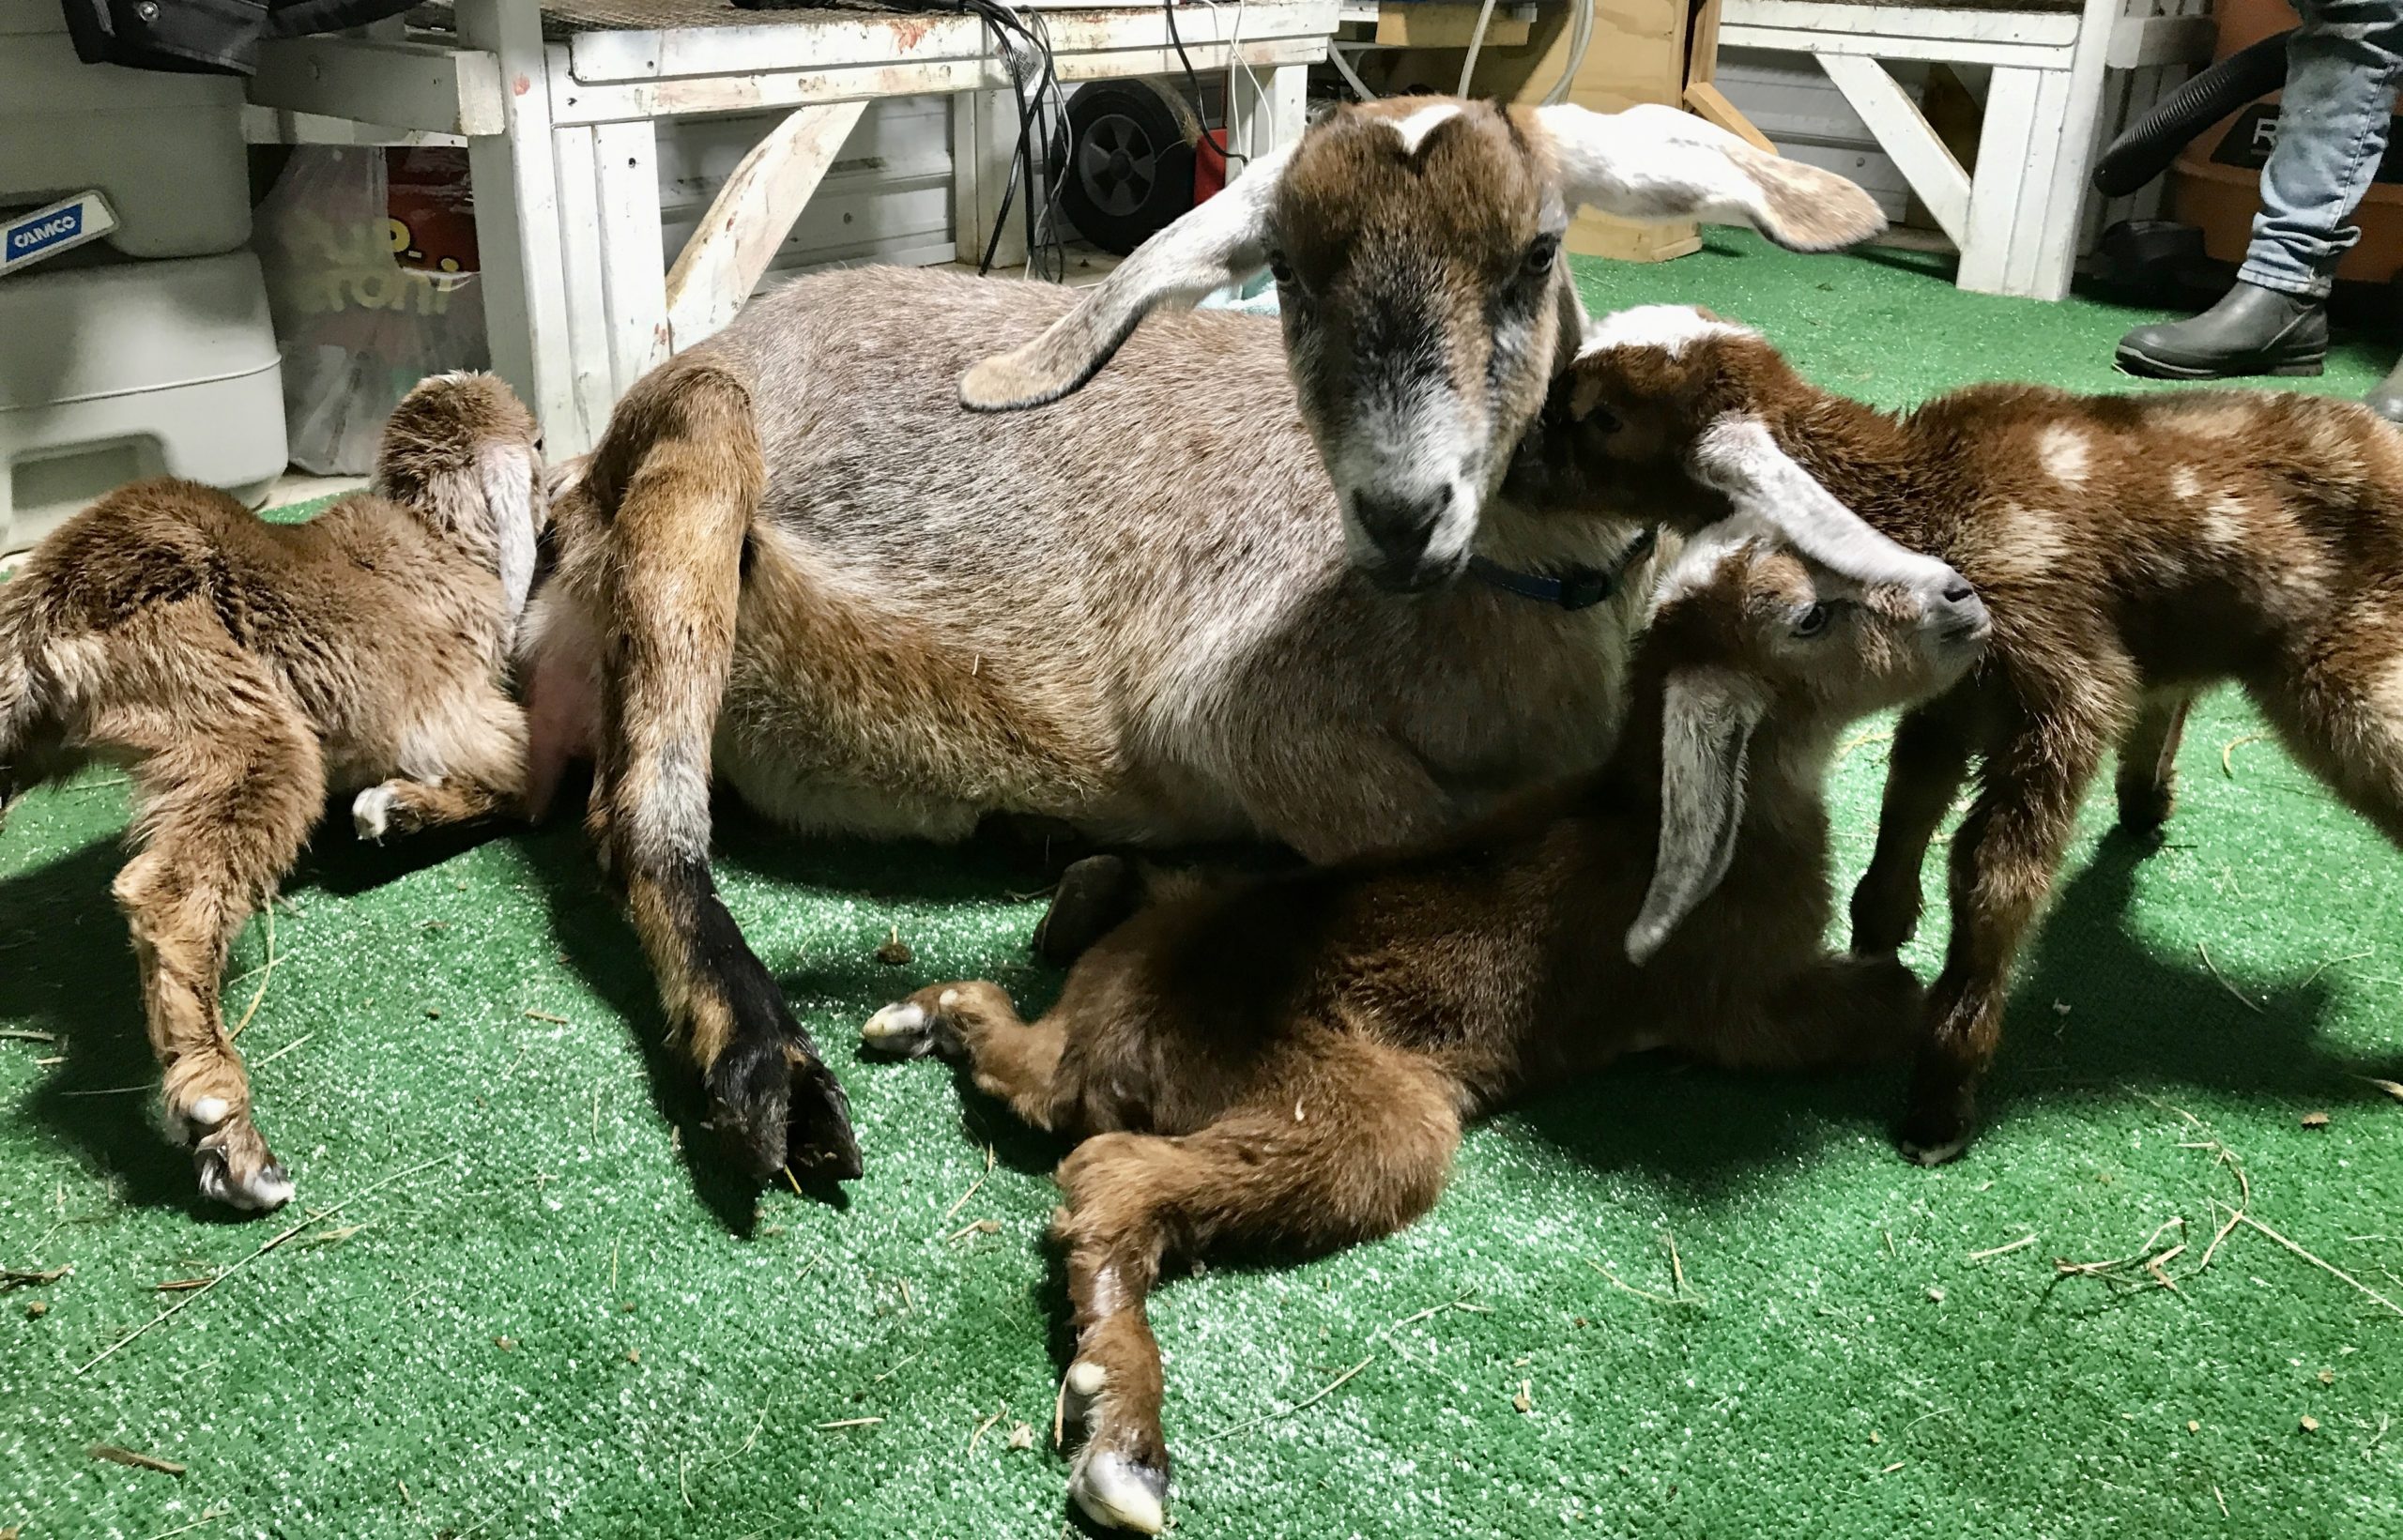
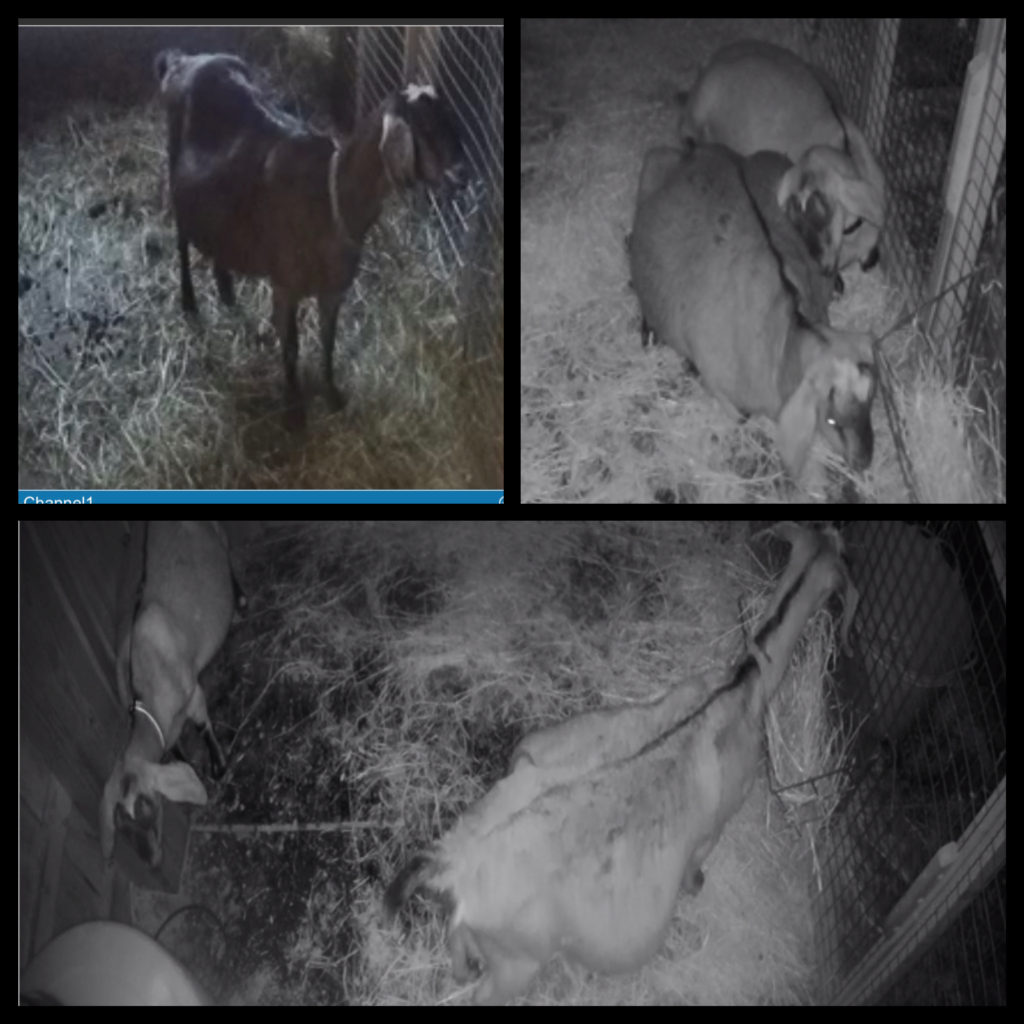
Our does can get SO big and look SO uncomfortable during the last month or weeks of pregnancy. Here is a small gallery of pictures of Candy (two with my barn cam at night) in her last week of pregnancy in 2023. I just feel SO BAD for them, but be reassured, they are fine and those babies will eventually come out.

The thing to watch for most when does are big with multiple kids is their behavior. If they seem listless, low energy, or “walking on eggshells” then suspect pregnancy toxemia and/or ketosis. Read up on these and lay in supplies so that you can detect/treat them!

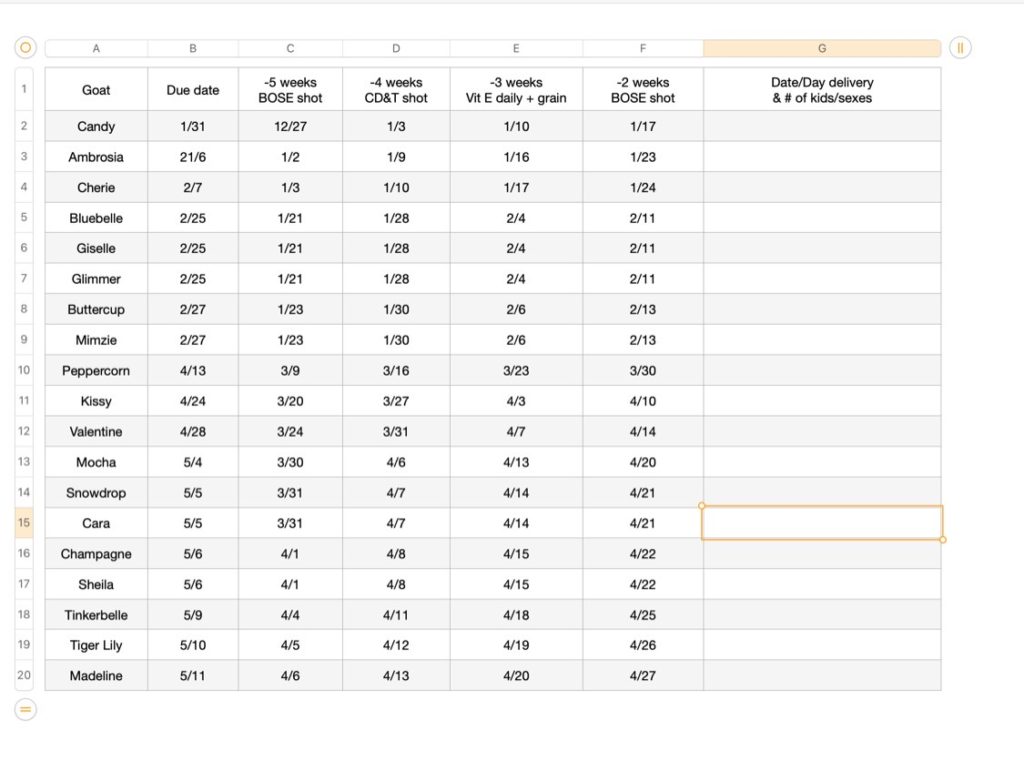
To detect or confirm these conditions, I buy new each year (because they do expire) Ketone strips. You can find them at any drug store. You hold them in a doe’s pee to detect ketones. We give our girls small amounts of grain, with Vitamin E and red raspberry leaves starting at 3 weeks out from their due dates.

Signs That She’s Getting Ready or in Early Labor

Spoiler Alert: A doe may have none of these signs, or all of them. The Doe Code keeps us guessing!

  • Taken together, the signs give a pretty good warning that “today’s the day (or night!)” but a doe can fool you.
  • For grins and giggles, watch THIS VIDEO to give yourself a stress reliever and reality check. Does have their own body clocks, and usually obey Murphy’s Law to the letter! 😉
  • The Doe Code is real, so find some stress relievers and pace yourself. Try to not stay up all night watching the barn cam from a week before the due date. My husband and I check a doe who’s soon due, watch and watch, every two hours (He wakes up at 2 AM and 6 AM, while I wake up at 12 AM and 4 AM). Thus, we both get 4 hours sleep at a time on those nights when it’s feasible that a doe could deliver, or is overdue and needs watching. Given your resources, choose a pace that’s sustainable for you!

OK: the list of SIGNS. From the earliest indicators to “this is probably IT!” signs.

Check her ligaments. Next to the tail, there are two ligaments (that support tail wagging) which, before delivery, soften and seem to “disappear.” (See more details on the ligs here.) In goat-speak, we talk of a goat’s “ligs being gone.”

Full disclosure: I’ve had does whose ligs go a week or two before delivery. But, for many does, it’s a good indicator that labor is a day or two away — or closer. Remember, it’s just one of the many signs that labor is close at hand.

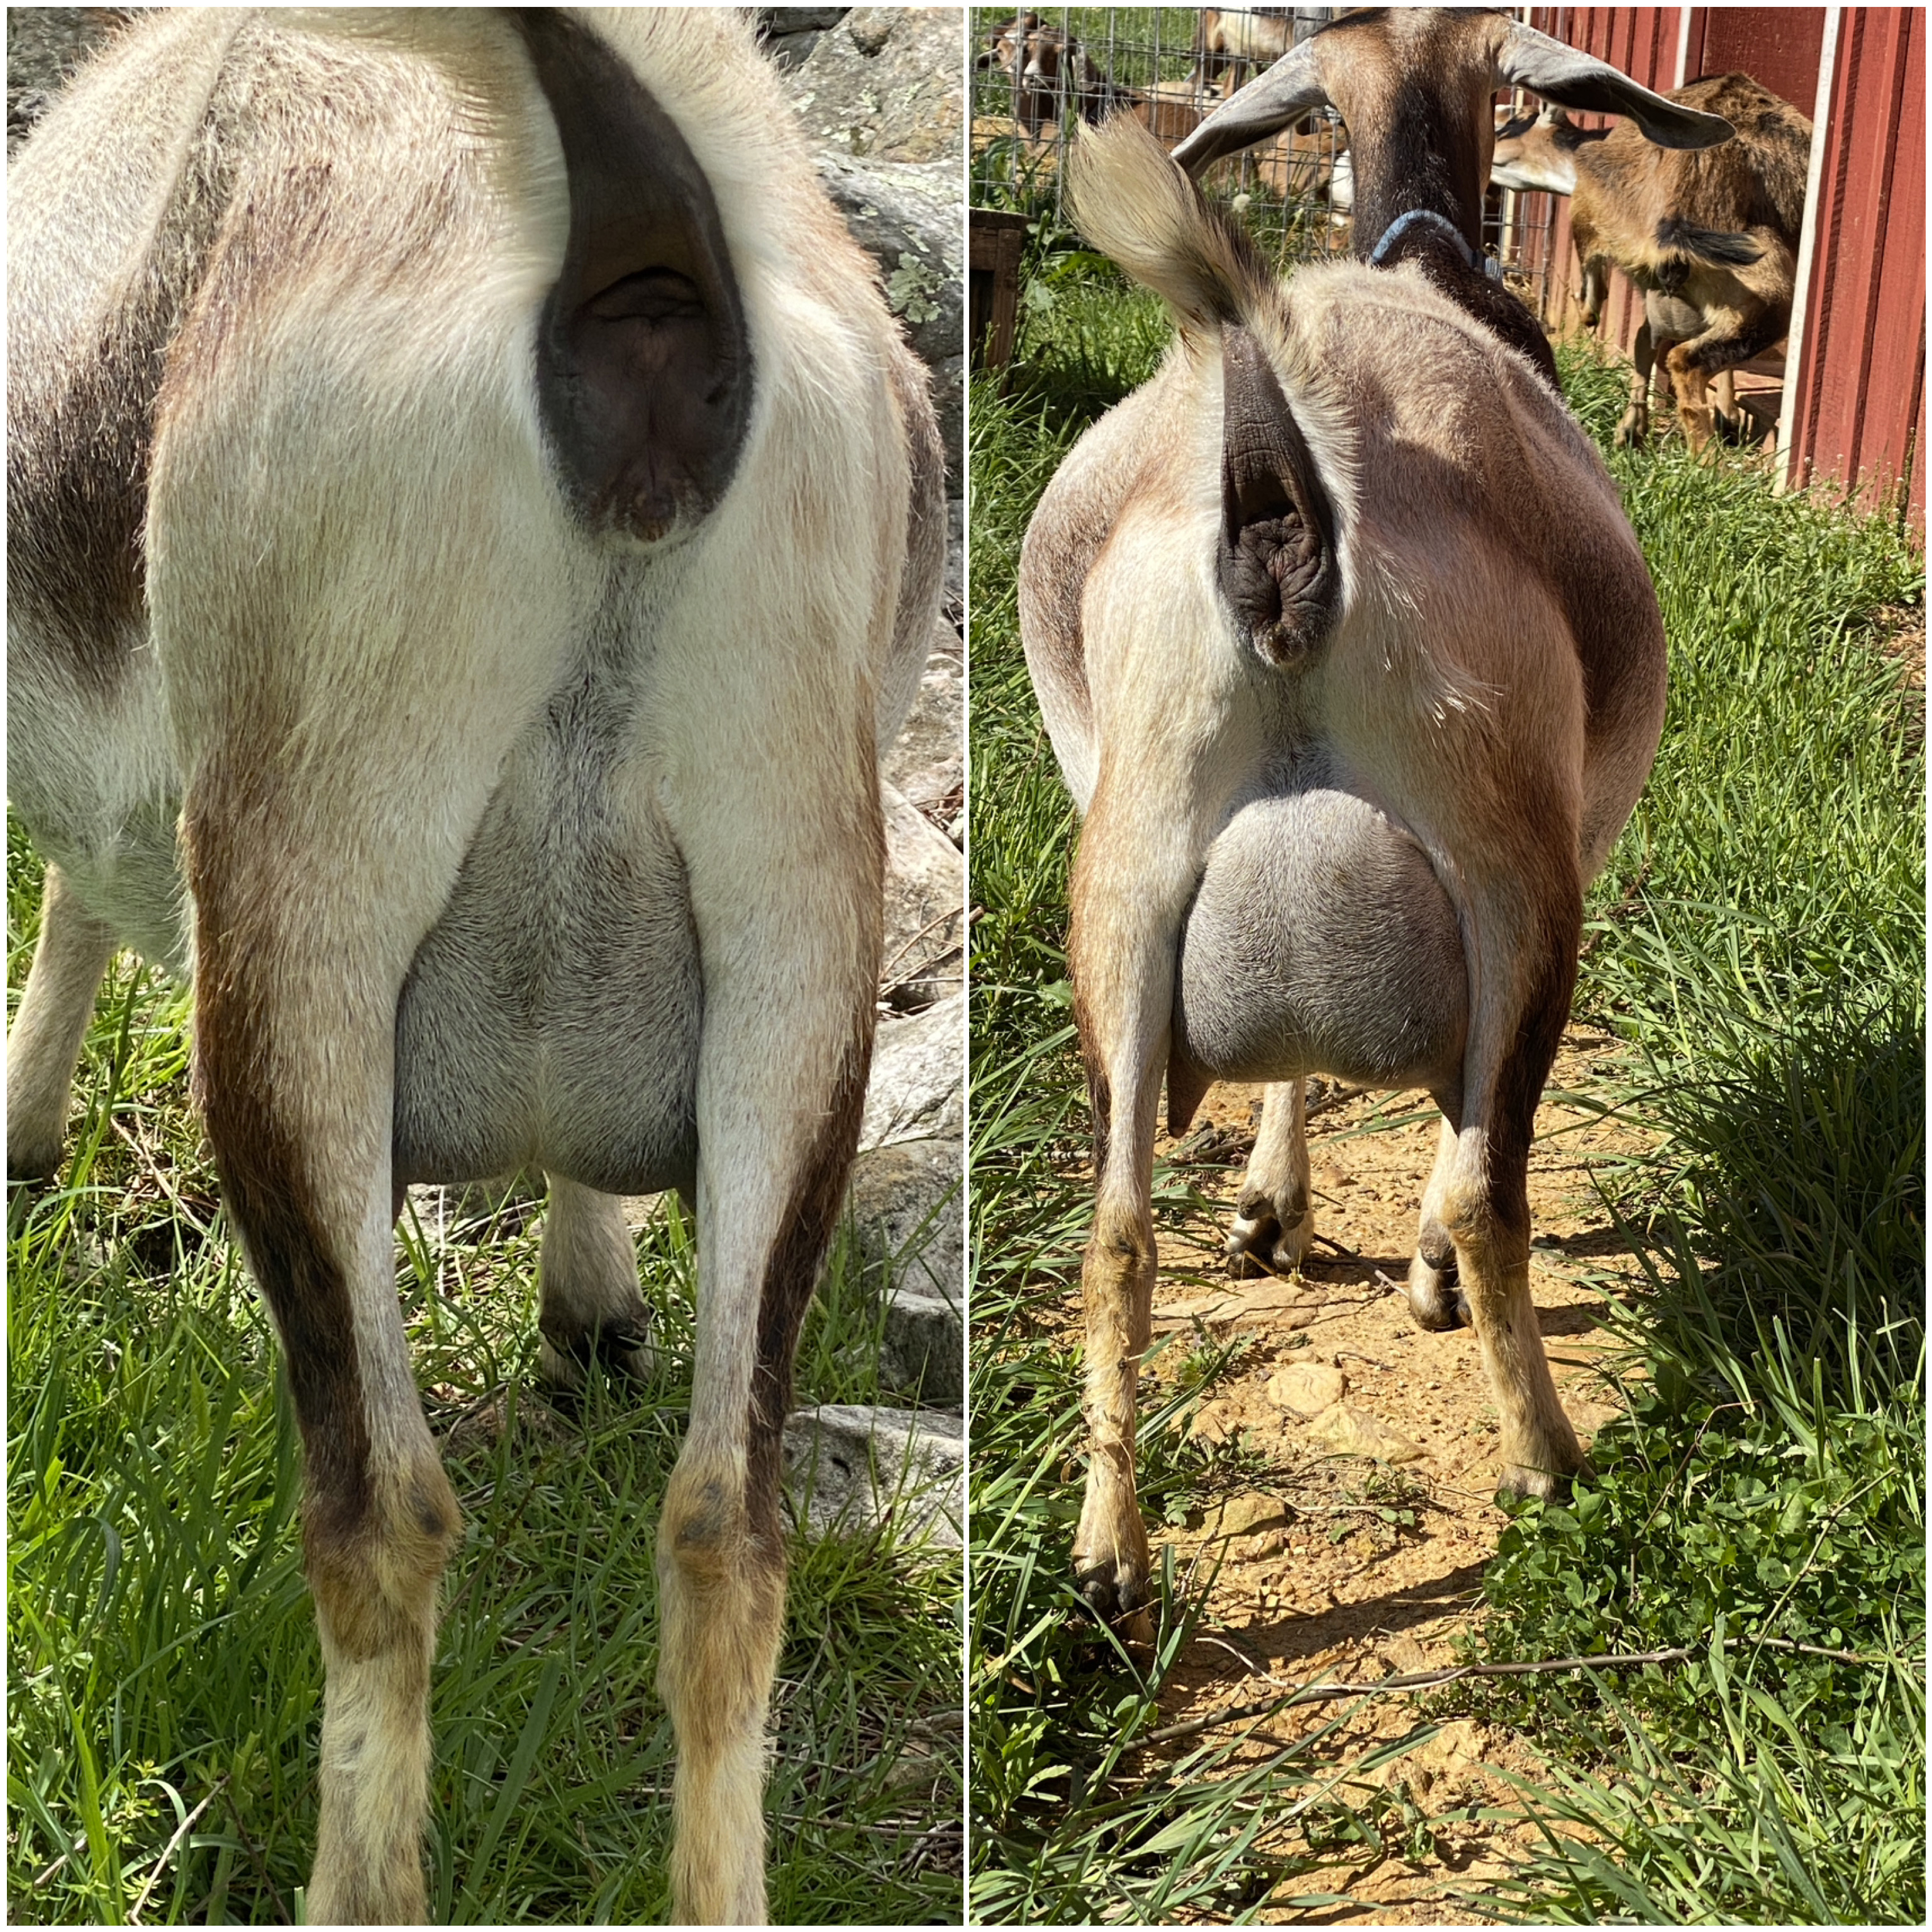
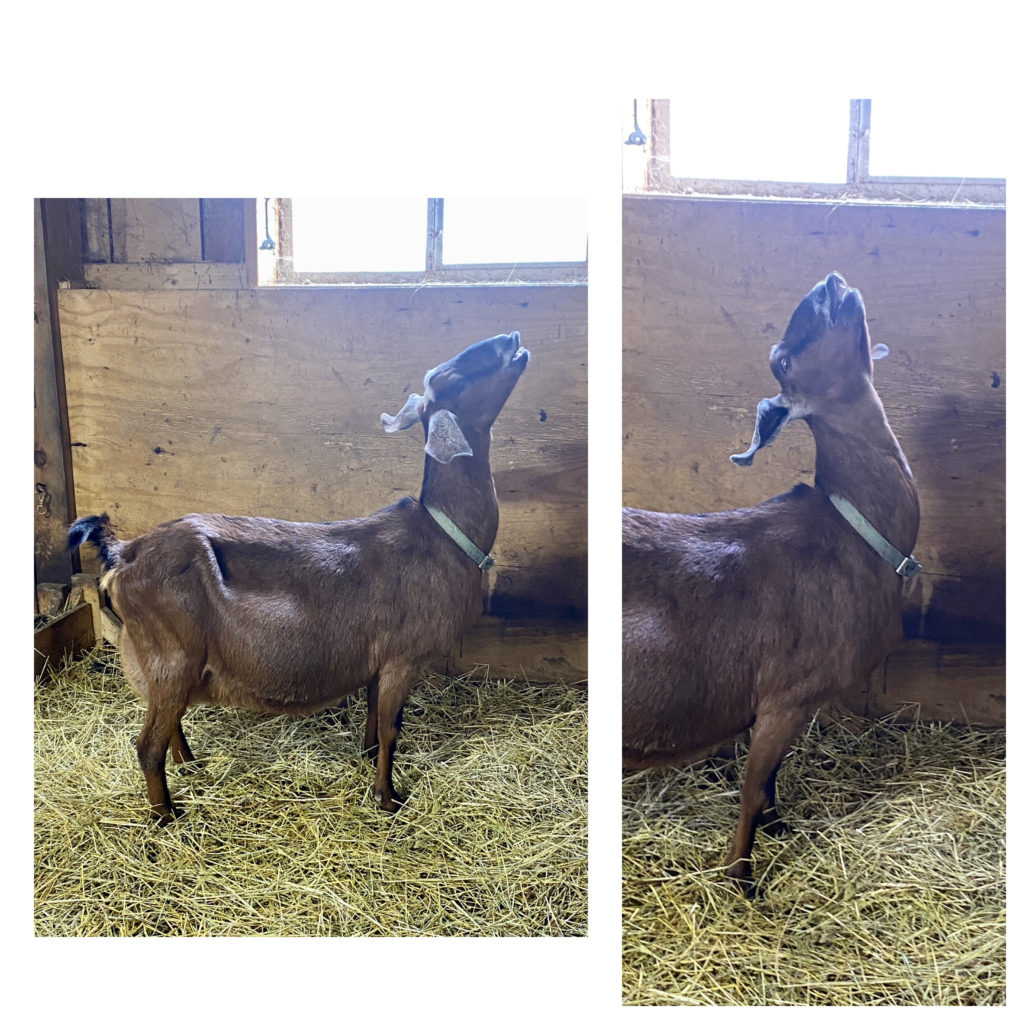
Look at her udder. Taking pictures every couple of days, starting when they are 2 weeks out or so, can really help newbies to see changes. A doe’s udder starts to be noticable anywhere from 6-8 weeks before due date. BUT, it really grows in the last few weeks, and typically, you can really tell a difference in the udder and teats when labor is 24 hours (or less) away (right picture is 2 days later than left). The udder will be engorged, and the teats will be firm to stiff.

Watch for her mucus plug. This is my most reliable sign. If I see an inch or more of mucus hanging out of her butt, I know that we are going to have babies within the next… oh… 10 hours on the outside, but typically more like 6. 🙂

Signs of Early Labor

  • Not eating her breakfast. Or, not eating hay, if it’s after breakfast.
    • If I’m watching a doe through the night on the barn camera, and she’s eating away, I’m thinking she’s not in labor, nor will she be, for the next few hours.
    • Generally speaking, does kid on an empty rumen, so they don’t tank up right before delivery.
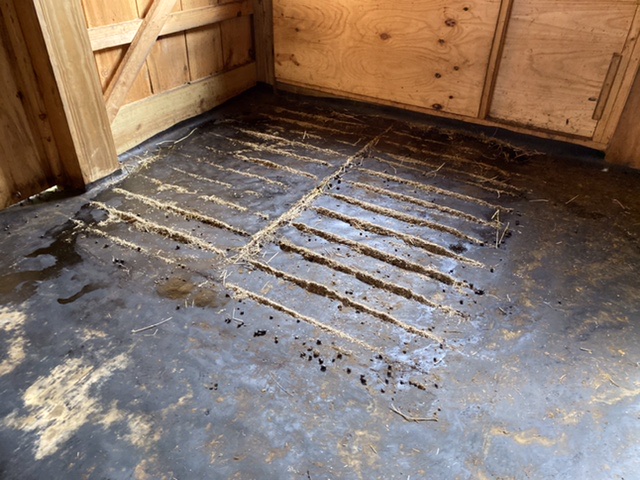
    • Here’s a free tip: LOAD up does who are near to deliveries on hay in the evenings and you may not have as many night time labors.
  • Standing off by herself in a way not usual for her.
  • An “inward look.” She’s not alert to her surroundings. She concentrating on what’s going on inside her.

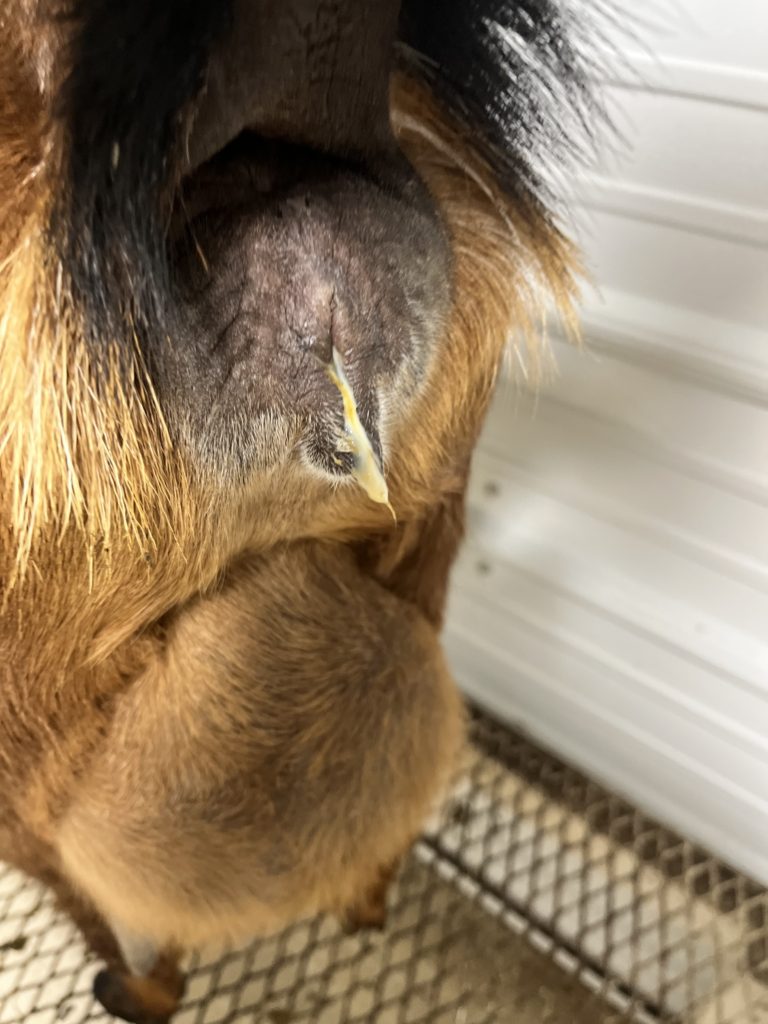
Mucus is visible on her butt, or even a long stream of mucus as in this picture… six to eight inches long, thick and white or yellowish and more transparent. This doe is well into labor.

Generally, the closer to delivery she is, the more liquid or transparent it will be.

  • Stretching and moving, looking uncomfortable. Some will lie down and then get up several times.
  • Biting her sides.
  • She may want to be licking your hands.
  • Visible contractions: tensing of muscles, while tail extends straight upward.
  • Her vulva may look convex (pushed out).
  • She may paw at the ground.

NOTE: You may have all these signs going, and then they will diminish, and the doe may eat and/or drink. It’s normal. She is taking a break. Typically, labor will start up again after a bit.

You should not think of intervening until the doe has been actively pushing for 30 minutes. The early contractions are lining the kids up inside, and the cervix is opening. The doe must feel the pressure of the first kid to be born pressing on her cervix before she will begin to push him out. If you intervene too soon, you will be trying to pull a kid through a tight cervix, and can do real damage.

In these pictures, Candy is not pushing. She is having heavy contractions and stretching so as to line up her kids, but she is silent.

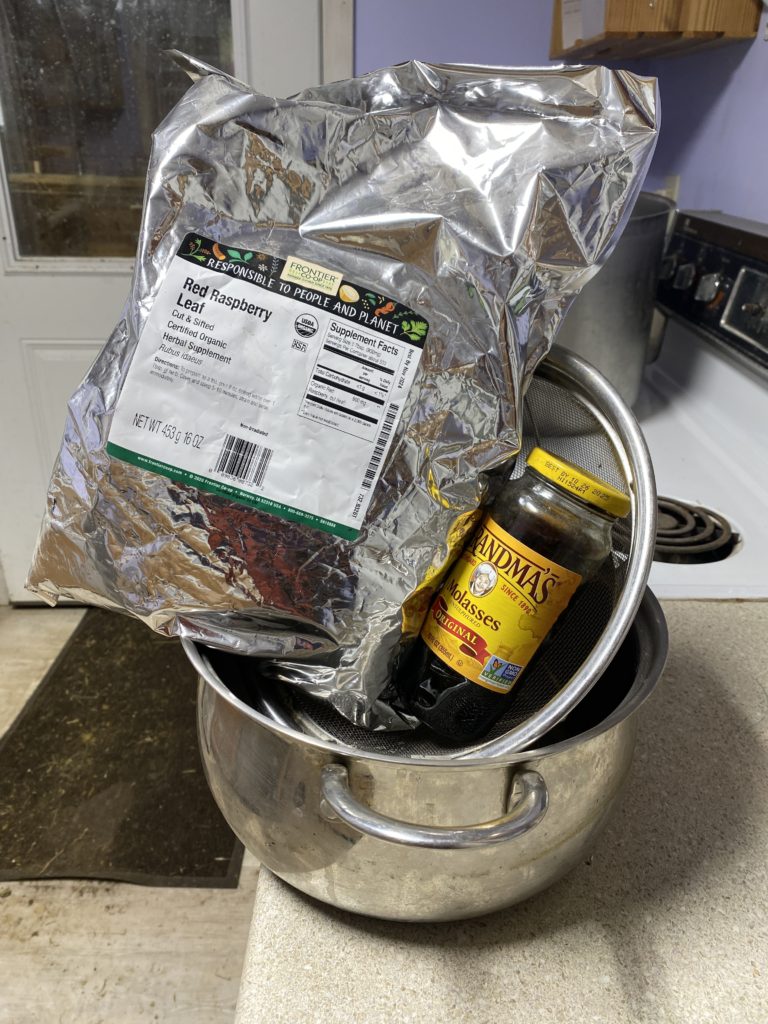
When the doe is well into labor, you’ll want to start brewing the red raspberry leaf tea. This warm drink given after all the kids are delivered will give her an energy boost and also help her uterus to contract and expel the placenta(s) sooner.

Get a 4 quart pot and a colander that will fit into it.

Put the red raspberry leaves (available on Amazon or other providers) into the colander and turn the water on to medium heat.

Allow the leaves to steep, making tea. Set a stopwatch for about 20 minutes.

After the tea is made, turn down the burner to “warm.” (Make sure it doesn’t boil away…)

Get out your molasses and a large serving spoon. Put them nearby.

Right after the doe is done kidding, you’ll stir in a big dollop of molasses and serve the tea warm (but not hot) to the weary momma.

Pushing and Delivery: Normal or Ideal Presentations.

Normally, after a few hours of contractions, the doe will begin pushing. I’ve only had two does who was soundless in this. Most will give prolonged grunts as they bear down; a few will actually give high-pitched screaming at this stage.

  • Pushing is different from contractions: you can tell that she is bearing down. You can hear it on a barn cam, so I always leave the sound on at night. I’ve had one birth in particular to which I was only alerted through hearing the doe pushing, since it was mid-morning, and she was out of sight behind a manger, and we had no idea since our last barn check that she was in labor.
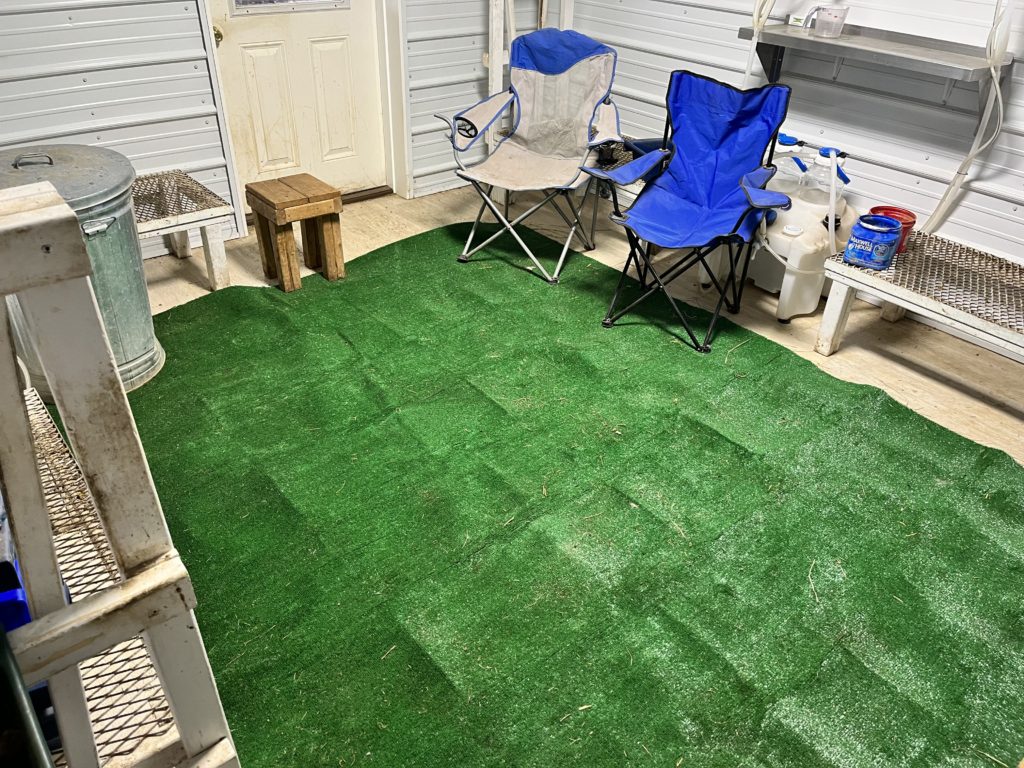
  • The dam may push standing up or lying down. Mine almost always lie down, and almost always wedge their butts into the most uncomfortable (for me) location available. This is one good reason for kidding in the open, and not in a tight kidding stall. It gives us humans more room to maneuver around the doe.

Pushing is the stage when you will begin to see the kid. Below are details of what you’ll hope to see and do …

Focus on the dam

  • Each normal, live kid is encased in an amniotic sack, filled with fluid. This sack can look white or yellowish, and is translucent. As the kid begins to be pushed out of the doe, you’ll see a “bubble” — it’s the tip end of this sack.
  • There are two ideal (or normal) presentations: two feet and head first, or two hind feet first. Both of these are “normal” or “ideal” presentations. See these diagrams. (We will discuss abnormal presentations in Part 3.)
  • If you have a bright light (such as a flashlight or cell phone light) you can look into the bubble, and hope to see two hooves encased in a protective, white casing. Ideally, there’s a nose there, too. Often you can see teeth and a tongue.
  • Sometimes, the sack will burst as the doe pushes the baby out. This is normal. If it does, and the kid is nose first, you can wipe its face and nose with your towel, as it may start to gasp and breath before it’s fully born, or not.
  • Typically, after the head and shoulders are out, in a normal delivery, the rest of the kid slides out and onto the floor.
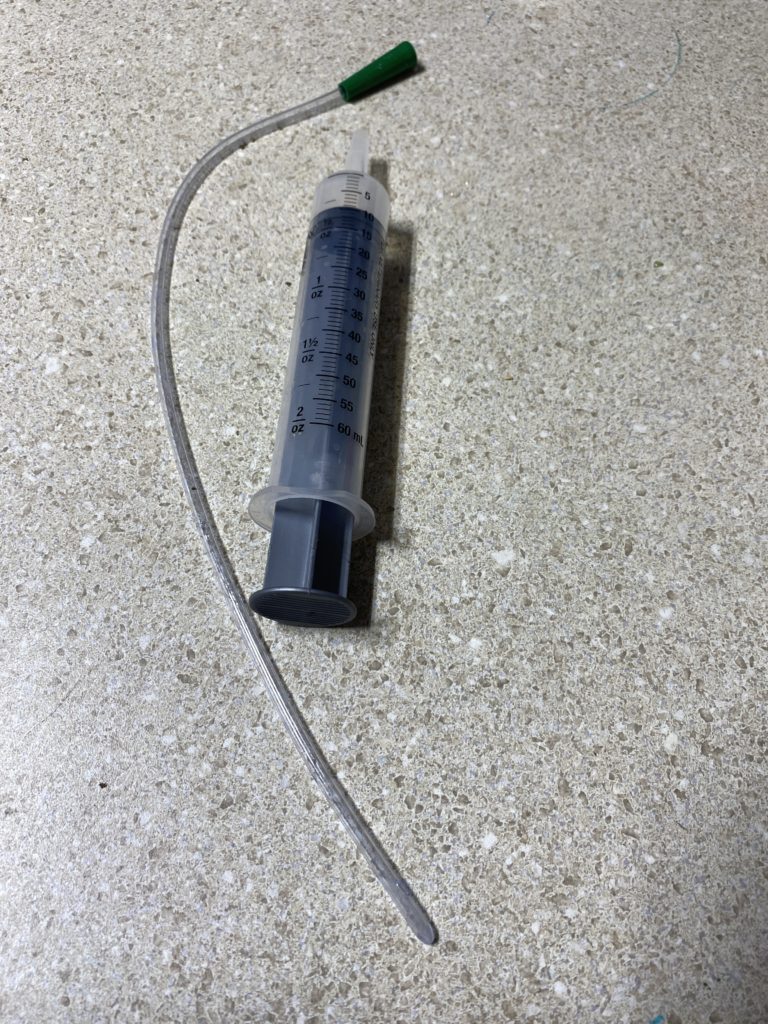
  • Ideally, you are waiting with a towel (or feed sack) placed right near the scene of the action. You should wipe the kid’s head with a towel first, clearing its nasal passages (carefully — they are delicate) and throat if needed with the bulb aspirator.
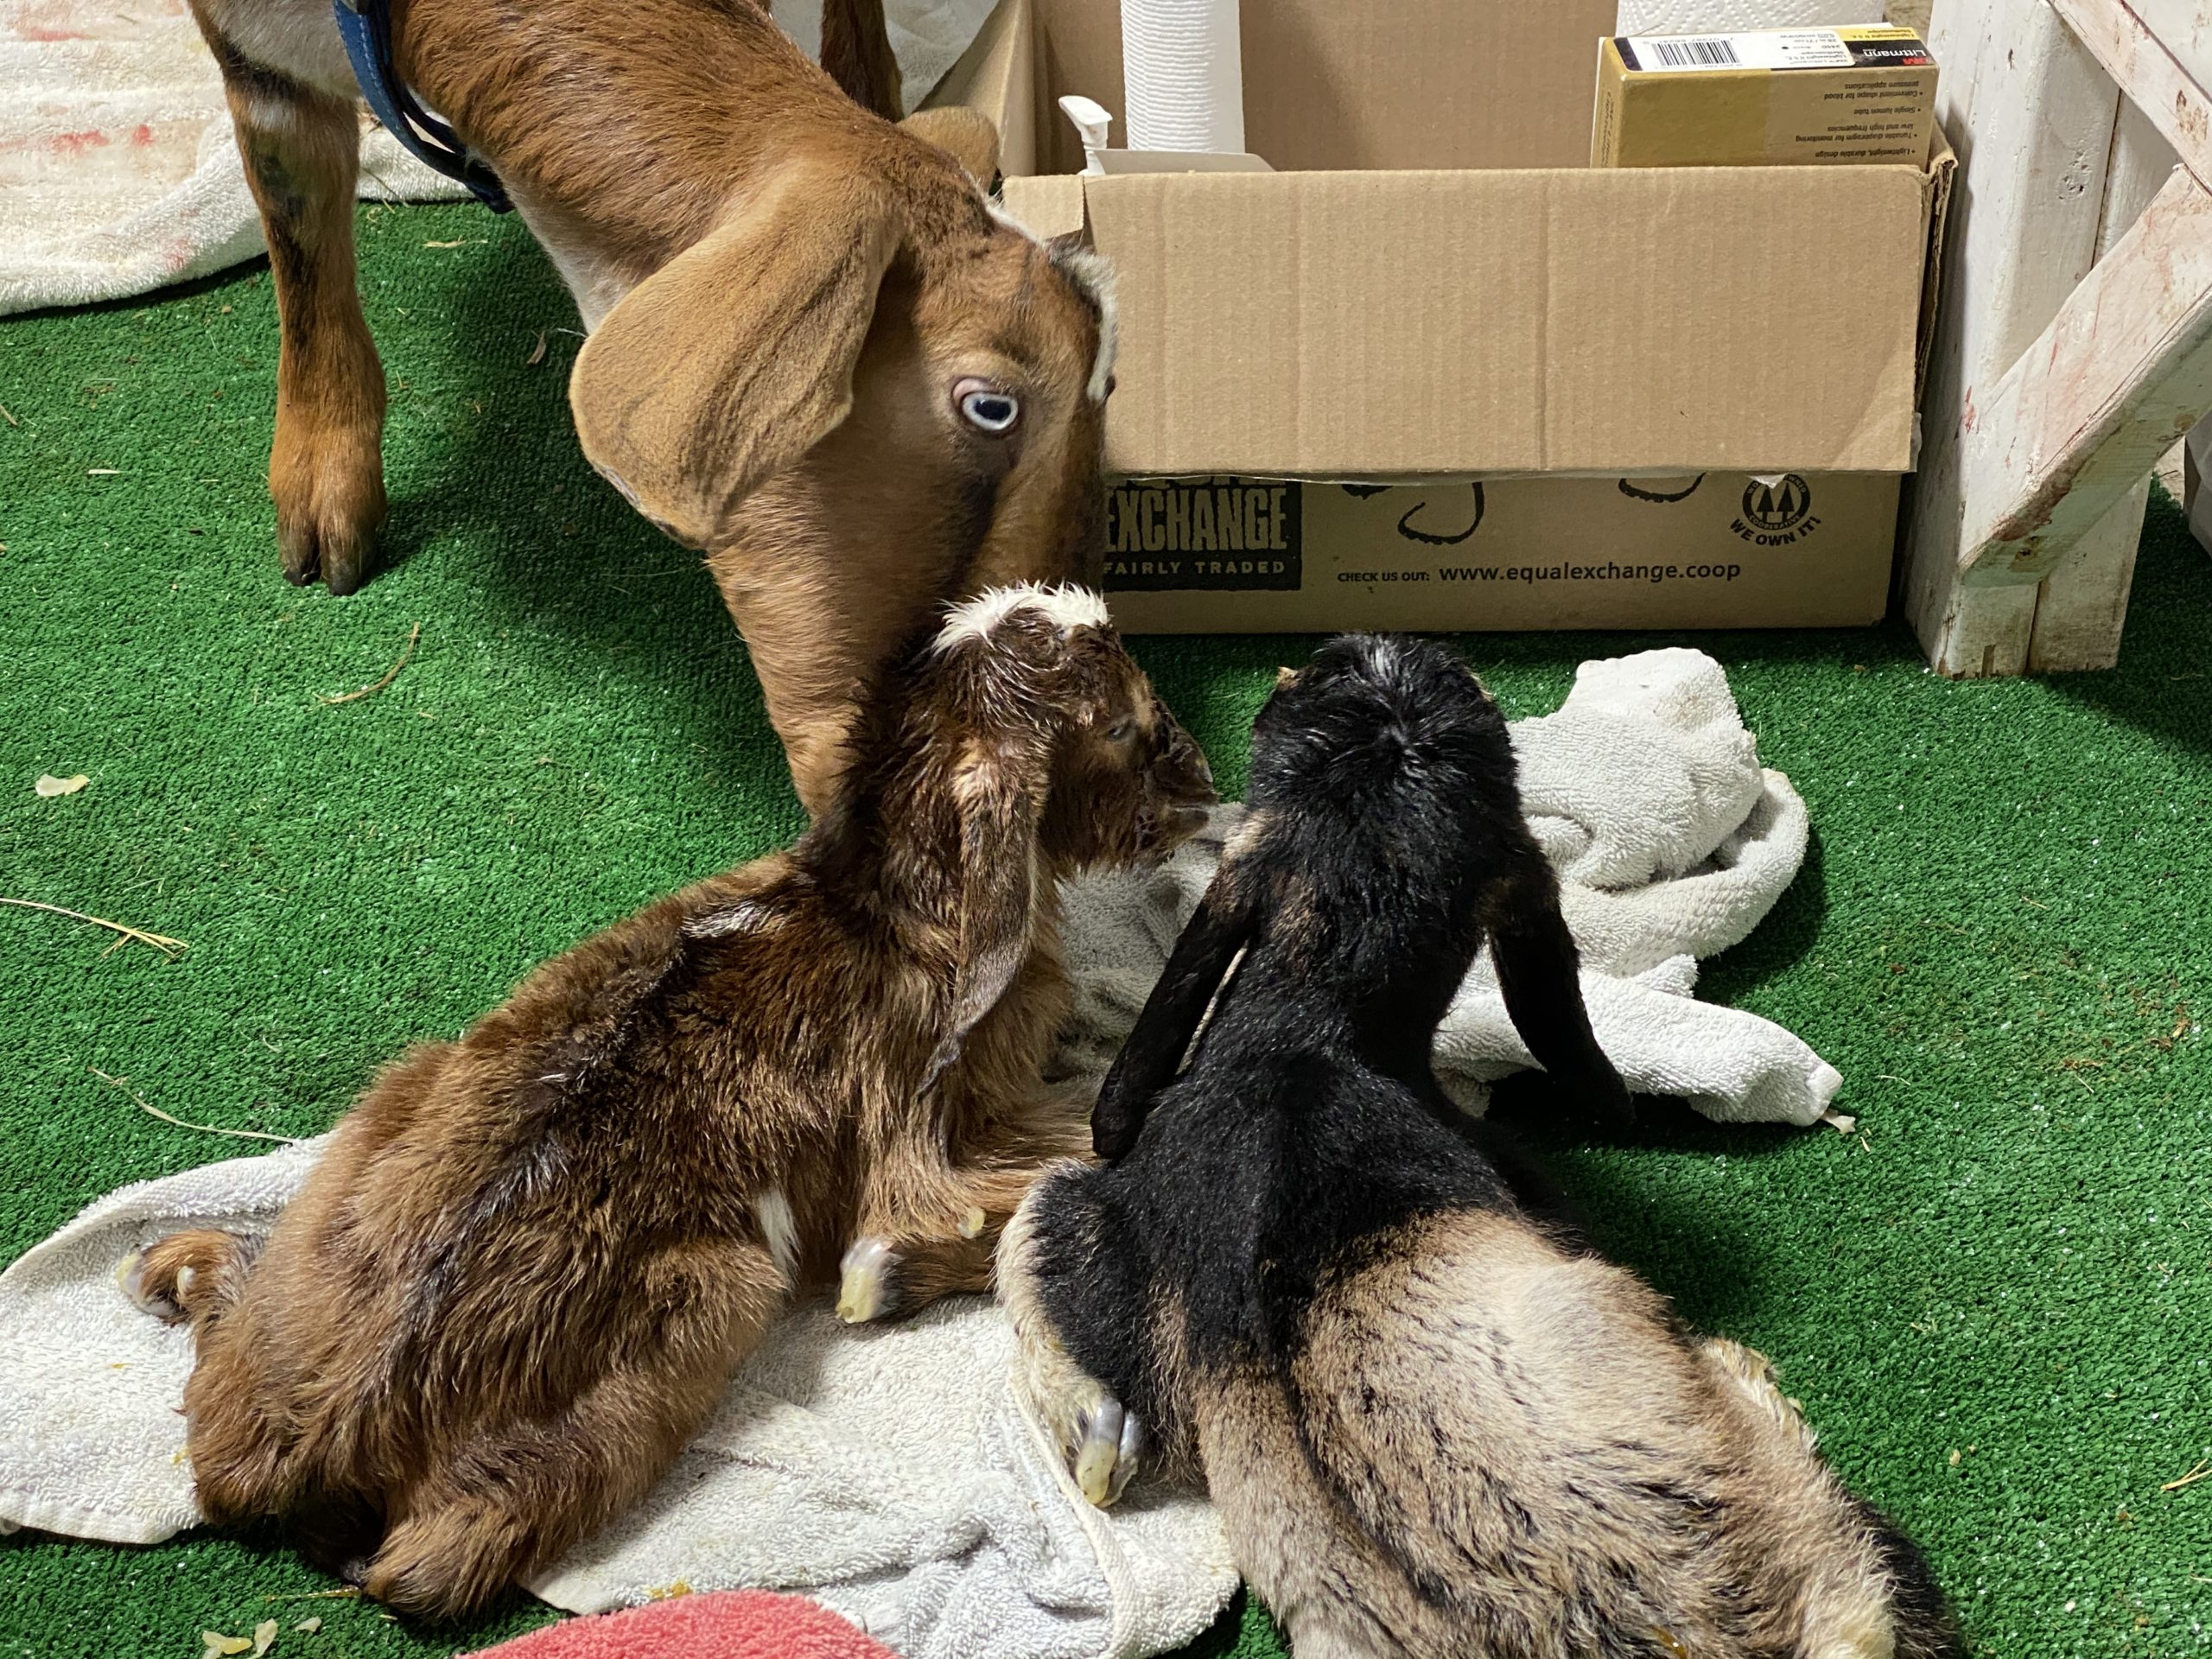
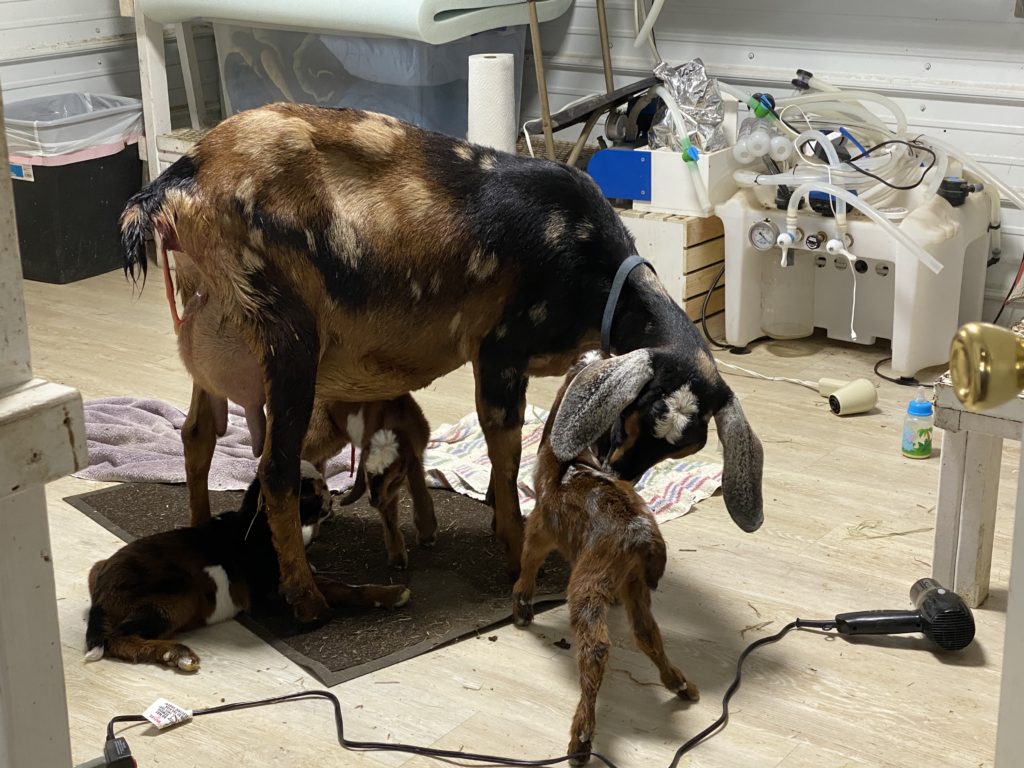
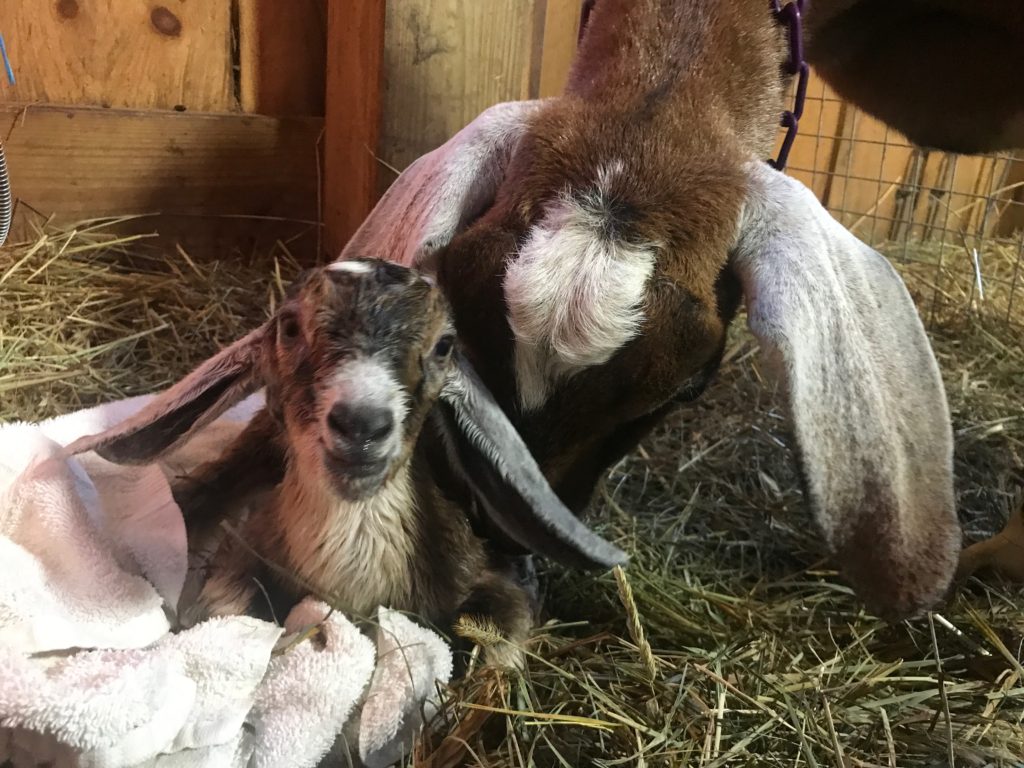
  • After the kid is breathing well, which should be within 30 seconds, put the kid in front of the doe so that she will lick it and smell it.
    • This is VERY important. She needs to bond with her baby, and should eagerly lick it. You can assist with drying, but do not get in her way, especially if she’s a first freshener. Such new dams might not know to do this. Present the baby to the doe, and if she’s uncertain, back away and see whether she will start to lick it on her own.
      • If it’s not cold in the barn, you don’t have to assist with drying at all.
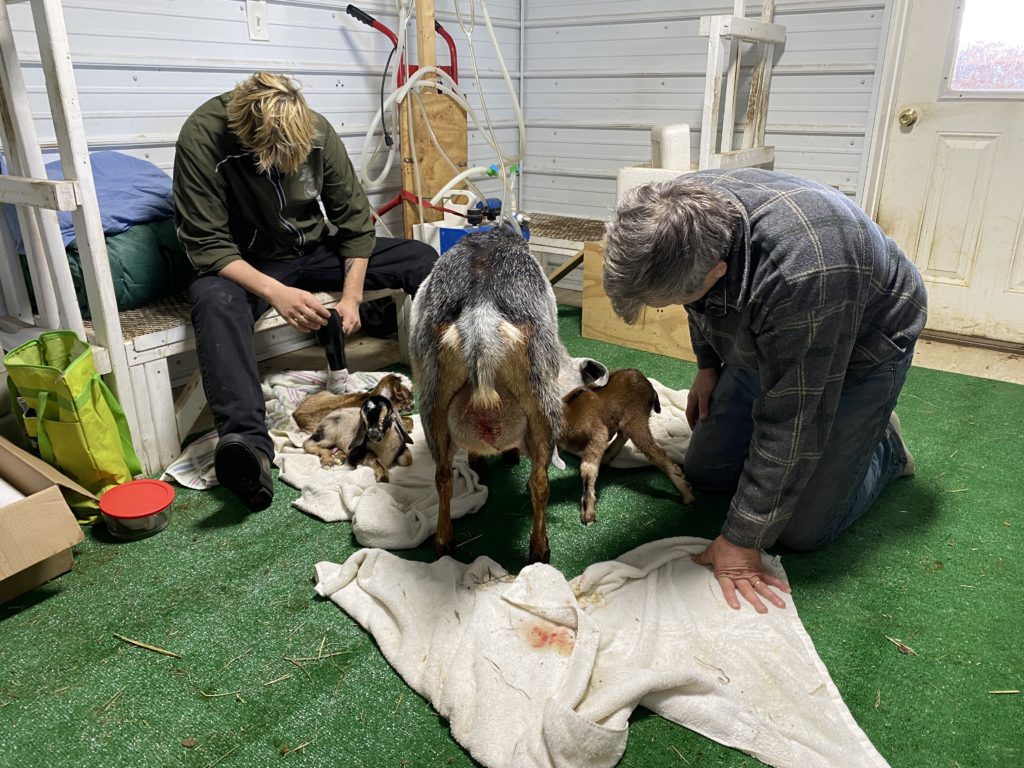
  • In most cases, there will be about 15-20 minutes between kids. It can go longer, or shorter. Sometimes multiple kids can come fast: one after the other. During the interval, it is a great idea to get each kid nursing if possible. (See details below)
  • Bumping her: If you think the doe may be done delivering kids, you can try a little test to see if there are any kids left inside her. If she is standing up, stand behind her butt and reach around her belly and lace your fingers together. Then pull up on the belly and then let it drop again into your hands. (This is not a big motion, but it is quick. Be gentle, but firm.) If there are kids left, you can typically feel sharp hooves or bony butts bumping against your hands.
  • When she is finished delivering kids, you will want to give her the red raspberry tea with molasses as an energy boost and to help the uterus contract to expel the placenta(s). (If the tea is too hot, cool it by adding some cold water.) Most of mine gratefully suck down nearly a gallon of the stuff.

Also focus on the Kids…

As each kid is born, it will need to breathe freely first, and then quickly be presented to the dam for cleaning, sniffing, and bonding. Additionally, you need to be concerned with each kid’s temperature and note their sucking reflexes.

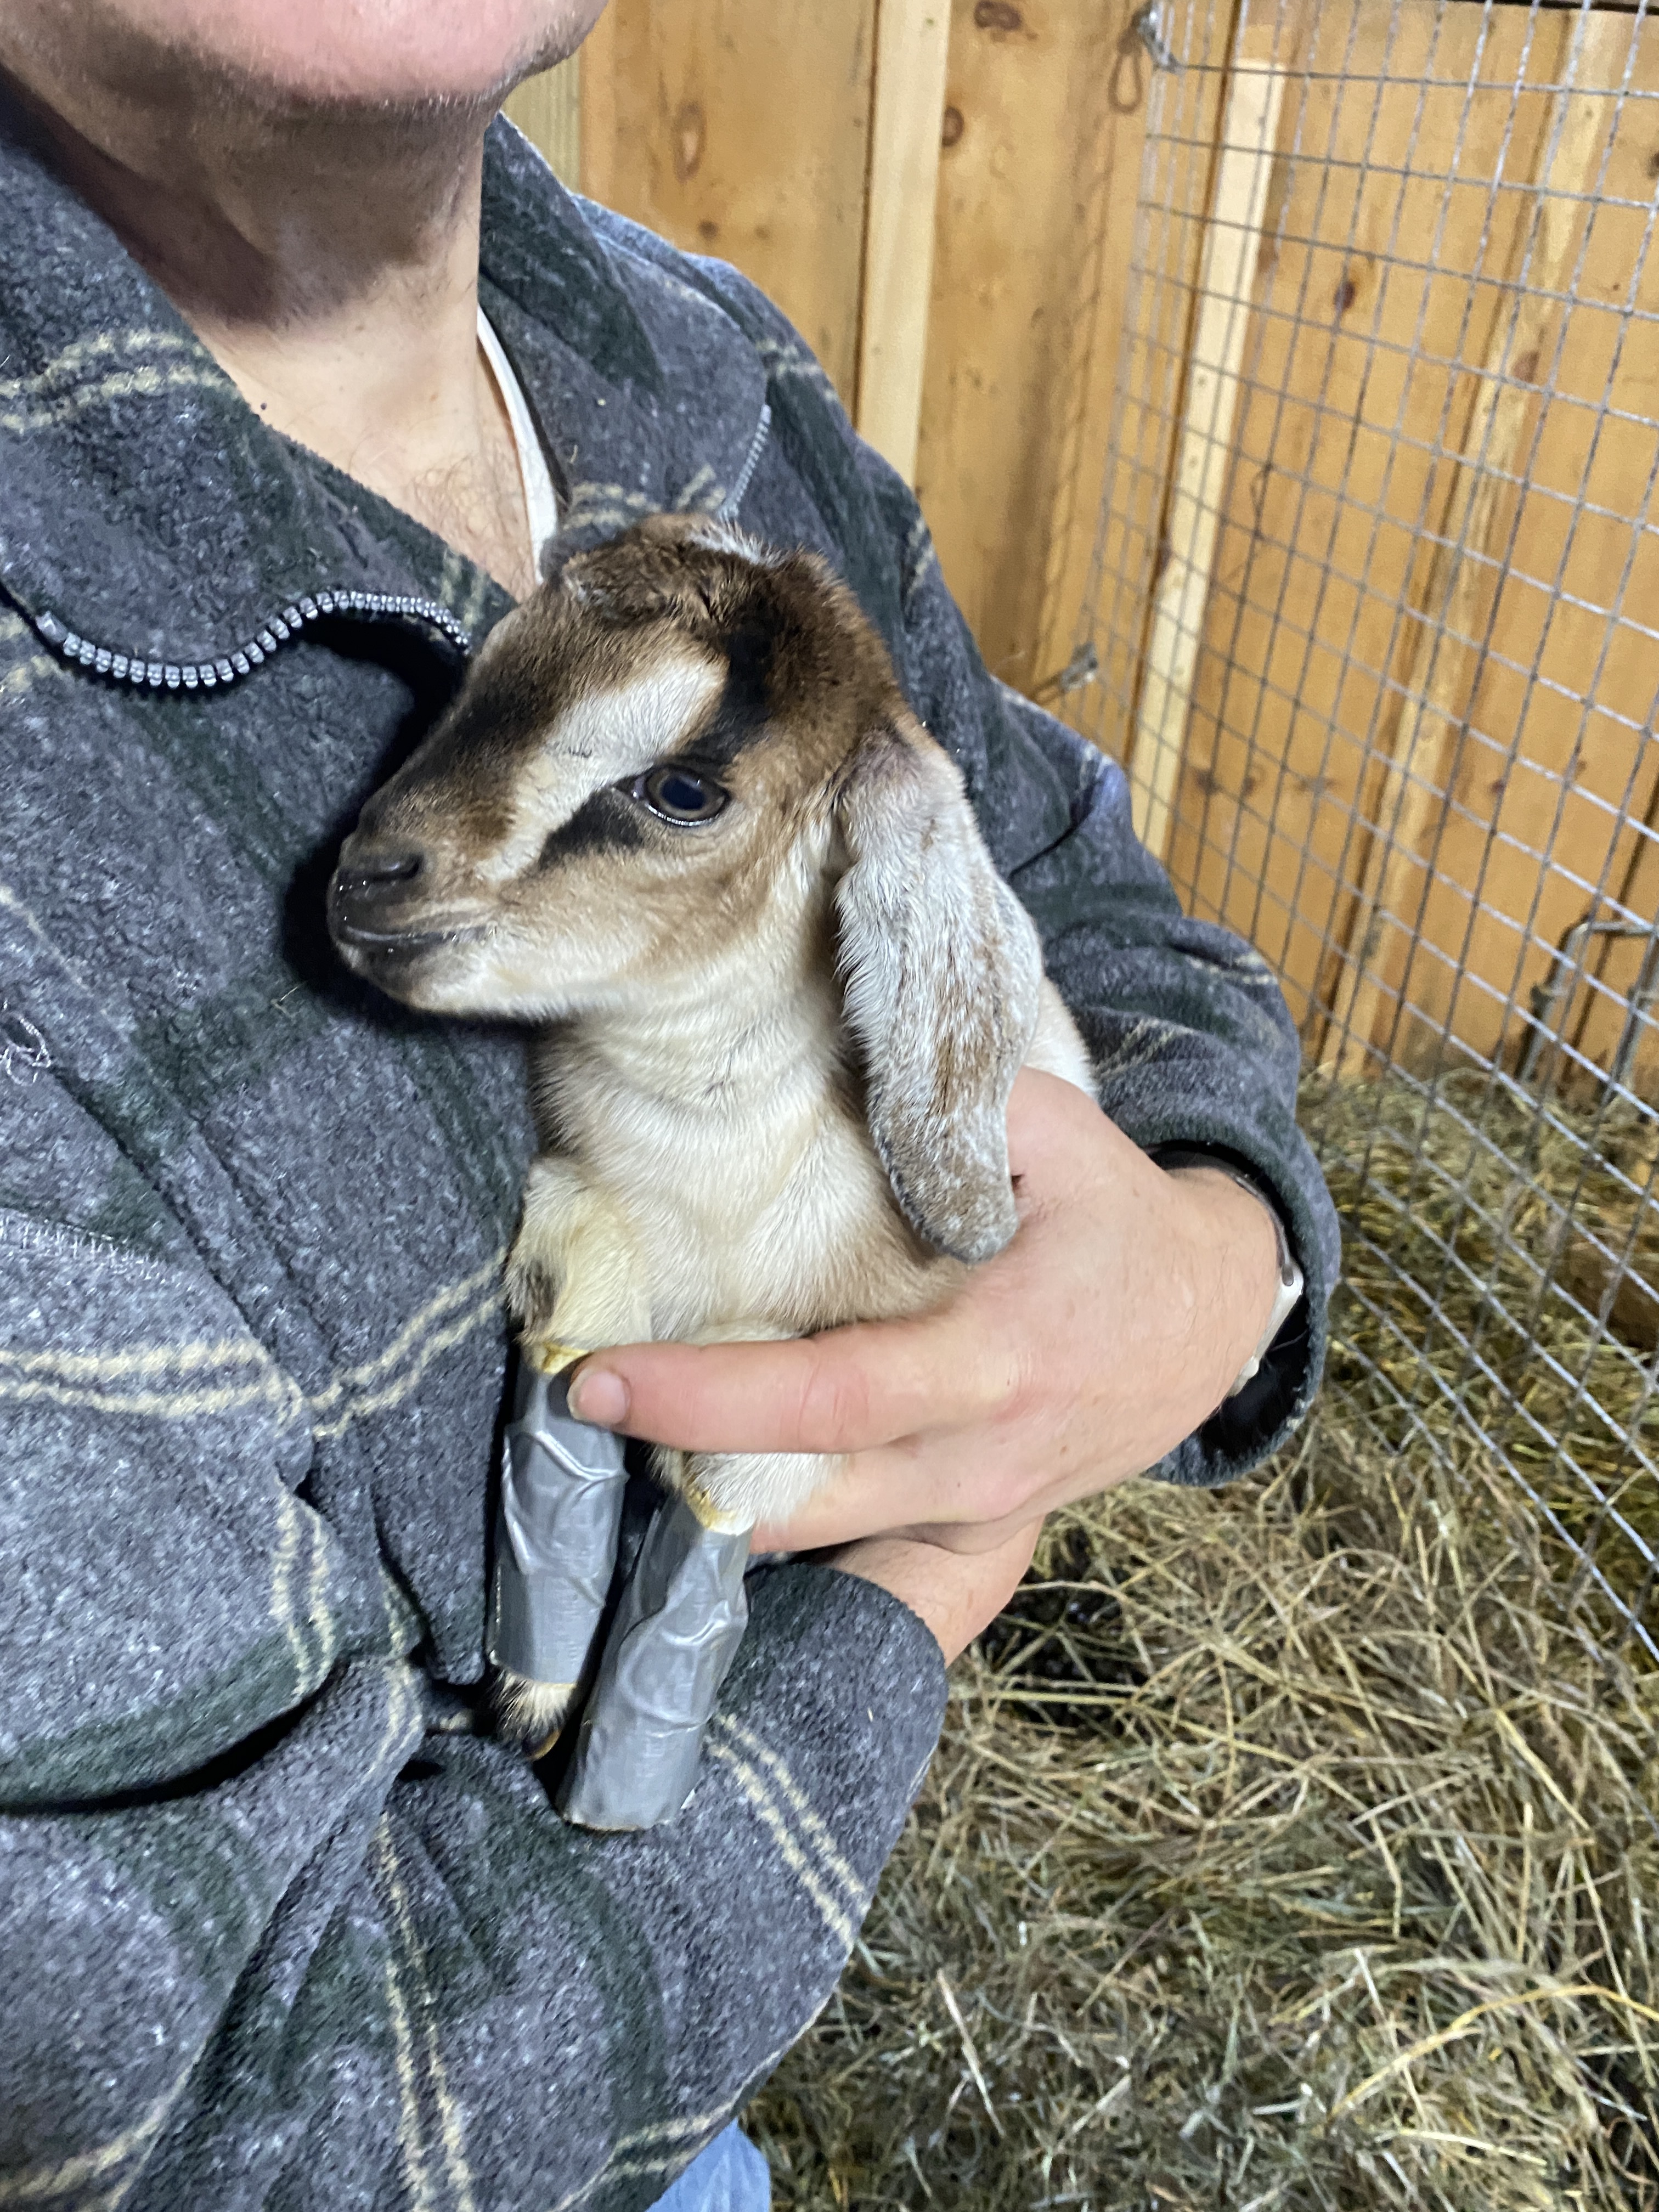
Healthy kids will emerge with open eyes and a perfect mouth. They are miracles on hooves, ready to stand and eat within 5-10 minutes of birth.

They will be slick and wet from birth fluids.

As the dam licks them, she is drying and stimulating (and thus warming) them. However, if the barn temperatures are cold… under 40° or so… the wet kid can get chilled.

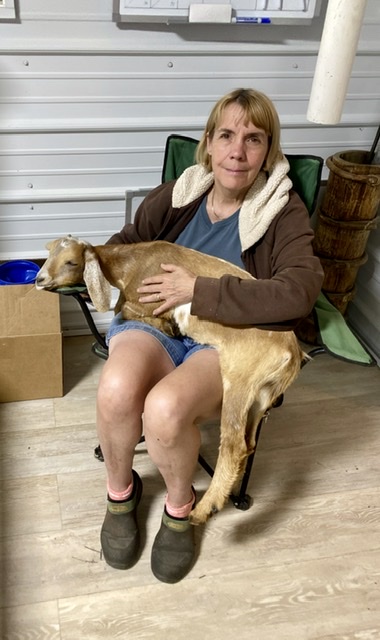
  • If your barn is cold, help to dry the kid with a towel and, if the kid is “floppy” — i.e. not attempting to get up to nurse — put your finger in its mouth. If it is cool to the touch, then you need to warm the kid.
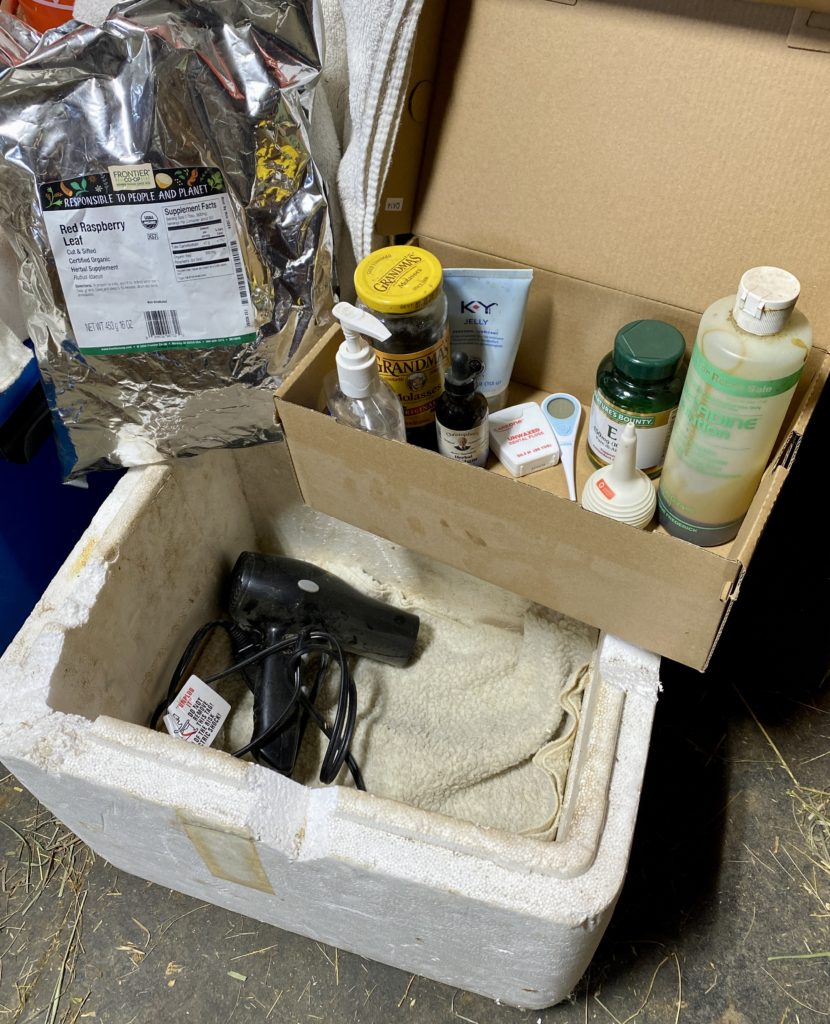
    • We use a styrofoam cooler and a hair dryer. Put the kid into the cooler; turn the hair dryer on a low but warm setting, and then put a towel over the cooler. Be careful not to burn the kid, but fill the cooler with warm air from the hair dryer. Typically, this only takes 5-10 minutes. If this is the kid’s issue, it will brighten considerably and start looking to nurse your hands and/or to stand up. Take it back to its mother and help it to nurse, as described below.
    • As you are helping to dry a healthy kid with a towel, don’t be too gentle. Friction on its skin will stimulate and warm it.

  • As the kid warms, it should attempt to get on its feet. Because it is using its ligaments and muscles for the first time, it will usually take many tries for the kid to be on his feet, and some only seem to know how to go in “reverse.”
  • You can assist with this process, maybe by untangling limbs and making sure that the surface under the kid gives him good footing, but also do let the kid struggle to right himself. This is how his muscles strengthen.
  • IDEALLY, each kid should get some colostrum in him within 30 minutes of being born, the sooner the better. It is vital that the kid be warm, or he will neither seek the teat nor be able to digest the colostrum.

  • If the kid is warm and active, it will start searching for the dam’s teat. She will nuzzle her dam’s side and bump her head on her dam’s belly (or your hands). She may go the wrong way, nuzzling along the dam’s chest or ear.
  • If it’s been about 15 minutes and no active pushing is going on, urge the doe to stand so that the firstborn can nurse. (Nursing will stimulate uterine contractions!)
    • You can pick the kid up and bring her to the teat. Don’t try pushing her butt or her head towards the teat, as her instinct will be to push back. The kid has eyes; you can put her in front of the teat, and then bend the teat towards her mouth. Her God-given reflex will be to “latch on” and suck vigorously.
    • If the kid just “sips” at the teat, that’s OK for a first try, but attempt to get the kid back to the teat in a very short while. You want to see vigorous, prolonged suckling as soon as can be.
  • Take a break from trying to get kids to nurse if the doe starts to deliver another kid. Make sure that the first one is safe from being sat or stepped on, and then give your attention to the delivery of the next kid.
  • As soon as you can, dip each kid’s umbilical cord in iodine.

The Clean Out

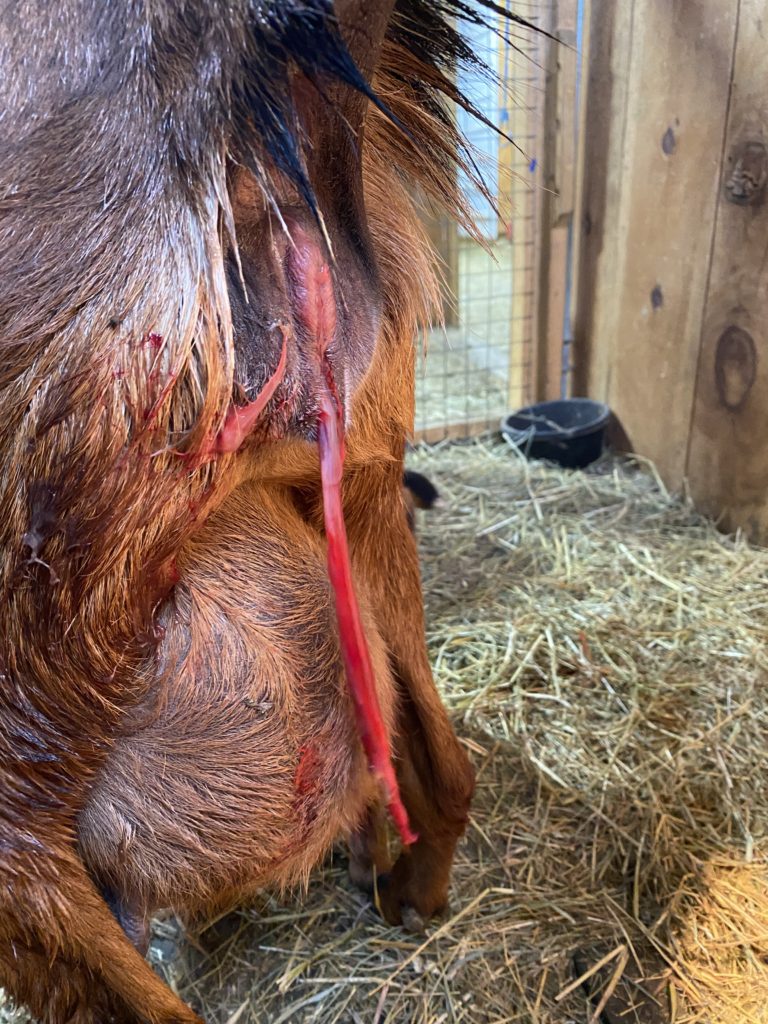
Typically, after the last kid is born, there will be long, stringy, bloody tissue hanging out of the doe’s vulva.

Do not touch it! Between one and twenty-four hours later, the placenta(s) will emerge on its own.

  • Most of my does have birthed their placenta(s) within 2-4 hours, but it’s not unsafe in goats for it to take up to five days to deliver placentas, especially if there are birth complications (see Part 3).
  • Again, NEVER pull on the tissue that is hanging out of the vulva. You want the placenta(s) to disengage naturally.

  • Did you notice that (s) on the end of “placenta”? Yup. Sometimes there are two.
    • A goat’s uterus is pronged: it has two “horns” in which kids can be lodged. In some cases, each of these “horns” can have its own placenta.
      • VERY rarely, you can have a kid or two born, and then a placenta, and then another kid (or two). This has only happened only a few times to me.

Back to Part 1: Getting Ready for Kids

Posted on Leave a comment

Kidding 101: Part 1

PART 1: Preparing for Kids!

It’s the time of year when many of us are expecting goat kids, so I thought I’d put together a primer for newbies. I make no claims to be an expert, but am just trying to share how we do things, and offer a few lists and tips. This turned into a three-part series.

Linked here is the second part in this series: Part 2: Normal Labor and Delivery

I so remember my first kidding season. We bought two pregnant does to start our herd, and our very first kid got stuck in her mom. When we finally got her out, she had stopped breathing. My husband, Scott, gave her mouth to mouth resuscitation for over half an hour.

When we called to say that we wouldn’t be making it to our Care Group, our pastor, who had raised sheep all his life, advised us to put this kid into a styrofoam box with a hair dryer blowing on her to warm her up.

She finally made it through all this! Her name is JC’s Bluebelle 3*P, and she’s been one of our best dams ever since. Here are Scott and Bluebelle, days after the birth.

As we are starting our fifth kidding season, I thought I would share some basic information for those who are just starting out. Many have written much more comprehensive articles on this subject (and books). I’m not an expert by any means! But I have had preemie kids (who we lost) and tangled kids, most of whom we’ve pulled through, but not all. Birth is a scary business, and all the more so when you are just starting out. My prayer as I write is that this will help someone to have more confidence, and/or knowledge, as they enter their first kidding season.

Prenatal Care of Expectant Dams

We have a chart that I create each year. The information here is then also transferred to my day timer calendar.

A picture of this chart goes onto our cell phones for easy reference in the barn, but it’s also helpful to me to have it where it can be cross checked and a reminder in the day timer.

For each doe, here is our care list, counted back from a due date that is figured at 150 days from breeding.

  • 5 weeks before delivery: BOSe shot (Vitamin E and selenium shot: read more here)
  • 4 weeks before delivery: CD&T shot (this will cover kids from tetanus during disbudding)
  • 3 weeks before delivery:
    • Start feeding a handful of grain 1X/day to get the rumen ready for bigger feedings immediately post partum. In this grain, we put one Vitamin E liquid capsule (cut open) and a small handful of red raspberry leaves. The grain gradually increases to about 1 cup/day until delivery. We find that we’ve never had pregnancy toxemia using this protocol.
    • We also start pregnant dams on alfalfa hay around this time. Since we have 20+ does kidding, this is not as strictly controlled, since they all eat together. We usually house about 10-15 of the does nearest delivery together, and feed one bale of alfalfa to all each morning, then feed high quality grass hay through the day.
  • 2 weeks before delivery: another BOSe shot

One more note about prenatal care: For our first 2.5 years of kidding we used various brands of loose, all-in-one, goat minerals. In our first kidding season, we frequently saw kids with weak front legs, or kids who “walked on their knuckles” — really, their pasterns. Both of these conditions required splinting.

In our third season, we switched to a free-choice mineral bar. We have seen a marked change ever since. We have had extremely healthy, vigorous kids ever since, and not one has needed splinting, or walked on their pasterns. Additionally, our does have had glossier coats and brighter eyes overall.

Getting Ready for Kids

When I was starting, I spent an entire day searching out and watching every single goat birth video on YouTube or blogs. It really DID help. I saw normal birth after normal birth. Some videos showed tips and tricks that helped. Almost none of them showed troubled births because, well, if things are going awry, there’s not always the desire or attention to give to capturing events on film.

I also gathered supplies specific to kidding. I gathered far more than I needed, so this list is in order of things that we really use almost every time, down to things we are sure glad to have when we need them!

Equipment for Normal Deliveries

Barn Cameras: Top of my list. Saves us so much sleep and so many steps. I wrote a whole blog post on ours, and you can search to find tons of articles on various systems, from baby monitors to security cameras. Do it! (You can thank me later!)

Towels. We use 4-6 bath towels, and 1-2 hand towels per birth. We wash them afterwards, and use them each year. We keep them in a tote from year to year, and just pull it out with the first kids.

Hand Sanitizer, or better, soap and hot water, for sanitizing hands before you go inside a goat. Put it in a bucket and have it handy as the goat goes into serious labor.

KY Jelly: Lubricant to be used AFTER cleansing hands, or with gloves.

Bulb syringe (also called a nose sucker) to help clear mucus from nostrils and throats of baby goats.

Gloves (throw away, latex or other kind). I don’t always use gloves, as in hairy situations they can impair my grip on tangled kids. I soap up and go in without them. But, we always give LA200 antibiotics to does whom I have had to enter deeply, regardless of whether or not I was wearing gloves.

Iodine: because you need to dip the kids’ cords in iodine as quickly after birth as is practical. Find a container about 1″ deep with a lid and use the same 1/2 cup full for the season.

Scissors: for cutting a cord. Mostly never used.

Supplements

Red raspberry leaves and molasses: to make a post partum tea for does. The sugar restores their energy and the raspberry leaves help the uterus to contract and expel the placenta. Put the leaves into a colander and thence into hot water in a pot to brew the tea while the goat is in advanced labor.

When she finishes, serve it warm with a big dollop of molasses stirred in. Most of them LOVE this brew!

Herbal calcium drops: Can help does during long labors or pushing sessions with added calcium. It helps the uterus to contract. I administer two dropperfuls at 30-minute intervals during protracted labor.

Helps for Distressed Dams/Kids

Styrofoam cooler: About 12″ x 18″ inside. This is used with a hair dryer to warm up chilled kids. (See Part 2)

LA 200 antibiotic: (see above). It’s available at feed stores. Also check your supply of syringes and needles. We have syringes in 1 ml, 3 ml, 6 ml, and 10 ml sizes, and needles from 1/2″ 20 gauge to 1″ 20, 16 and 18 gauge.

Colostrum substitute (or frozen colostrum cubes from last year’s kidding) in case the mom doesn’t make it, or rejects a newborn. Buy fresh from year to year.

Thermometer: rectal type.

Normal temperature is 102° F.

Newborns need to have temps above 100°F to digest colostrum. If a kid is cold (feel mouth to see, or take temp) you must warm them before feeding (whether they nurse from dams or are tube fed.)

Winter kids sometimes get pneumonia, or hypothermia. Read up about distressed goat kids so you can recognize the signs.

Feeding tube: This has two uses.

One is for tube feeding distressed kids, but I use the apparatus far more often for helping very small or weak kids with constipation issues. See Part 3 for more on this.

Again, YouTube videos on tube feeding are a great resource. If you’re new to kidding, watch some while you are waiting for your babies to arrive! It’s easier than you think, but also very scary. You CAN do it, if you have to!

Kidding Stalls or Bonding Pens

Whether or not your doe delivers among her friends in the general population or in a kidding stall is personal preference. We have tried it both ways, and we prefer kidding out in the general pop area (where clean up is easy and goats may be less stressed) and then transfer to a clean, waiting bonding pen with a kid-warming hut, water and minerals, and fresh hay waiting for mom and babies.

There are articles on this website about various pop-up bonding pens/kidding stalls (we are fans of movable, modular goat enclosures) and kid-warming huts made of 50 gallon barrels equipped with heating pads under and heat lamps over. You may need HD (heavy duty) extension cords to supply hair dryers, heat lamps and/or heating pads with power.

NOTE: We NEVER, EVER leave the heat lamps on when we are not IN the barn. Too many animals and barns have been lost to heat lamp accidents. That said, heat lamps do warm up the hut initially and help newborns to dry off. Since we spend the night in the barn during cold weather (on cots in our heated milking parlor) in order to check on newborns through their first night, we do use the lamps. But, we never leave them on if we’re not there.

In winter, it’s nice to have hot pots (if you don’t have hot running water) in the barn. Does really appreciate warmed water on cold mornings with their alfalfa! Keeping them hydrated (particularly if they are nursing) is very important, and we find that they will readily drink down warmed water quicker than ice water.

We have a newer barn, and it has a heated milking parlor. (Yes, I know how blessed I am!)

The floor of the milking parlor is washable vinyl planking, so it’s pretty slippery for newborns, compared to a barn floor with hay spread. We find this heated room invaluable for warming kids when the barn temperatures are in the low 30°s. As soon as all the kids are born, we bring the doe and kids into this room. At our leisure, they are warmed, dried off, and fed. We then cool the room down slowly, and put the doe and her kids into the bonding pen, with the kids in their warming hut.

Last year, we bought a piece of inexpensive indoor / outdoor carpeting from Home Depot that we put down for good footing for kids in our milk room. This carpet gets used year after year.

The doe can deliver her placenta here, pee here, or poo here. It’s all good. We wash it off with a hose, or vacuum it with our shop vac, and it’s good to go again.

On to Part 2: Normal Labor and Delivery

Posted on Leave a comment

Loving My Modular Barn!

Boy do I LOVE LOVE LOVE my modular barn. I am so glad that I didn’t make permanent divisions within my goat space!

In the past 12 days, we’ve kidded out six does. Now we’re done until April, when we’ll start kidding out 11 more over the space of a month and a half. But then we’ll have nice weather for it! Whew!

We now have 14 new kids on the ground: 10 bucklings and 4 doelings, and their moms, to care for. I’ve spent 3 hours today digging out jug stalls and rearranging heat pads and barriers. As a result, our barn can easily accomodate the changing size and needs of our herd.

The Nursery Setup

With six does due to kid within a week during record cold and heavy snow and ice storms, we set up what I would call “the nursery.”

We could accommodate up to 4 does kidding and bonding simultaneously (three in stalls and one in the aisle as pictured, right). Then there was the adjacent “romper room” where 2-3 day-old (and older) kids and their dams can hang out.

In the romper room, for cold nights, we have heat pads under the manger, but will transition kids to just sleeping on hay under there in the next week, as temperatures are supposed to become warmer when the polar vortex moves out (yay!).

Tot Lot

With all the kids in this batch of does safely delivered, and with some sleep under my belt, I took the morning to change the space from “nursery” to “tot lot.” It took about three hours of solid work.

I left the jug stalls in place, but opened and latched back the doors so that all moms and all kids can have whichever spaces they choose. I took down the aisle partition, so the “romper room” space is bigger.

Does can also browse hay in the stalls, since the manger is tight for six does at a shot. (The hay scattered on the floor is for footing for kids as they run and play.) Below are some pictures of new kids exploring their expanded spaces and snuggled up under the manger for naps.

In a couple of weeks, as pasture comes in and fences are completed, we’ll be moving the cows to their new shed from this barn (their winter quarters), which has an adjacent 1.5 acres “safe pasture” for these six moms and their 14 kids.

Then, eleven more does will use the nursery/toddler space over a month and a half (early April to mid-May) to do their kidding. As their kids are established, they’ll in turn move to this “safe pasture” stable and these first six moms from winter kidding with their kids now six weeks older will move back to the big barn to enjoy larger pastures and the main barn space.

When they do, we’ll take down all the internal barriers, and voila! The now-older kids and their dams will have all the space they need at nights in the barn. Most days, they’ll be out on pasture.

Finally, as the second wave of kids grows older, they will also move back to the main barn to enjoy the enlarged space and bigger pastures.

Posted on Leave a comment

New Shed on the Farm

In late December, we had many adventures, not the least of which was the delivery of a new shed. I was SO praying that this shed would come before we left on our mid-winter break to FL so we could bring Maude home. Kudos to Caleb of Helmuth Builders for NOT giving up on what proved to be a grueling 14-hour delivery challenge!

Pictures below show the painful and difficult “birth” of this building. So narrow were the margins that we more than once got to calling it “the baby” and talking about “the birth canal.”

The building arrived from Helmuth Builders JUST after a big melt, and JUST as the sun was going down. 😬🙄🤷🏼‍♀️

Caleb (the delivery driver) put the building on a set of wheels on the back and on the front he pulled the building up our hill using his “mule” — the small hydrolic jack you can see in the pictures and video. It was astounding to me how this mule went over ice, thru mud and finally across our (former) riding ring in order to get the building to the site prepared for it.

First, the building went up our hill (we had to tear down our orchard fence on the left in the picture above) to get it past there. Then it had to go across the icy part at the top of the hill.

THEN it had to go between the existing big barn and past the goat porch — which is how far they got after the first 5+ hours of sweat and strain.

All this in the cold and dark. They didn’t give up until one of the mule’s tires blew.

Kudos to Jonathan Eye who came and helped with his skid steer and body until 10 PM that first night, when we all gave it up and went home to regroup for the night.

Next morning, it was more ticklish business to get the “baby” past the new barn goat porch, across the (now frozen) mud to the proper site, and then position it in place.

The above picture is of the “field side” where animals can use it as a run-in shelter. We plan to add gates as needed so that these can become holding stalls as well. Each has a door opening into the “ring side” of the complex.

After placing the building correctly, the delivery team had to erect the overhang that had hung by the side of the building on a giant “hindge” when it was in motion. They put four supportive posts in place where there were pre-existing piers poured, afixed trim, etc. Again, they finished after dark.

SO: we have a great new shed.

Again, so many thanks to Caleb and Jonathan and a good God who made it all possible!

Posted on Leave a comment

Listeriosis and Polio in Goats

I am relatively new to goats. This spring will be our third kidding season. As I reflect back on 2020, two success stories stand out, and I wanted to post about them to give hope to others, and give thanks to God, Who enabled us to bring full healing to two of our kids.

Listeriosis and polio in goats are both deadly diseases, left untreated. They present with nearly identical symptoms, so the typical approach is to treat for both of them simultaneously. Listeriosis can cross to humans, so you need to wash hands after treating sick goats. In case you’ve never had either of these, I’ll briefly define them.

“Listeriosis is caused by the bacterium Listeria monocytogenes and is commonly seen in cooler climates [though our first case was in August]. These bacteria can be found in the soil, food sources, and even the feces of healthy animals. Most commonly, this disease of sheep and goats is observed as a result of feeding moldy or spoiled hay or silage.”

You treat listeriosis with massive amounts of penicillin, given in shots. Because these bacteria cause a neurological disease yielding deadly paralysis, you need to push the bacteria-killing penicillin past the brain/blood barrier to defeat it. Some people give the shots every six hours around the clock. Our vet directed us to give it twice a day, AM/PM.

We didn’t have moldy hay in our barn, but our goats forage daily in a large pasture, so in the humid days of late summer, our 10-week-old kid, Dandy Lion (right), could have gotten it in the field.

Or… he could have had polio. “Polioencephalomalacia (polio) in ruminants is caused by a thiamine deficiency and/or sulfur toxicity. Other causes include improper feeding, feeding too much grain, or anything that disrupts the health and well being of rumen microbes, such as chronic or acute acidosis or indigestion.”

The treatment for polio is to give large doses of Thiamine (a type of vitamin B) injected sub-Q. Polio is relatively easy to cure if caught early, but since both of these diseases present the same, and it’s important to act immediately, we treated Dandy for both simultaneously, under the direction of our vet.

We think that nine-month old Bridget (left) was possibly stressed by being forcibly weaned, and that her stress brought on her susceptibility to her listeriosis/polio battle.

I felt really badly that two of our animals came down with this disease within a few months of each other, and I earnestly asked my vet if my management was at all at fault, and he said “No. These bacterium are everywhere.”

Symptoms and Treatments for Dandy Lion

So, if you’ve never seen it, what are the symptoms of listeriosis/polio?

With Dandy, during morning chores one day, I noticed that my normally bouncy, friendly little buckling was sleepy and listless. He looked punk; he looked “off.” I noted it, thinking it might be coccidia, and moved on.

But, that night on barn cam, he was standing with his head jammed into a crook in the goats’ sleeping benches. When I went up at 2 AM to help him (thinking he was actually stuck) he stumbled away from me as if drunk and dug his head sideways into another corner.

We waited until daybreak, and then contacted mentors and our vet. After gaining an ides of what it was, we started pumping penicillin and thiamine into him.

Since he was young and really bad, we also had to tube feed him. It takes about 4-7 days of treatment fo them to be fully healed, so they need to be hydrated and fed, or the disease will win.

The idea of tube feeding terrified me at first. Our vet talked us through the process by phone, but it was watching YouTube videos that really helped us out.

We found that, in practice, with a 10-week-old kid tube feeding is not hard, especially if the kid is really out of it. If you mistakenly get the tube down the windpipe (which we never did) they cough. If they don’t cough, you’re good!

We ended up tube feeding this little guy four times a day, giving him four ounces of milk each time. It got to be routine, amazingly, and now I can do it easily. But starting it was scary. I’m just writing this to say: YES, you can if you must!

We also made Dandy into a little pin cushion: we gave him 10 ccs of penicillin morning and evening for about five days. I hated it; but again, the alternative was death.

Part of Dandy’s response to his pain was to STAND for three straight days (as in the picture above) with his head jammed in a corner. He would NOT lie down to rest. We tube fed him, isolated him to a small area for his safety, and gave him shots for four to five days (I can’t remember the exact number).

PLEASE NOTE: We isolated Dandy for his safety. You do NOT have to quarantine for these diseases since the bacteria are everywhere. However, we did use gloves and wash hands because Dandy was drooling and listeriosis does cross to humans.

At nights, we put his mom in with him for comfort. She needed to go out during the day to eat, but at nights we put him in with her. He would try to nurse but not be able to suck the teat because his brain had lost that connection. He would need to re-learn it, or not be able to drink, and thus live.

I watched him day and night (on my barn cam) and he never layed down. This worried me. After he’d been on his feet for three days straight, I decided to just FORCE his little body to rest. I sat in this chair for three hours on the fourth day and just let him sleep in my lap. I also did the same that afternoon for more than an hour. He really did seem to get better from that time on, and that night I saw him lie down with his mom.

After about five days of treatment, Dandy was definitely on his feet and moving around normally, but he still couldn’t nurse his mom. This worried me so much! He did start eating hay, but wasn’t nursing. I worried about dehydration.

Finally, on the sixth day, I saw Dandy take a LONG drink from a bucket of water and I dissolved into happy tears. He was old enough to wean from milk and eating hay. If he could drink from a bucket, he would live without tubing.

As it turns out, one of the strengths of the mammalian brain is that it can reroute itself to re-learn tasks that are lost from injury to the brain. So it was with Dandy. We kept him another two weeks beyond what we would normally have before he went to his new home, and in about 10 days, he had figured out how to nurse again! (It was just in time for us to send him home with his new family, and he had been trained to the bottle, so they were able to baby him with milk feedings for another month to help him regain his lost weight.)

Symptoms and Treatment for Bridget

We were so grateful that Dandy was healed through this process, and it gave us confidence when, on November 4, during morning chores, 10-month-old Bridget started the behavior in the video, right (click on the triangle to view the video, and be patient while it loads).

Note the tongue hanging out the left side of her mouth, the slobber, and the rubbing of her mouth on surfaces.

We knew something was badly wrong, and began immediately with the penicillin and thiamine. We contacted our vet, and he agreed on the treatment.

Bridget was much older than Dandy had been, and it was fall, where the foliage was dying down. She was too old for us to safely tube, and she was not as sick as Dandy had been, in terms of behavior. She was walking, eating, and drinking. She just could not put her tongue in, and her cud got caught in her cheek.

In her case, we asked our vet to come out and make sure that it wasn’t a dental issue, or maybe a thorn caught in her cheek or throat. He checked her thoroughly and determined that it was most probably early listeriosis/polio.

Thus, Bridget became our second pincushion for another week or so. She was eating and running with the herd the whole time we were treating her. She had plenty of energy. She never had the twisting of the neck or the dazed “out of it” expression. She laid down with her mom at night, and also ate out of the manger from time to time at night on cam.

The issue with her was that, each morning, in the bedding (and also in the mineral dishes) we found regurgitated cud. LOTS of it. At first I thought it was scours, but then I would see her poop normal, black goat berries, and this “scour” had texture to it and was very green and didn’t smell bad. It finally dawned on us that it was drool! All night long, as Bridget chewed her cud and sought to process her food normally, her mouth paralysis was preventing her from swallowing her cud back down to where her the rest of her digestive system could finish processing it. We worried about her losing weight day by day and bought an animal-size scale.

We started to weigh Bridget and found that she was losing weight. Though her rumin could process 80% of the fatty acids of her feed through its walls (thus, she was not dying quickly), we were thinking that if she became weak or wasted away to pitiful proportions, we would have to put her down. Having fought so hard for her, and having a lot invested in her bloodlines, I was really sad and praying hard for her to be healed. Morning by morning, there were several large piles of cud drool in her bedding, and on her mom’s back from sleeping near each other, and some in those mineral dishes. SIGH. (It was both gross and discouraging.)

Having seen Dandy’s brain reconnect, though, I kept waiting to see if her brain would repair the paralysis damage. But, I also worried that it was taking so long. After six weeks of drooling illness, I was seriously thinking of putting her down, and really depressed about it. At that point, though, Eliya Elmquist really encouraged me that one of her does had taken a LONG time to recover from listeriosis. This gave me peace to wait on the Lord to see what would happen, and to simply give it to Him.

On Christmas morning (almost 8 weeks since she had first sickened), I went up to do morning chores and mucking. I came to Bridget’s bed with a pitchfork, ready to put her drool piles into my muck bucket. There was almost no drool!! Excited, I told Scott about it and waited for the next morning… no drool!!!! I was SO HAPPY and excited. She has been drool-free since Christmas Day.

After a few days of not seeing drool, we weighed Bridget. She had gained 10 pounds in two weeks from her last weigh in! We were SO SO grateful to God for His grace in creating that mammalian brain that had been re-routed to allow Bridget not only to live, but to re-learn how to swallow her cud. Bridget will probably make a full recovery and be bred next fall.

We are thankful, and I hope that this post will encourage you in any battles with listeriosis/polio to hang in there and wait on that amazing mammalian brain if your goat has some lasting after effects.

Posted on Leave a comment

Turning the Tables

So, tomorrow is November 1. It’s starting to be freezing temperatures at night, but I’ve been tracking early morning temperatures, and they are consistently 15-20 degrees higher inside my barn than the outside temps. Of course, it’s still warming up to the 60s during the day, with lots of bright sun. So, winter isn’t really here—yet!

If you follow this blog, you know that I had planned to have my girls on bare tables this winter. The reasoning was that pee would go down through (which it does) and I could clean off poo each day (which I now do) and they would be fine. The photo at the right is first thing each morning. Here’s where I detail the table construction.

Last winter was a mild one, and I used the kiddie pools, which worked well for warmth, but were difficult to clean out in the dead of winter. (I had to clean them out because pee was trapped in them and they became heavy and yucky within 10-14 days.) I have a friend in PA, though, who used bare tables for her does and had no problems last winter. BUT: it was a mild winter there, too. I wanted less heavy lifting in bad weather this year, so I decided to follow my PA friend’s lead, but wasn’t entirely sanguine about this plan. I had given myself the option of hanging radiant heaters over the tables, but upon pricing them, found them well out of our budget. So, I was unsettled.

The Dilemma

Then recently, a good and kind neighbor of mine (with a lot more experience with goats than me) had me come over and look at her barn, and talked to me about the benefits of deep litter. She had seen my blog posts and she believed that my goats would suffer from being on bare tables—that they would be cold and possibly get arthritis over time. I went away from our conversation thoughtful, and then prayed about her advice.

Now, I knew about deep litter before my neighbor spoke to me. We successfully use it with our chickens. But with goats, I do not like bare dirt floors. Been there, done that. We have clay for dirt, and the pee puddles as if the goats were on cement. And, I do not like cleaning out deep litter from mammals. In fact, my barn is designed such that if I had dirt floors, I could drive a tractor through it and clean that way (as opposed to the back breaking chore of using pitch forks and wheelbarrows). But, I chose to use rubber roofing over my clay floors instead of deep litter in winters.

I have had it for over a year, and I love this rubber because I can squeegee it daily and sluice it with water when it needs it and it gets really clean and the barn smells sweet because the pee runs out of the barn in our handy gutter. It takes less than an hour each morning to muck. I do it while my husband milks the goats.

In the picture at the right, that floor will be dry in 20 minutes or less.

BUT: I would not want my goats sleeping on the bare rubber floor. While the tables’ wood gave a decent R factor of insulation, the rubber on dirt has none of that. And then there was the cold air underneath the tables. Would they insulate the goats enough, being elevated? My neighbor’s advice kept rattling around in my head and heart, and I felt like I should heed it, but I didn’t want to give up that rubber floor!

My Solution

Deep litter boxes (instead of pools or bunks—the new experiment!)

After much thought and prayer, I had an idea. I decided to turn my tables upside down for the winter, building plywood sides that would keep hay in for bedding. This is similar to kiddie pools, but the cracks in the tables‘s boards allow pee to run out under the box, down the sloped rubber floor, and into the pee gutter that I now like and use.

The plan is to put a light topping of bedding over the poo each morning (deep litter) but not (as with pools) to put absorbent pellets in the bottom to trap the pee. Because the tables are rigid, we can simply elevate them over the sloped rubber floor. Note that we put blocks under the downhill side (front in these pictures) so that pee can run out from under the beds.

Construction step 1 is pictured at the left. Steps 2 and 3 (building plywood sides and then filling them with bedding) are below.

These plywood sides may stay on, becoming aprons after I flip them again in spring (to keep little kids out from under them) or we may just remove them. We’ll see!

So, this was our prototype. We built it in an hour yesterday, and then waiting to see how the does would vote with their hooves! Where would they choose to sleep? Bare tables or deep litter boxes?

Spoiler alert! This prototype “litter box” was a tremendous hit. The left picture below shows mother and daughter exploring the possibilities before lights out last night. The one on the right was taken on our barn cam at 6:15 AM. There were 9 does in the box right before I snapped this picture, 2 does on the bare benches nearby, and one on the rubber floor next to the box. Clearly, the does had shown their preference, and my neighbor was correct.

So, this morning, my husband and I spent a couple of hours sawing up plywood pieces and repositioning the tables—upside down.

(Can I say again how MUCH I love modular solutions? SO glad that we didn’t build them into walls or build stalls in this barn!) These “litter boxes” aren’t screwed together; they are heavy enough that they stay put without it.

This is how it looked when I’d finished screwing the plywood sides in place, and putting in bedding.

Just a few quick notes below, and then I’m done.

One thing I quickly realized this morning was that we’d made an oops putting the trial bunk (pictured up above) in that corner. The problem is that this is where our kidding stalls will be erected in late January, and I’m hoping to not have to move these litter boxes until early spring. So we moved the trial box to become the closest of the three pictured right above.

When we moved that trial box, I saw that if I used hay that I cleaned out of the bottom of our mangers, it would have lots of fine “hay dust” that will sift down under the box during the night. Because I don’t want to impede the flow of pee out from under these boxes, I made sure to use our round bale bedding hay, which is more like straw, rather than use waste hay from our mangers.

And here they were on November 1, looking so cozy. Makes my heart happy!

Posted on Leave a comment

From Pools to Tables

You know how it is. You try one thing, and it’s good. But then it has problems. And you think, “There has to be a better way!” If you follow this blog, you know that I’ve tried floor bunks with deep bedding and pools with deep bedding atop our rubber barn floor. There were definitely pros to these, but there were cons as well.

The pros were that they kept our girls warm, and they nestled into them with their growing kids. We had enough that there was plenty of choice.

Thing is, the girls did pee and poo in them… so, maintenance. Sigh. The bunks got too heavy to muck at all easily. The pools, we had to drag out every week or two (some pools were more popular than others) and then redo them: pellets for absorption of pee, PDZ powder, and then a starting layer of bedding hay. (We bought year-old hay for bedding only.)

Pools are okay… They really are! And I still recommend them. BUT: they’re work, and we like to minimize work where we can! They also have the expenses of pellets, PDZ, and bedding hay. So, we’re trying something new: tables.

What are Tables?

Some people call them bunks. Ours are more like tables, so that’s what we call them.

We built them all identical and freestanding, so we can move them around in various configurations… because, if you’ve been following us for any length of time, you know that “modular is us.” We have configured them all in a row, or we have put them (more successfully) into blocks. (See pictures below.)

This picture shows the basic framing. The table top is 6’ x 3’. The framing is 2 x 4 legs that are 15” tall, with 2 x 3’s for the braces and horizontal struts. We have been using old fence boards for the surfaces.

I have found, by trial and error, that it’s best to keep the seams between boards snug. The goats will pee on these tables, but the pee will go down through tight seams, and the poo will not, which is beneficial on the back, because there’s less to bend and scoop when mucking.

Here’s the finished product, before goaty hooves (and hinds) have touched it.

As I said above, at first we put the tables in a line… this picture is taken first thing in the morning… all the girls are waiting to be milked.

As you see, they do poo on the tables at night. But, their udders seem to be just as clean in the morning as they were with pools.

Recently, we changed these tabes to be side by side in a square configuration. This is a night picture via video cam. You can see that it’s a pile of goats, grouped in families… I just love this picture!

Some of the does don’t want to sleep on the tables, but it’s still warm weather. We believe that the wood will be warmer than the rubber floor come freezing weather.

We don’t think we’ll need to bed with hay, but we may use heat lamps in the coldest weather, mounted above these tables.

Posted on Leave a comment

Rubber Barn Floor Upgrade

In previous posts, I’ve explained that we chose rubber roofing material (all one piece) to cover the dirt floor of the barn we built in the summer of 2019, and written about various ways that we’ve found of cleaning the floor and economically bedding down our goats.

This post continues that series. It is comically subtitled “Piddle to the Sea.”

The Challenges

As I’ve explained, there are pros and cons to rubber floors. I have LOVED the fact that I can muck it every morning and keep it squeaky clean, because urine and poop do not seep into underlying dirt, but are removed daily. I have loved that it smells good in my barn. I have LOVED the fact that I’ve had no trouble with mites or cocci (one case among 25+ kids this year).

The only thing I have not loved is how long it took me each day to muck, and the unsuitableness of the tools I employed to do it. The main problems have been puddles and too-soft poops (the kind you get in the spring when goats first go out on pasture).

We have tried the following approaches:

  • Sweeping up berries with a broom, and allowing hay that falls from the manger to absorb most of the pee, while bedding the goats in bunks (that had to be dumped every week or so, and then re-bedded).
  • Using a broom to sweep up, but then employing a heavy-duty shop vac to remove urine, puddle by puddle, while still using pools.
  • Using a small, plastic squeegee/broom to get up the berries, then using the shop vac, puddle by puddle.

With all these approaches, morning mucking was taking 1.5 hours daily for a 48’ x 18th space.

The Breakthrough

My eldest son, Nathan, who is 39 years old, often helps us care for our goats when he visits. He was contemplating the situation, and we were discussing it one day, when he made a suggestion that turned out to be brilliant. He suggested terraforming.

Our barn was not leveled correctly by our excavator before it was built. Our fantastic builder had to compensate for a 10” drop over 48’ from front to back. He made that drop invisible to the human eye, but what it meant when it came to the pee on our rubber floor was that urine did run downhill and tended to puddle deepest towards the middle of the area.

Nathan’s idea was to peel back the rubber (which has never been attached to the sides of the barn), use our tractor to dig a center ditch, take out all the rocks in that dirt, and then spread it—plus some of the black sand that we had left from the original laying of the floor—on both sides in order to slope it yet more steeply to a central gutter.

The Process

We gathered five adults on a Saturday morning to tackle Phase I of the project. It had to be done in one day, because of human schedules and the need of the goats to have shelter at night. Phase I was to do the right side of the barn. Phase II was to remove mangers and do the right side.

In Phase I, we dug the center ditch about 8” deep using a tractor. This depth caused wrinkles in the rubber after we put it back. These wrinkles then inhibited flow in the gutter where they pinched, and berries got caught in those pinches.

We gave it three weeks of testing before doing Phase II. Initial results were impressive. Each morning, there were no puddles! The urine flowed gently downhill on the left side, and the (mostly dry) berries remained where I could sweep them up with my newly discovered industrial-sized squeegee.

After about three weeks, our crew reconvened to do the other side of the barn. In Phase II, we made the center ditch far more shallow. It works VERY well. It gets deeper and deeper as it travels downhill from the back of the barn to the front, thus making good use of that original 10” overall drop. It is less than an inch deep at the back of the barn, and maybe 6” deep at the front, but the overall drop makes the flow strong.

Below is a gallery of images that show the following:

  • Picture #1 is after Phase I and before Phase II. (As you can read in my next post, we replaced pools with tables.) Notice how the rubber is wrinkled, especially in the gutter. That’s because we made it too deep in Phase I.
  • Picture #2 is us working to slope the second side of the barn (Phase II) to the central gutter. It also shows us filling in the central gutter with black sand to ultimately make it more shallow.
  • Picture #3 shows how the floor looks each morning. The urine has run down into the central gutter and out of the barn. The berries remain: easy to use an industrial-sized squeegee to scoop together, then pick up into a muck bucket.
  • Picture #4: shows the cleaned floor, about 45 minute work. Scooping up berries, sluicing with remaining water bucket liquids, and then squeegeeing water off the rubber, into the gutter, to clean it thoroughly.
Posted on Leave a comment

Building Bonding Pens with Creep Gate Option

We are still perfecting our infrastructure here at Storybook Farm. Last year, we had three goat litters widely spaced apart, and it was not hard to portion off generous parts of our barn spaces for moms and babies to bond and grow until they were ready to rejoin the herd.

This year, from late February to early April, we’re expecting six does to deliver, and some of those does are due only days apart. We have been doing research on “jug stalls” — small stalls that does and kids can inhabit for several days to bond tightly before rejoining the general population.

In addition, we have really found a benefit in providing a creep pen for kids who have begun to eat hay (which they do at about 2 weeks old). In this post, you can read about the prototype pen we made to see if we liked (or needed) such a space, and we found we really did. However, the creep gate that we bought from Premier 1 was both heavy and expensive, and not the easiest to join to our existing stall partitions. It’s great, and we’ll probably use it outside, but I got the idea of making jug stall partitions that would convert easily to creep gates, so that jug stalls could become creep pens for any number of little kids, should we so desire.

Below are shots of the construction of our three identically made panels. Obviously, you can scale to your space, but for reference, two of ours are 5’8” long, one is 5’7”, and all are framed in 2” x 3” lumber, with 10-gauge, 2” mesh fencing, 4’ high (purchased at Home Depot).

Each has a door that opens toward the humans, with the fencing towards the goats. When desired, the gate swings back and can be locked open, and then 1/2” metal conduit is inserted in pre-drilled holes so that the gate opening becomes a creep gate. There are construction notes on each picture below.

Step 1: framing. We decided to make the uprights the strong part, and so they are a full 4’ long. The horizontal pieces are 5’5”, giving an overall panel width of 5’8”. The center strut (to which we hinge the door) is 45”.

Step 2: frame the door and hinge it. (We made our door openings 24” wide; you can make them any width.) The only thing I’d note here is that I left a sizeable space (a good 1/2” or more) vertically between the overall frame and the door frame because the wood is “on edge” and I didn’t want it to catch when operating. The two uprights of this door are 44.5” (so as to leave 1/4” of space for it to swing top and bottom) and then the horizontals were 19”.

Step 3: If you’re using metal half-inch conduit (which is cheap and can be found in any hardware store) for your creep gate function, it usually comes in 10’ lengths. So, you’ll need a Saws All or hack saw to trim it. (In picture 6, we were just fitting it; we hadn’t trimmed yet).

You’ll need a 3/4” bit to drill the holes in the top and bottom of the frame, swinging the door out of the way first. Half-inch conduit is 1/2” interior; it’s wider on its exterior, so a 3/4” bit works well. In the beginning, I did not drill all the way through on the bottom of the frame, but then I thought of dirt and poops lodging in the holes, and decided to go all the way through.

Spacing is a matter of personal preference. We raise Mini Nubian kids, so I know that we wanted spaces that could be adjusted from 3” (can’t get thru) to 4” (can get thru when itty bitty) to 5” (lasts from about 3-8 weeks) to 6” (about the widest we’ll need). My measurements for these holes (on center, in inches) in a 2’ opening were as follows, left to right: 3, 6, 8, 10, 13, 15, 19, and 22.

Another trick on this step: drill partially through the top of the door frame on the ONE hole closest to its non-hinged, top edge. Then, you can use a piece of conduit scrap as your latch and save money and labor!

Step 4: Affix the fencing wire. We used regular staples on each division of the wire, and then reinforced those with some leftover insulated electrical staples (hence the blue plastic on them). We found that large, standard, barbed fencing staples threatened to split the wood.

Fencing was affixed on the goat side of the partition, because mine LOVE to scratch themselves on woven wire, so we wanted the frame to be buttressing the strain. In this picture, as well, note the pressure-treated two 2” x 2” pieces on either side of the door. They are on the goat side, and are 14” long. (You do not need pressure treated, but it won’t hurt to have it. That’s what we could find, so we went with it.) See Step 5 for how we use them.

Step 5: If you try to simply bore holes for horizontal creep gate restraints in the same plane as the uprights, they will butt into each other. So, you need to create a deeper plane. Hence these pieces. We drilled three holes in each one, after screwing them to the frame, which is more than enough for our purposes.

Step 6: Fit your conduit into all holes to check for alignment, and then trim them to size. In this photo, we have yet to trim.

Final setup: above are our three panels, joined together with bolts and joined to each wall using eye hooks and conduit down thru them.

They will be divided with two 7’ lengths of the same 2” square mesh wire, to create three jug stalls and/or creep pens, depending on our stages of raising kids. We used bolts between the panels to join them together now, and (in keeping with our overall modular approach) to be able to take them apart when kidding season is over and we want the space for other things.

That door at the end leads to an area outside that we call “the playpen.” It is a kid-safe area outside where kids can go on nice days. The wire you see to the right divides this “nursery area” from the rest of the goat space.

Right now, we’re still storing round bales in the jug-stalls-to-be, but we’re going to clear that hay out this weekend and get the kid-warming huts set up, so stay tuned!

Posted on Leave a comment

Creep Pen

We have some young kids in with the herd, and with our new mangers, I was concerned that they weren’t able to graze spilled hay anymore, and that — when the hay was eaten down some — couldn’t reach the hay. (Yay for no more hay waste! Boo for hungry kids.) Also, we might have something like 12-16 kids coming from February to March, and I’ll want them to have a good place to get away, eat, and sleep, too, so, we’ve been experimenting with a creep pen for them.

Left is a video of the kids first exploring the prototype version that we threw together so that we could learn. (Hit the triangle if you don’t see a preview picture.)

This pen measures 5’ x 5’. It first had the kids’ heat hut in it, mostly to train them to it, then it had just the heat lamp above the kiddie pool, and now it just has the pool with hay in a purple bucket.

Obviously, those three 5-week-old kids were barely fitting in that kid hut by this time, and we certainly weren’t going to fit 15 in kid huts this spring. Thus, we will need a creep space come March, and it will need to be bigger than this prototype we’re playing with now. (More on the new and improved version that resulted HERE!)

In case you don’t know what a creep space is, it gets its name from the creep gate that will only allow a small baby — goat or sheep, or sometimes a puppy — to creep in while keeping adults out. Some farmers give food that they only want babies to have, and others want to provide heat or a rest area free from adult bullying. We use ours for all these features.

Our creep gate was made by Premier 1. It is very sturdy. It is built with holes that are drilled at specific intervals both tops and bottom and side to side. Moveable steel rods allow the farmer to adjust the height and width of the creep openings to the size of their growing young ones.

The basic gate comes with 5 vertical steel rods inserted into PVC slip covers, and one horizontal one. We invested in four more rods (black in the picture) from a local hardware store, but you can also buy extra rods from Premier. We found by trial and error that we needed six-inch openings for our littles to get in, and still keep out a petite 6-month old doeling in our herd.

We attached two 5’ goat panels to the gate and wall with carabiners and wire. That wooden wall behind is really one of our gates that leads to our barn aisle. This has proved very handy in servicing this area, though one can remove the rods to get into the area from the front.

As you can see in the picture below, this creep space doesn’t take up much of our overall space, and the kids freely go out with the herd whenever they want to. We often find them in the pen in the early morning curled up together. (If you’re wondering about the kiddie pools, click here.)