Posted on Leave a comment

First Steps to Take With Your Child

This is post #2 of 2 in a series on keeping chickens with children.

Post #1 focused on the research you should do, and decisions that you as the adult should come to, before you introduce the idea of a chicken-keeping project to your child. If you take the time to narrow down options, and identify your goals for this adventure, you have more options and a greater chance of success.

1. From the list you’ve narrowed down, help your child to choose his breed(s).

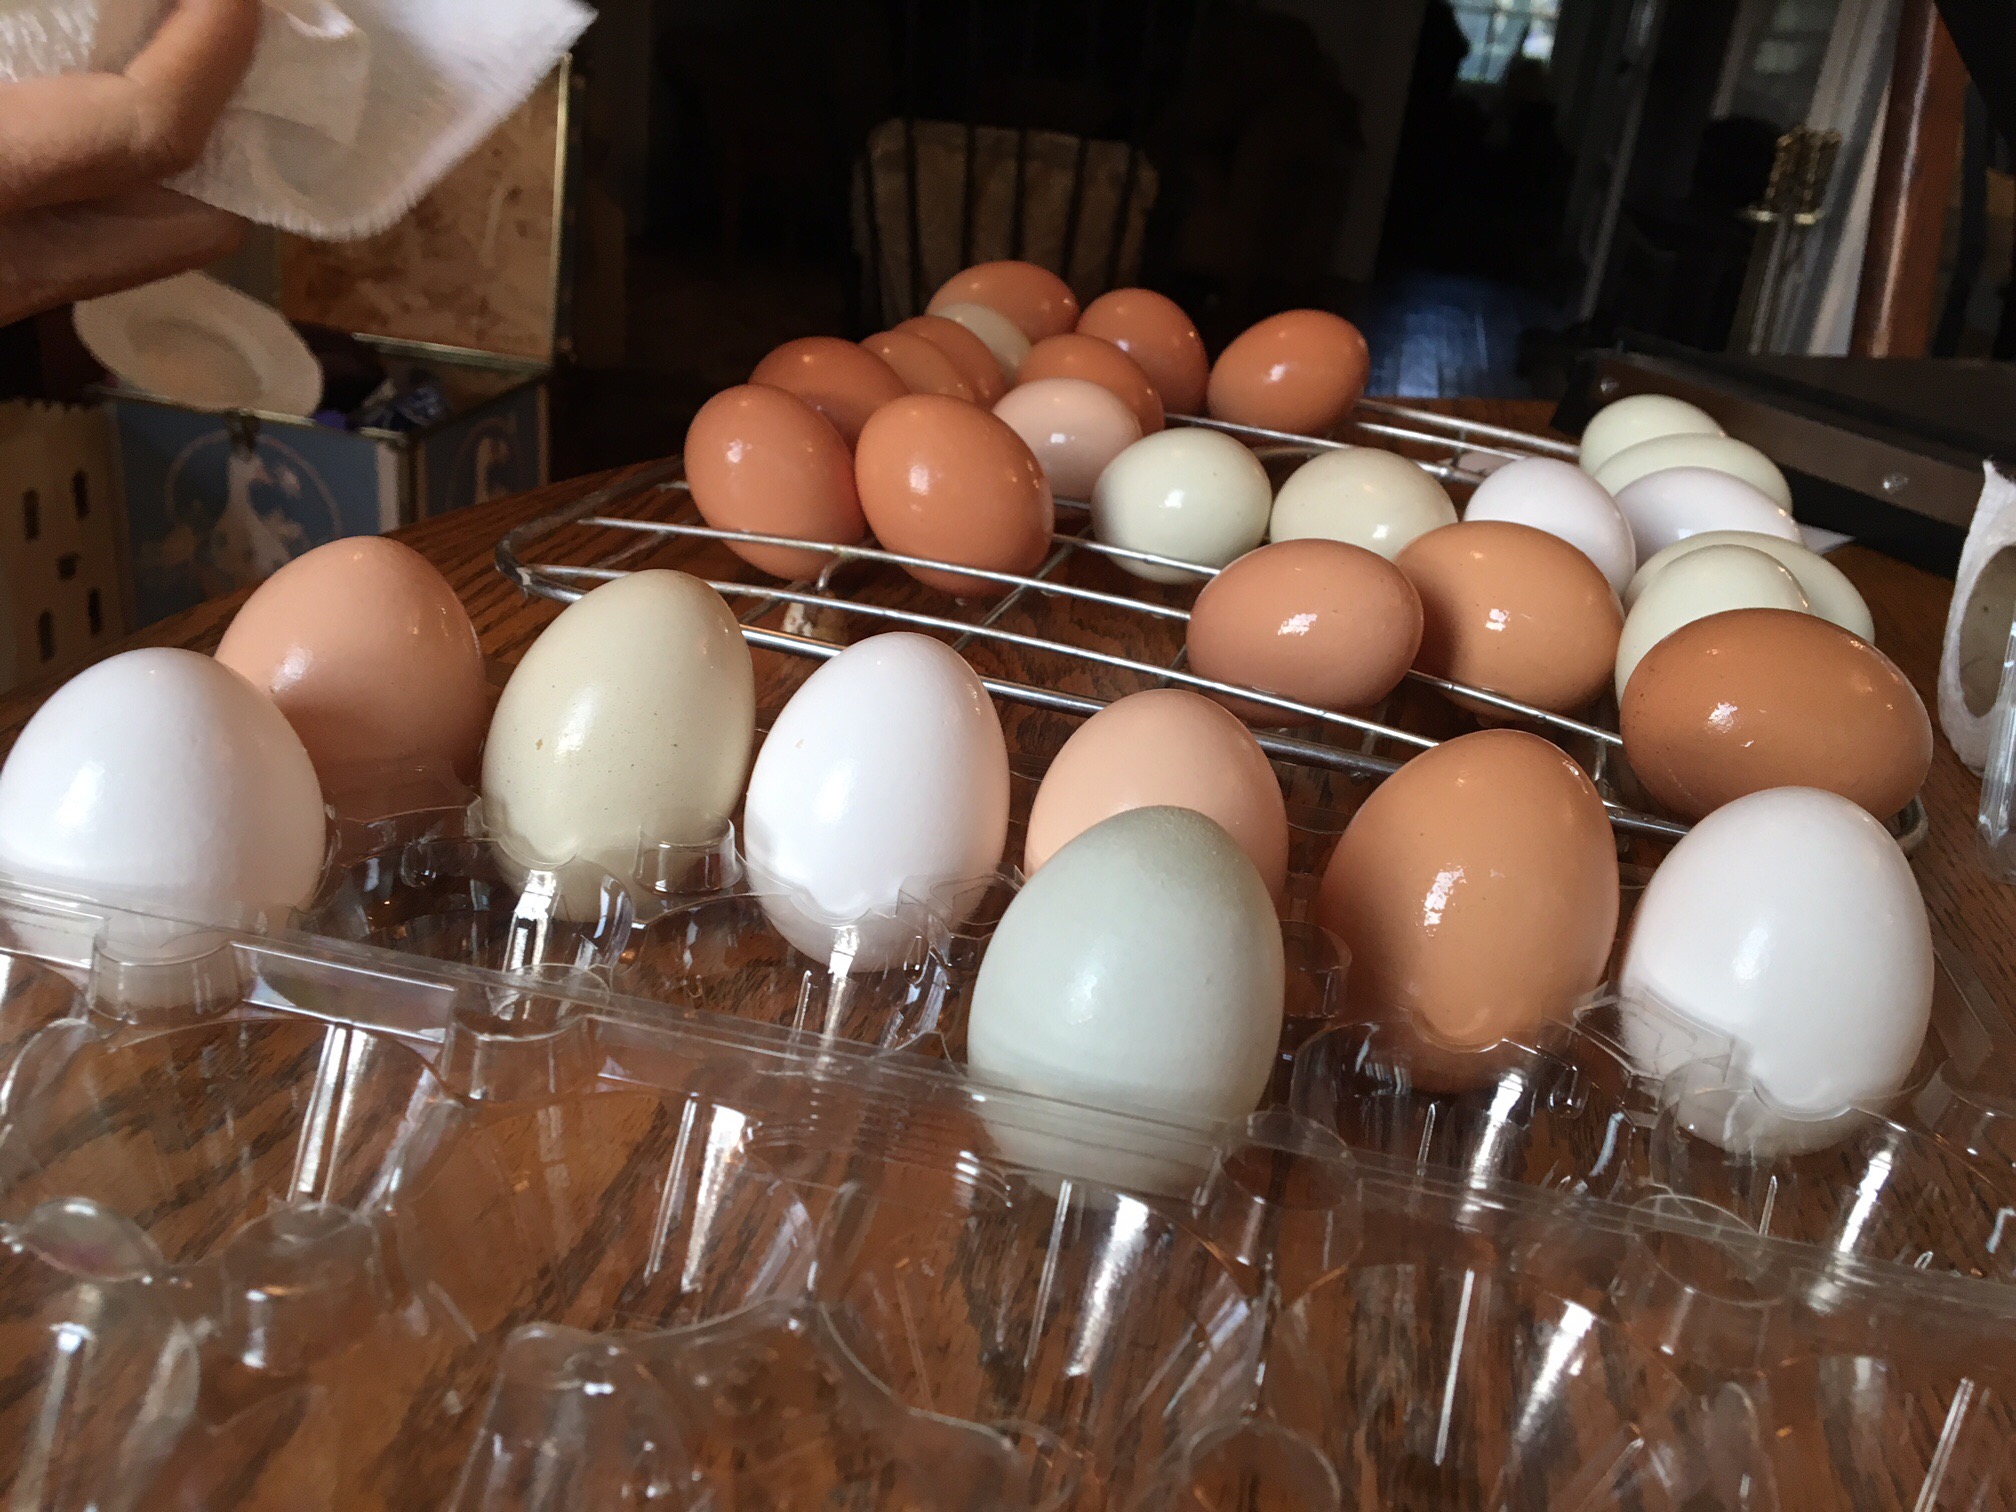
He might want to specialize in one breed if he’s thinking of breeding and showing in the future, but most kids will want an assortment of breeds when starting out. This gives a rainbow egg basket, and variety in the hens’ appearances. There’s always time to specialize later if you become interested in breeding more seriously.

2. From your earlier research, with your child, choose your breeder.

There are large hatcheries that provide (how to put this?) basic chicks inexpensively. (Read a good article on this here.) These chicks would not be exhibition quality and, more importantly, as the article states, large hatchery chicks tend to be weaker, watered down versions of the terrific birds of yesteryear. Large hatcheries usually allow random breeding (many roosters among many hens in large poultry houses), whereas those who breed heritage birds for exhibition or simply to improve their breeds use selective mating. The difference here is similar to buying a puppy from a pet store vs. a breeder. Generally, the rule is you get what you pay for with chicks. I wrote a whole blog post on this, if you want even more food for thought.

In case you’re wondering: I put this step here because involving your child in this decision gives him experience in cost/benefit choices that we all make in the adult world. However, you may want to narrow down his choices ahead of involving him, so as to not get his hopes pinned on one gorgeous picture that a hatchery happens to post. After you make this choice together, you’ll need to read details about how to order chicks from your breeder (all are different) and when to expect them after you do. But — before you order — read on!

3. Purchase (or build with your child) a coop for your chicks well ahead of their arrival.

Some people start chicks in a simple brooder — it can be a box or baby’s wading pool with a light for heat, food, water, and shavings that starts in your house, but quite quickly you want to move the chicks to their permanent coop.

Note well, please: chicks produce dust after about a week or two that can be dangerous to humans, especially if it gets into food. Always keep chicks in the house for as short a time as possible, and don’t brood them in your kitchen ever.

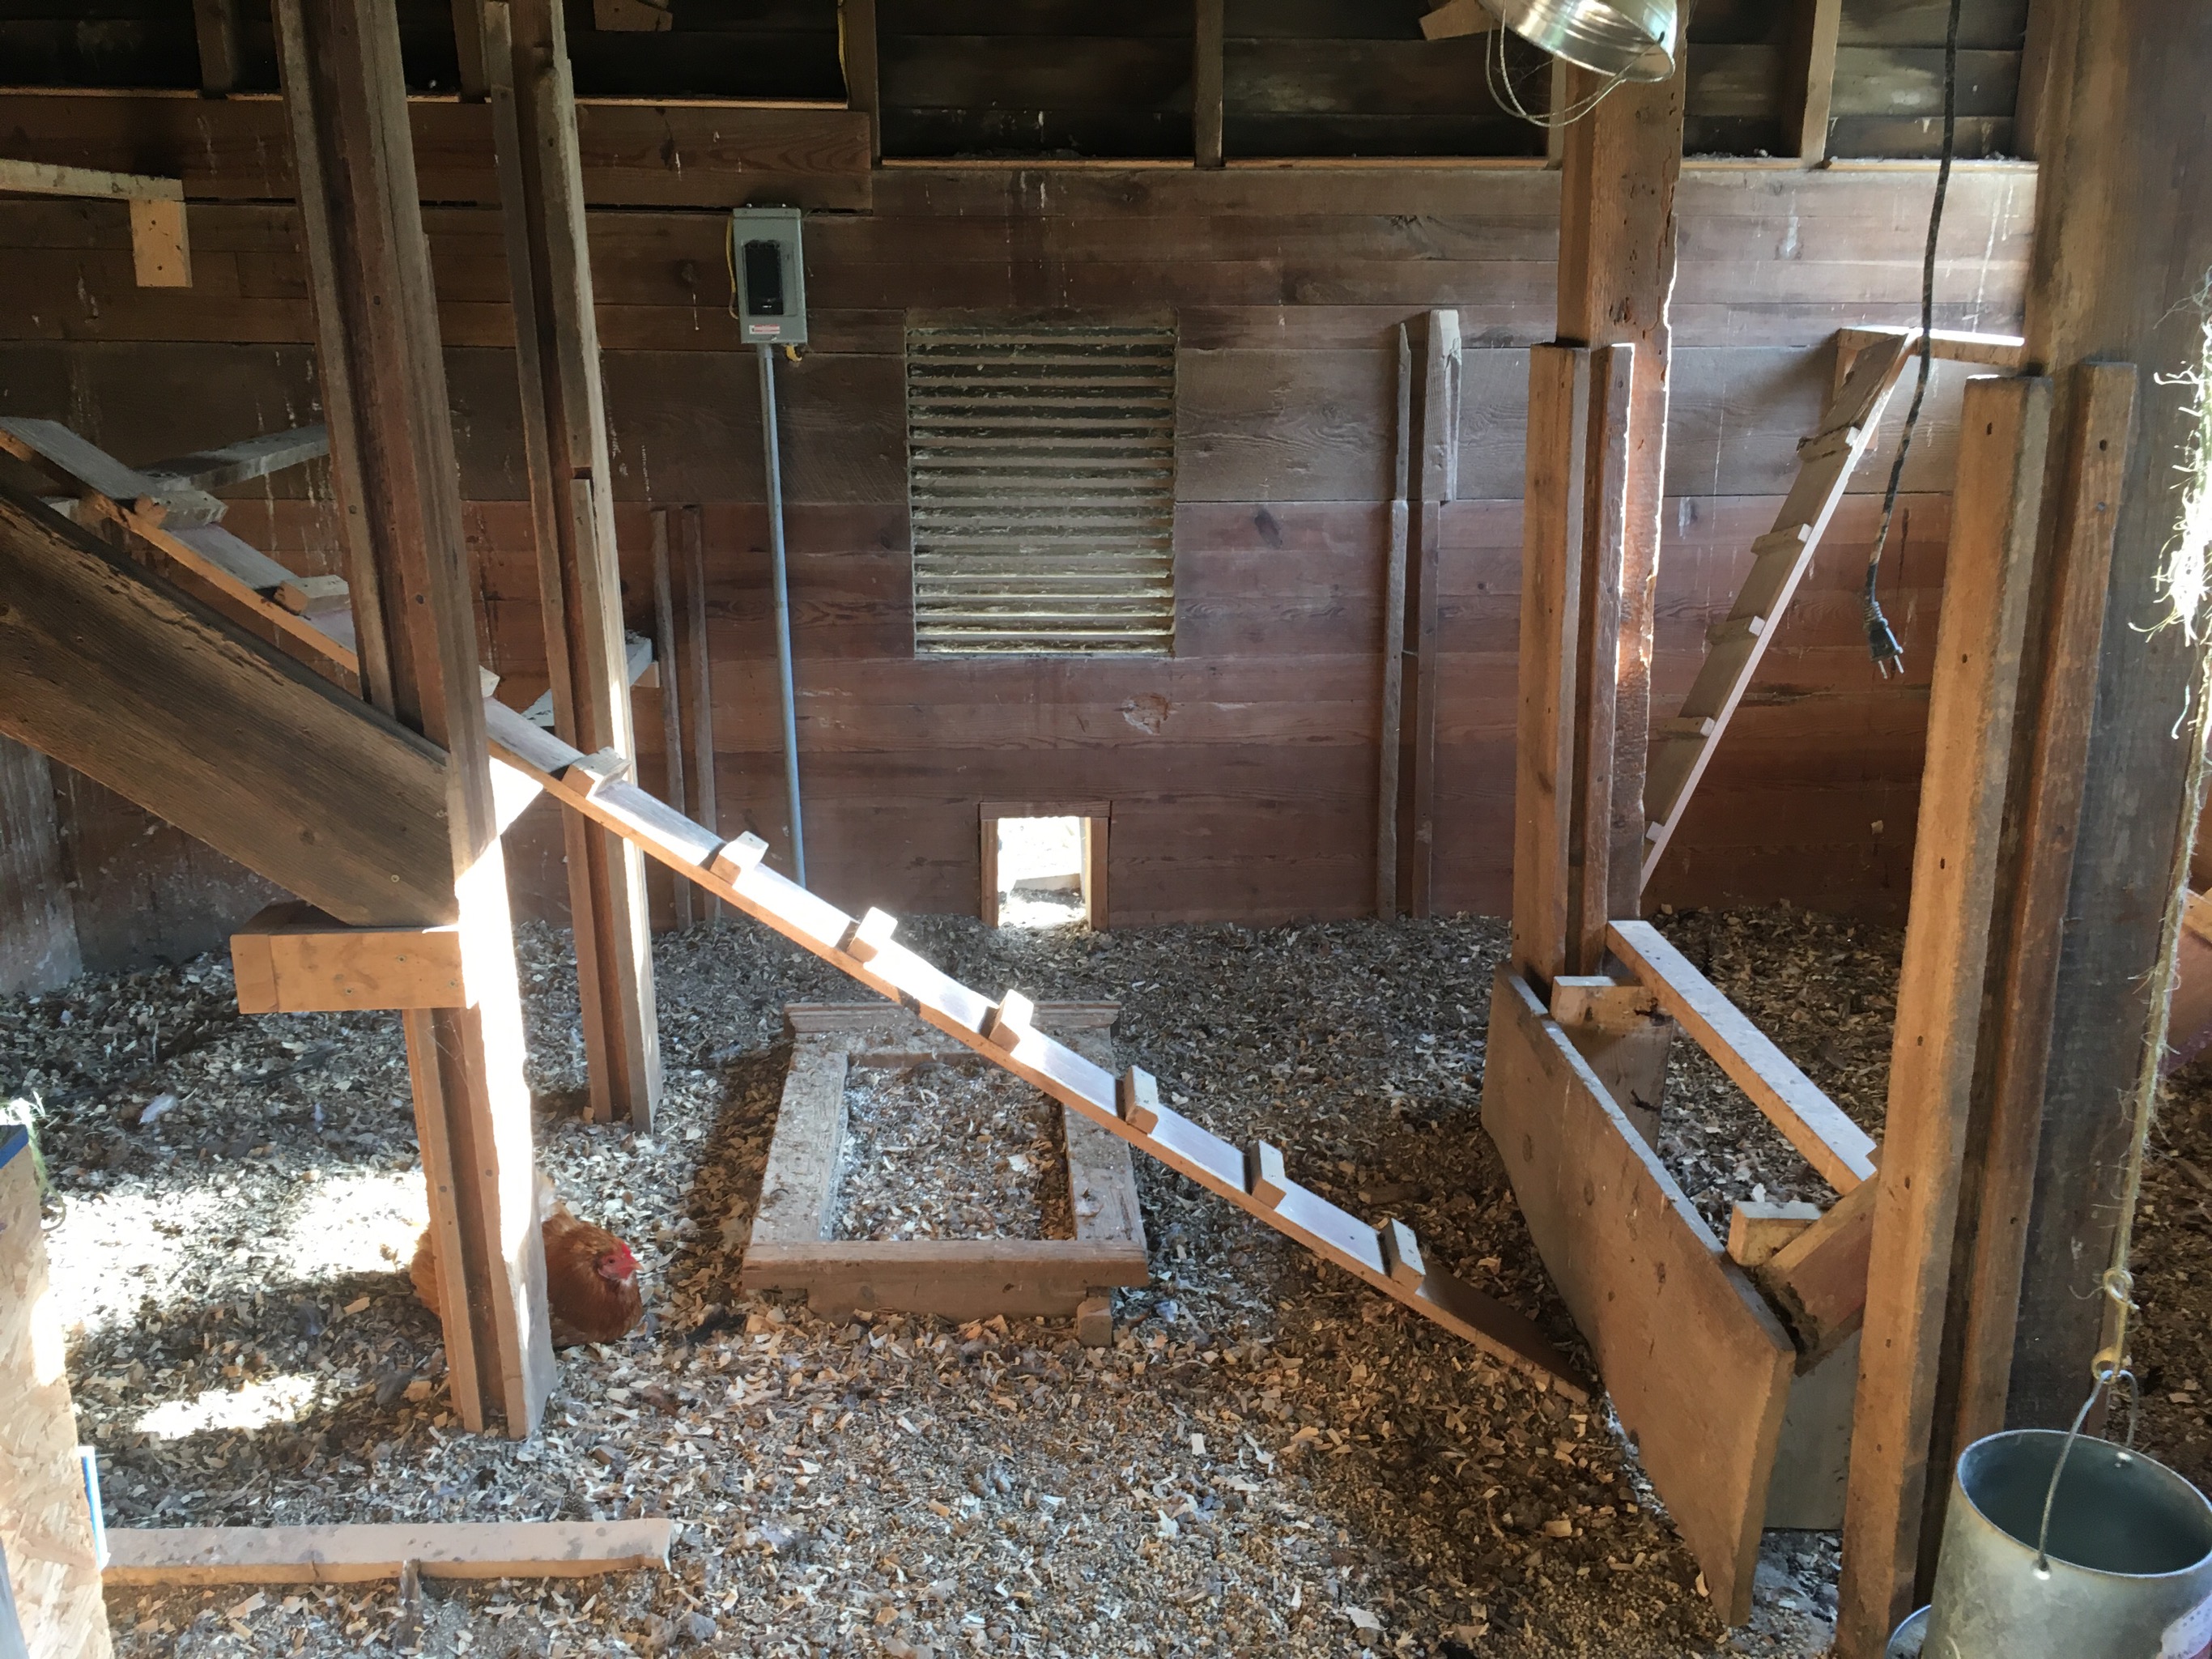
There are as many plans for making coops as there are people keeping chickens. In this post, I talk about the best coop I’ve ever worked with, and sell plans for it here. In this post, I talk about general features to look for in any coop plans. Check them out, discuss their features with your child, and be sure to get that coop (and all needed equipment, like food, water, and feeders/waterers, as well as grit, perches, etc.) in place before ordering any chicks or hatching eggs! (If you plan to hatch eggs, you’ll need an incubator as well!)

4. Now you can order your peeps (or hatching eggs)!

Again, I’m not a fan of starting with hatching eggs as a beginner, but if that’s your choice, then order hatching eggs at this point. Otherwise, order your peeps and start talking with your child about feeding and watering practices.

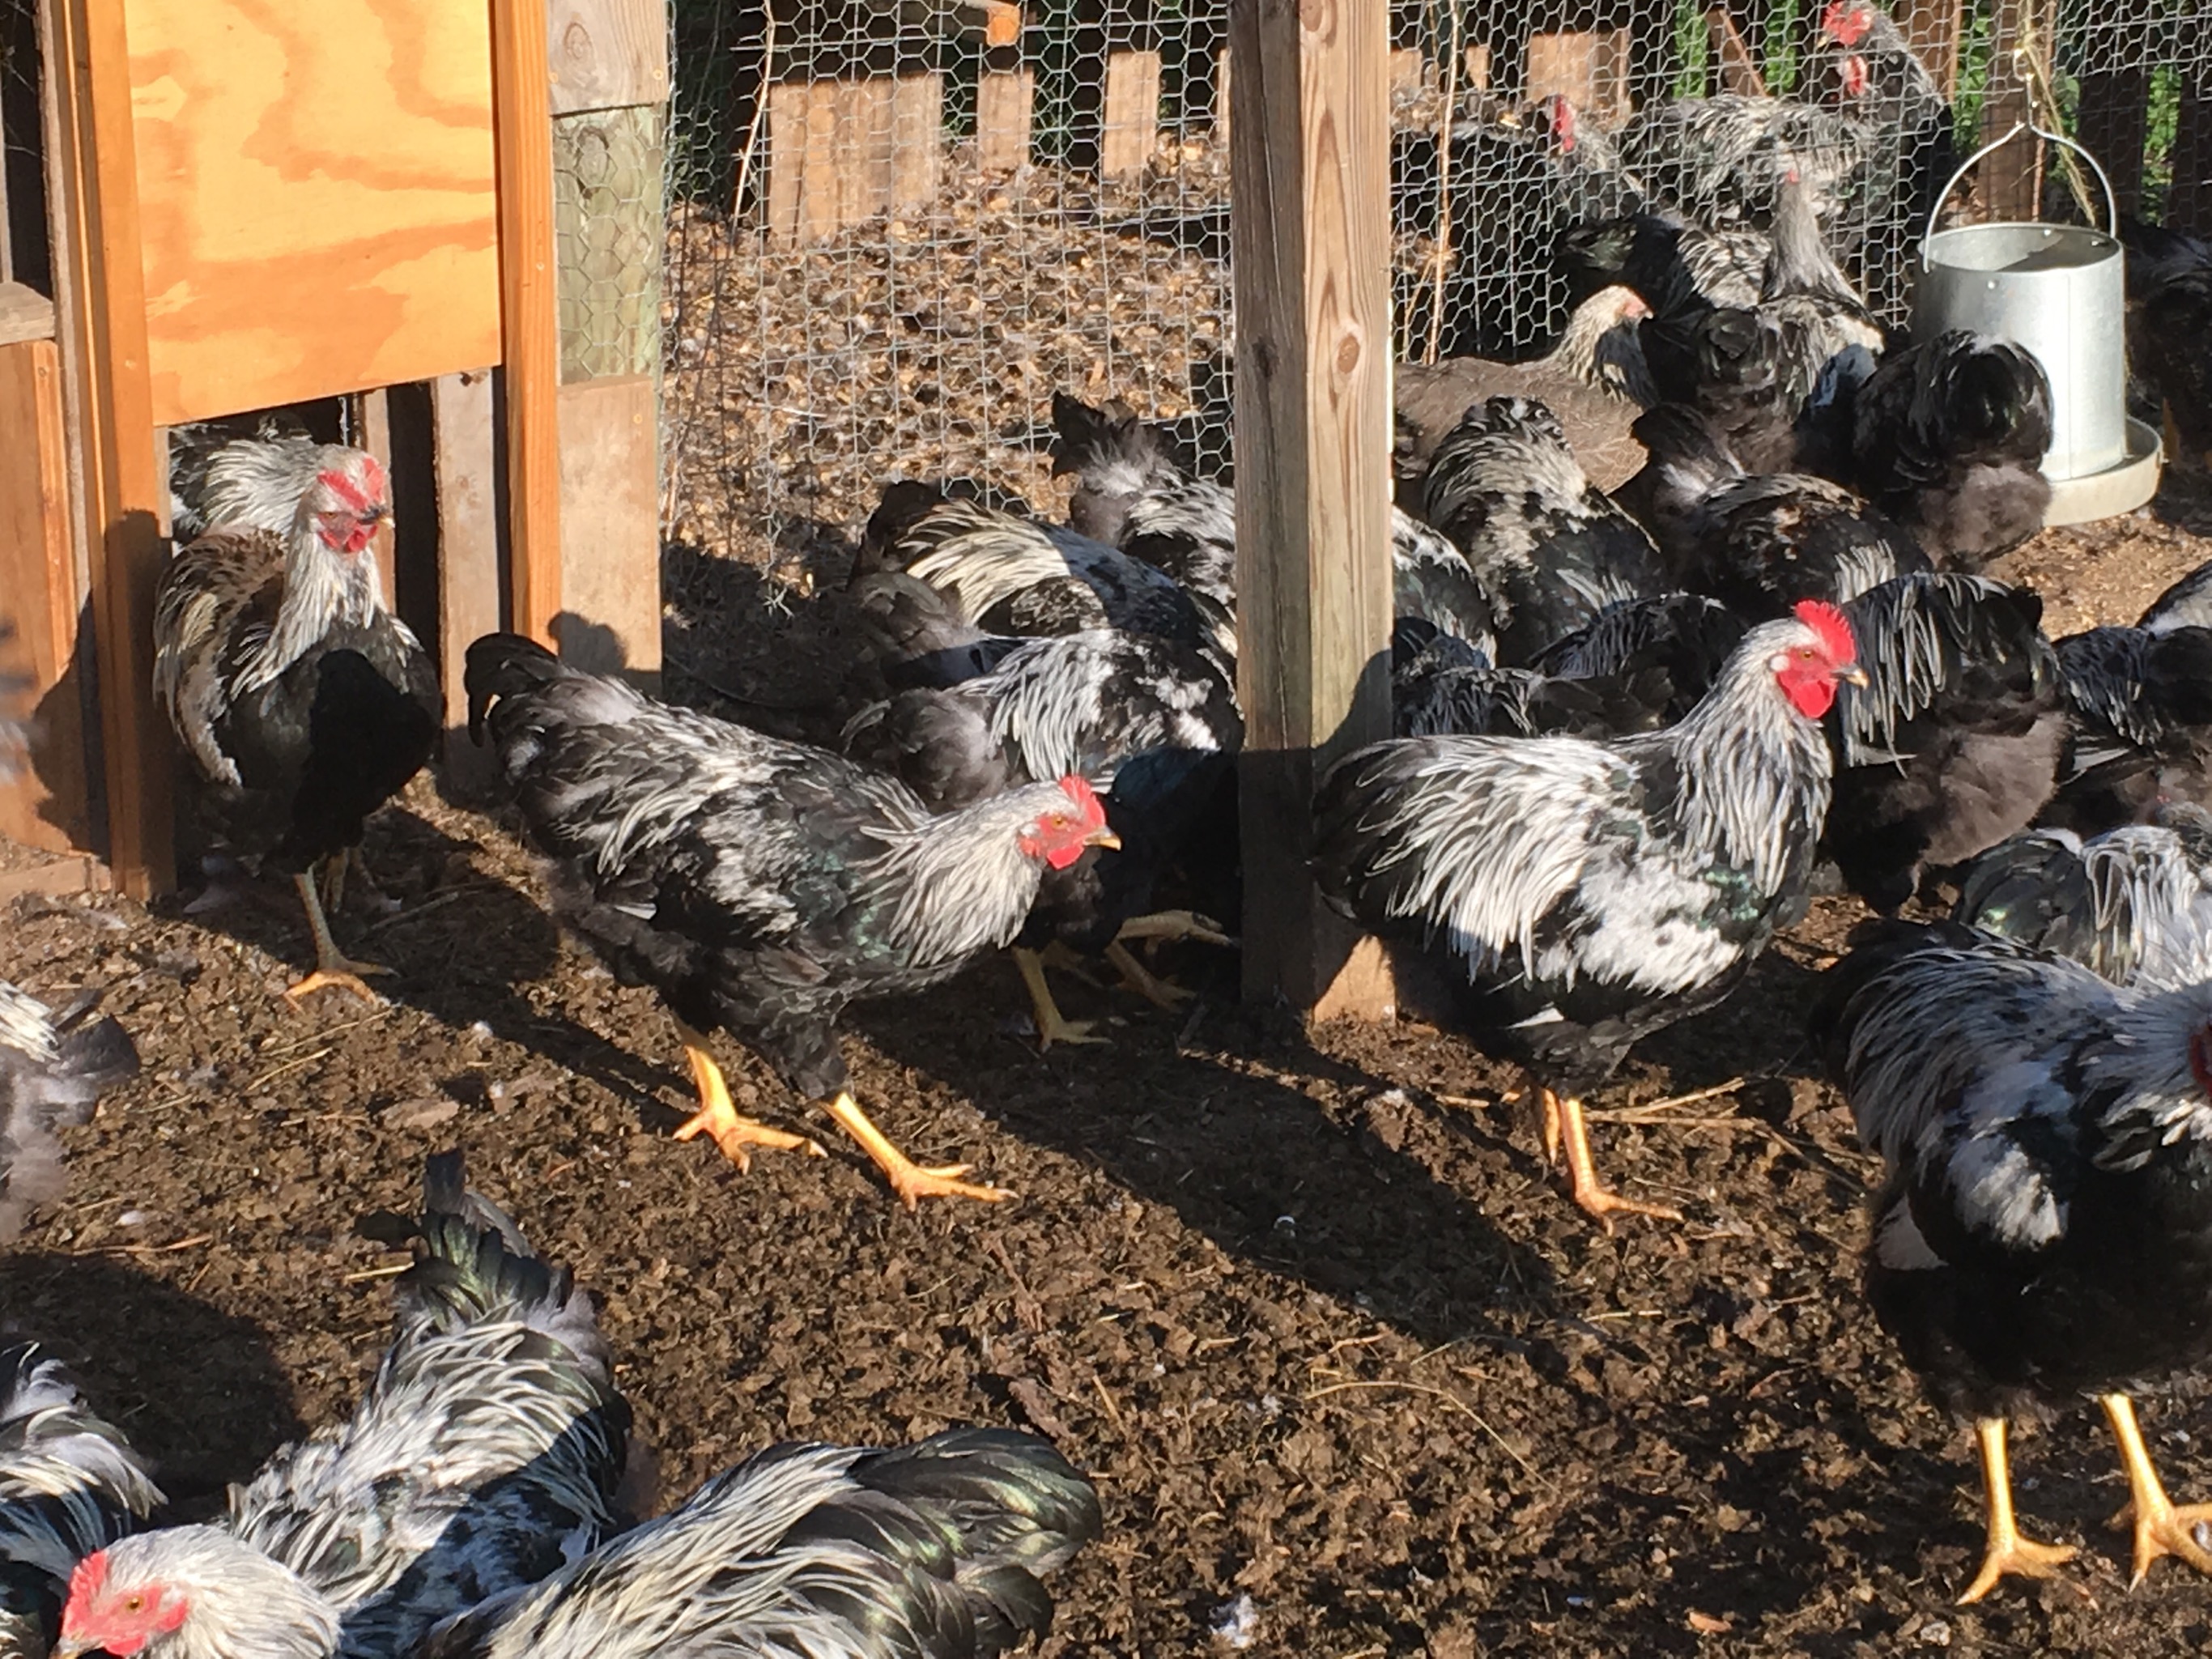
As stated above, you and your child can both access online communities where you can learn about rearing chicks. We, at Storybook Farm, sell four different breeds of large fowl, heritage chickens. All of them are excellent choices as dual purpose, gentle, friendly birds. (They are grandchild tested, so we know for sure! 🤗 ) If you are interested in learning about our French Copper Marans, our Silver Penciled Plymouth Rocks, our Light Sussex, or our Blue Wheaten Ameraucanas, click here.

This article should get you started. Do you have any questions? Feel free to post comments and I’ll do my best to answer. Good luck!

Posted on Leave a comment

Bears? Oh, my!

We have been happily building our cute little family coops all summer. How I have loved to watch each one be completed and established around our former garden’s perimeter. I’ve been loving the look, the ease of tending, and the happiness of my birds.

Until last week, that is, when I had a vivid dream — a nightmare, actually.

I dreamed that a black bear came out of the nearby woods (where we know for certain that they do live) and exerted her awesome strength to claw open my tarped coops and ravage my chickens. In my dream, the coops lay scattered on the lawn, overturned and broken. Chicken feathers were everywhere. Some chickens escaped into nearby woods; others were bloody casualties scattered on the lawn. It was horrendous; I could not return to sleep for hours.

In the clear light of day the next morning, my husband and I discussed the dream, and its implications. We are serious about finding the best possible breeding stock and doing highly selective breeding. We are investing time, love, and dollars into this endeavor. Whether now — when investments are relatively modest — or in the future — when years of effort have produced very expensive, high quality birds — we do not want to lose out to a wandering black bear in search of a meal.

So, we read up on this topic. We learned that black bears do indeed attack chicken coops, and with devastating results. However, bears will respect electric fences (yay!). One sets hot lines at about 24″ above ground (as well as higher or lower). The best scheme involves multiple strands, since bear paws are well insulated. We also read that it’s a good idea to slather the line with honey, so that a wandering bear will lick the line. Apparently, once a bear has registered the shock, they typically won’t try again.

Before: coops outside garden; runs inside

Our problem then became how to electrify our perimeter. We had placed the family coops outside the garden fence, with runs extending inward. There was no good way to place electric fence around these coops and still maintain 1) the ability to mow easily, 2) create a pleasing look, or 3) create an easily-operated gate.

With a groan, we came to the conclusion that we needed to rotate our scheme 180 degrees. Our plan is to have 12 family coops in all, housing 4 breeds, divided into three families each. We had built and mounted five of these so far. We would now move all five of these family coops to the interior of the garden, mounting them back-to-back down the center, and have the runs extend outward, towards the perimeter. Then, we would electrify that perimeter.

We were grateful that the coops had been designed to be mobile, but they are still heavy. When we finish each one, it takes a minimum of two strong people to move it (using a heavy-duty wagon) to the garden area from the garage workshop. In this case, it meant disassembling the coop’s supportive legs (which had been well pounded into the ground), removing the wire that allows chickens to go under the coop), moving each coop up, around, and down over stepped garden terraces, re-pounding in supportive legs, re-leveling the coops, and finally, reworking the runs (which involved repairing openings in the garden fence perimeter and making new openings near the coop doors) and finally, rewiring the underside of each coop. We also had to reverse the tarps, since we want south-facing sun to pour into those clear vinyl panels that we incorporated. Whew!

After: coops in center; runs go outward

I was no help in the heavy lifting part of the endeavor. I’m not strong, and had recently injured my back. But, in God’s special providence, my strong and willing son called a couple of days after my nightmare (and our decision to move the coops) to announce his decision to visit us with his family.

With his help, we moved the coops in two days, but it’s going to take at least a week to accomplish all of the above-listed tasks, and still longer to electrify the garden. In the picture at the right, you can see the coops moved, and the patches that were under three of the coops when they were outside of the garden fence. Chickens sure can eat green stuff down to nothing in a short amount of time. In hot weather, they love hanging out under these coops: shade and breezes! You can also see the progression of eaten-down vegetation in the runs (that have been created as each coop was erected). The lowest coop (far left in the picture) is the most recent. The only reason that there wasn’t a bare patch for the far right one is that we never cut a door for those birds to go under that coop.

As all five coops are moved now, a hidden blessing has emerged: they are even easier to tend! Before, when the plan was to line opposite sides of the 1800 sq. ft. garden with six coops each, I would go down one side, tending six coops, then truck across to the other side, and then go down it, tending the other six coops. Now, instead of my needing to go down each outside wall of our garden, the new placement will put them back-to-back in the center of the garden. Thus, I will walk down the center aisle of 12 coops in order to tend them daily: six on my left and six on my right. This will be especially welcome in winter, as I water and feed with snow on the ground. So far, as you can see, five coops are in place that will be on my left as I walk down the row.

So, even though the electric fence isn’t up yet, we sleep better at nights now, and are grateful for the added benefits of easier tending of our little flock! 🐔


Posted on Leave a comment

New Pens in Our Henhouse

We have some aged hens, which are kept all together with younger ones, and also some juveniles that are not ready yet to go in with adults. We also need to make decisions about which hens to put with which rooster for breeding season in early spring. So, we needed more pens, mostly for short-term occupancy (not over the entire winter, like these).

The Project

Right side before revamping

We inherited an old shed which, in the six years we’ve lived at Storybook Farm has been (by turns) a grain and tractor storage shed (its original purpose), a tack room and one-stall barn for my first horse here, sheep stalls during breeding season when new mamas needed warmth and quiet, a general-purpose chicken coop for a small laying flock, and now it’s to become the nursery/observation poultry barn.

In the right picture, you can see it before we started work this week. The vertical divisions were what the original builders used to store grains and seeds. They had boards that slid down through grooves such that they divided this space into three (or fewer, larger) bins, each about 4′ x 4′. (Both sides of the aisle had these dividers.) When we turned this shed into a general purpose coop for layers, we created the windows (using old storm windows found in a different barn) by removing the exterior and interior siding. Then we had one perch high up, and their food and water there, but otherwise, it was just open floor space.

Two new pens completed

This week, we cleaned out this right side of the overall space entirely, except for the dividing posts. Then, we set to work dividing each bin horizontally, at about 3′ off the ground.

Our goal is to create six pens in this space, each about 16 sq. ft., with a perch, 2 laying boxes, and a modular feeding/water station that traps food debris and uses small feed/water bowls like those we’ve loved in our hoop coops.

In the picture at the right, you can see one bin that is finished into two new pens (bottom and top). Two nesting boxes for each pen are permanently built in (stacked on the right of each space). Feed/water stations are on the left, and are removeable for access to the pen behind. Each pen has a permanent perch built into the rear right corner. The top pens have full windows; bottom ones are cozy and darker, but we installed electric lights.

The Build

Cleaned out

In each bin, we started with a clean out of old litter, down to the rubber floor matts we installed over the old wooden subfloor when sheep were housed here. (We figured the old floor would last longer without coming into contact with urine.)

New shelf w/paint

Next, we framed the new shelf using 2 x 3’s and 1/2″ exterior grade plywood, and screws. Then we painted the new shelf with white exterior paint (see picture, left). The coat of paint is intended to help the plywood last longer. Chicken poo is powerful stuff, and though we intend to continue to use deep litter methods, we know that liquids (of all kinds) rot plywood over time. As an added bonus, when the floor shows through the litter, it makes the space brighter.

After paint, we installed needed items working from rear to front. First came the fixed perch. Then the overhead light fixtures: upper pens get a heat lamp; lower pens (which are warmer, especially at night) get simple 100 watt bulbs with metal shields to protect from fire and concentrate light/heat downward.

Next, we built the two stacked nesting boxes.

Food/Water modular stations

Beside these, we make a space for modular feed/water stations. These have several fine features.

  • They catch wasted feed in a bin that easily slides out so that food can be either disposed of or reused (depending on if it gets wet from the water bowl)
  • They employ a wire shield that prevents chickens from scratching and scattering feed, or sitting in the feed/water bowls. As you see in the picture below right, birds of all ages (these are 4-week-olds) can stick their heads through the wires to easily eat and drink.
  • They allow us to clearly see the birds as they are eating (giving us a great way to observe their heads, combs, breasts, stances, and eating habits, etc., easily)
  • Each night, we quickly and easily empty the bowls and catch bins into a nearby metal trash can and store the bowls in there, too. This gives the rodents less to gnaw on.
  • Young pullets eating

    In winter, the water in these small bowls freezes in a few hours, but they are also easy to dump (iced over water just pops out of the heavy rubber bowls) and refill from a nearby heated bucket cistern. We water three times a day in winters; twice in summers, because with only 2-3 birds on each of these bowls, water doesn’t go very fast in summers.

  • Finally, the whole wood-and-wire structure slides out so that we can clean the pen, access a dead bird (God forbid, but it does happen) or change it for a different kind of feeding/watering set-up (like for really young birds who need feeding right in the shavings). In this last case, we have a simple wood framed wire barrier that we put up in the space vacated by the feeding station pictured here.
Finished bin

As for costs, we used up a lot of old 1 x 1 and 1/2″ plywood that we had hanging around in building the nest boxes. We did buy the 2 x 3’s and the 1/2″ plywood horizontal dividers and the poultry netting new. We had some of the hardware cloth, and the feeding station frames are made mostly from old fencing. All it all, it’s been a pretty cheap way to have six new pens for mult-purposes.

Multi-Purpose Pens

So, how are we planning to use these pens? So glad you asked!

First, as winter comes on, we have been wondering which of our older hens are still laying. Ours is a mixed flock. We have collected (and hatched) hens from different breeds over three years as we were figuring out what we really wanted to stick with, so they all lay differing sizes and colors of eggs. (I love having a rainbow egg basket!) For the purpose of tracking laying frequency, the new pens will house 2-3 hens for a week or two. We can easily collect their eggs, and keep track each hen’s current production. As an added bonus, we can worm them easily. This kind of tracking will become more and more important at we get serious about breeding show birds.

Two 4-week Light Sussex pullets enjoy the sunshine

Second, we grow birds out in all seasons, and with fall coming on hard, we don’t have enough pens to keep our young juvies in. We like for them to get Vitamin D as soon as possible, and we like to be able to see how they’re developing and if they have any obvious deformities, beginning at about 4 weeks old. The top three new pens are great for this.

Third, we need to establish breeding matings each year. For this, we need to have the ability to closely observe pullets and cockerels for both faults and strengths. The top three pens are ideal for this: there is lots of light, they are

Finally, if we have sick birds that need to be isolated and treated easily, these pens are great for that.


Posted on Leave a comment

First Steps when Raising Chickens with Kids

So, you’ve been convinced (by me?) that your child will start a small backyard flock of chickens. What a great decision!

Chickens are live animals! There are many things to consider before you bring home your first fluffy chicks! Part 1 of this 2-part series centers on steps to take before you get your child all enthused about chicken keeping.

1. Check ordinances and HOA rules.

  • Make sure that you are allowed by the powers that be to keep chickens on your property. If not, consider storming city hall with a petition. 🤔 This battle has been won in recent years in countless municipalities across America.
  • A second important question to ask is whether or not you can keep a rooster. Many ordinances allow a certain number of hens to be kept for eggs, but not roosters (because of their crowing).

2. Join an online community.

I can recommend Backyard Chickens as a warm, supportive, active, welcoming group, but there are others as well.

From their forums you will get immediate, experienced help from people who have no dog in the fight: they are not salespeople. They are chicken lovers just like you. But make no mistake: these are folks who are knowledgeable and serious about chicken keeping! You can learn about coops, diseases, feeds, breeds, hatching — in short, this is your go-to support as you learn to raise chickens with your child. Your child can/should even have his/her own account on this forum!

3. Peruse chicken breeds while considering your goals

There are hundreds to choose from, and the newcomer can be easily overwhelmed, so here are some questions to help you narrow the search before you involve your child (who probably should have the ultimate choice among those you suggest to him or her) 😉 :

  • How much space can you devote to chickens?
    • Many breeds come in bantam (miniature) sizes and/or large fowl (sizes that you think of when you think of most chickens you’ve seen). Bantams can be kept kindly in about half the space of large fowl.
    • General guidelines suggest that each large fowl chicken needs 4 square feet (so 2′ x 2′) of floor space inside your coop, and 10 square feet of run space outside the coop (which can include space under the coop if it’s elevated).
    • Large fowl need 1 foot/chicken of roosting space, and a 1 foot cubed nesting box (provide 1 box for every 2 hens). Nesting boxes can be very simple: you can do a Google search and see them made out of everything from dish pans to crates to wood to metal to 5-gallon buckets. There’s no lack of creativity among chicken keepers–that’s what keeps it fun!
  • Our colorful eggs

    What are your goals for eggs?

    • Large fowl birds are the better choice for large or jumbo eggs, and there are breeds that lay up to 280-350 eggs per year. Eggs from these hens can be green, blue, brown, tan, dark brown, and white.
    • Bantam hens are also used as laying hens, with some breeds laying up to 150 eggs per year. However, Bantam eggs are only about one-half to one-third the size of a regular hen egg.
    • In general, some breeds are reputed to “go broody” easily. This means that they will lay a clutch of eggs and sit on them until some hatch–three weeks, minimum. Then, they will care for these young for months. They will not lay during this period. So, in terms of egg production, broody hens are not a plus. (However, read more about broodies below before deciding on this factor!)
    • There are champion egg layers among the breeds (topped by the white Leghorns). These birds tend to be small and streamlined. There are also the “dual purpose” breeds (so called because they both lay a decent number of eggs yearly and have enough size that they are good for meat as well). The latter are also often termed “heritage breeds.” The story is too long to tell here, but suffice it to say that today’s commercial breeders raise hybrid birds in conditions similar to veal calves. (You won’t want your child to even know about conditions in such operations.) Many backyard chicken keepers choose to breeds that are beautiful, docile, and have a long heritage among poultry keepers because they were prized for their meat and eggs in bygone days on smaller, family farms. (These are the breeds that we have chosen to raise, and sell as day-old peeps and hatching eggs.)
  • Do your goals include raising chickens for meat?
    • With the growing movement towards organic foods, many backyard chicken keepers raise and process their own meat. If you are not so much oriented towards having your child raise chickens as pets, but want him to learn the cycle that brings food to our table, you may be interested in a heritage breed that is known as a good table bird and a good layer (called a dual purpose breed).
    • There are great resources in the online communities that can teach you to process your birds if you decide to go this route.
  • Would your child be interested in hatching chickens to raise, or breed, or possibly show or sell?
    • In this case, you want to know which breeds are somewhat unusual, and in higher demand. Simple searches on the Internet will open your eyes to the possible markets for day-old chicks or hatching eggs. (Check out Greenfire Farms as an example of a breeder who started small but has made an entire livelihood out of selling rare and exotic breeds for high dollar amounts.)
    • I highly recommend that your child hatch chicks at some point in your chicken-keeping adventure. It is such a great experience, and again, the online community at Backyard Chickens can hold your hand every step of the way. A small, but decent, incubator can be had, new, for something between $60 and $150. (Check out our favorite online store for incubators, and/or check Craig’s List for used ones near you.) To gain vision, check out this lovely guide.
    • Please note that, if you incubate chickens, you will end up with roosters. What will you do with them? It is quite unreasonable to plan to rehome them as pets. Most people will not feed a bird that gives nothing back, no matter how beloved a pet it has become in your household. Most of the time, you’ll need to plan (and prepare your child) to give it away to a farmer who will eat it, or sell it for meat. That’s just a reality in hatching chickens, and if it bothers you greatly, please read this post. It may help.
  • Finally, what kind of housing will you provide for these birds? You absolutely need to have a coop built, down to the shavings and heat lamp in place, and feed ready, when you bring your first chicks home. So, consider (and price) the housing that your chickens will need (using allowances in chicken math offered above) before you purchase your first hatching eggs or peeps! This is another great project for you and your child to do jointly! (See more on this below.)

Next post in this series: First Steps to Take With Your Child


Posted on Leave a comment

5 Top Coop Considerations

When I was first learning to keep chickens, I did a lot of research on coops. It was good that I did, because there are a surprising number of things to know that are not obvious to the beginner. There are a zillion plans and examples of chicken coops out there: the creativity of backyard chicken keepers is just as robust as it is in most hobbies! For the newbie, however, this variety = confusion, and often leads to regrets as the emphasis on certain features can be misplaced. That’s why I wrote this article!

1. Farmer First: What You Need

Feeding should be easy!

Whatever the design, it needs to be farmer friendly. Don’t build or buy coops that are hard to access for the following frequent activities:

  • Feeding
  • Watering
  • Accessing the floor of the coop for cleaning, or getting at sick/dead birds
  • Gathering eggs
  • Protection for your feed: a place to conveniently store feed in galvanized trash cans, or the like
  • Storage for chicken gear in off seasons

When looking at a coop plan or design, ask yourself how much effort it will take to service the birds and the coop floor. This is key to your longevity in (and enjoyment of) backyard chicken keeping.

  • So, if you’re going to have to crawl into the coop’s run, don’t use the plan.
  • If you can’t access inside the coop floor to clean it easily, don’t use it.
  • If feed and water are set outside (open to the elements) you’ll be wasting a lot of feed (it will go to rodents, to wild birds and animals like squirrels, and be ruined rain/snow).
  • If you have to stoop, or bend, or twist in order to feed and/or water, don’t use the plan.

2. What Chickens Need

Convert a shed by adding windows

In order of importance:

  • Fresh water (preferably cool in the summer, and definitely not frozen in winter)
  • Appropriate feed (the type changes three times over the life of a chicken: starter, grower, layer feeds)
  • Enough floor space inside the coop for the number of chickens you keep
  • A roomy place to run safely outside the coop (can include free ranging): a run
  • Bugs, grasses, seeds (and other natural foods) in addition to commercial feeds. For some, this means using chicken tractors that can be moved easily. For others, free ranging is the answer.
  • They need to be kept safe, especially at night: their coop/run need to be secure from predators.
  • Their preference for night time is to roost (ideally on wide boards, like 2 x 4’s, turned sideways) in a draft-free zone (especially important in winter) at least 15″ and no higher than 3′ above the floor.
  • Hens will lay on the ground, but if you care about harvesting eggs, provide one nesting box per every two hens.
  • A clean environment. This point takes in the absence of parasites, the management of the chickens’ bedding, and the condition of their nesting boxes.
  • It also refers to the fact that the coop must be well ventilated, offering fresh air that is free of amonia buildup. This means that a coop will be far more open to outside air than most beginners think, especially in winter months. Think about vents to outside air being both up high and down low, but not in the middle of the coop.
  • Adequate bedding: we use and vastly prefer the deep litter method.

3. What Adult Chickens Do Not Need

  • Blankets, sweaters, or tightly closed-up, or heated, coops. We get cold in winter, but chickens have feathers. If they have broad perches, they tuck their feet up under themselves in extreme cold. While some breeds have large combs and wattles that can be frost bitten, almost all of them are way more cold hardy than beginners dream.
  • Frozen or dirty water.
  • Drafts: ventelation is one thing; drafts are another. Learn the difference!
  • Aesthetically pleasing coops: those are for your enjoyment, not theirs. They don’t care how cute their coop is, and you can spend many more dollars than you need to on cute coops. Just sayin’. 😏
  • Over crowded (allow minimally 4 sq. ft./large fowl chicken inside and 10 sq. ft. of run) and/or dirty coops that reek of ammonia (which will sear their lungs and shorten their lives). This is where ventilation comes in again! Can’t really stress this one enough.
  • A place where they can be pounced on by dogs, hawks, or other predators by day. Most people in neighborhood settings need to cover their runs with wire and use sturdy wire to construct them.

4. Nice Frills and Extras

  • A light inside the coop on a timer in winters — if you want to try to boost egg laying rates. It doesn’t always work, though.
  • Heated bucket waterers with nipples: also nice for a farmer in winter. Be sure to check regularly to ensure that it’s working properly.
  • Automatic watering systems in summer: however, be careful that the ease of this amenity doesn’t lull you into a false sense of security. You need to check that it’s working daily. Fresh, clean water is the single most important element of your chicken’s diet.
  • Automatic pop door: these are expensive and, again, need to be checked to make sure that they don’t shut too early and leave chickens outside.
  • A cute coop that makes your neighbors smile. While the chickens don’t care, the neighbors might. Making your coop pleasing to look at (using a coat of paint even on pallet coops can do wonders) can go a long way to buying good will for your flock. The reverse is also true.

5. Building Your Own vs. Buying

  • In our experience, diy coops are always cheaper than purchased ones. A lot cheaper!
  • You don’t need mad carpenter skills to get the job done. Again: simpler is better, and farmer friendly is the key!
  • Check into hoop coop designs: these are by far the most weekend warrior friendly coops to build, and are usually the most economical as well. (We offer plans for a small one that meets all of the criteria above, and you can find examples of larger ones on our Pinterest boards — and more — by searching for Storybook Farm Poultry.)
Our hoop coops

If you have six or fewer birds to house, you might want to consider building a design that we’ve come to love. We practice clan breeding with five carefully selected hens and one rooster per coop. They’re pictured at the right. They take us about two good days to build (using average skills) and cost around $80 if you have to buy all the materials new. They are the easiest possible coops to service, work well in hot and cold weather, are extremely clean and well ventilated for birds (none needed for humans) and have the elegance of simplicity. We think they’re pretty cute, too! You can read details about this design here. We sell highly detailed plans for constructing them at our store, here!

Posted on Leave a comment

Circle of Life

It’s fall, and that’s the time when we face one of the harder parts of breeding chickens: culling. I can still remember the first time I realized that we would need to learn to butcher our roosters (and some older hens). While we often can rehome young hens, almost all roosters end up as food for our table. I know it’s a topic that many chicken lovers try to avoid or ignore, but I’d like to offer some thoughts on the rightness of seeing chickens all the way through their life cycles since the reality is that backyard chicken keepers will end up with roosters at some time in their careers.

First of all, though many of us keep chickens as pets, which means they are beloved individuals with names, they are animals: as such, they have no self consciousness. For instance, a chicken does not “say goodbye” to another chicken when they are sold away from each other. Chickens don’t fall in love, get married, or even — as do some animals — mate for life. Neither do chickens freak out at harvest time when cage mates are culled. Chickens are not humans: they do not reason as we do, or know their world as we do. Of course they have feelings, which include pain and fear. But the fear is more like startling, or a flight instinct, than a reasoned dread such as you or I would have in the face of mortal danger.

As a breeder of chickens, it gives me a great sense of purpose to raise birds that are the best that they can be. I choose high quality parent birds, and seek to feed and house them very well so that they will be as healthy (and happy) as possible. I place carefully chosen eggs in an incubator, and hover over it as the eggs set. I watch with amazement as chicks hatch — sometimes even intervening to help, though I’ve found that usually there’s a reason why a chick can’t make it out of the egg unaided. Many of our day-old chicks go off to be adored by others. But many also remain here at Storybook Farm.

I nurture my newborn chicks with electrolytes and apple cider vinegar in their water, medicated feeds that I grind in a blender to make sure they can get it into their newborn beaks. I provide warm lights, and clean, large pens. If they get pasty butts, I wash them off lovingly by hand.

As the birds who remain here grow from fledglings to adolescents, I watch them with delight. I love to see them come running at chow time. I love to hear the young cockerels learning to crow, sounding so much like adolescent boys whose voices have just changed. I laugh over the sparring matches of the young cocks, and am amazed to see the feathers change on pullets with each successive molt. Over and over, I wonder daily at the miracles of life, and growth, and beauty, and sweetness that my birds display.

Both cockerels and pullets frolic all summer at Storybook Farm on green grass, with plenty of sunlight, shade, food, clean water, and company. Unlike most large hatcheries, we do not dispatch young males. We purposefully choose breeds that are 1) heritage, 2) dual purpose (so that they are valuable for both meat and eggs), and 3) homozygous (look the same at birth) so that we sell all our chicks as “straight run” — and raise them the same as well. They all live sweet, pleasant lives while at Storybook Farm.

And then, in the fall, comes time for the hard choices of which chicks will feed us, which pullets will go into our laying flock for eggs, and which of the best birds will be bred to produce the next generation. For me, there’s a holy sense of awe when we go to harvest chickens. I’ve watched each animal its whole life, and now I’m bringing it full circle, and taking it to its final purpose. Each bird here has had a good life. Each bird has been loved and appreciated. And each bird will meet a quick, peaceful, painless, and humane end. It is hard, but it is also good, right, and proper.

All animals die. If I do not lovingly end their lives, their lives will still end eventually, and often in the claws of a predator or in disease brought on by old age. I cannot breed chickens and avoid that fact. Better I do it kindly and quickly than that they fall into hands less loving — like those of predators, or cock fighters, or as a by product of a larger chicken mill.

Deep thoughts about life and death come naturally to me because I am a Christian. I believe that God created chickens for a purpose. Actually, He created them for more than one purpose! Chickens give us so much: their eggs, their friendliness, their funny antics, their silly ways, and ultimately, their bodies. We live in a world where death comes to all. My faith teaches me that death is an evil, but a necessary evil, and sets me free to play my part in this circle of life.

So, I don’t have to ignore or avoid this phase of my responsibilities as a breeder. Bringing chickens into this world includes the duty and privilege of seeing them out of it, and I accept that, humbly and gratefully. I’m standing in the image of my Good Shepherd, Who has determined the roles that each of His people shall play, Who provides for, cares for, loves, and nurtures His children, and Who decides when He will bring them — not to an end, for we are not unconscious animals — but to be home with Him forever.

For me, then, butchering chickens is a sober, sacred business. God gave them life, and then gave them to me. As I choose which ones shall live and die, I reflect in my tiny way His awesome authority. I suppose it could make some people proud to wield such power, or help them become callous/indifferent to death. It has the opposite effect on me: I value the lives of both myself and my chickens more, seeing each day as a joyous gift. I also face death better (mine and my chickens’) by seeing it in right relationship to a bigger picture, and I am grateful.

Posted on Leave a comment

10 Reasons Why Kids Should Raise Backyard Chickens

I birthed, raised, and homeschooled six kids: three boys and three girls. I’m nearing my 60th birthday (April of 2018, and yes, it’s surreal, thanks for asking), and I’m blessed with 10 grandchildren who visit us often. All of my grandchildren love doing farm chores, but our most avid young farmer is probably my two-year-old sweetie, named Torri.

Torri & Grandpa check for eggs

If Grandpa gets his boots on in the morning, Torri scrambles to find her “farm boots” — which her mom says she had better remember to pack when she comes, or else Torri will go out barefoot!

Grandpa and Torri feed the calves their grain, and make quick work of mucking the horses’ stall before beginning the real joy of the morning: feeding the chickens!

Because we use small Family Coops in a clan mating program, we have lots of small feed and water bowls at just Torri’s height. She truly can help with the chores! With just a little help from Grandpa, two-year-old Torri can open the nesting box and look for eggs, she can pull the cord to open the pop door, and she can feed and water the chickens. Because our Family Coops are designed as they are, she does much of this work herself, and comes out clean after doing so! (Read more about this here.)

Torri (and our other grandchildren) have also enjoyed helping with incubating eggs. They love to watch me candle eggs. They are fascinated to see chicks hatch (aren’t we all?). I have shared hatches with my grandchildren via FaceTime: you can see grandson Hector watching the chick hatch all the way from Maryland in this picture to the right!

And of course they all love to hold the fluffy darling chicks as soon as they are dry enough to do so. One task we set them is to watch the smallest chicks –usually the last to hatch — as we put them into the brooder. They make sure that the older chicks don’t peck or heckle younger ones.

Some of my older grandchildren have become quite adept at catching adolescent chickens when it’s time to move them to bigger pens as they grow out. They are not afraid to hold the flapping birds and help us to clip their primary wing feathers so that they’ll be safe in uncovered garden pens.

All this to say: generally speaking, children and chickens are natural together.

I know that my grandchildren come by a love of the farm honestly. It’s in their blood, and nurture! I always loved animals, and our family enjoyed a huge variety of pets growing up. To list a few, we had: salt water fish/corals, chinchillas, a ferret, white rats, a guinea pig, horses, an octopus, parakeets, and dogs.

Being a homeschooler, I was always on the lookout for projects that my young children could do. I wanted ones that would bring a sense of independence, hands-on learning, and delight in nature (and nature’s God). Book learning is necessary, but I always felt that my kids should also have as close a connection with what I called “the elements” as possible. For this reason, for instance, we chose to heat our home with wood when we could, took our kids to zoos and nature centers, and (of course) had all those pets.

Kids Should Consider Keeping Chickens

Raising, breeding, and even showing chickens are all well within the realm of a young child’s abilities. Most of the work can be done by them independent of hands-on adult supervision. Thirty years ago, when my kids were born, the backyard chicken movement hadn’t gotten underway. Our suburbs didn’t allow us to keep chickens, much less our HOAs. So, I never even considered chicken farming as a project for my homeschooled kids.

But, today I sure would! Things have changed. The movement towards buying food that’s fresh and local, and as organic as possible, has led to chicken advocates across America lobbying successfully for the ability to keep small flocks in backyards. Chickens are easy to keep, hardy, and inexpensive to buy. Like all pets, they need housing, food, and attention.

So, here are 10 reasons to consider encouraging (and financing) your child’s chicken project:

  1. Chickens are the right size. Whether your child chooses bantams (miniature chickens) or large fowl breeds, chicks are certainly not intimidating when you purchase them as babies, and they tend to grow up to be very tame. Kids can handle adult chickens all on their own, usually without intimidation.
  2. Chicks are adorable, and then they grow up to be beautiful birds. Aesthetically, chicks are as cute as puppies, and you don’t have to housebreak them. Kids have a huge variety of breeds to choose from when starting out, which is part of the fun. They can choose heritage breeds, and help save them from extinction. This is meaningful, but perhaps they’ll choose more exotic breeds for their amazing plumage. It’s up to them. 🤔
  3. Forget the parakeets! Chickens are far more hardy and handleable! Chickens will eat treats from a child’s hand, sit on her lap (with training) and follow her around the yard. Chicken antics and expressions are funny and endearing. Chickens are great pets by any standards!
  4. For those with allergies to furry pets (like some of my grandchildren) birds can offer an great alternative. And chickens are great birds to choose (see #3). Chicks are cheap, and their housing can be as reasonable as any other pet. (Older children can assist in building a chicken coop as well, which is a great hands-on project itself!
  5. The life cycle of a chicken — especially egg formation/laying and then hatching eggs — is fascinating and brings great glory to the Creator God. You can study chickens and be amazed at how they propagate and grow.
  6. If your ordinances permit a rooster, your child can breed chickens. He can learn about genetics, and become an astute observer of breed traits, good and bad, in the birds he breeds. He can raise better and better birds each year. Ordinances may limit the number of birds you can keep, but if you are in a rural setting, you don’t need a lot of space to dedicate to breeding chickens, and it’s easier than breeding puppies!
  7. Possibly, there is no cheaper or easier animal to show. If your child likes to compete, she can enter her chickens in shows large and small, near and far. This is a great experience for many young people, offering honest feedback on your child’s efforts. Most counties have a 4-H office, or YFA where you can learn more about showing.
  8. Torri feeding chickens

    Don’t forget the eggs! The same satisfaction that a gardener experiences is felt when your child, day after day, goes out to the coop to harvest eggs for his family’s consumption. Different breeds lay different colored eggs. Your child might want to choose breeds that yield a rainbow egg basket.

  9. As with all pets, keeping chickens will teach your child to be consistent and responsible. Chicken pens do not need to be stinky or difficult to clean. There are methods of bedding and there are coop designs that minimize the work and unpleasantness of tending chickens. Most birds can be tended only morning and evening, so those in traditional schools can keep chickens just as well as can homeschoolers.
  10. Going all out, your child could dabble in a home business. She can sell table eggs (in your neighborhood, or at a local farmers market). If a rooster is allowed, she can sell hatching eggs and/or day-old baby chicks! This last one will need adult help and supervision, because there are permits and car trips involved, but the child can do much of this home business on his or her own!

Do you have questions or comments related to this topic? Feel encouraged to comment below if so!

Posted on Leave a comment

Farmers’ Market

For years now, we’ve had a serious egg surplus. It came from my chicken habit, and my husband (who collects the eggs) often had to say to me, “Honey, what shall we do with them all this time?”

And now that we’re breeding more chickens, our laying flock is increasing (since that’s where those hens who are not comely enough to be bred can still find a useful place at Storybook Farm).

We eat a lot of our yummy eggs. We have also sold them to friends locally, and given them away to family members. But this summer, I realized that our tiny town hosts a fledgling farmers’ market in good weather, and when I went down to check them out, they allowed as how they never had enough eggs!

The first hurdle was, as is so often the case, legalities. I consulted the WV Vendors’ Handbook. Here are the (lightly annotated) regulations I found:

  • A small producer may market up to one hundred fifty (150) dozen eggs (!) or less (that’s me!) per week of their own production.
  • The producer must register with the WVDA (West Virginia Department of Agriculture).
  • Small producers must label their cartons with:
    • The name and address of the person selling the eggs
    • The date the eggs are packed
    • The words “Ungraded Eggs” in print of at least 5/8″ high
  • Eggs shall be washed (removing their bloom, and necessitating refrigeration, whereas if we had not washed them, they would stay fresh for up to 6 months, but never mind).
  • Eggs shall be transported at forty-five degrees F, unless the time for transportation is less than three (3) hours. (Great! I only live 20 minutes from the market. 😇)
  • Eggs are to be stored and displayed at the Farmers Market in cold-holding equipment capable of holding forty one degrees F or less. The eggs must reach the forty-one degree temperature within four (4) hours of receipt at the market. (That cold-holding equipment was my cooler, and since our market lasts from 9 AM to noon, no problems here.)
  • Small producers are permitted to pack in recycled or used cartons when the distributor’s name, address, expiration date, size and grade are marked out and replaced with the labeling required for small producers.
  • Cartons shall be clean and free of odor or debris.
  • Any vendor selling eggs shall have a valid Food Establishment Permit from the local health department before the date of sale. (Our county did not actually require this. Yeah; it’s almost heaven here! 😍)

It took me a couple of weeks to get all these ducks in a row.

I had to fill in a WVDA form and show it to our county Board of Health.

Then, I had to pay for a county permit ($15/year), which my county BoH discounted since we were at the end of the season. I paid $6.

After all that, there were only a couple of weeks left in the selling season, but we got up early to wash and pack eggs. Here we are in our PJs getting it done (right)!

Eggs were washed.

Eggs were packed and labeled according to regulations and put into clean, clear cartons (so, no need to ink out the former farms’ names).

Me at our table

We set up our table, and had a blast networking with other likeminded folks.

We sold about half of the eggs we brought and had a great time! Can’t wait for next Saturday!


View of our entire market from my table