Sometimes, it’s the little things that make daily life a joy or a hassle. For quite awhile now, one aspect of goat herding that had me stumped and frustrated was how to dispense minerals and baking soda. Goats need daily supplies of these two essential elements, but keeping their containers clean, free from moisture, and available to the goats without contamination was a bridge to far for me for months. Now, I finally have two solutions that are working for me, so I thought I’d share.

First, I may not have picked the best container for dispensing minerals and baking soda, but this one (I got it at Tractor Supply) was what I had. (I have seen people use PVC pipes, but I’ve tried those with chicken feed and they were a PAIN to clean, plus the feed got moist and caked. So, I went with these for minerals/baking soda.)
This container comes with three holes for screws so, being new to goats, I promptly screwed it to the wall and filled it full of minerals on one side and baking soda on the other.
Then the problems began. First of all, if you’re new to goats, please know that goats LOVE to put their feet on things mounted to the walls. Sometimes they use them as a leg up to jump out of their stalls. Sometimes, they just want to see over the stall edge, so they plant their feet on whatever they can, or hang them over the edge of the stall. These mineral dishes are perfect for such goaty antics. As you can imagine, it only takes one goat using the dish with its feet to soil the whole stock of minerals/baking soda! 🙄
If they don’t stand in these dishes, then they poop in them! I have found little “love gifts” in these dishes time and again! Then, there are the flying goats, like my Meda. She is small and agile, and LOVES to simply launch herself into the air and come to a perfect pose on top of ANY protrusion, of ANY depth. I am amazed at where she can jump and how she can balance! And, of course, one of her favorite perches became these mineral dishes.
Finally (and this is true with all mineral feeders) there is the problem of moisture building up in the minerals/baking soda. This moisture can actually host coccidia! These feeders, screwed to the wall, are really hard to clean properly! You can’t dump them; you have to scoop stuff out. You can’t spray them with the hose. I got some Clorox wipes and tried to empty and wipe them down periodically during the humid summer months, but it was always a pain to do and never yielded satisfactory results.
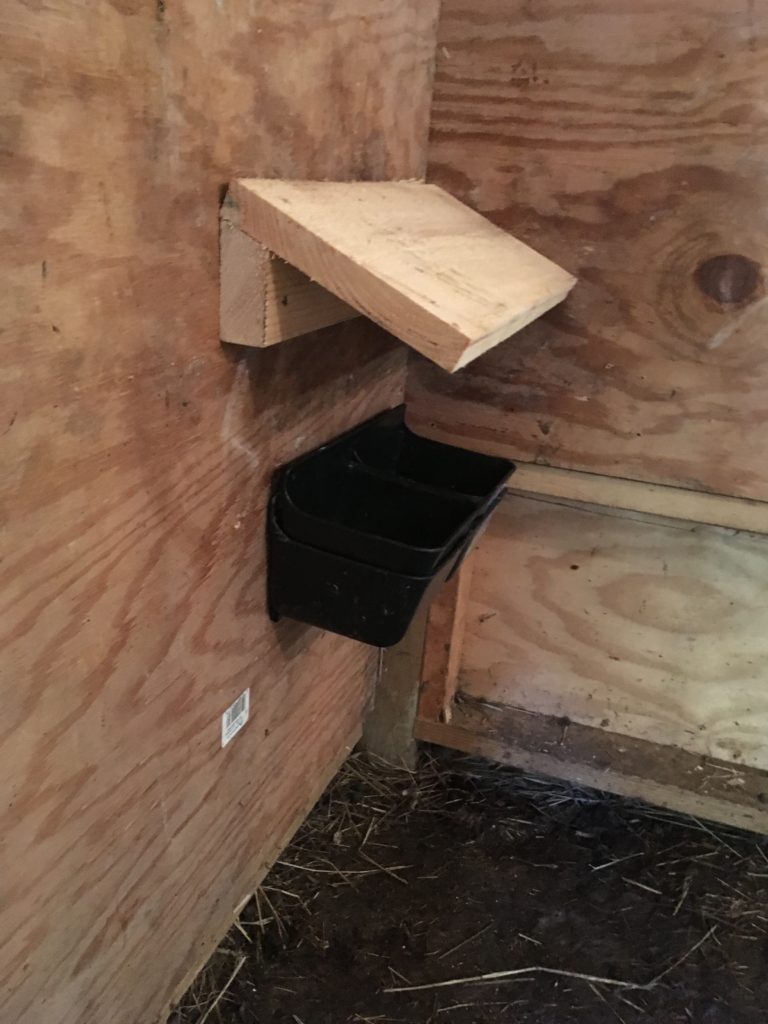
Frustrated, I asked around on goat groups, and someone suggested that I put a topper board (or canopy) on over it, as in this picture.
I thought this was a terrific idea!
It HAS solved some of my problems. Once I put these on, the goats no longer poop in the dish. They also don’t stand on it to try to see over the stall wall.
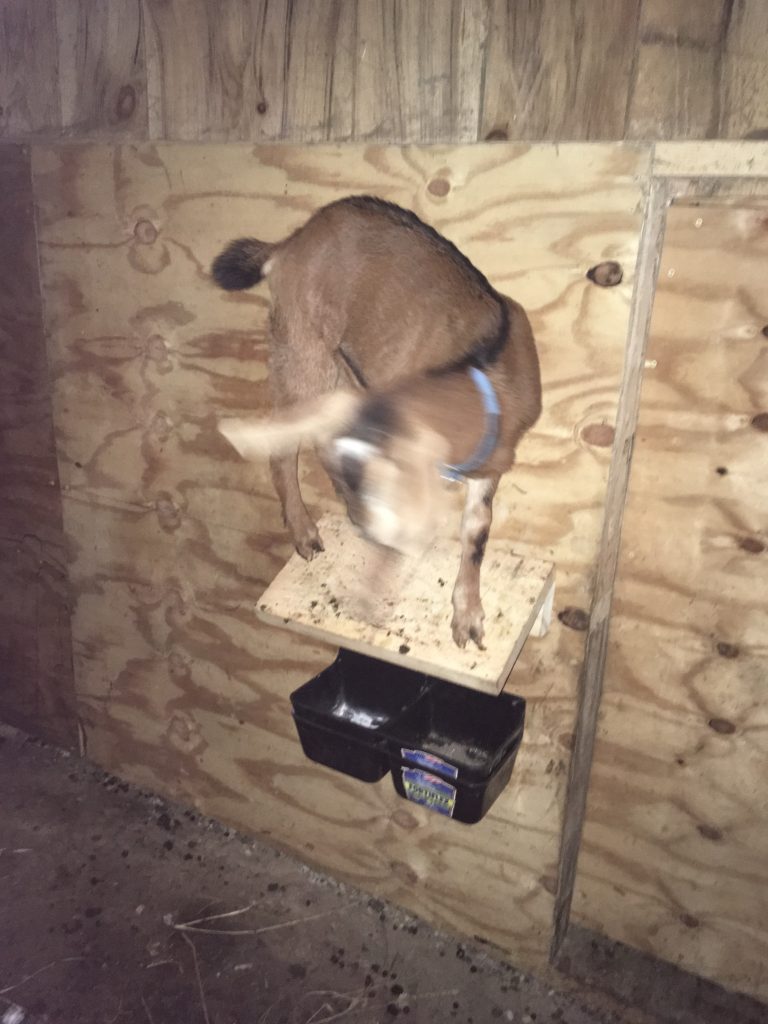
On the other hand, this mineral canopy hasn’t slowed Meda down.
Every morning, she rockets around the stall and launches herself onto it, does a little tap dance, and then leaps into the stall, rockets around, and leaps back on top of it again.
She’s amazing. She moves so fast that my camera’s shudder speed can’t keep up with her!
So, while the wooden canopies did help, they actually made it harder to clean! I ended up buying duplicate feeders and nested one in the other so I could pick out the top one, clean it, and then put it back. That was okay, but gee—buying two for each place I needed them seemed excessive.
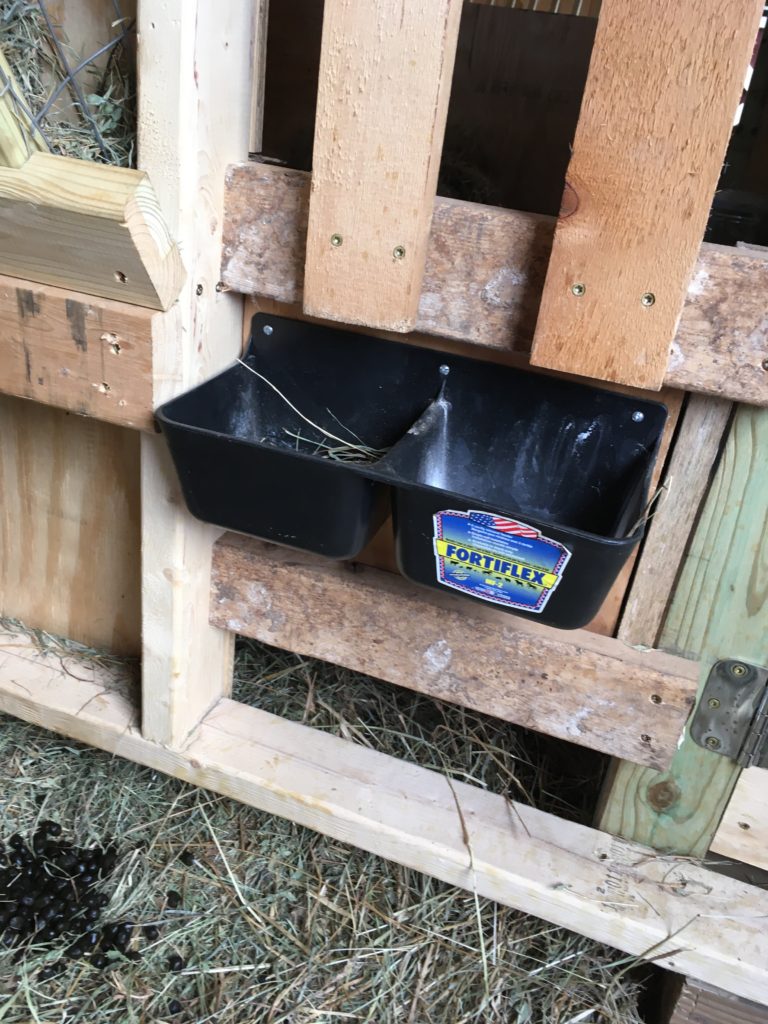
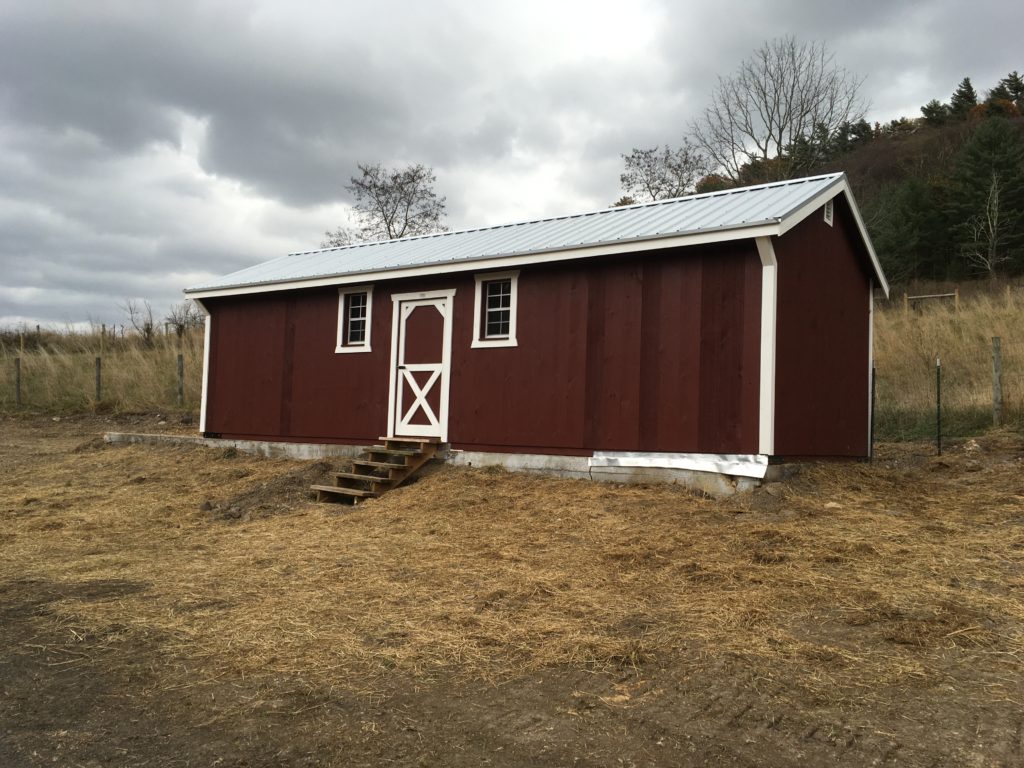
Then, recently, we built stalls in our new prefab buck shed, and I think I have finally solved this problem! If you’re read my previous post on the buck stalls, you’ll know that I have two of these mineral dishes in each stall, in case I want to divide it.
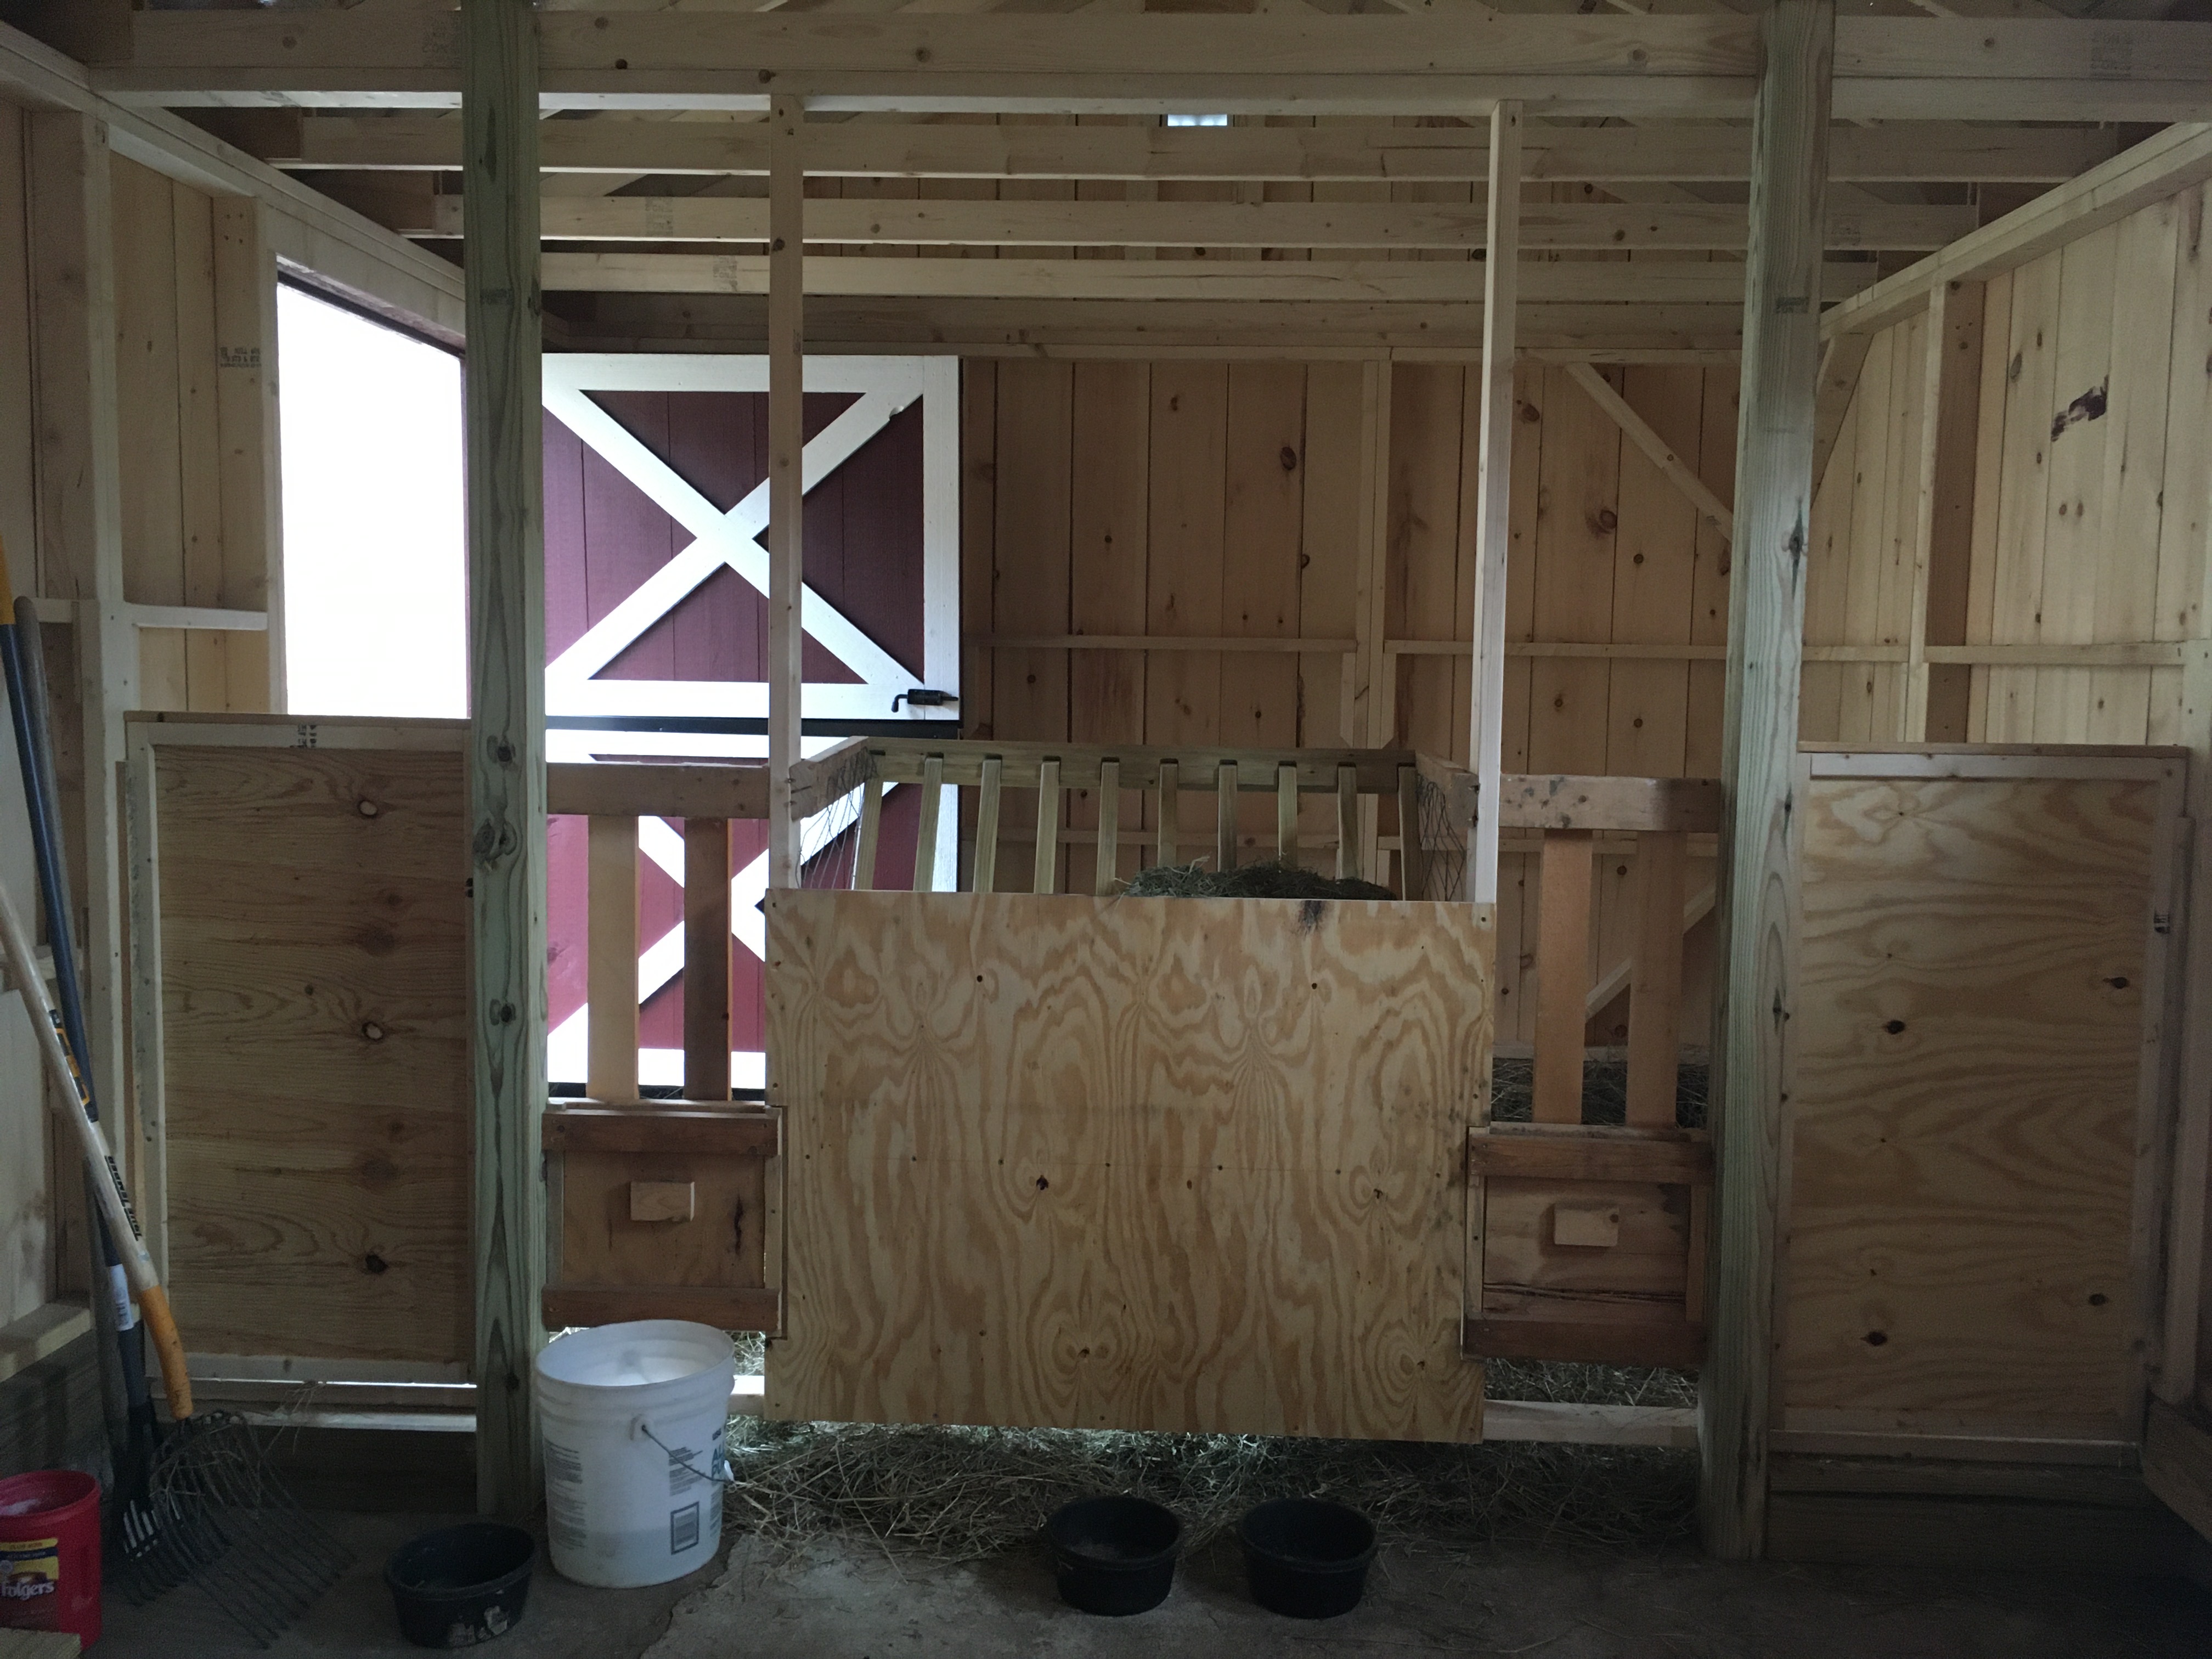
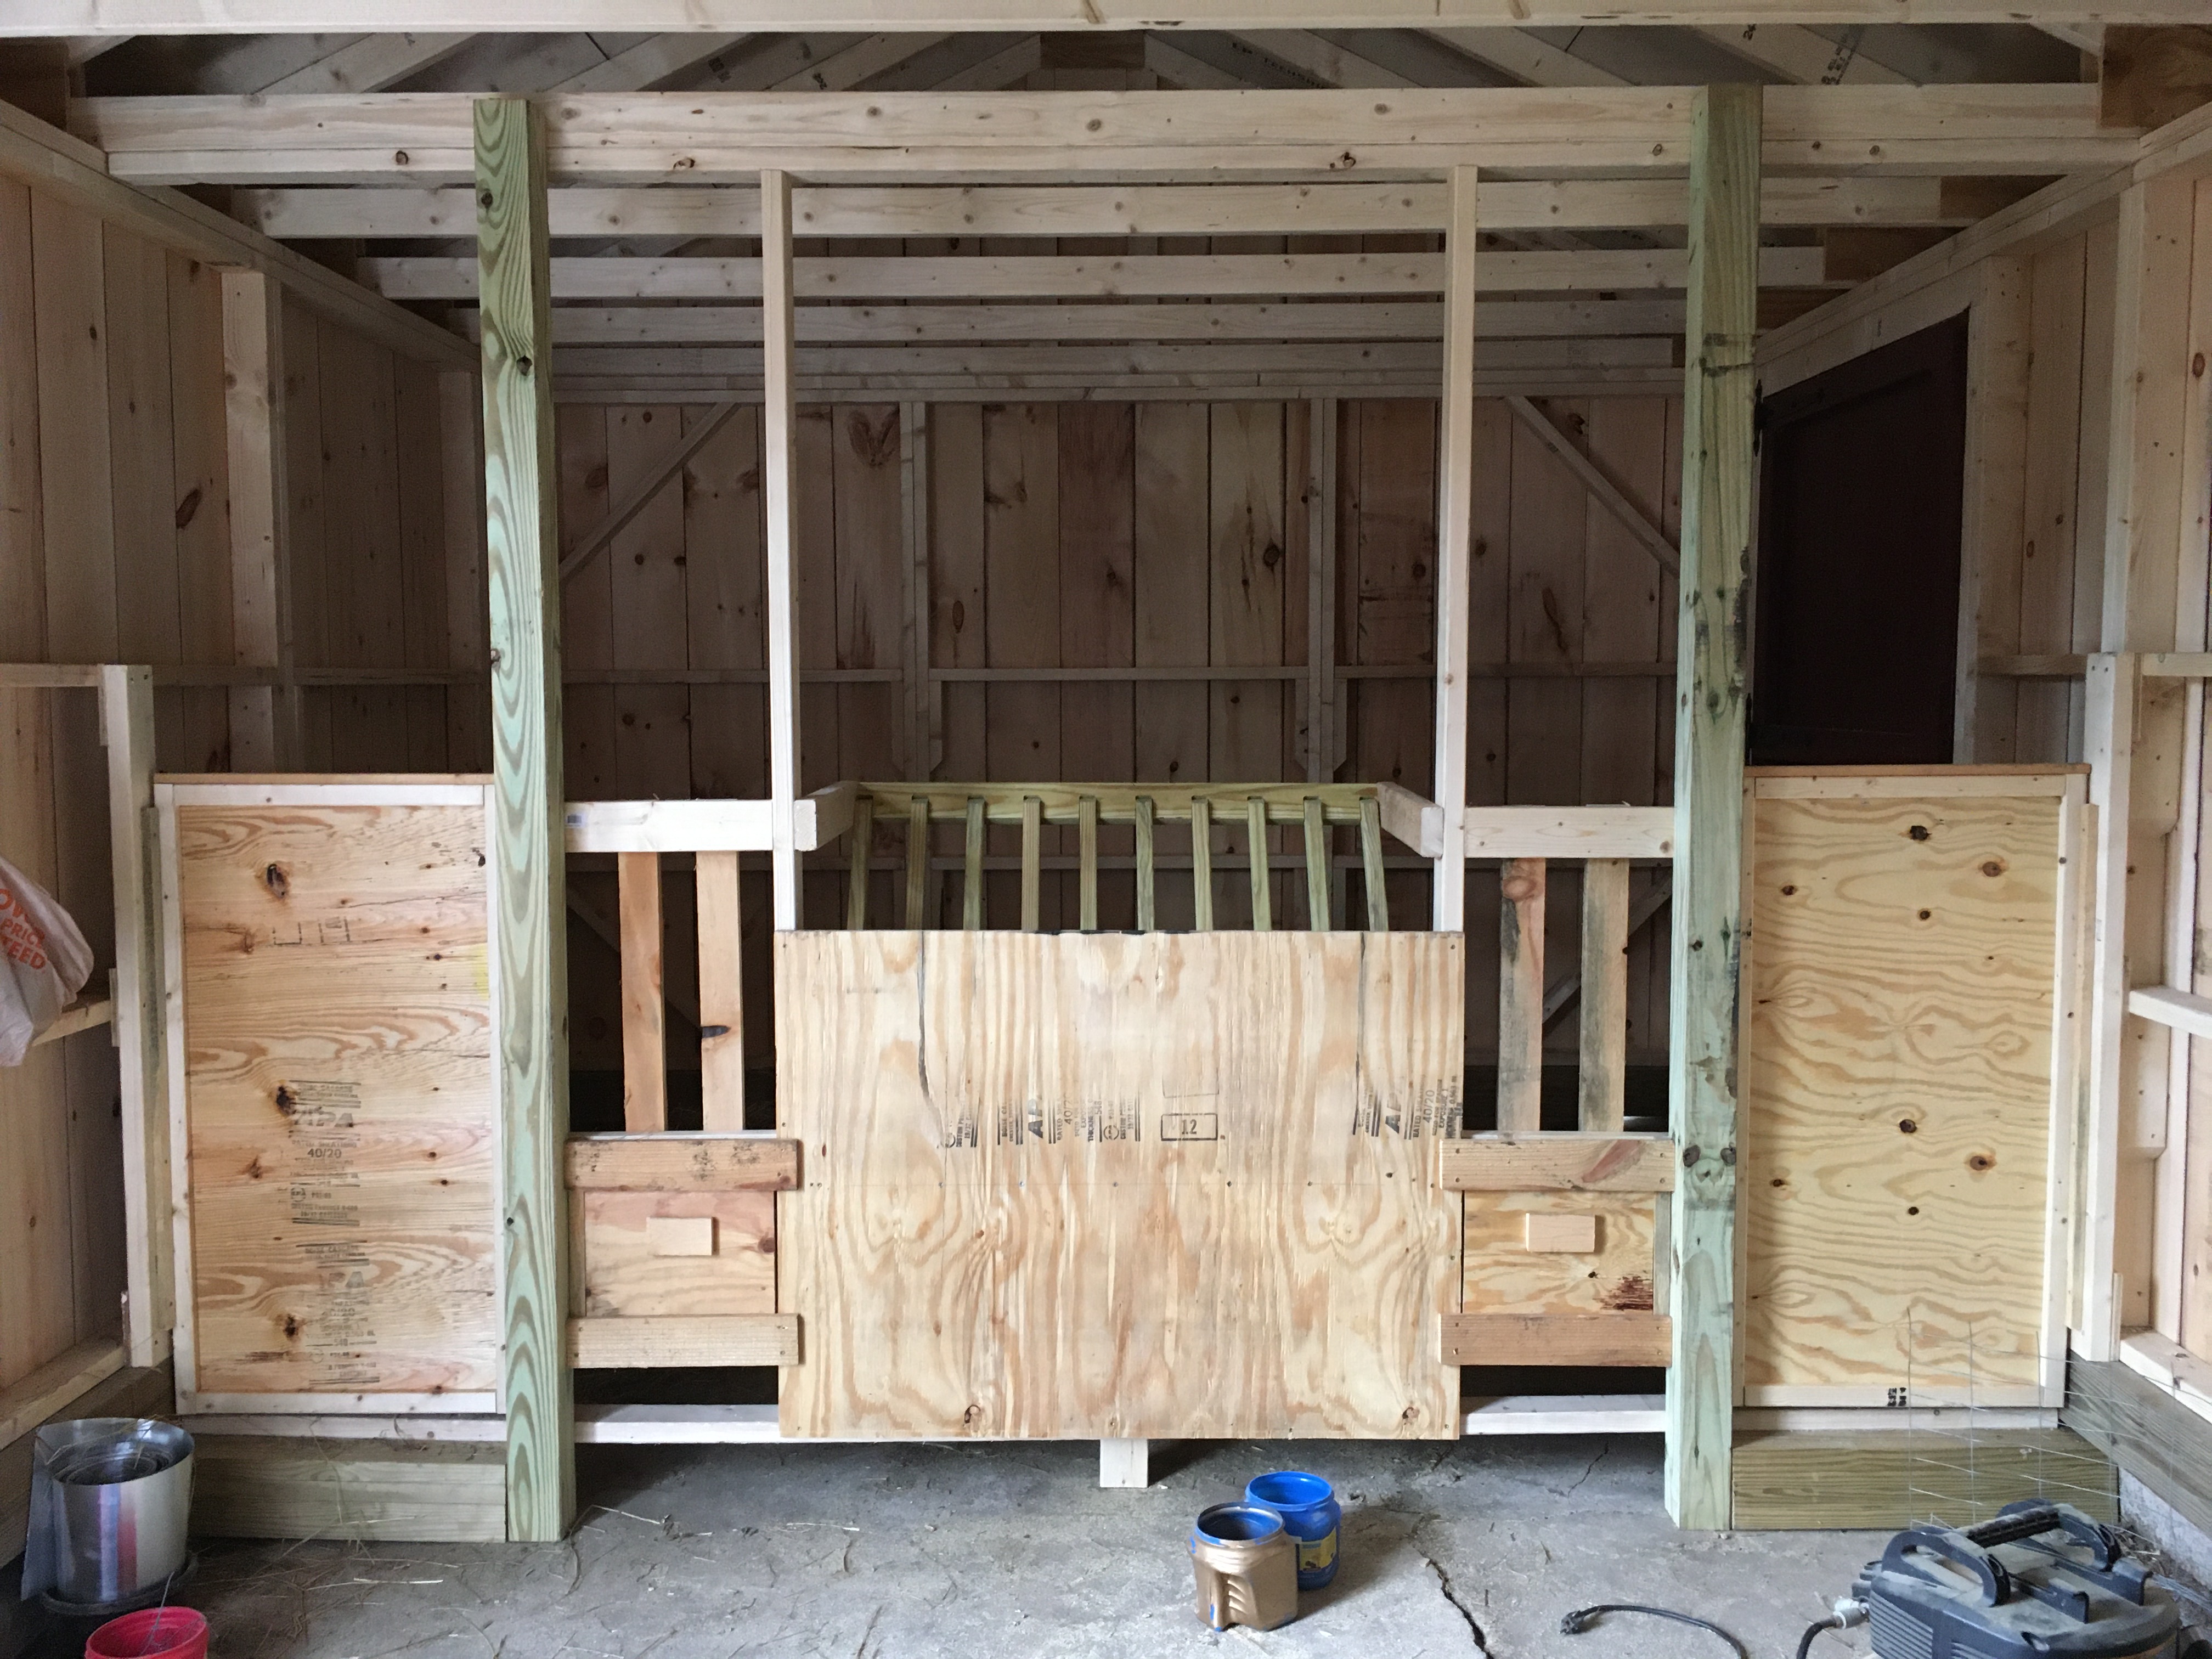
Pictured at the top of this post (and on the left below) is one of the new stalls from its outside. Pictured on the right below is the same stall from the inside. See those mineral dishes? They are not attached to the solid wall! Look closely at the left picture. You see those squares below the open, slatted walls? Those are the removable boards onto which the mineral dishes pictured on the right are screwed!

Stall from outside 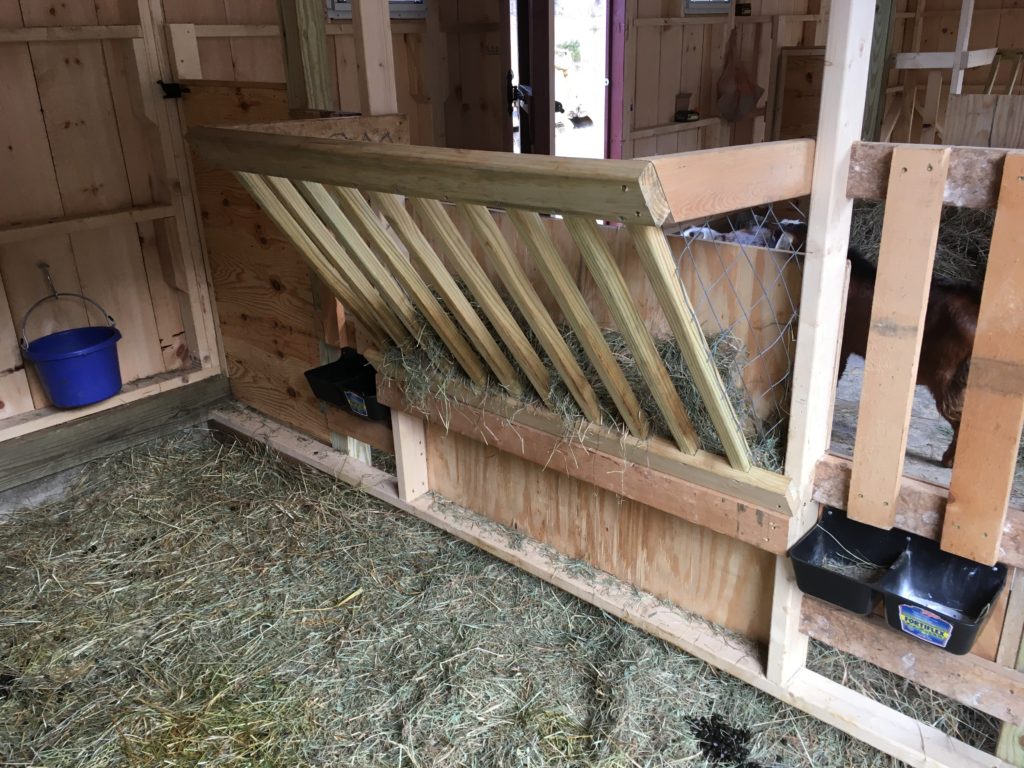
Stall from inside
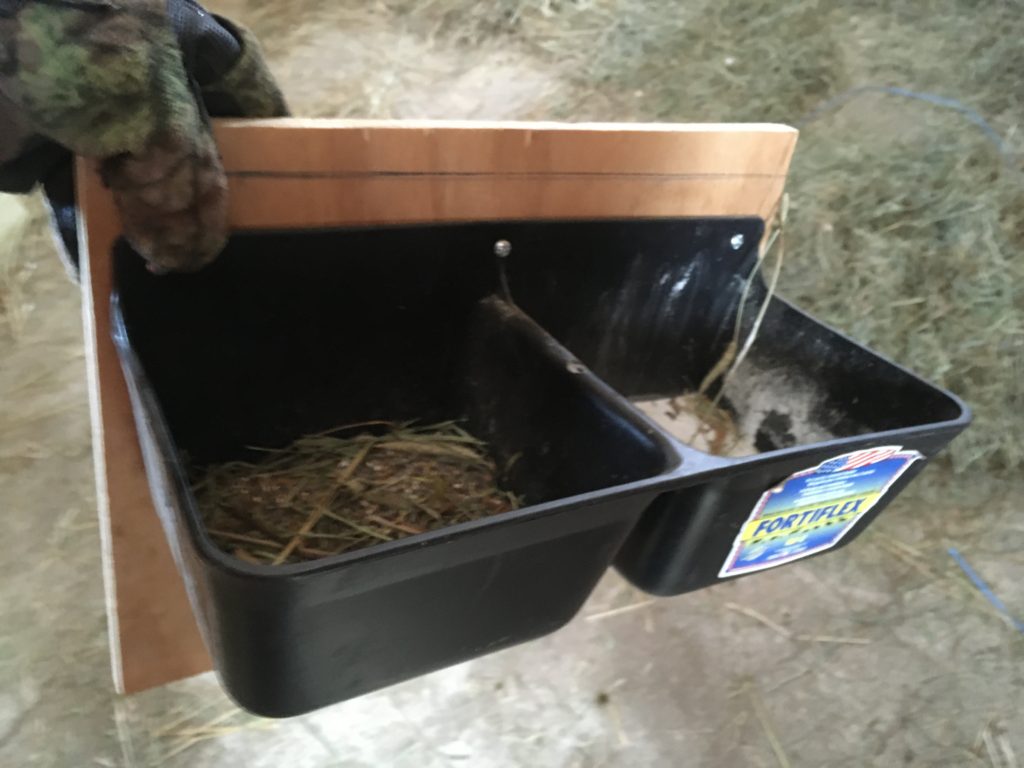
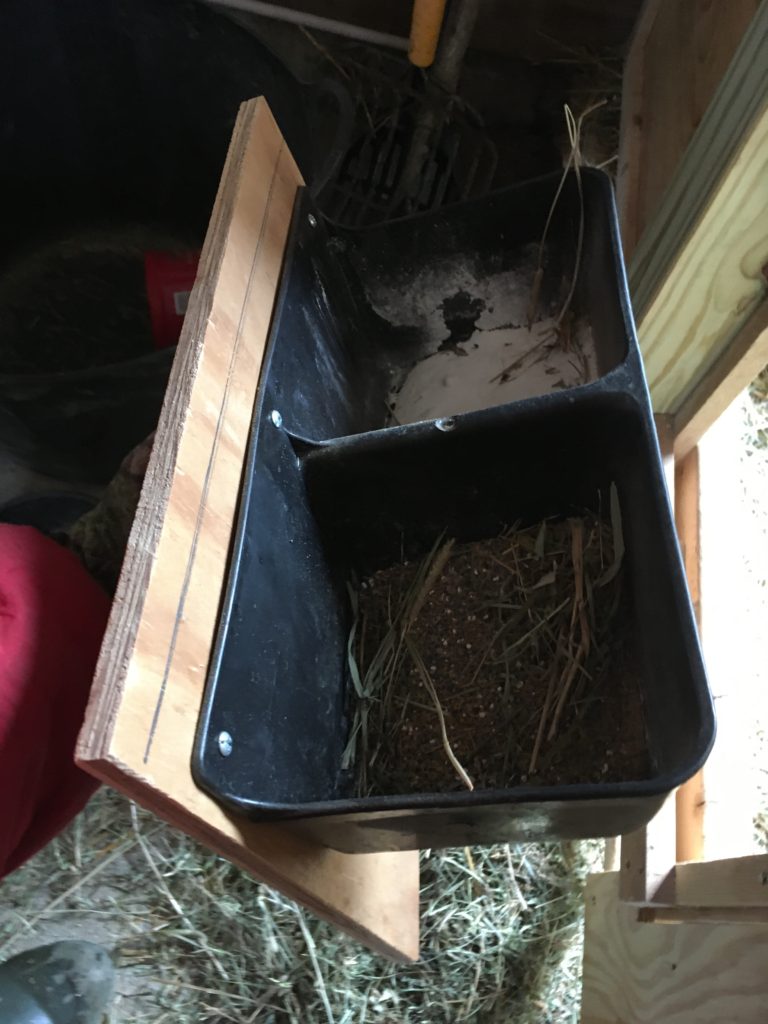
The feeders are attached to a piece of plywood, that then inserts into slots. From the OUTSIDE of the stall, I can grab the handle on that plywood, lift the plywood out of its slots, and thus remove these dishes to dump them, clean them with a hose, refill them—all the things!—and then put them back!
So far, the bucks don’t stand on them. If they start to do so, I’ll put on a canopy as above. But for now, I just am reveling in the ability to remove, refill, and clean these dishes.
As I said at the start of this post: it’s the LITTLE things that can get to you day after day. I’m glad I have one less little thing niggling me now! 😍
Below are more shots of this setup, just in case you want to duplicate it.