We are still perfecting our infrastructure here at Storybook Farm. Last year, we had three goat litters widely spaced apart, and it was not hard to portion off generous parts of our barn spaces for moms and babies to bond and grow until they were ready to rejoin the herd.
This year, from late February to early April, we’re expecting six does to deliver, and some of those does are due only days apart. We have been doing research on “jug stalls” — small stalls that does and kids can inhabit for several days to bond tightly before rejoining the general population.
In addition, we have really found a benefit in providing a creep pen for kids who have begun to eat hay (which they do at about 2 weeks old). In this post, you can read about the prototype pen we made to see if we liked (or needed) such a space, and we found we really did. However, the creep gate that we bought from Premier 1 was both heavy and expensive, and not the easiest to join to our existing stall partitions. It’s great, and we’ll probably use it outside, but I got the idea of making jug stall partitions that would convert easily to creep gates, so that jug stalls could become creep pens for any number of little kids, should we so desire.
Below are shots of the construction of our three identically made panels. Obviously, you can scale to your space, but for reference, two of ours are 5’8” long, one is 5’7”, and all are framed in 2” x 3” lumber, with 10-gauge, 2” mesh fencing, 4’ high (purchased at Home Depot).
Each has a door that opens toward the humans, with the fencing towards the goats. When desired, the gate swings back and can be locked open, and then 1/2” metal conduit is inserted in pre-drilled holes so that the gate opening becomes a creep gate. There are construction notes on each picture below.
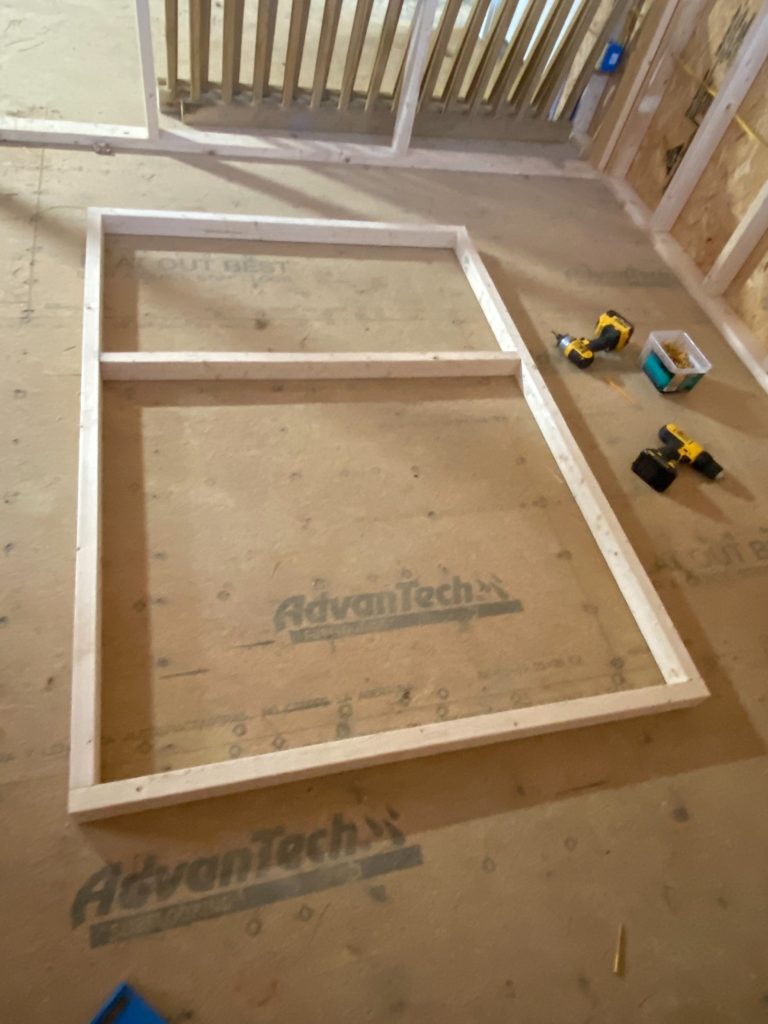
1. Begin the frame. 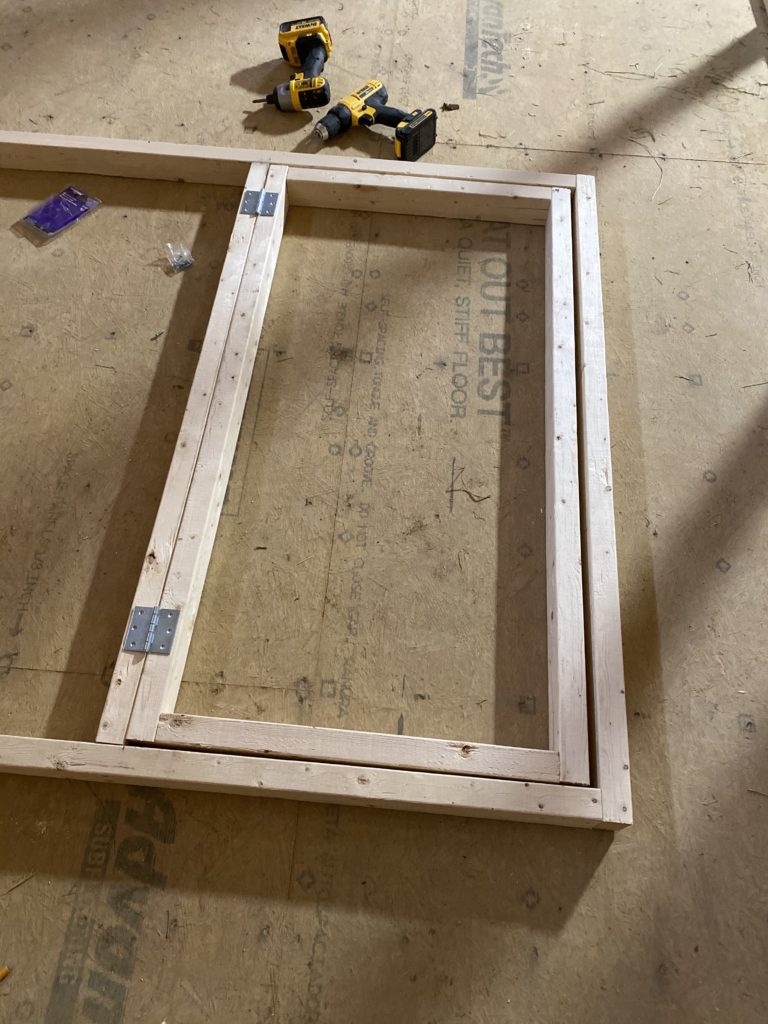
2. Frame door and hinge it. 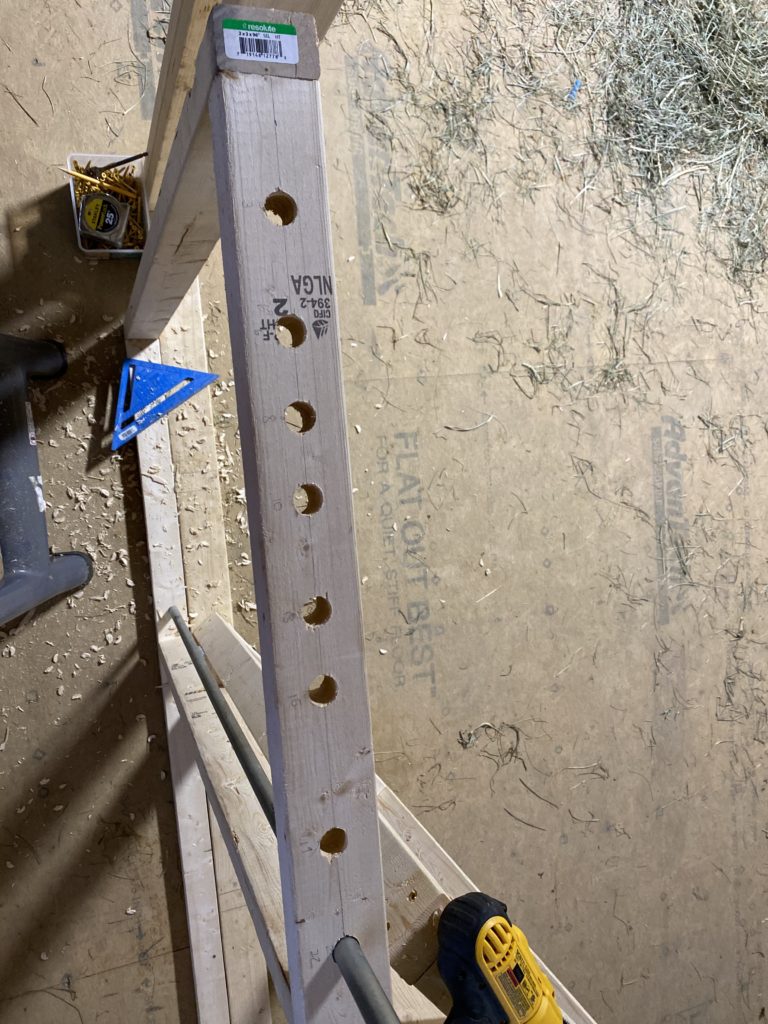
3. Drill holes top and bottom 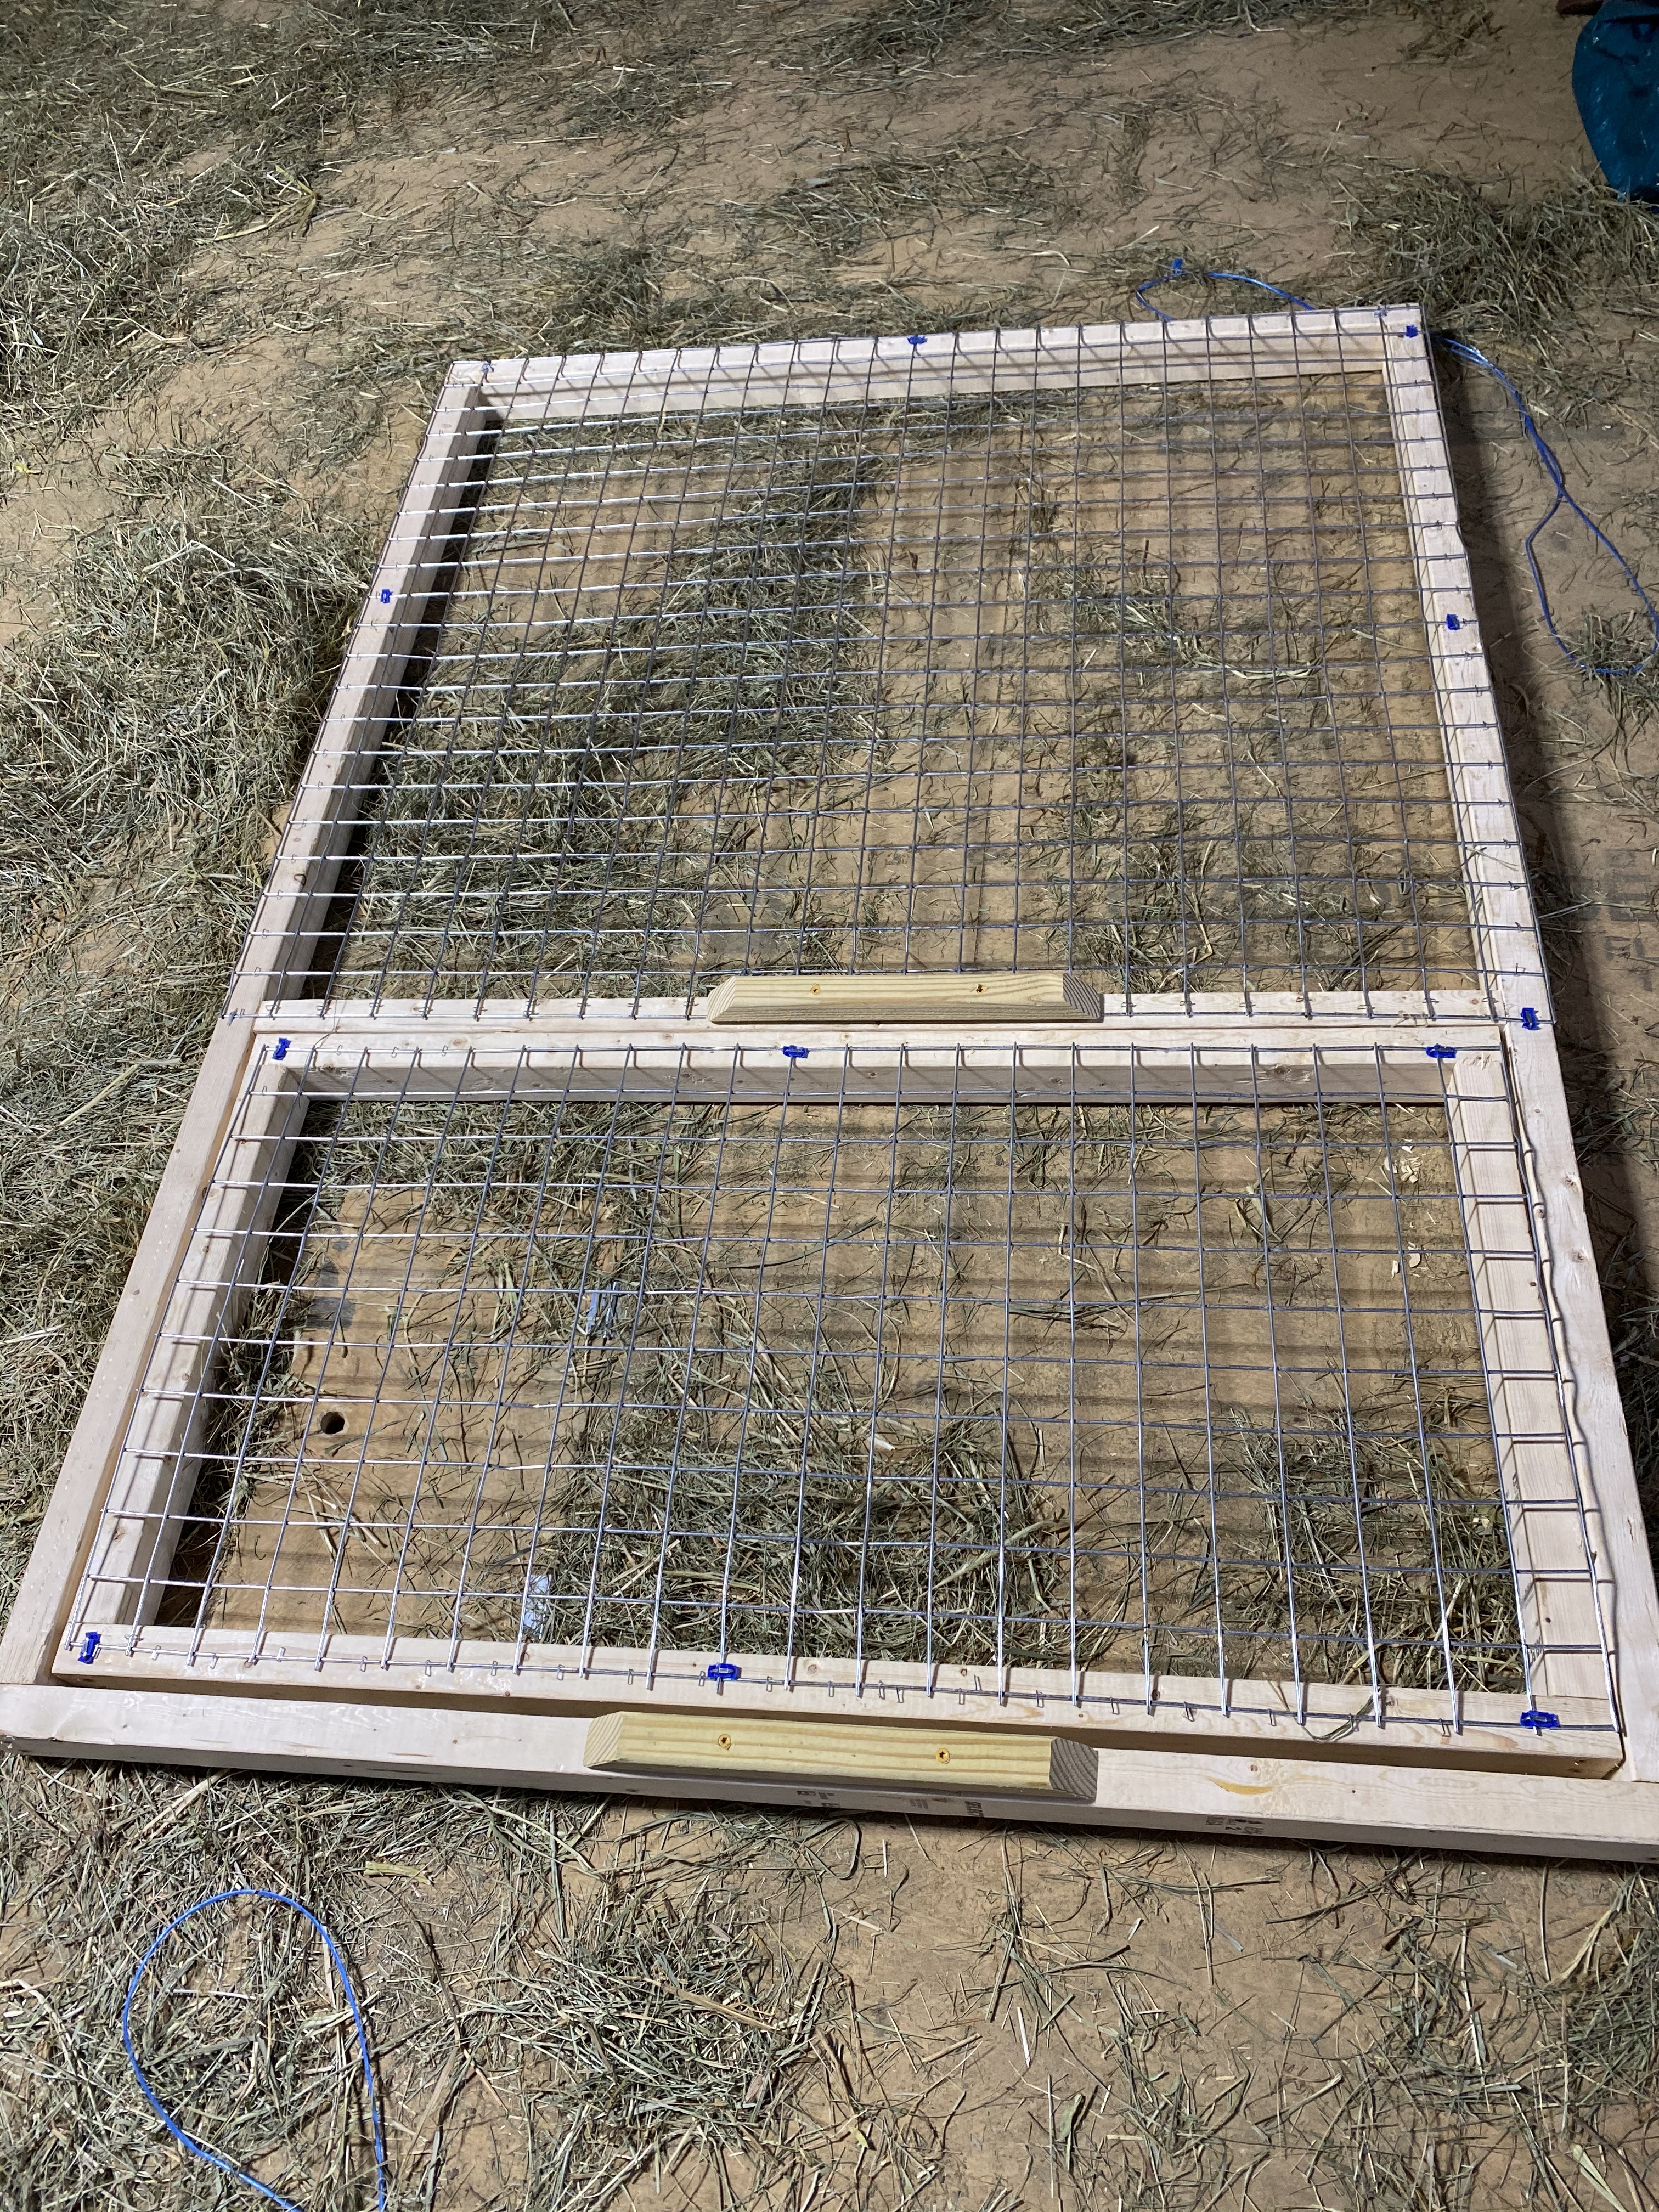
4. Put on wire w/staples 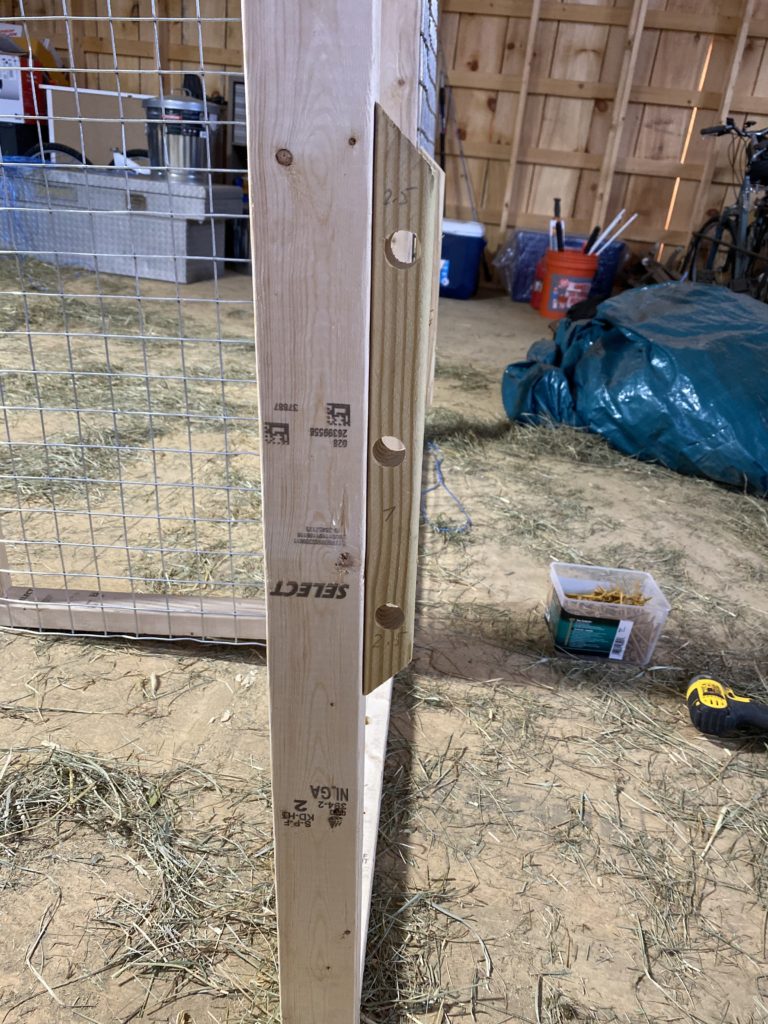
5. Drill holes for horizontal bars 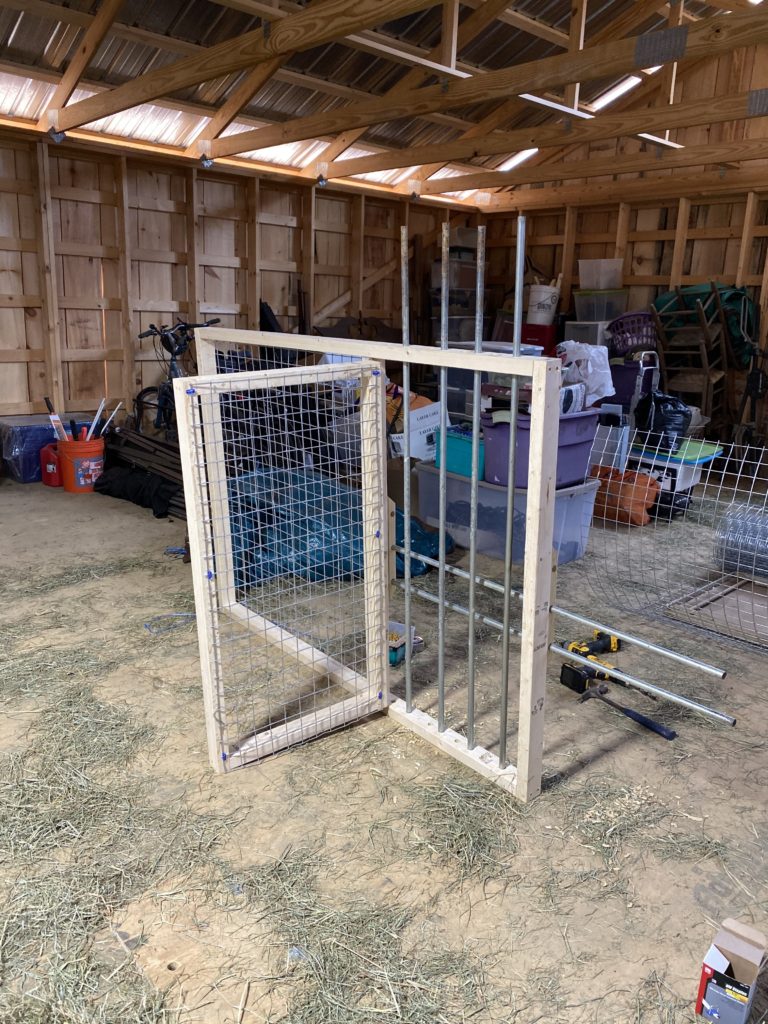
6. Fit conduit and trim to correct lengths
Step 1: framing. We decided to make the uprights the strong part, and so they are a full 4’ long. The horizontal pieces are 5’5”, giving an overall panel width of 5’8”. The center strut (to which we hinge the door) is 45”.
Step 2: frame the door and hinge it. (We made our door openings 24” wide; you can make them any width.) The only thing I’d note here is that I left a sizeable space (a good 1/2” or more) vertically between the overall frame and the door frame because the wood is “on edge” and I didn’t want it to catch when operating. The two uprights of this door are 44.5” (so as to leave 1/4” of space for it to swing top and bottom) and then the horizontals were 19”.
Step 3: If you’re using metal half-inch conduit (which is cheap and can be found in any hardware store) for your creep gate function, it usually comes in 10’ lengths. So, you’ll need a Saws All or hack saw to trim it. (In picture 6, we were just fitting it; we hadn’t trimmed yet).
You’ll need a 3/4” bit to drill the holes in the top and bottom of the frame, swinging the door out of the way first. Half-inch conduit is 1/2” interior; it’s wider on its exterior, so a 3/4” bit works well. In the beginning, I did not drill all the way through on the bottom of the frame, but then I thought of dirt and poops lodging in the holes, and decided to go all the way through.
Spacing is a matter of personal preference. We raise Mini Nubian kids, so I know that we wanted spaces that could be adjusted from 3” (can’t get thru) to 4” (can get thru when itty bitty) to 5” (lasts from about 3-8 weeks) to 6” (about the widest we’ll need). My measurements for these holes (on center, in inches) in a 2’ opening were as follows, left to right: 3, 6, 8, 10, 13, 15, 19, and 22.
Another trick on this step: drill partially through the top of the door frame on the ONE hole closest to its non-hinged, top edge. Then, you can use a piece of conduit scrap as your latch and save money and labor!
Step 4: Affix the fencing wire. We used regular staples on each division of the wire, and then reinforced those with some leftover insulated electrical staples (hence the blue plastic on them). We found that large, standard, barbed fencing staples threatened to split the wood.
Fencing was affixed on the goat side of the partition, because mine LOVE to scratch themselves on woven wire, so we wanted the frame to be buttressing the strain. In this picture, as well, note the pressure-treated two 2” x 2” pieces on either side of the door. They are on the goat side, and are 14” long. (You do not need pressure treated, but it won’t hurt to have it. That’s what we could find, so we went with it.) See Step 5 for how we use them.
Step 5: If you try to simply bore holes for horizontal creep gate restraints in the same plane as the uprights, they will butt into each other. So, you need to create a deeper plane. Hence these pieces. We drilled three holes in each one, after screwing them to the frame, which is more than enough for our purposes.
Step 6: Fit your conduit into all holes to check for alignment, and then trim them to size. In this photo, we have yet to trim.
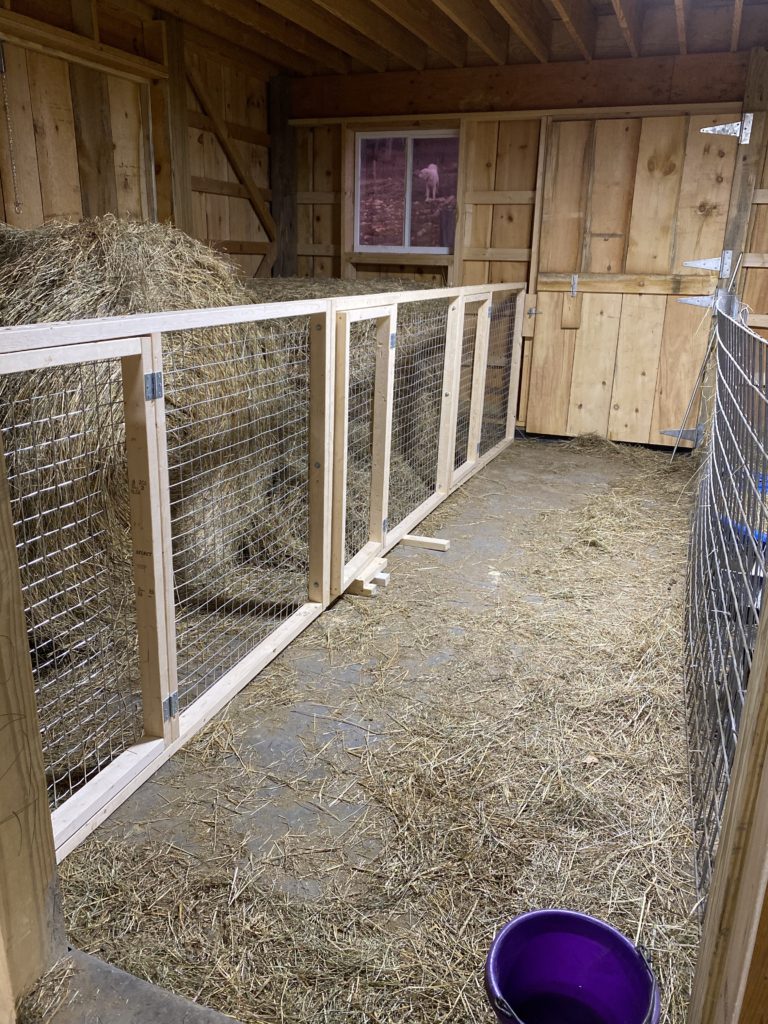
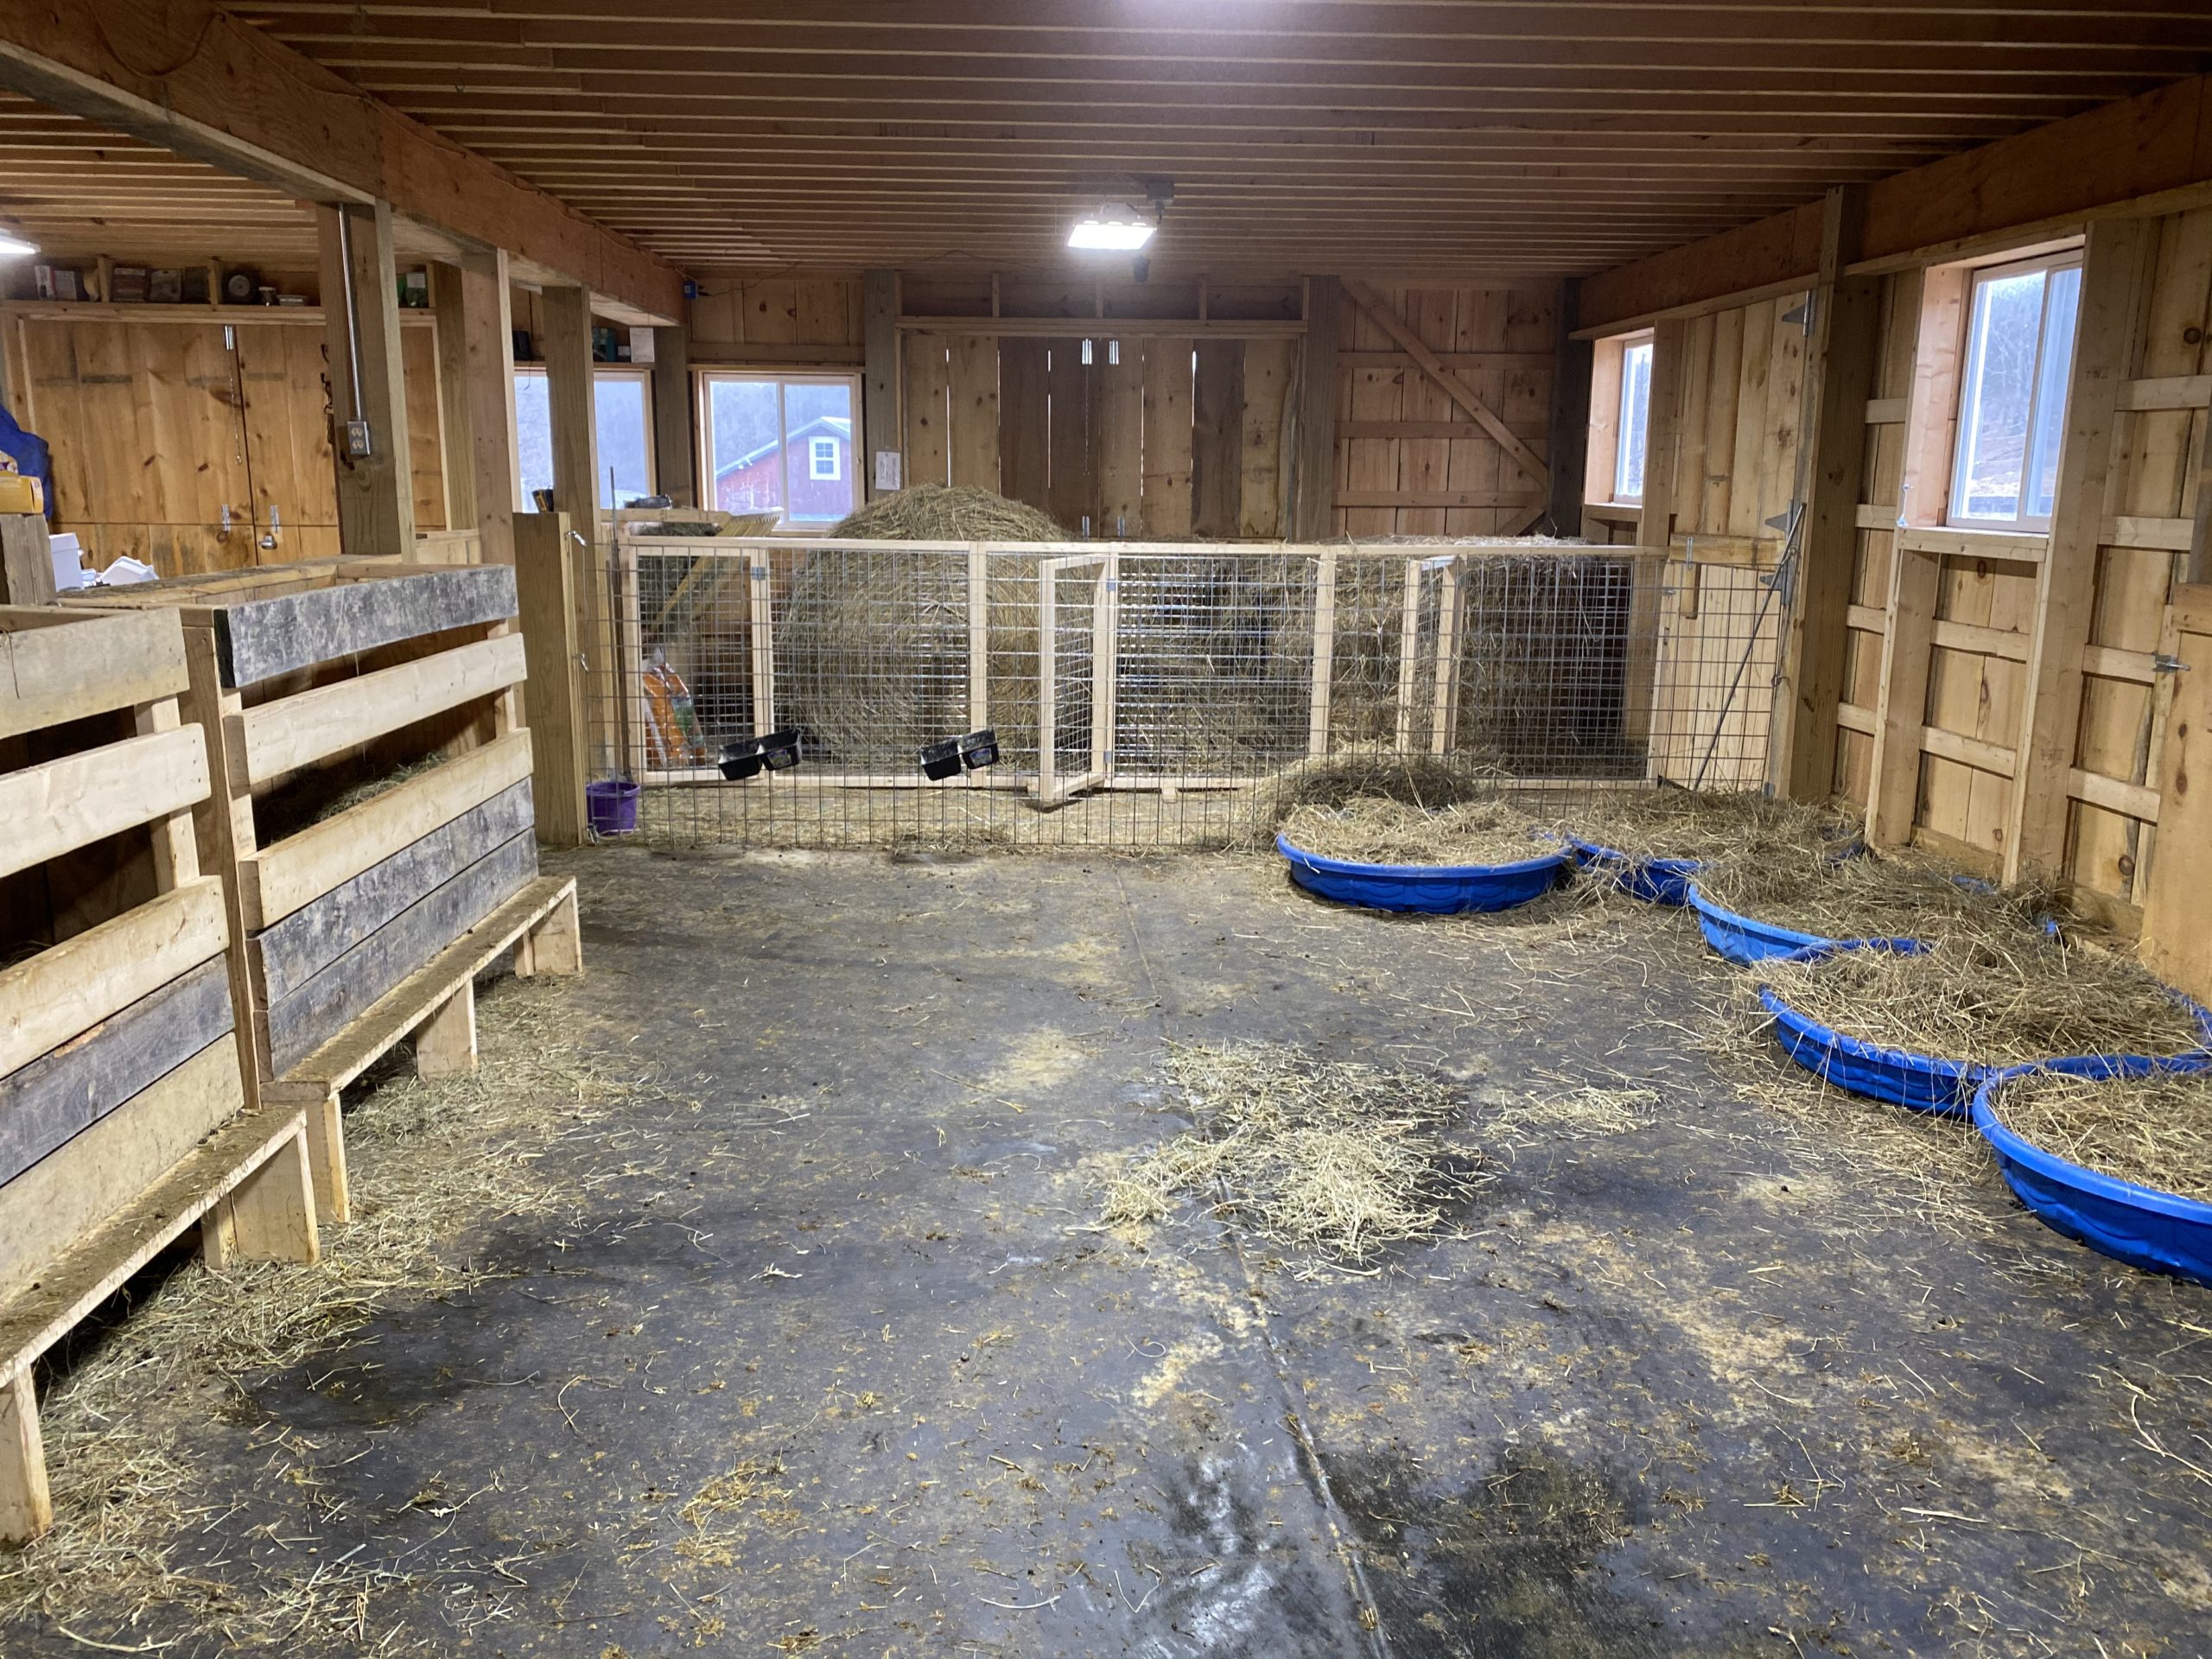
Final setup: above are our three panels, joined together with bolts and joined to each wall using eye hooks and conduit down thru them.
They will be divided with two 7’ lengths of the same 2” square mesh wire, to create three jug stalls and/or creep pens, depending on our stages of raising kids. We used bolts between the panels to join them together now, and (in keeping with our overall modular approach) to be able to take them apart when kidding season is over and we want the space for other things.
That door at the end leads to an area outside that we call “the playpen.” It is a kid-safe area outside where kids can go on nice days. The wire you see to the right divides this “nursery area” from the rest of the goat space.
Right now, we’re still storing round bales in the jug-stalls-to-be, but we’re going to clear that hay out this weekend and get the kid-warming huts set up, so stay tuned!