Posted on Leave a comment

Mangers: Trial and Error

We are new to goats in 2019, and whenever I (Marcia) am new to anything, my first step is to research a topic up, down, and sideways. In researching the best way to build a manger, I ran across several references to Harvey Considine, and his book that detailed a hay-conserving manger design. Sounded good to me! So, I looked it up online, watched YouTube movies of contented goats eating peacefully from them, and set out to build one.

The idea with this design is that the slats are far enough apart to enable the goat to step onto the step and reach her head into the manger and pick her favorite portions, letting the extra fall back into the manger instead of onto the floor, as with many other designs, where the goats pull out more than they can chew and thus waste hay falls to the floor.

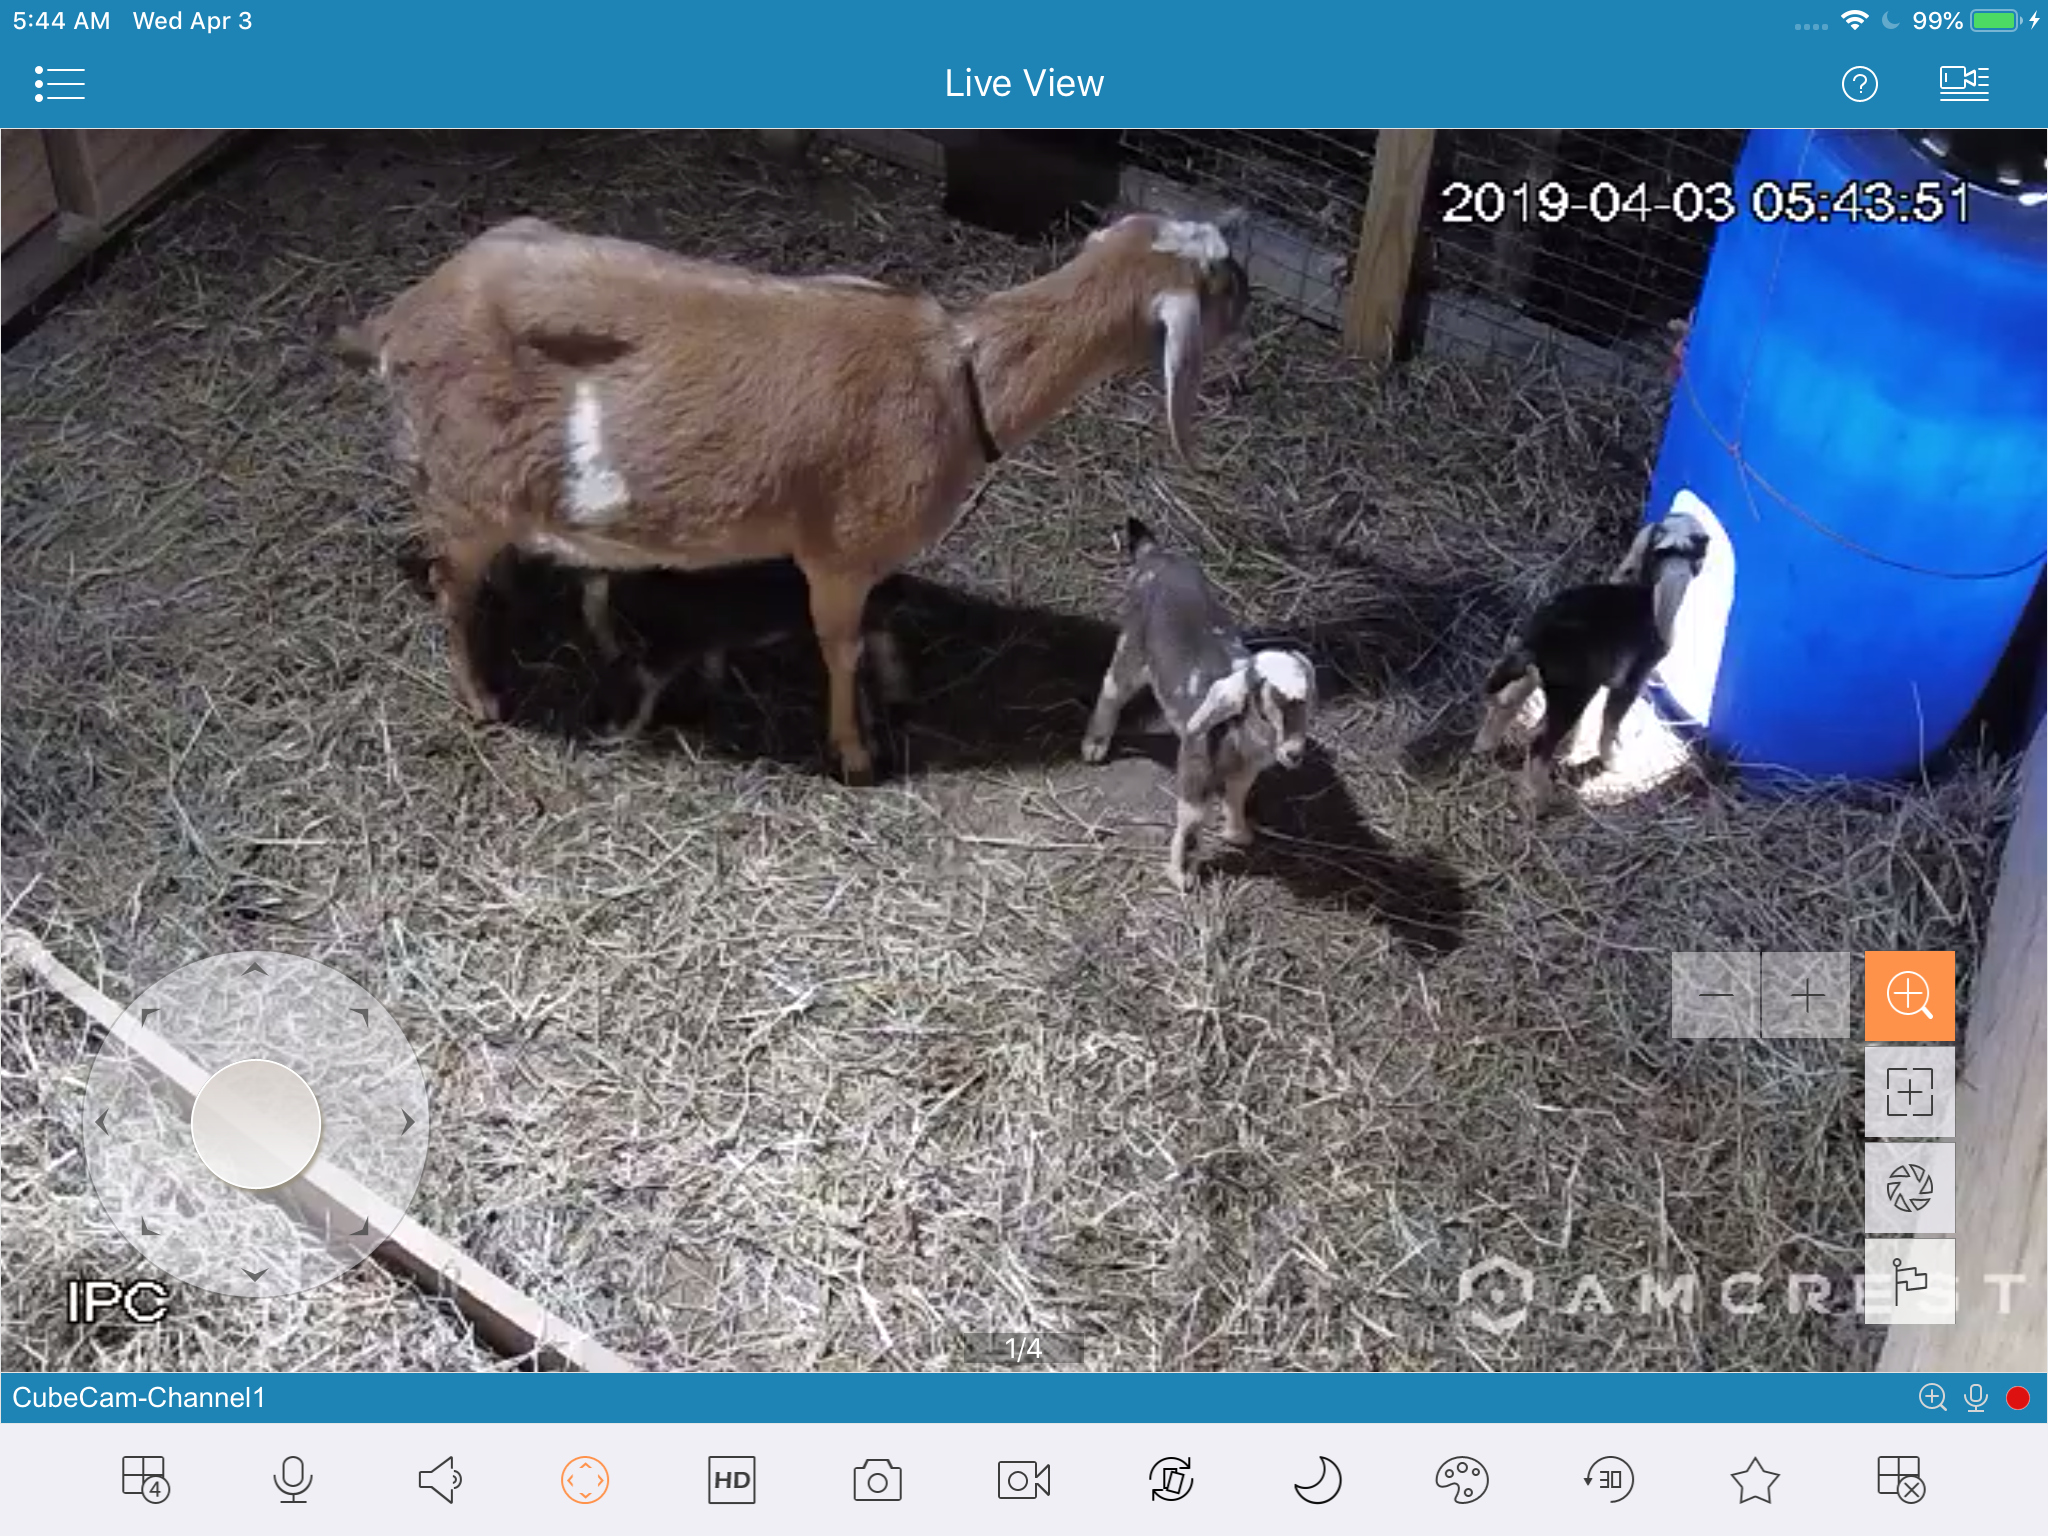
This is what mine looked like when I got done… sort of.

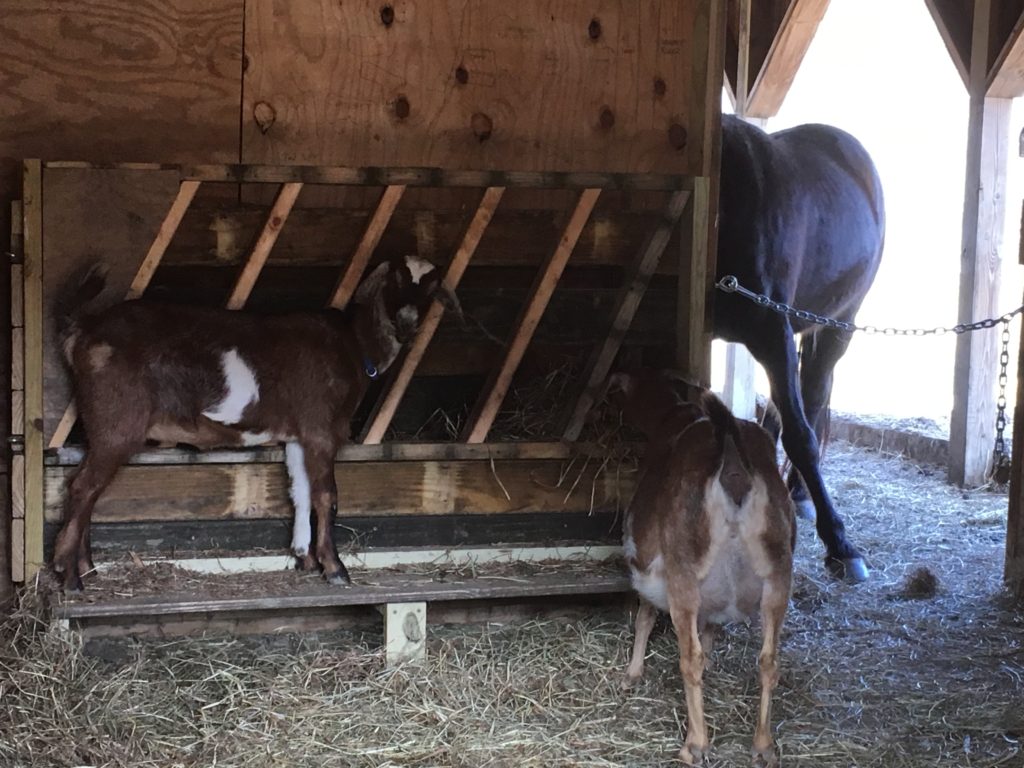
I say “sort of” because before that goat on the step on the left got here, it worked great. The goat on the right, a pregnant 3rd freshener (Buttercup) used it exactly as designed. She stepped up, put her head through the slats, and munched away. However, when the little, younger, slimmer, and more flighty goat (Milcah) arrived, she literally went through the slats and into the manger, then jumped out of it in her panic. It was amazing!

So, the picture above is actually the second revision that we made to this manger. First revision after Milcah came was to put 4” square wire on behind the slats. But that defeated the whole purpose of the design, and because the box was deep, and the front slats were not slanted back, the does could not reach much of the hay. SIGH!

So, we revised again, putting two boards horizontally behind the grill, as you see in that picture (if you look hard). That worked really well, until Rigel came. 🙄 Rigel was 9 weeks old, a handsome herdsire-to-be, and he immediately went through even this space and into the manger to hide from the older does. SIGH!

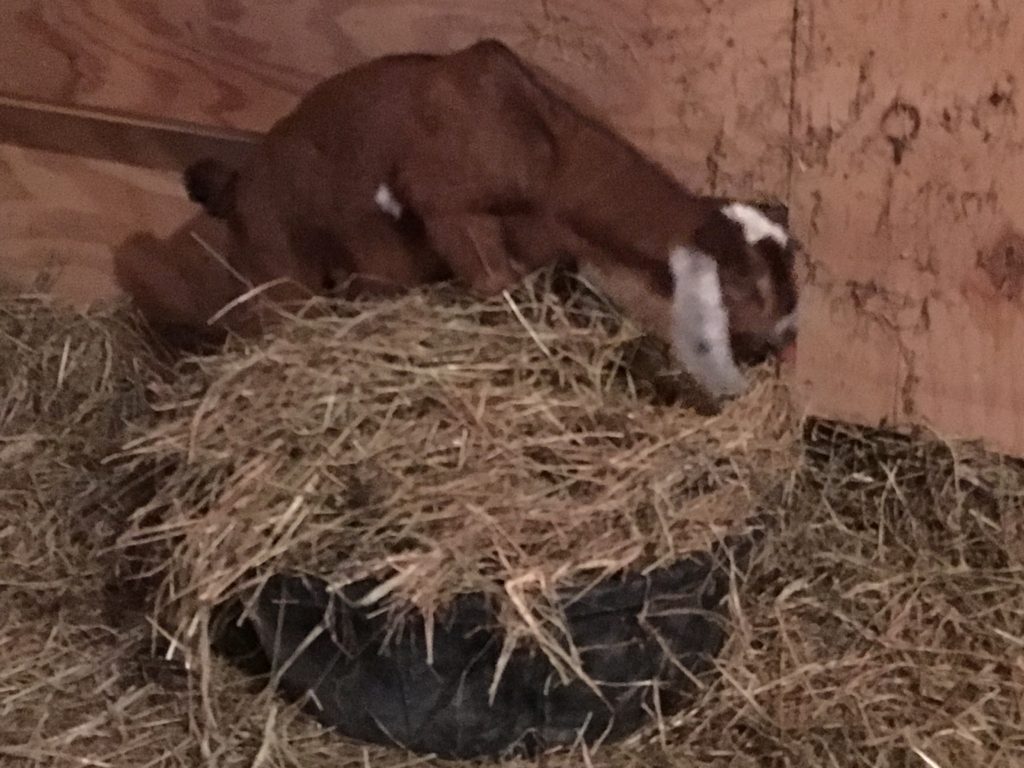
So, we took the manger out of the stall and tried other methods… a square wire basket of 2” X 4” openings mounted on the wall (same issue with not being able to truly browse the hay, so not eating it) and putting it on the floor in low feed tubs. Rigel loved that one. He could sleep in it! 😖

Rigel wasn’t the only one! By now, my Buttercup had given birth to three bouncing baby doelings, and once they were up on their feet, they were even more likely to get inside of our original (twice modified) hay manger.

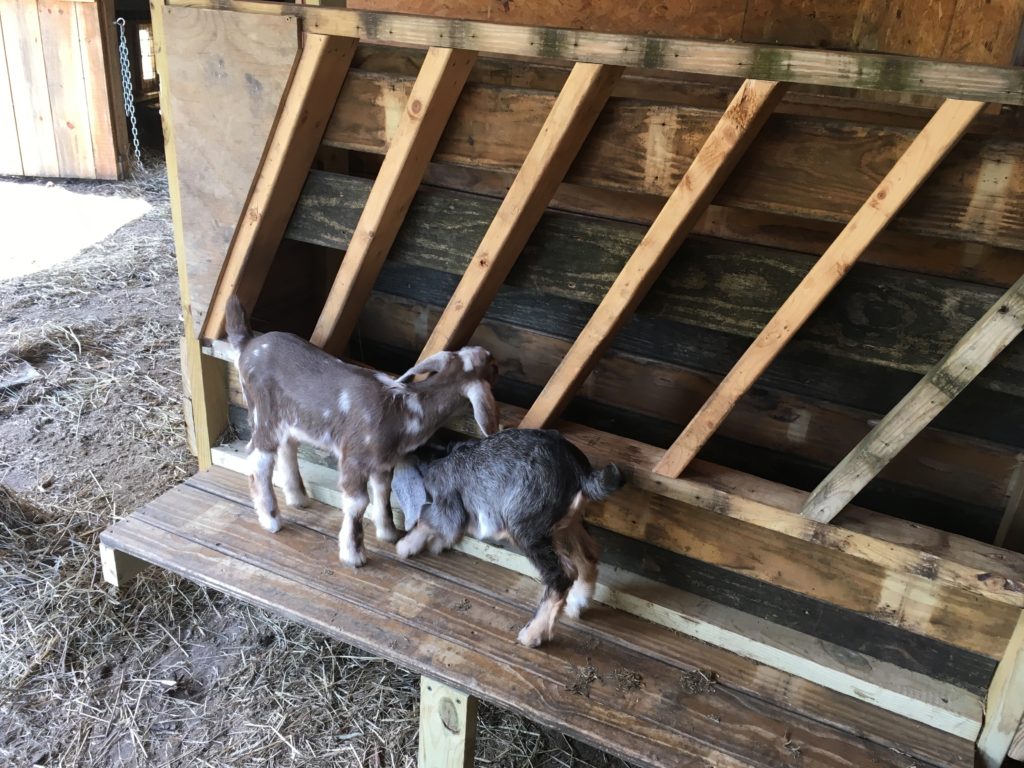
So, I went back online to my goat community and asked for help. From the replies to my post, I gained the inspiration to rework my manger with smaller slats spaced with 3” openings (too small for these little kids’ heads) and slanted from lower (back) to upper (forward) so that the hay would fall into the resulting tray.

Here then is our fourth revision (and we hope our final one, but stay tuned!).

Posted on Leave a comment

WiFi and Barn Camera!

If you have any animals in your barn, you know the feeling of wondering if everything’s okay, and yet not wanting to suit up to go check. We’ve all been there! If you breed animals, it gets worse around birthing time. And that’s just the middle of the night. Anxiety can escalate when “life” takes us away from our barns for hours or a day and we have animals due to give birth.

The Problem

I am a new goatherd, and my barn is 250 feet uphill from my house. In this photo, the red dot on the building at the top is my bedroom (under a metal roof) in my farmhouse. At the bottom of the picture is my barn, and the red dot is our kidding stall.

It’s cold on a mountain farm in early spring, when the kids usually come. Plus, I have real trouble getting back to sleep once I’ve suited up and checked the barn. When kids are due, I’ll want to check that bard 2 to 3 times between dusk and dawn, and then also during the day.

How I WISHED we could get WiFi to the barn… or maybe a baby monitor… or, well, ANYthing that would give me some peace of mind with kids coming soon.

My husband is tech savvy, but not particularly handy. We also didn’t have a lot of money to devote to this project. And, given the distance, metal roofs, and the fact that we don’t even have cell phone coverage here, I felt really dismayed. What if I would have problems with a doe kidding? I couldn’t even call anyone from the barn and have them talk me through it! 😬 The prospect really scared me.

So, feeling that I couldn’t be alone in this quandary, I made a post on the Mini Nubian Goat Breeders’ FB group. A wonderful man named CJ answered me and gave us the specs for the system we have now detailed below. I can now see and hear my barn through two cameras at any time of the day from anywhere where there’s WiFi. I couldn’t be more thrilled, and I’m delighted to share the details with you!

The Solution

NOTE: NONE of the links below are affiliate. We’re not making anything on these links.

THREE KEY COMPONENTS: We ordered three items from Amazon. They were:

Amcrest ProHD 1080P WiFi Camera 2MP Camera. This camera will pan 360°, tilt 90°, allows for 2-way audio, and allows digital zoom 4X. So, I can see and hear everything going on in my barn. The night vision is super sharp!

Note that there are other camera options that are sealed; in a dusty barn, this camera may have a shorter battery life. Price at this writing: about $60, with free shipping from Amazong Prime.

(YouTube video on setup here.)


Ubiquiti Nanostation Bridge. Think of this as an invisible cable that carries the WiFi signal from point to point. These have to basically be placed in a line of sight from eachother, but their published reach is 5 kilometers! Our 250 ft. distance was a piece of cake. These were $127.

(YouTube installation video here.)

WiFi Access Point. This is the device that plugs into the bridge and then provides WiFi for the entire barn area. (If you don’t already have WiFi in your house, get two of these.)

In our case one of these broadcasts a great signal for several acres, which means I now have cell phone over WiFi, and can talk to goat mentors if I get into birthing difficulties! This was $82.

(YouTube setup video here.)


Extras you’ll need to purchase or round up:

ETHERNET CABLES: Each of the items above came with a single, short Ethernet cable. It turned out that one can need two cables per item. We had several short Ethernet cables lying around the house, and wound up using four of them. If you need to run cable through your house, you will have all the materials you need to make your own patch cable. If you don’t, you can buy patch cables here. They cost about $2 each and you can get them in bundles of five.

These purchases were all we needed for the digital connection from house to barn. But we had to do a little bit of wiring because our WiFi is on the wrong side of the house for a connection with the bridge. For that, I had to buy 100’ Ethernet cable and two special tools: a data tester and a cable crimper.

Step by Step:

Here are the steps to complete the digital connection, without the details for running cables from one side of the house to the other, which involves holes in walls and crawling around in the attic. 🥺

  1. Open the WiFi extender, also known as an “access point.” It looks like a smoke detector. If you have WiFi in your house, plug it into your WiFi router, using the “power over Ethernet” powerpack. Plug a computer into the WiFi router, using a patch cable. The included directions will tell you how to configure the WiFi extender. If you don’t have WiFi but do have Internet, you will need to watch this YouTube video to see how to use it to provide WiFi in your home.
  2. Unplug the WiFi extender from the WiFi. We won’t need it again until we set it up in the barn.
  3. Open the camera package. Follow directions and plug it in. Follow more directions and download an app to your phone or tablet. Follow more directions to activate the camera. Make sure that you associate the camera with the WiFi you plan to use on a regular basis (we have more than one WiFi connection at our farm, so the camera is on the one Marcia routinely uses).
  4. Open the Bridge package. There are two identical devices. One will be set up as an “access point” at the house; the other will be a “station” at the barn. They both are designed to be zip tied to a vertical pipe. We used 1.5” PVC to mount it—see picture below.
  5. Plug one of these two identical devices into the house WiFi router, and follow directions to set it up as an access point. Give it a unique IP address (I used 192.168.1.21, and suggest you do the same). I marked this number inside the plastic housing with a Sharpie so I could tell them apart later.
  6. Unplug that and plug in the second device. It wants to be set up as a “station.” I used IP address 192.168. 1.22 and marked it on the inside of the removeable plastic housing that encloses the connection points.
  7. Plug the “access point” (device 192.168.1.21) into your WiFi router with a cable and point it at the barn.
  8. Take the “station” (device 192.168.1.22) to the barn and point it at the house. Plug it in!
  9. Plug the WiFi extender into the “station” at the barn.
  10. If everything went right, you should now have WiFi at your barn. (If it didn’t, leave a comment below and we’ll try to help if we can.)
  11. Plug the camera in at the barn. It should work.

Here are pictures of the installed hardware:

This is the “bridge” unit, installed under the eaves of the farmhouse. The cable goes up through the soffit, across the attic to the other side of the house, and down through the wall to where our WiFi router lives.

Post Script

We just had our first kidding at Storybook Farm: God blessed us with three beautiful doelings. The feature picture above is during their first night. I was SO glad to be able to peek at them as I awakened in the night to see how they were doing! Barn cams rule!

If you were helped by this post, please know that we LOVE to help others find their path with goats. We offer a monthly newsletter that includes free information (and recipes). Sign up using the form below if you are interested!

[mailerlite_form form_id=1]