Part 1: The Rubber Flooring
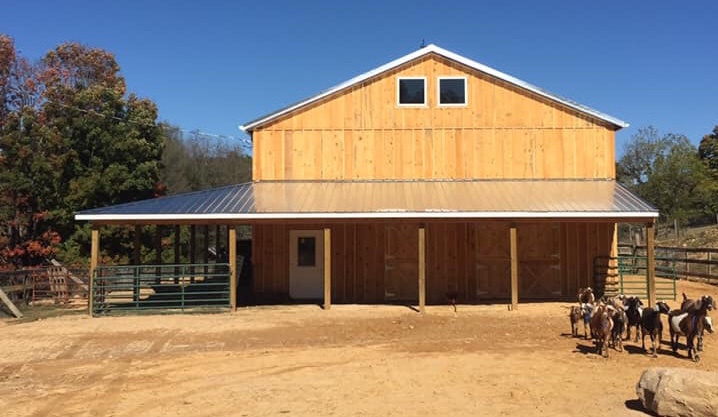
Well, we started in the second week of July, and we moved our does into their new space on Saturday evening. They’ve now slept in their space for three nights, and already we’re making tweaks and modifications. But, as my son Mike is fond of saying, “no plan survives first contact.” This post is mostly about the animal part of the barn.
Let me share some pictures of what we now have, and explain as I go what we plan to modify. This is PART 1. If you want to see our milking parlor and cheese making room, click HERE.
NOTE: I do all this in the hopes that some of the ideas that I’ve had will inspire you with ways you can maybe solve problems or improve your own setup. As goatherds, we’re always learning, right?
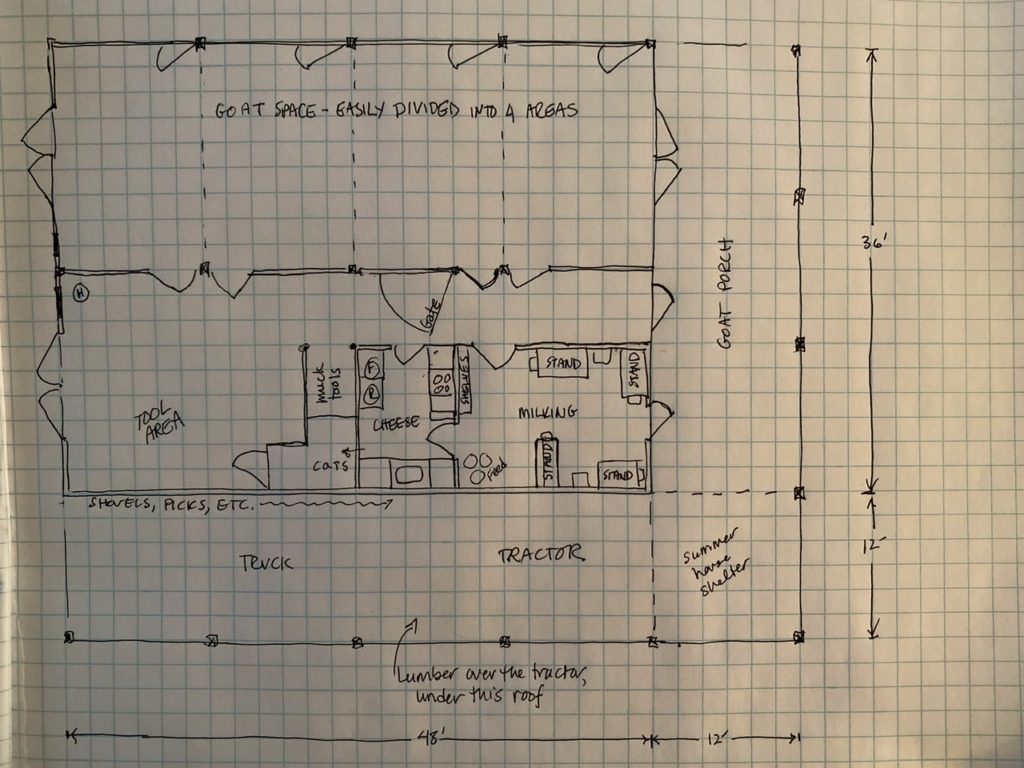
Below is the floor plan of our barn, just to orient you. This post is about the Goat Space, near the top of the drawing, where we have an 18′ x 50′ open space. This space can be divided or left open as the seasonal needs of our goats dictate (see more on this here).
Choosing, Prepping For, and Installing the Floor
I have had goats on dirt floors, and it’s not my preference. I don’t like how much pee gets into the dirt, and how stinky it gets, and how ruts form that become veritable ponds of pee. So, I opted for a single sheet of rubber roofing that covers the entire goat space: 17′ x 47′. No pee gets thru!
Rubber roofing is WAY cheaper than horse mats. Goats are WAY lighter than horses! So, we opted for the heaviest duty roofing material that we could find. It is only about 1/4″ thick, but it seems to be plenty thick for our little goats (non of whom is more than 120 lbs.).
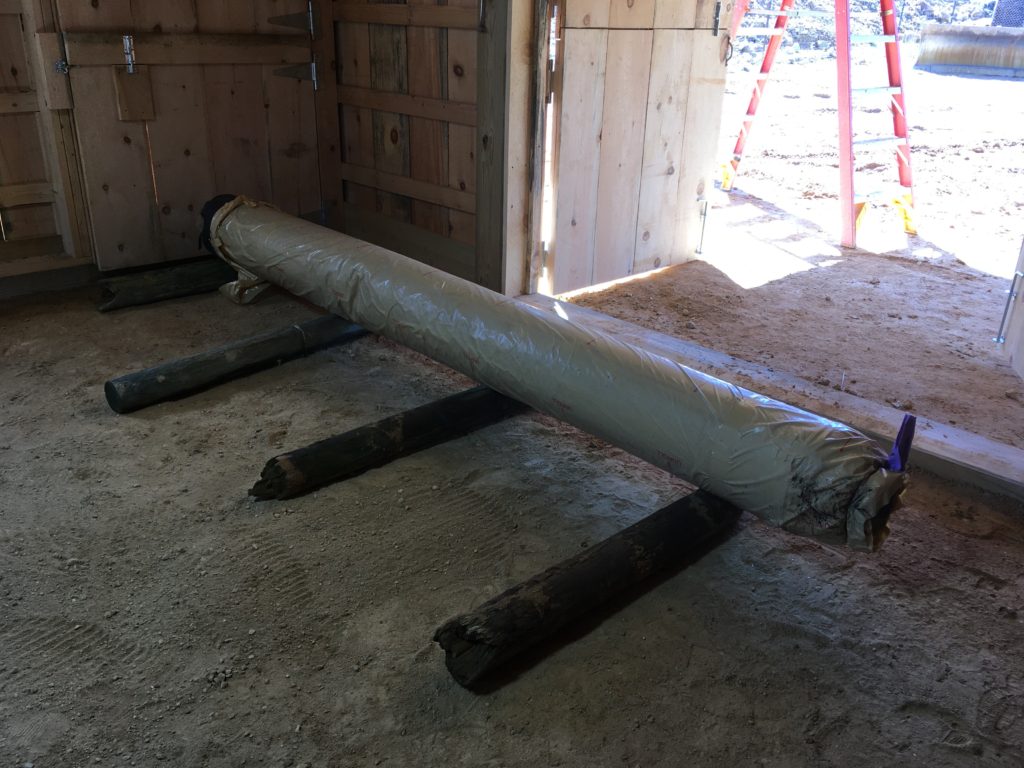
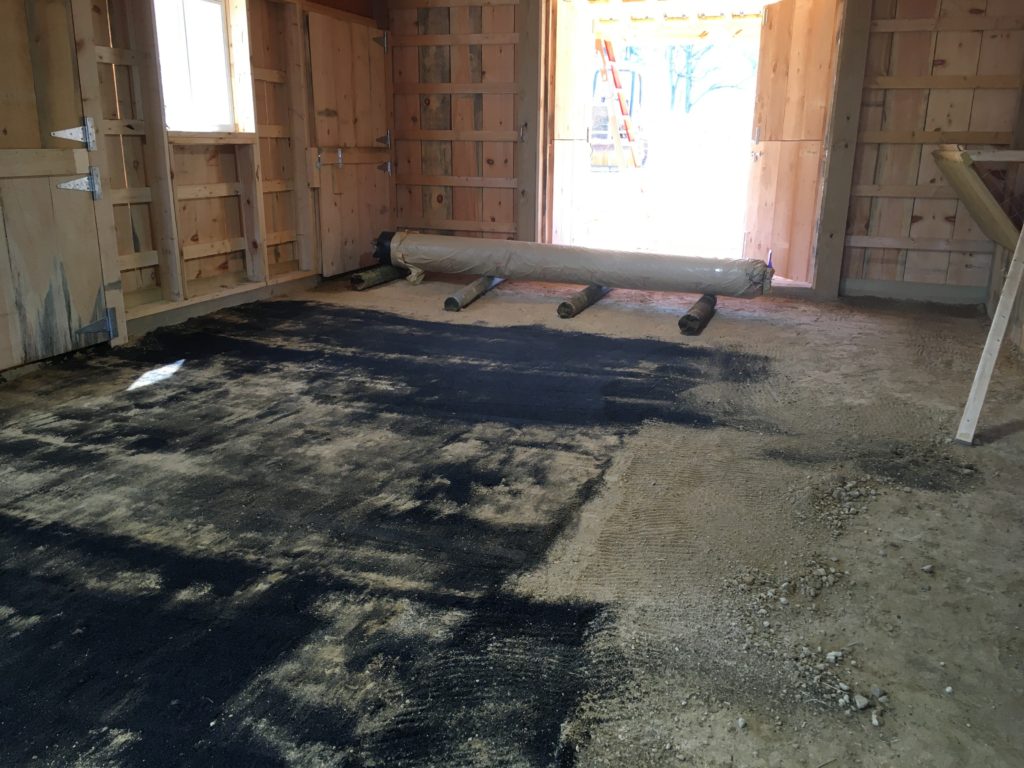
The first step was moving the roll of rubber roofing. It was NO JOKE. This 50′ x 20′ roll (doubled in half so the roll was 10′ x 50′, weighed at least 800 lbs. I brought it home in a pickup truck from the roofing company, but from there, it took three strong men to muscle it from the truck to the rollers, as you see in the first photo below.
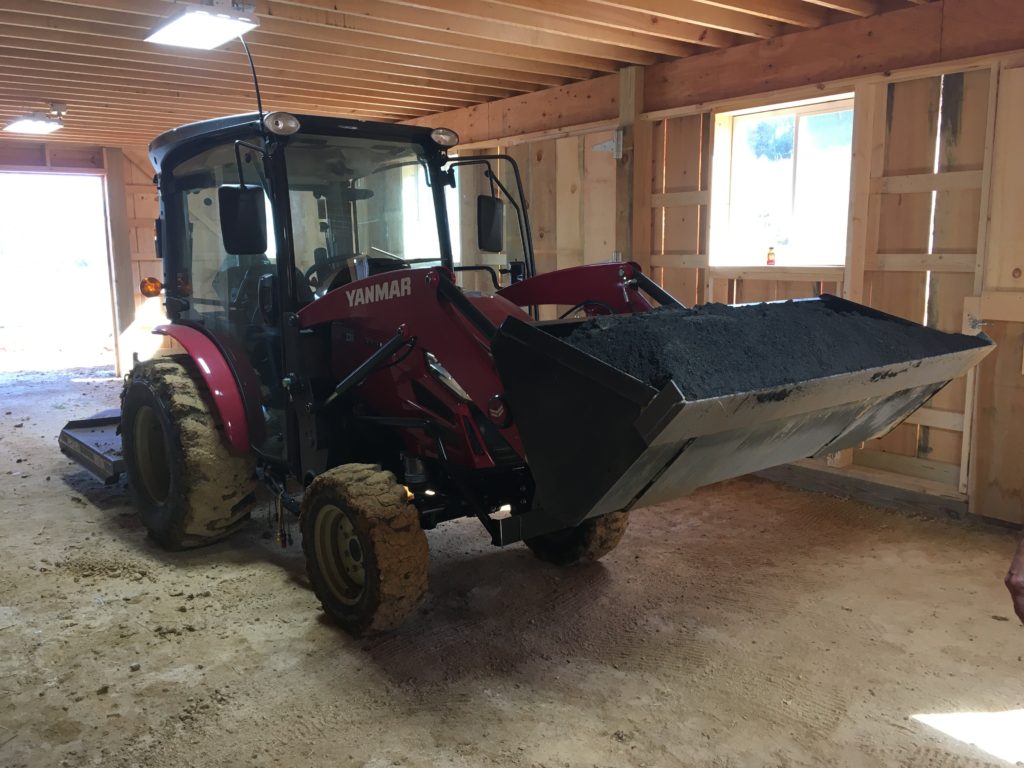
Then, we had to prepare the underlayment. Scott spent about two days doing this. We first raked the entire area with a garden rake, removing stones and carting them off. Then he began to level it with a 2 x 3 board from front to back on the left side (in front of the roll). I meanwhile drove our tractor with 5-6 loads of black sand. We used it to continue to level the area, filling in divots and smooting the area over and over.
Finally, (last picture) we unrolled and (with the help of visiting friends) we all got into those four doorways and PULLED together to properly position the left half of the entire piece.
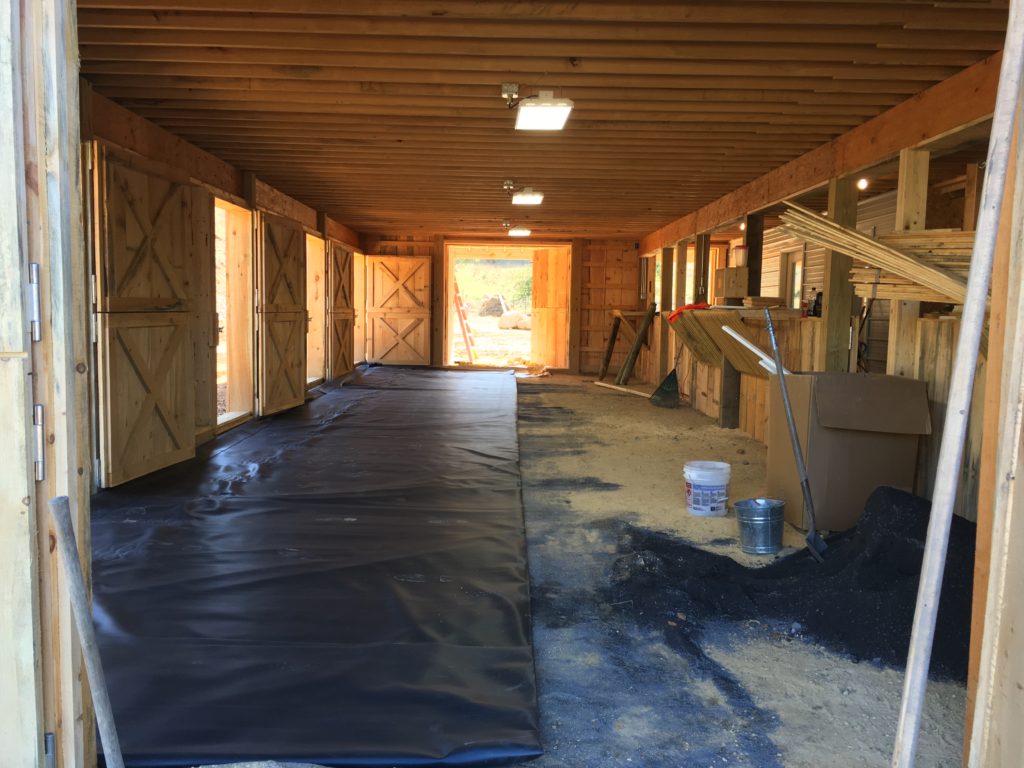
We then did the same exact process on the right half of the area.
Bring in the Does!

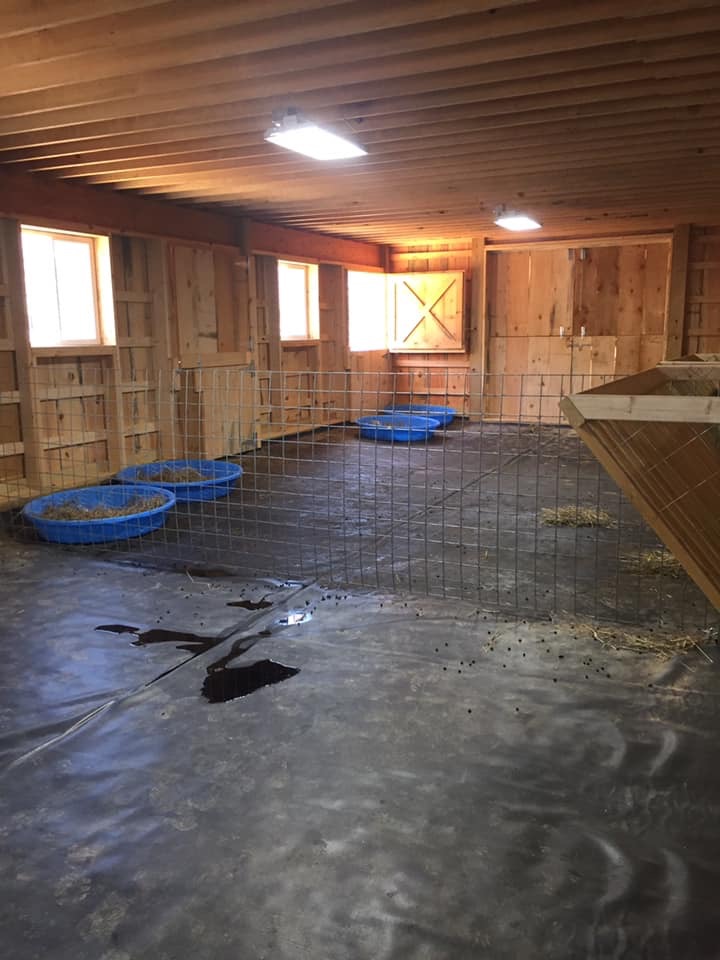
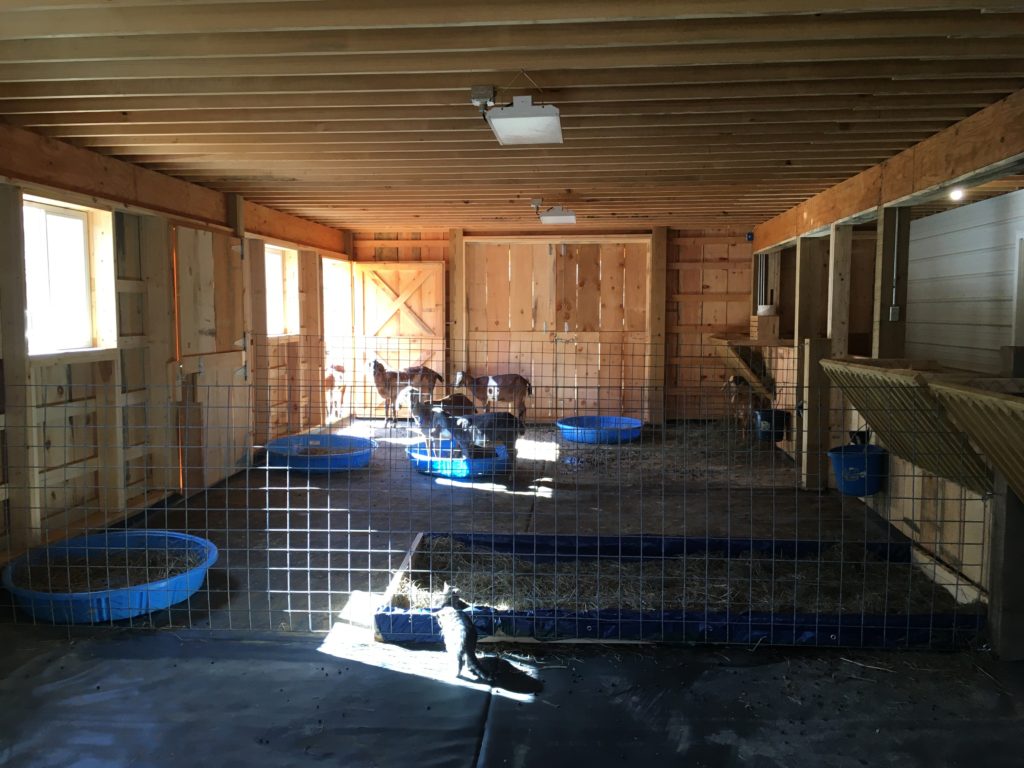
Here is a shot of the does exploring their new space for the first time on Saturday evening (10/12/19). In this first shot, I’m standing on the right side of the space, looking towards the exterior walls.
What you also see here, if you look closely, on the left, is a goat panel divider. More on this later.
In the picture below, I’ve reversed direction to be looking towards the interior of the barn. Same space. Obviously, we have built in mangers and water buckets. There are four doors here as well. They all lead into the center aisle beyond that half wall.
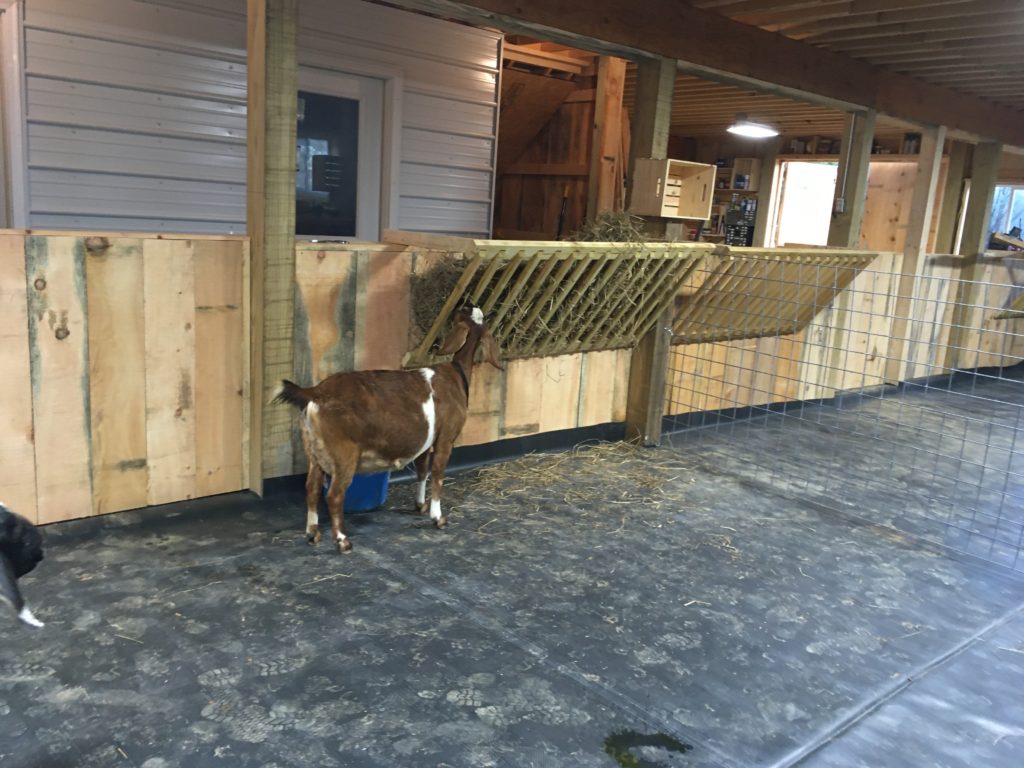
Here again, you see that same goat panel. It is heavy duty, like a calf panel, and it is removable, secured to the walls by means of large eye hooks and carabiners. Obviously, this panel divides the space. We can thus have four “stalls,” using three dividers in all. This proves to be economical and modular, and also keeps the whole space open. This means that we can see everything, and the goats can see one another when we need to separate them.
Pros and Cons on the Flooring
So far, I have things I like and don’t like about this flooring.
What I LOVE is the ease with which it cleans up, and the fact that no pee is seeping into the dirt underneath. Each morning, we feed and milk our does, and kick them out for the day (while the weather stays warm.) I sweep up the pee and goat berries with a straw broom, and then transfer them to my muck bucket by means of a terrific scoop that I bought at Tractor Supply.
What I haven’t loved so much is that the pee pools during the night, so that (without any bedding) the goats lie in berries and pee at night. (Everybody say “yuck”!)
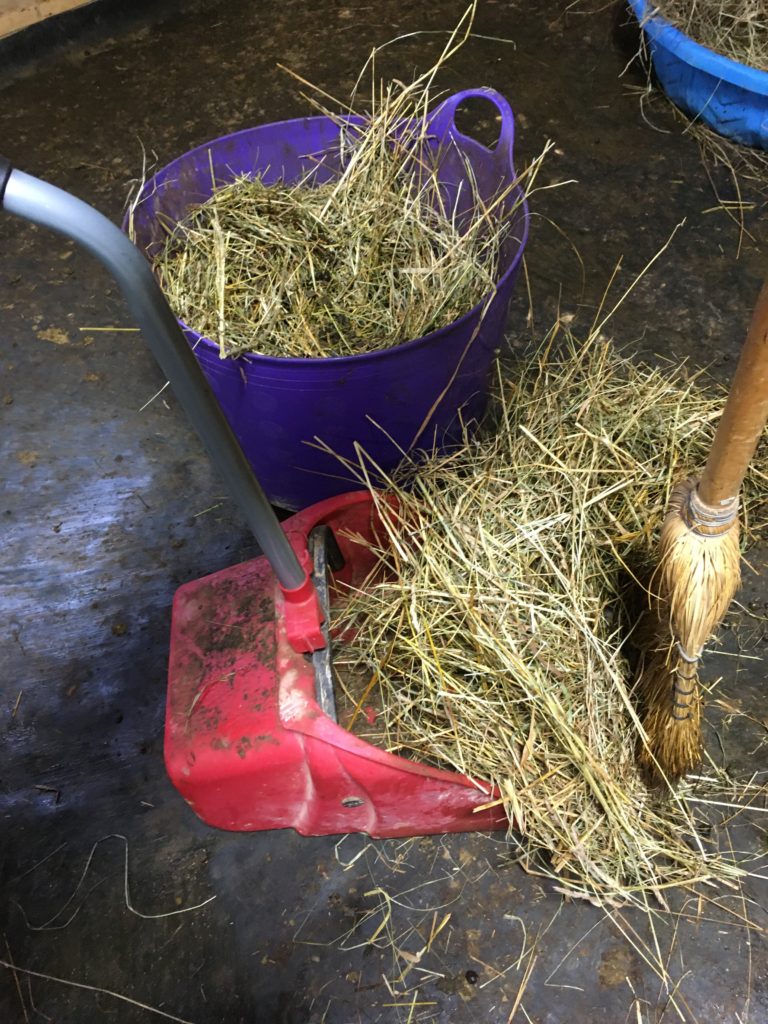
However, each day, the does also drop hay under the manger that stays clean and dry. I’ve found that it’s easy to sprinkle some on the pee puddles, step on it for good measure, and then sweep it into my shovel scoop.
For the most part, my girls choose to sleep in those kiddie pools, especially in winter or, in summer, outside.
NOTE: A year later, we did some terraforming, where we peeled back the rubber and ditched the center of the barn to an outside drain. It took some trial and error, but we love how our floor drains now, and how easy it is to muck.
Read details on this upgrade HERE.
In the summer, a bare floor at night is fine, but we’re also preparing all of our barns for winter now, and so we decided to address two concerns (staying dry and staying warm) with one solution.
Here in the foreground (which is in the second stall), you see the new “bunk” we made. It’s just 2×6’s screwed together and then a tarp over them. I put down a layer of horse pellet bedding, PDZ, and then hay over top. I will use the deep bedding method in this bunk, and the rest of the floor can be dry. So far, it’s working perfectly.
For details on using bunks and pools, click HERE.
To see an even more recent approach, check out or goat table bunks, HERE.
So, that’s it for the floor. I love the large, open, sunny space (the picture right above this is taken at about 10 AM, and you can see the sun pouring in). We allow the does into the first stall during cold or blustery weather so that they can get in out of the wind. The rest of the time, they can choose pasture or hang out on the back porch…
Feel free to tour our milking parlor and cheese-making room! And we love to read comments, especially if you’ll share what you do about bedding in your barn, and how you like it!
We also have other posts that detail modifications and additions that we’ve made. I link them here for quick clicking.