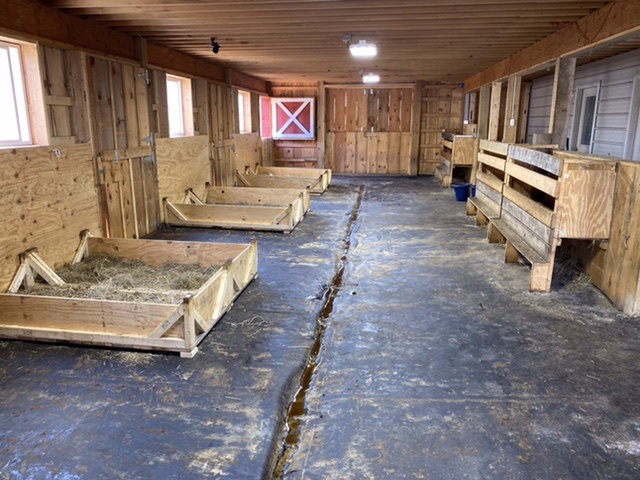
Boy do I LOVE LOVE LOVE my modular barn. I am so glad that I didn’t make permanent divisions within my goat space!
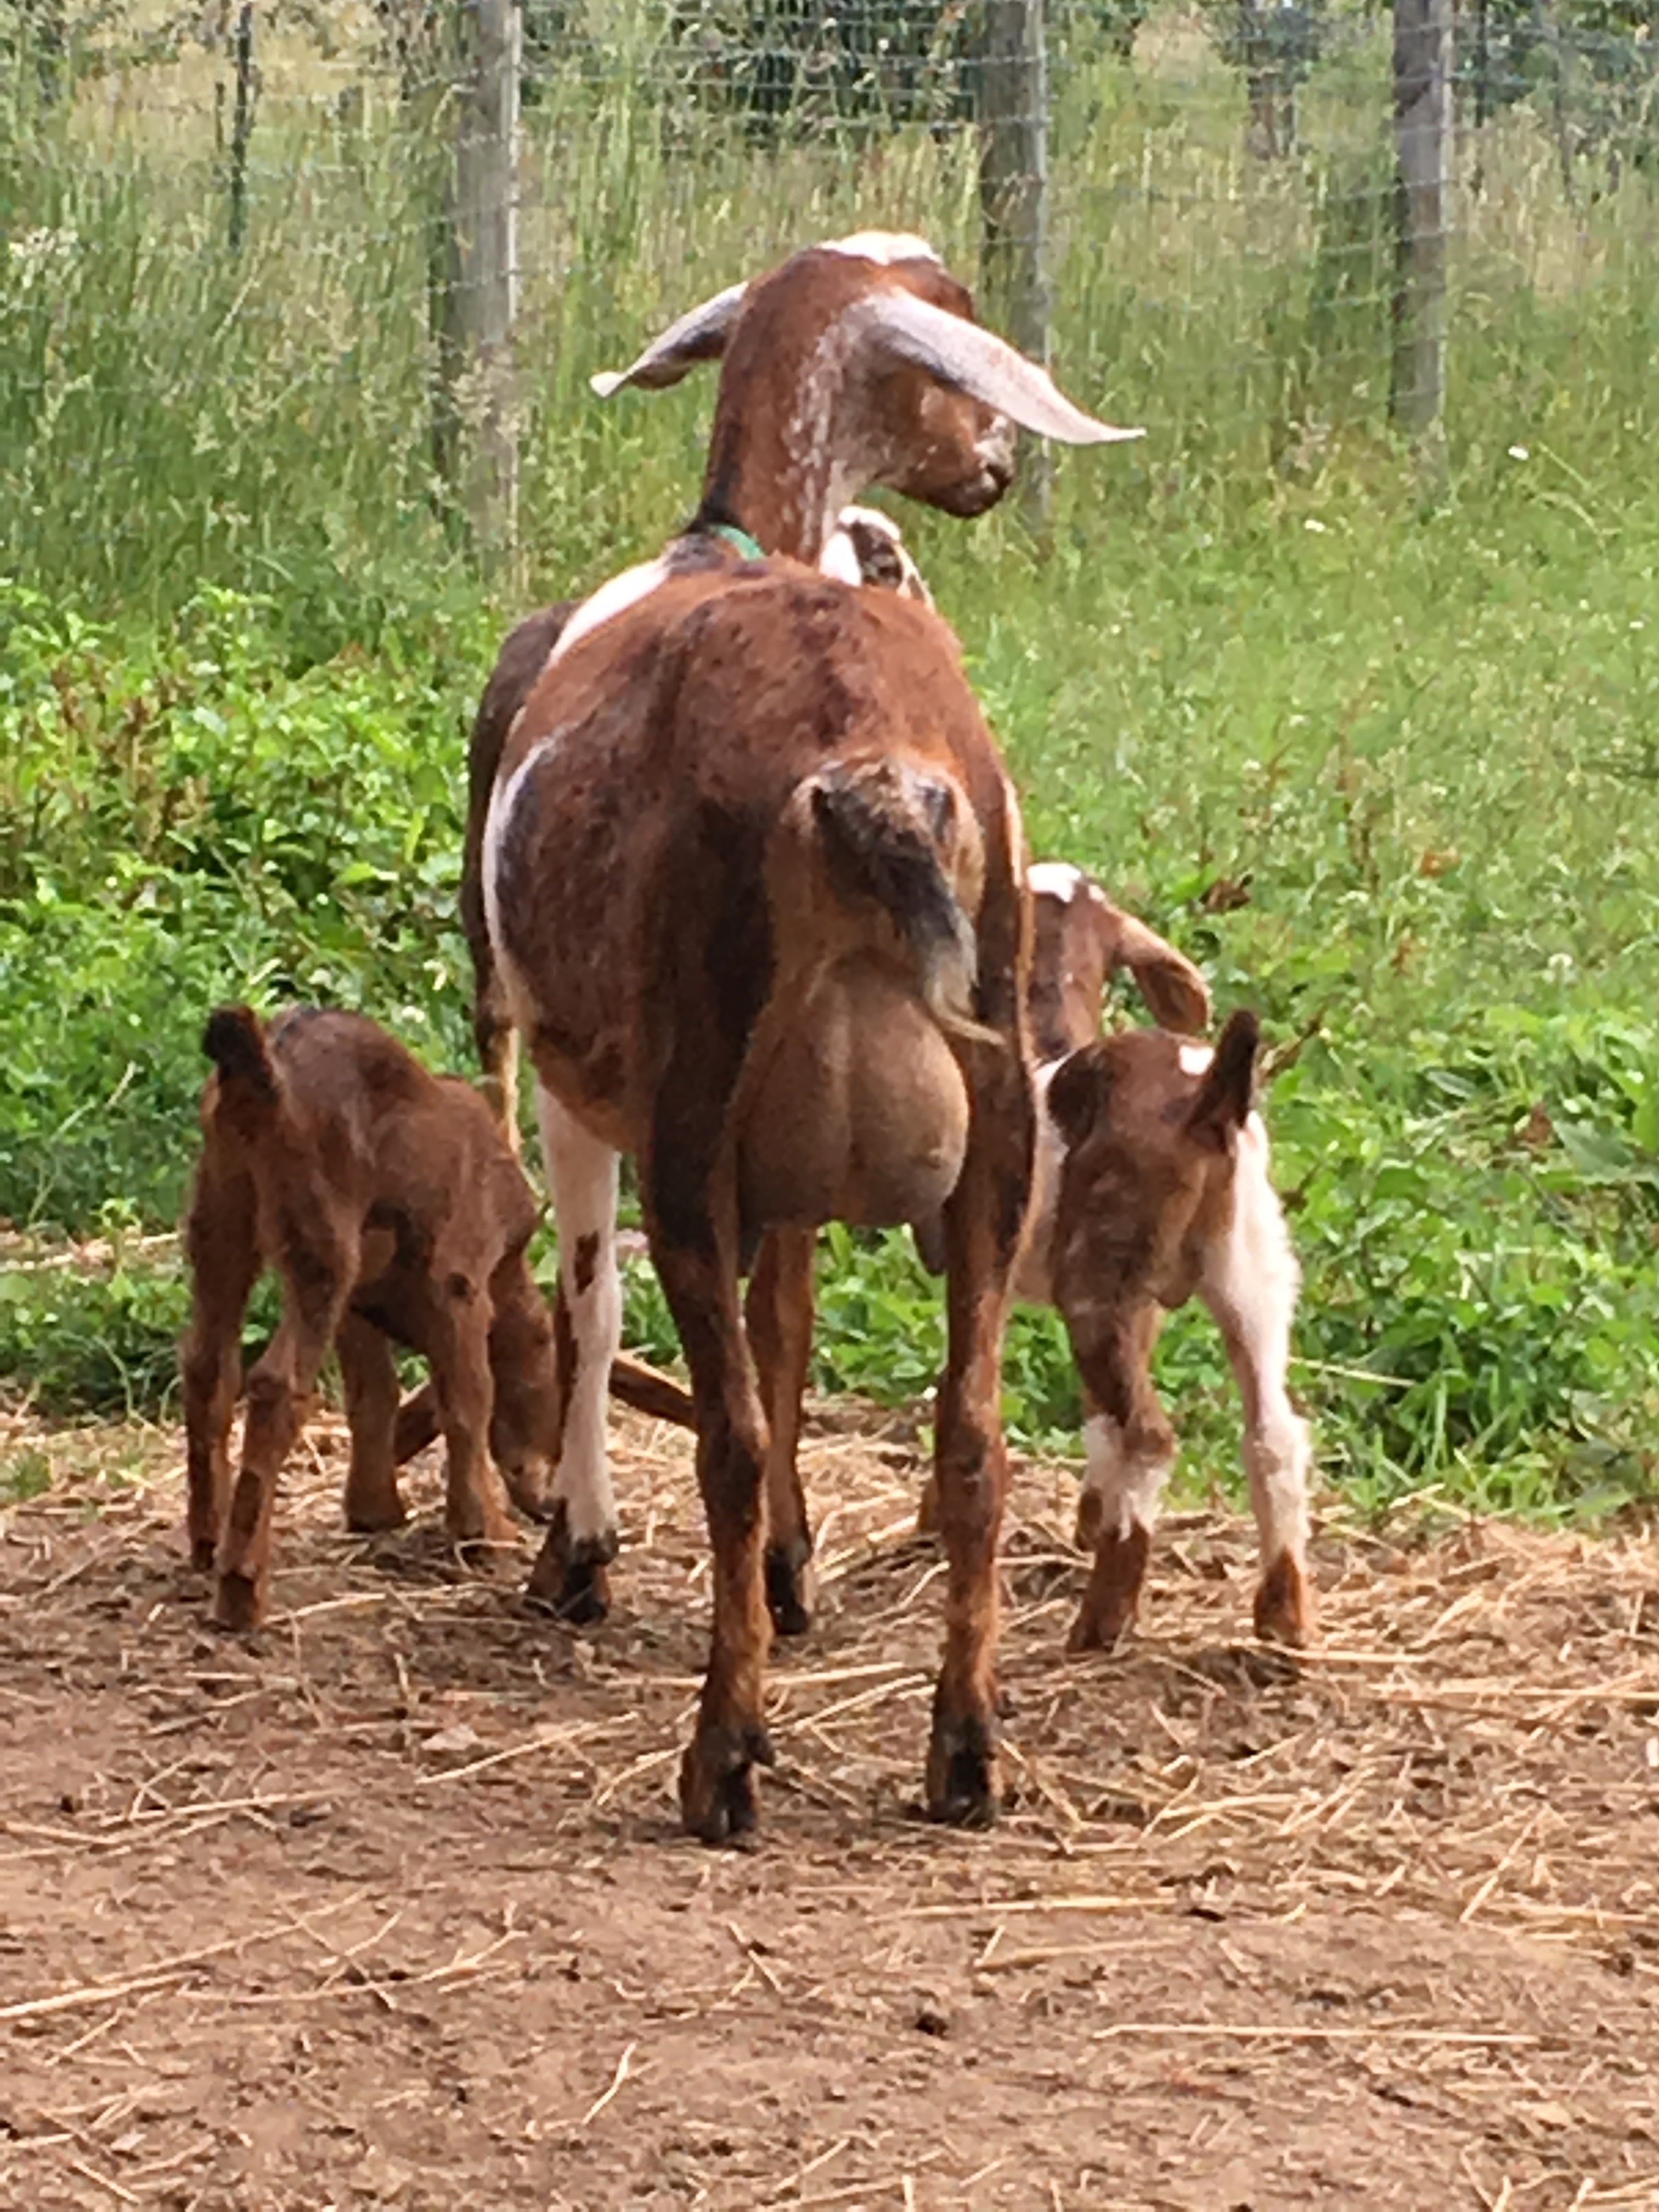
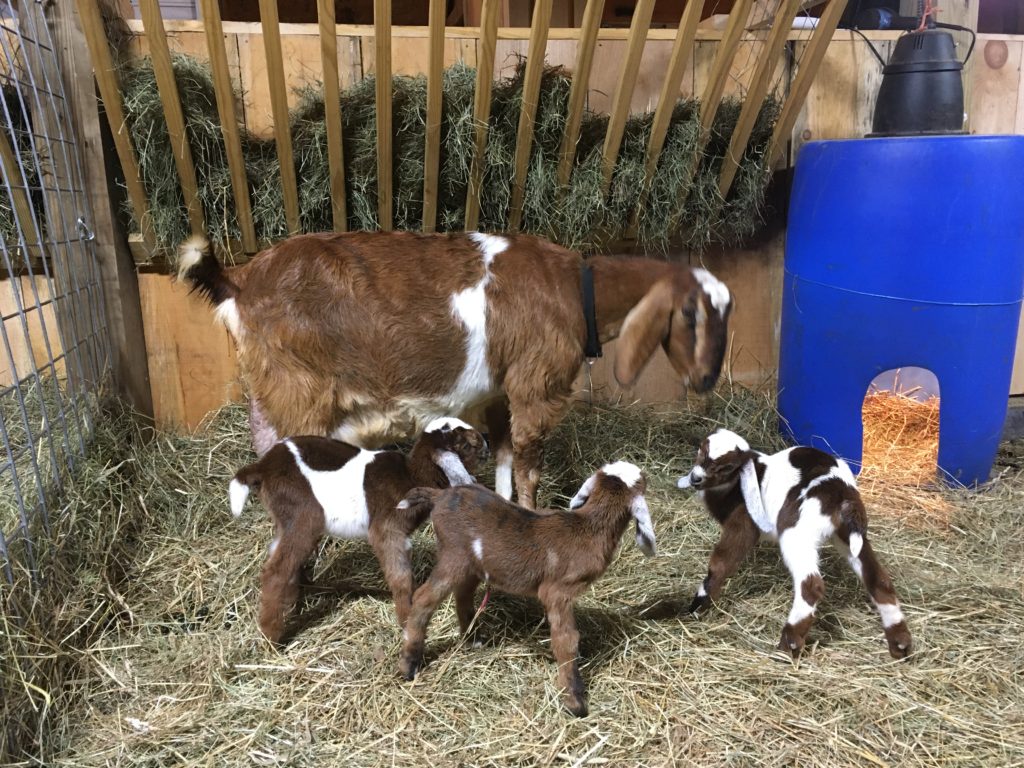
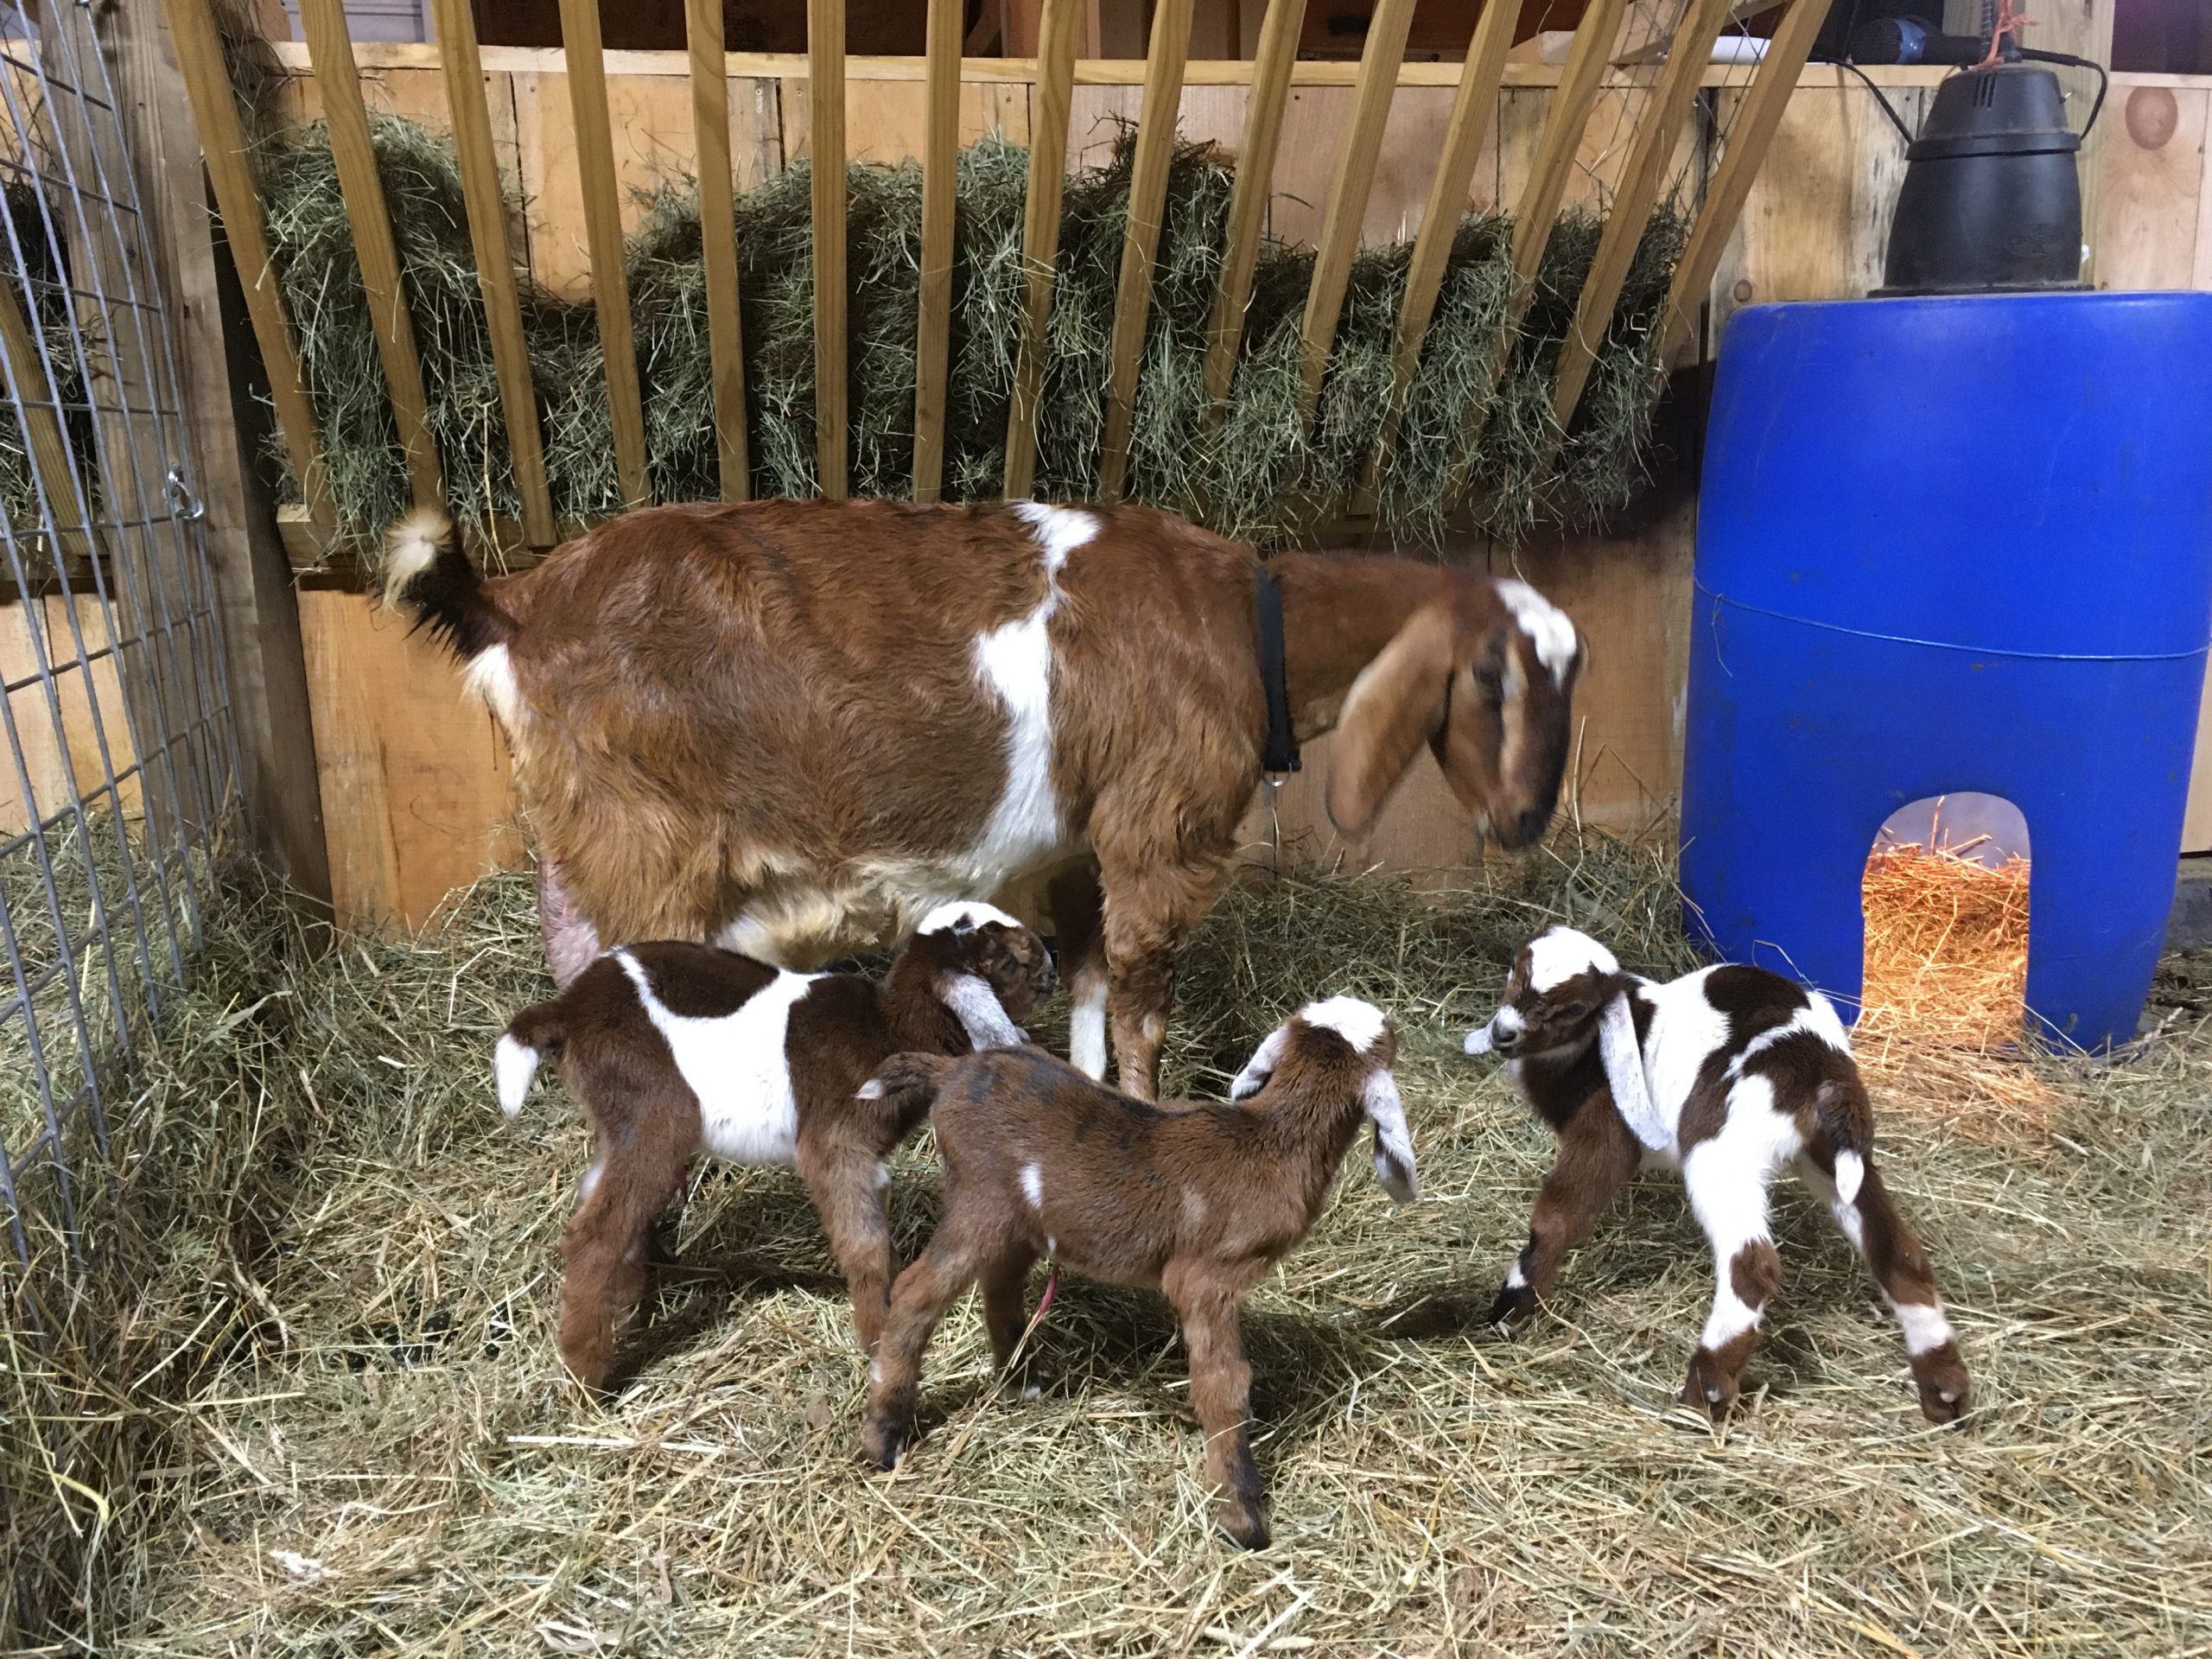
In the past 12 days, we’ve kidded out six does. Now we’re done until April, when we’ll start kidding out 11 more over the space of a month and a half. But then we’ll have nice weather for it! Whew!
We now have 14 new kids on the ground: 10 bucklings and 4 doelings, and their moms, to care for. I’ve spent 3 hours today digging out jug stalls and rearranging heat pads and barriers. As a result, our barn can easily accomodate the changing size and needs of our herd.
The Nursery Setup
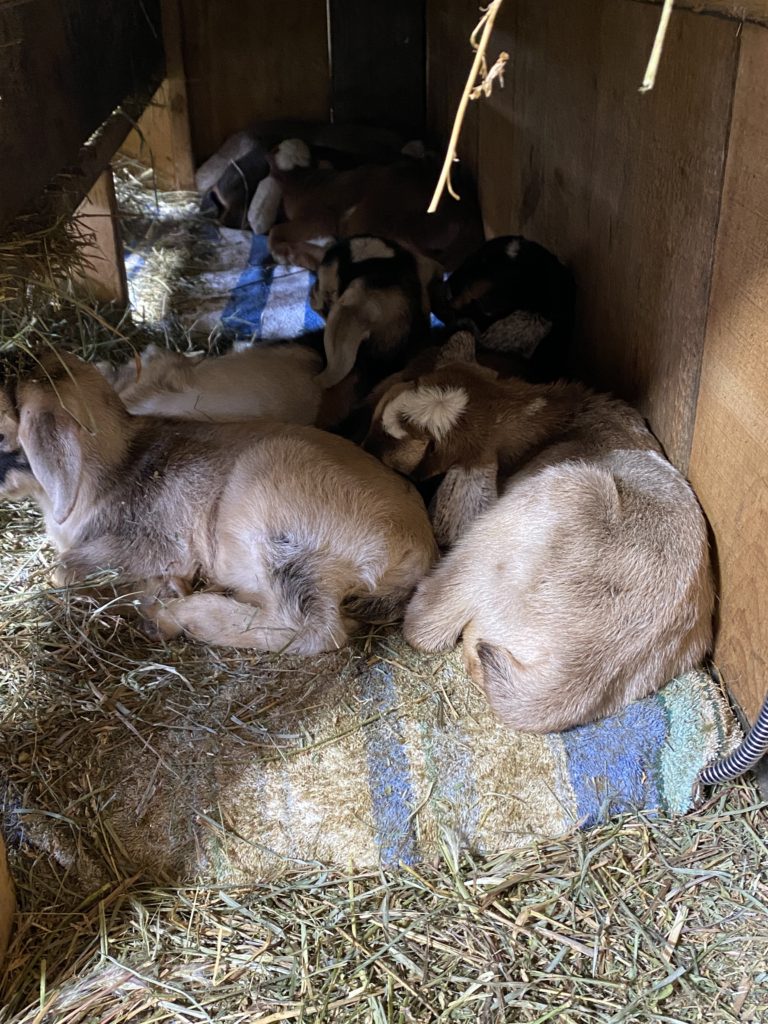
With six does due to kid within a week during record cold and heavy snow and ice storms, we set up what I would call “the nursery.”
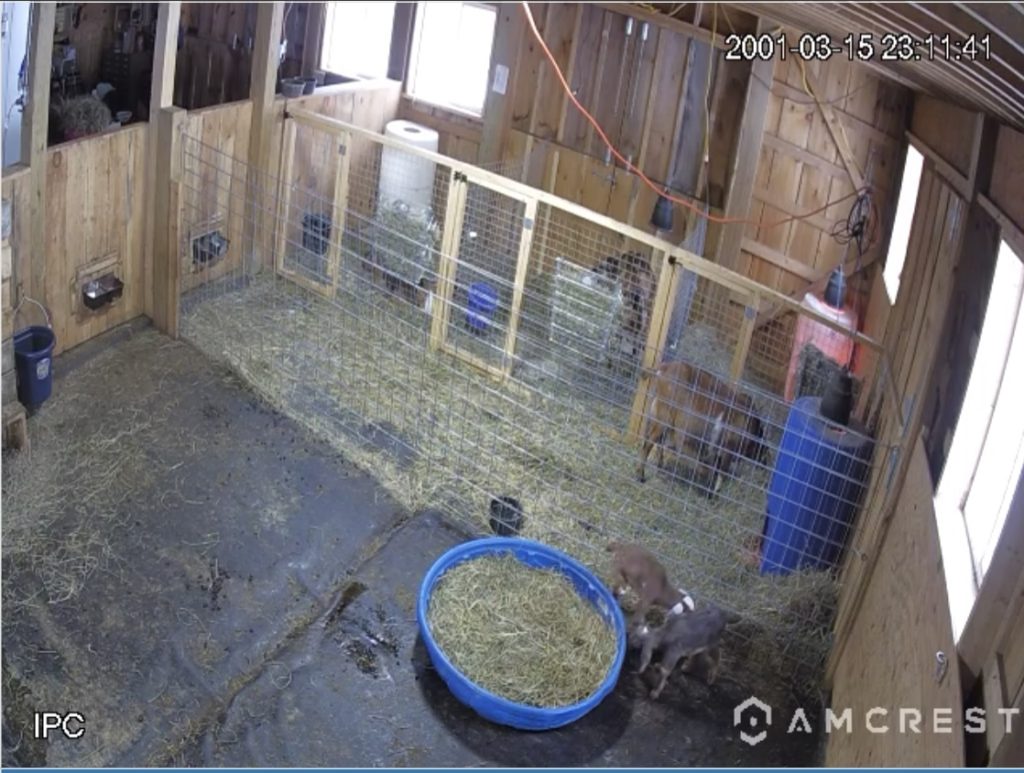
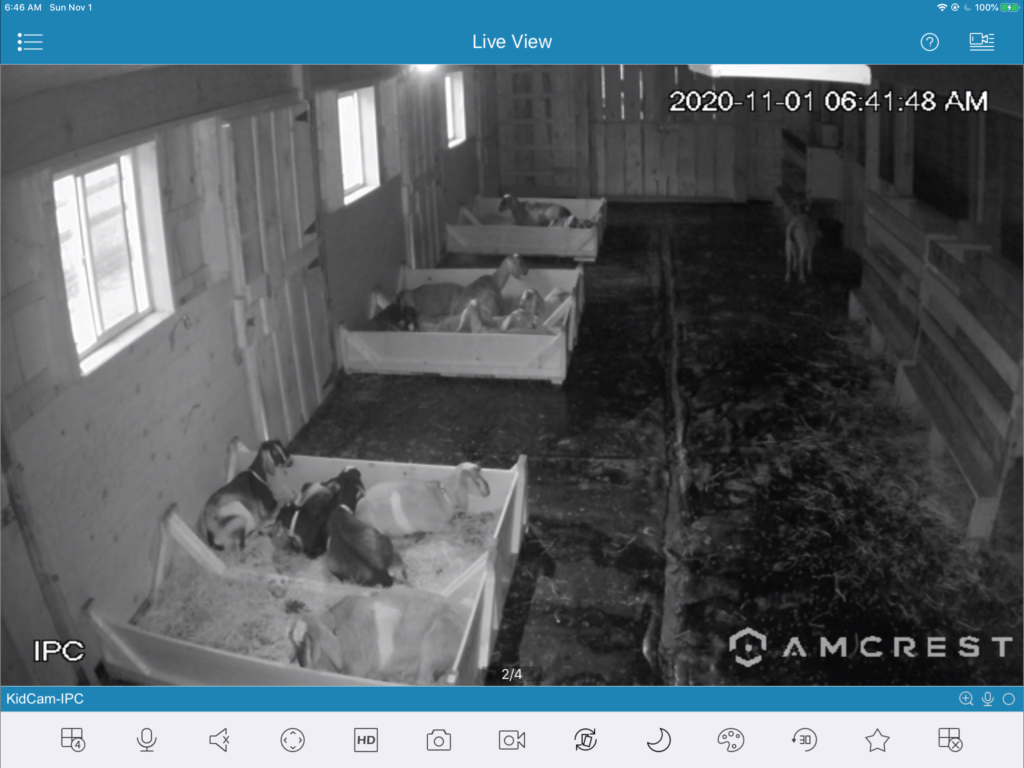
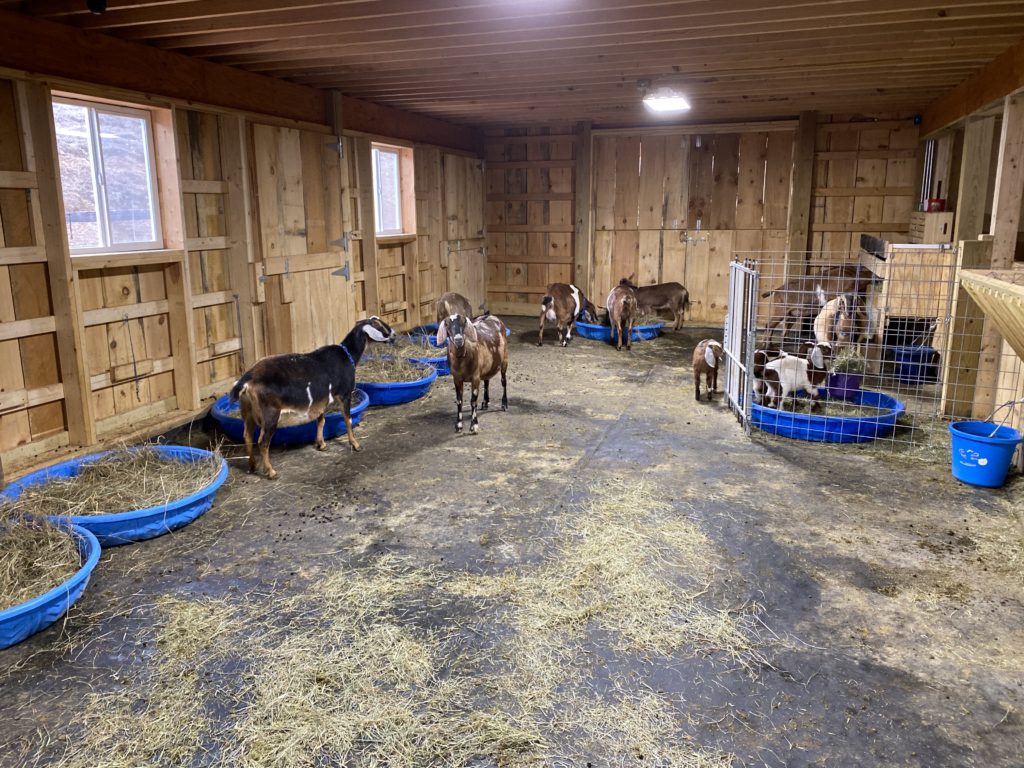
We could accommodate up to 4 does kidding and bonding simultaneously (three in stalls and one in the aisle as pictured, right). Then there was the adjacent “romper room” where 2-3 day-old (and older) kids and their dams can hang out.
In the romper room, for cold nights, we have heat pads under the manger, but will transition kids to just sleeping on hay under there in the next week, as temperatures are supposed to become warmer when the polar vortex moves out (yay!).
Tot Lot
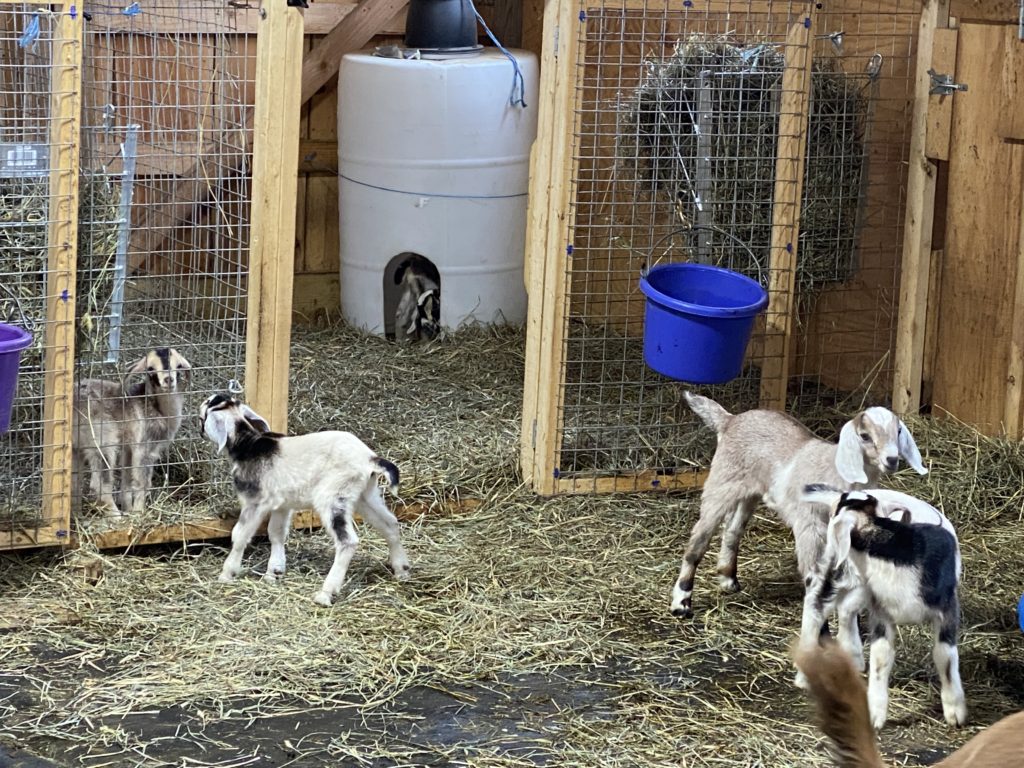
With all the kids in this batch of does safely delivered, and with some sleep under my belt, I took the morning to change the space from “nursery” to “tot lot.” It took about three hours of solid work.
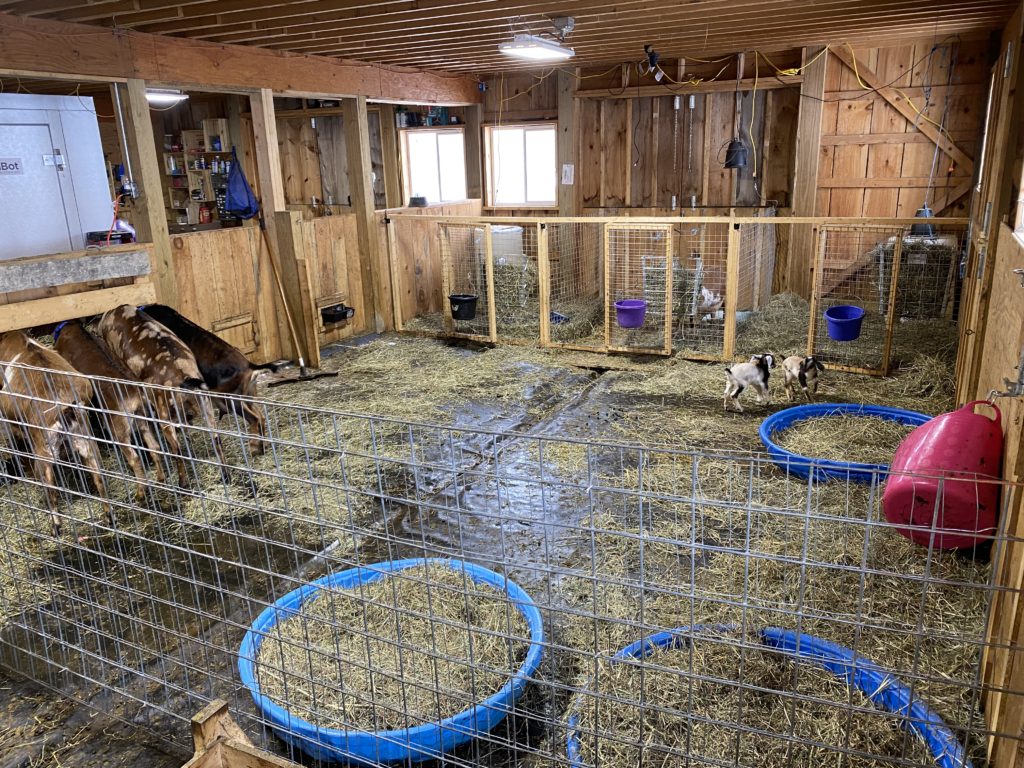
I left the jug stalls in place, but opened and latched back the doors so that all moms and all kids can have whichever spaces they choose. I took down the aisle partition, so the “romper room” space is bigger.
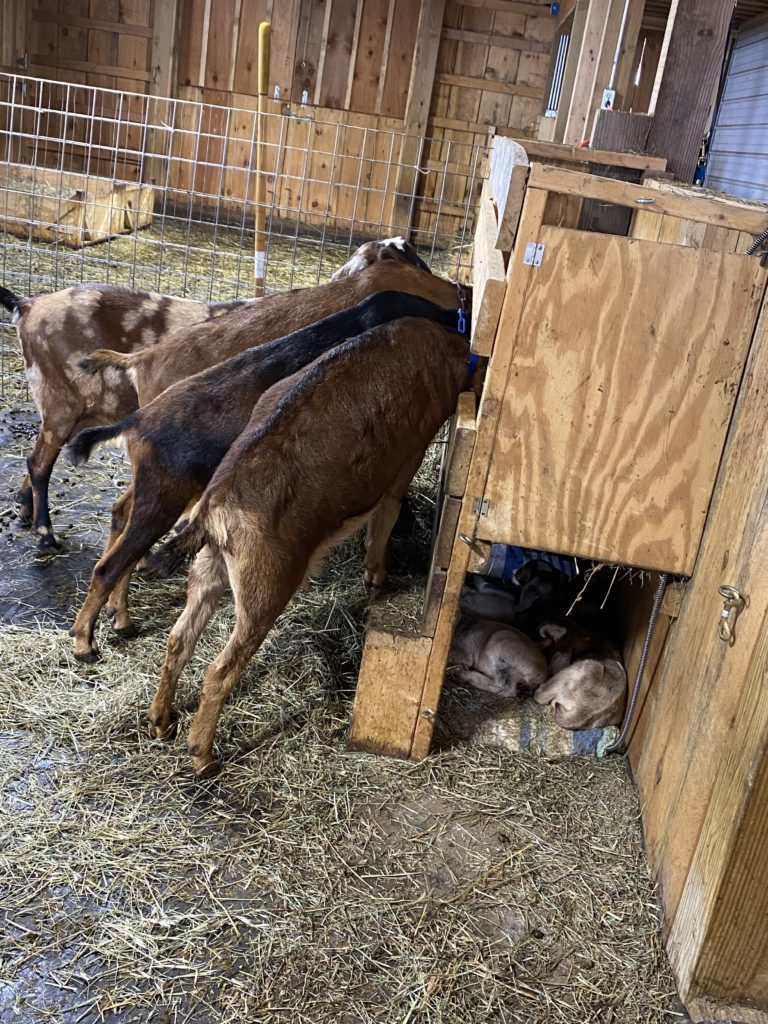
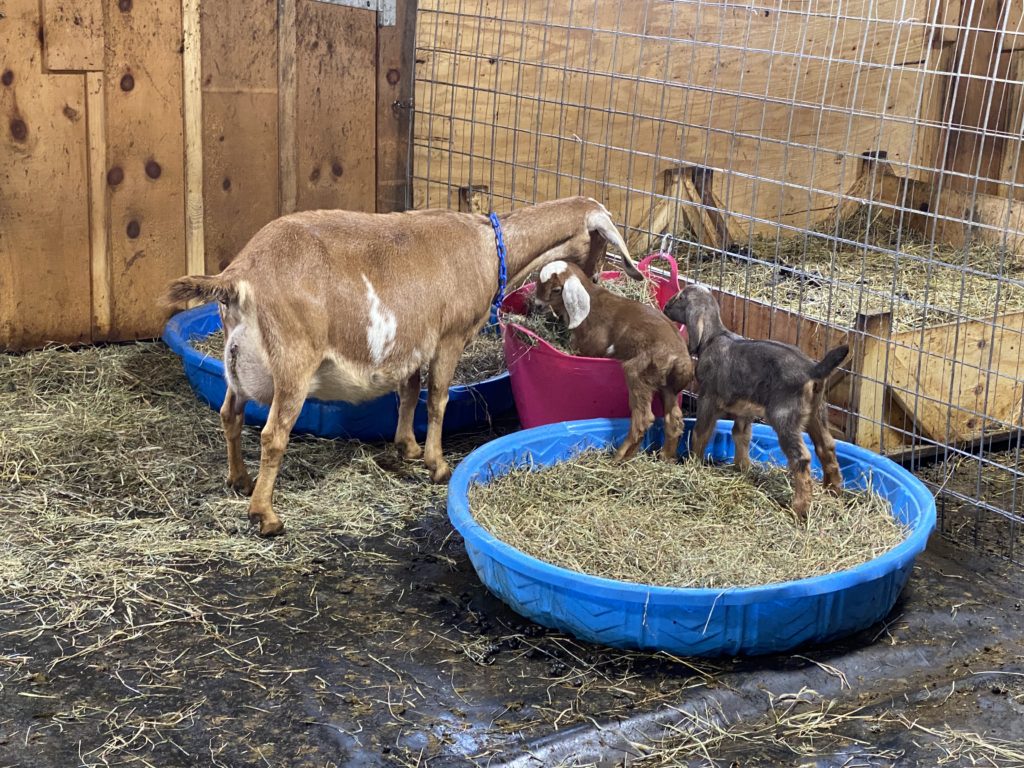
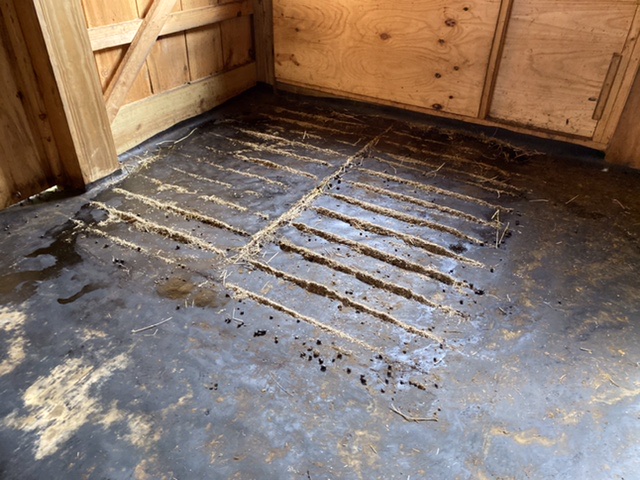
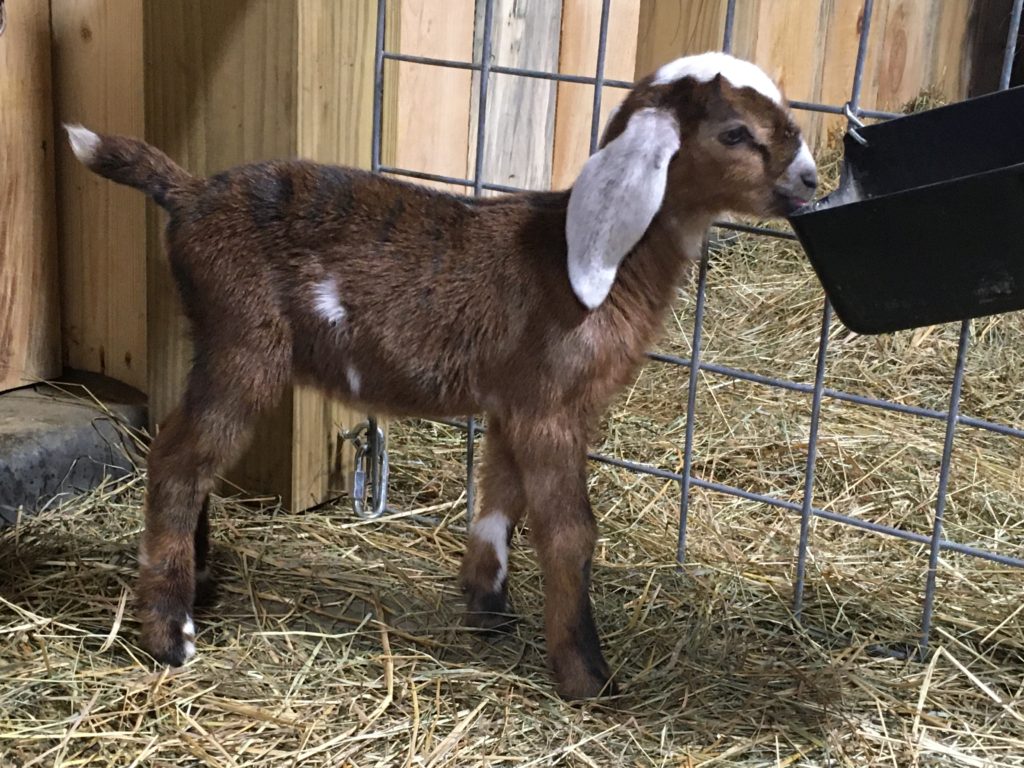
Does can also browse hay in the stalls, since the manger is tight for six does at a shot. (The hay scattered on the floor is for footing for kids as they run and play.) Below are some pictures of new kids exploring their expanded spaces and snuggled up under the manger for naps.
Manger with kids under
Kids sleeping under manger
Kids exploring new horizons
What’s that you’re eating, mom?
In a couple of weeks, as pasture comes in and fences are completed, we’ll be moving the cows to their new shed from this barn (their winter quarters), which has an adjacent 1.5 acres “safe pasture” for these six moms and their 14 kids.
Then, eleven more does will use the nursery/toddler space over a month and a half (early April to mid-May) to do their kidding. As their kids are established, they’ll in turn move to this “safe pasture” stable and these first six moms from winter kidding with their kids now six weeks older will move back to the big barn to enjoy larger pastures and the main barn space.
When they do, we’ll take down all the internal barriers, and voila! The now-older kids and their dams will have all the space they need at nights in the barn. Most days, they’ll be out on pasture.
Finally, as the second wave of kids grows older, they will also move back to the main barn to enjoy the enlarged space and bigger pastures.
Our kidding season is fast approaching. In about two weeks, we’ll have goat kids on the ground (and, Lord willing, a calf in June) and that means MILK — and also LOTS of cheese.
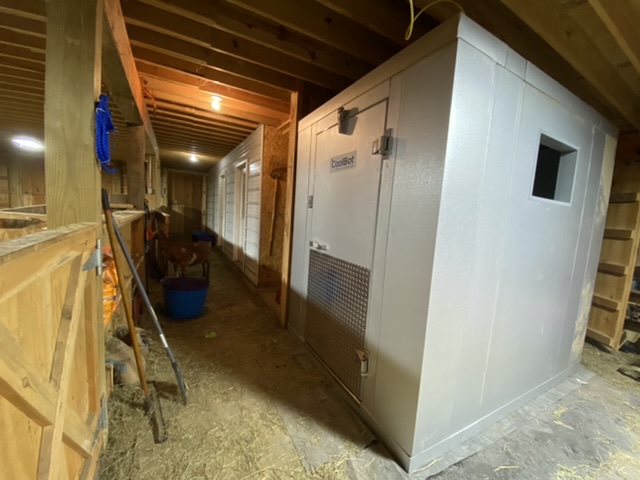
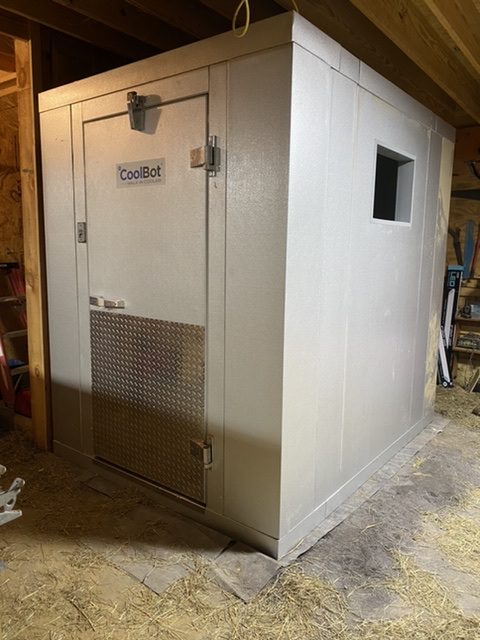
Last year, we started with a small wine cooler as a cheese cave. Then, we co-opted a freezer with a temperature controller gizmo on it. Still not big enough, with only 9 does in milk. This year, we are anticipating 17 does and one cow in milk, so now we have graduated to a 6′ x 8′ walk-in cheese cave! We’re excited.
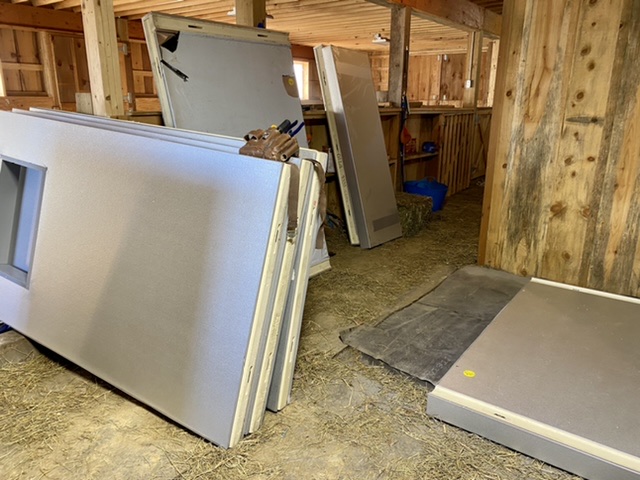
Our cheese cave is a Cool Bot brand walk in cooler. It came a few months ago in pieces, and has been stacked in a corner of our barn until our friend Chris Lambert could come and put it together for us. Last weekend, he did! It was a big jigsaw puzzle at first.
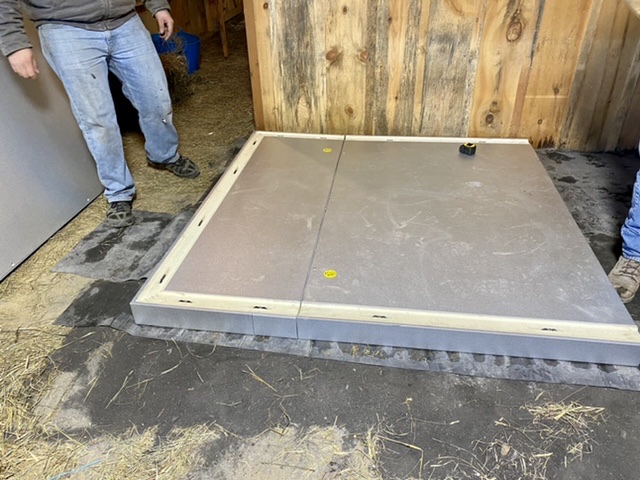
The first step was to create the base of the unit. The pieces fit together using cam locks, but it’s really necessary to get the floor dead level.
We had done the basics ahead of this day, but Chris still had to do more work to level the sand beneath the unit before it could be erected.
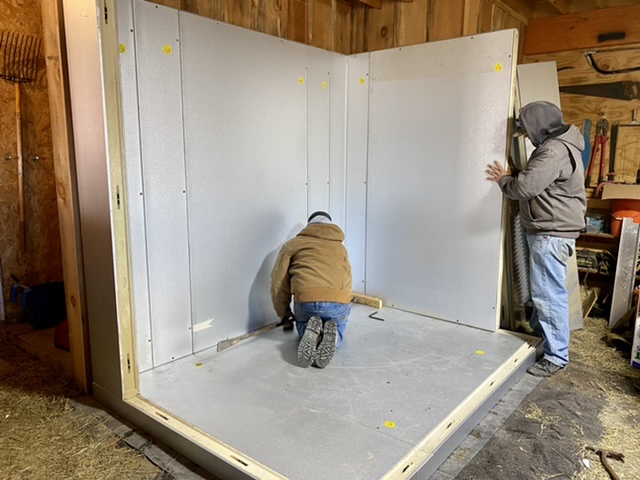
Once the floor was level, the sides started to go up quickly. One corner gave trouble, but most of the rest of the sides, and the roof, were pretty easy.
Here is the shell, all erected. That hole on the right is where an air conditioning unit will fit. This will cool the interior to a temperature controlled by the Cool Bot controller.
The door is really heavy duty and loaded with safety features so that no grandchildren can get trapped within. (Even if they did, it’s not airtight, nor will the temperature be freezing, but it would be scary, so we’d like to avoid that! 😉 )
I think it will take awhile for Scott to fill this with cheese. Basic exterior dimensions are 6′ x 8′. Plenty of room for cheeses!
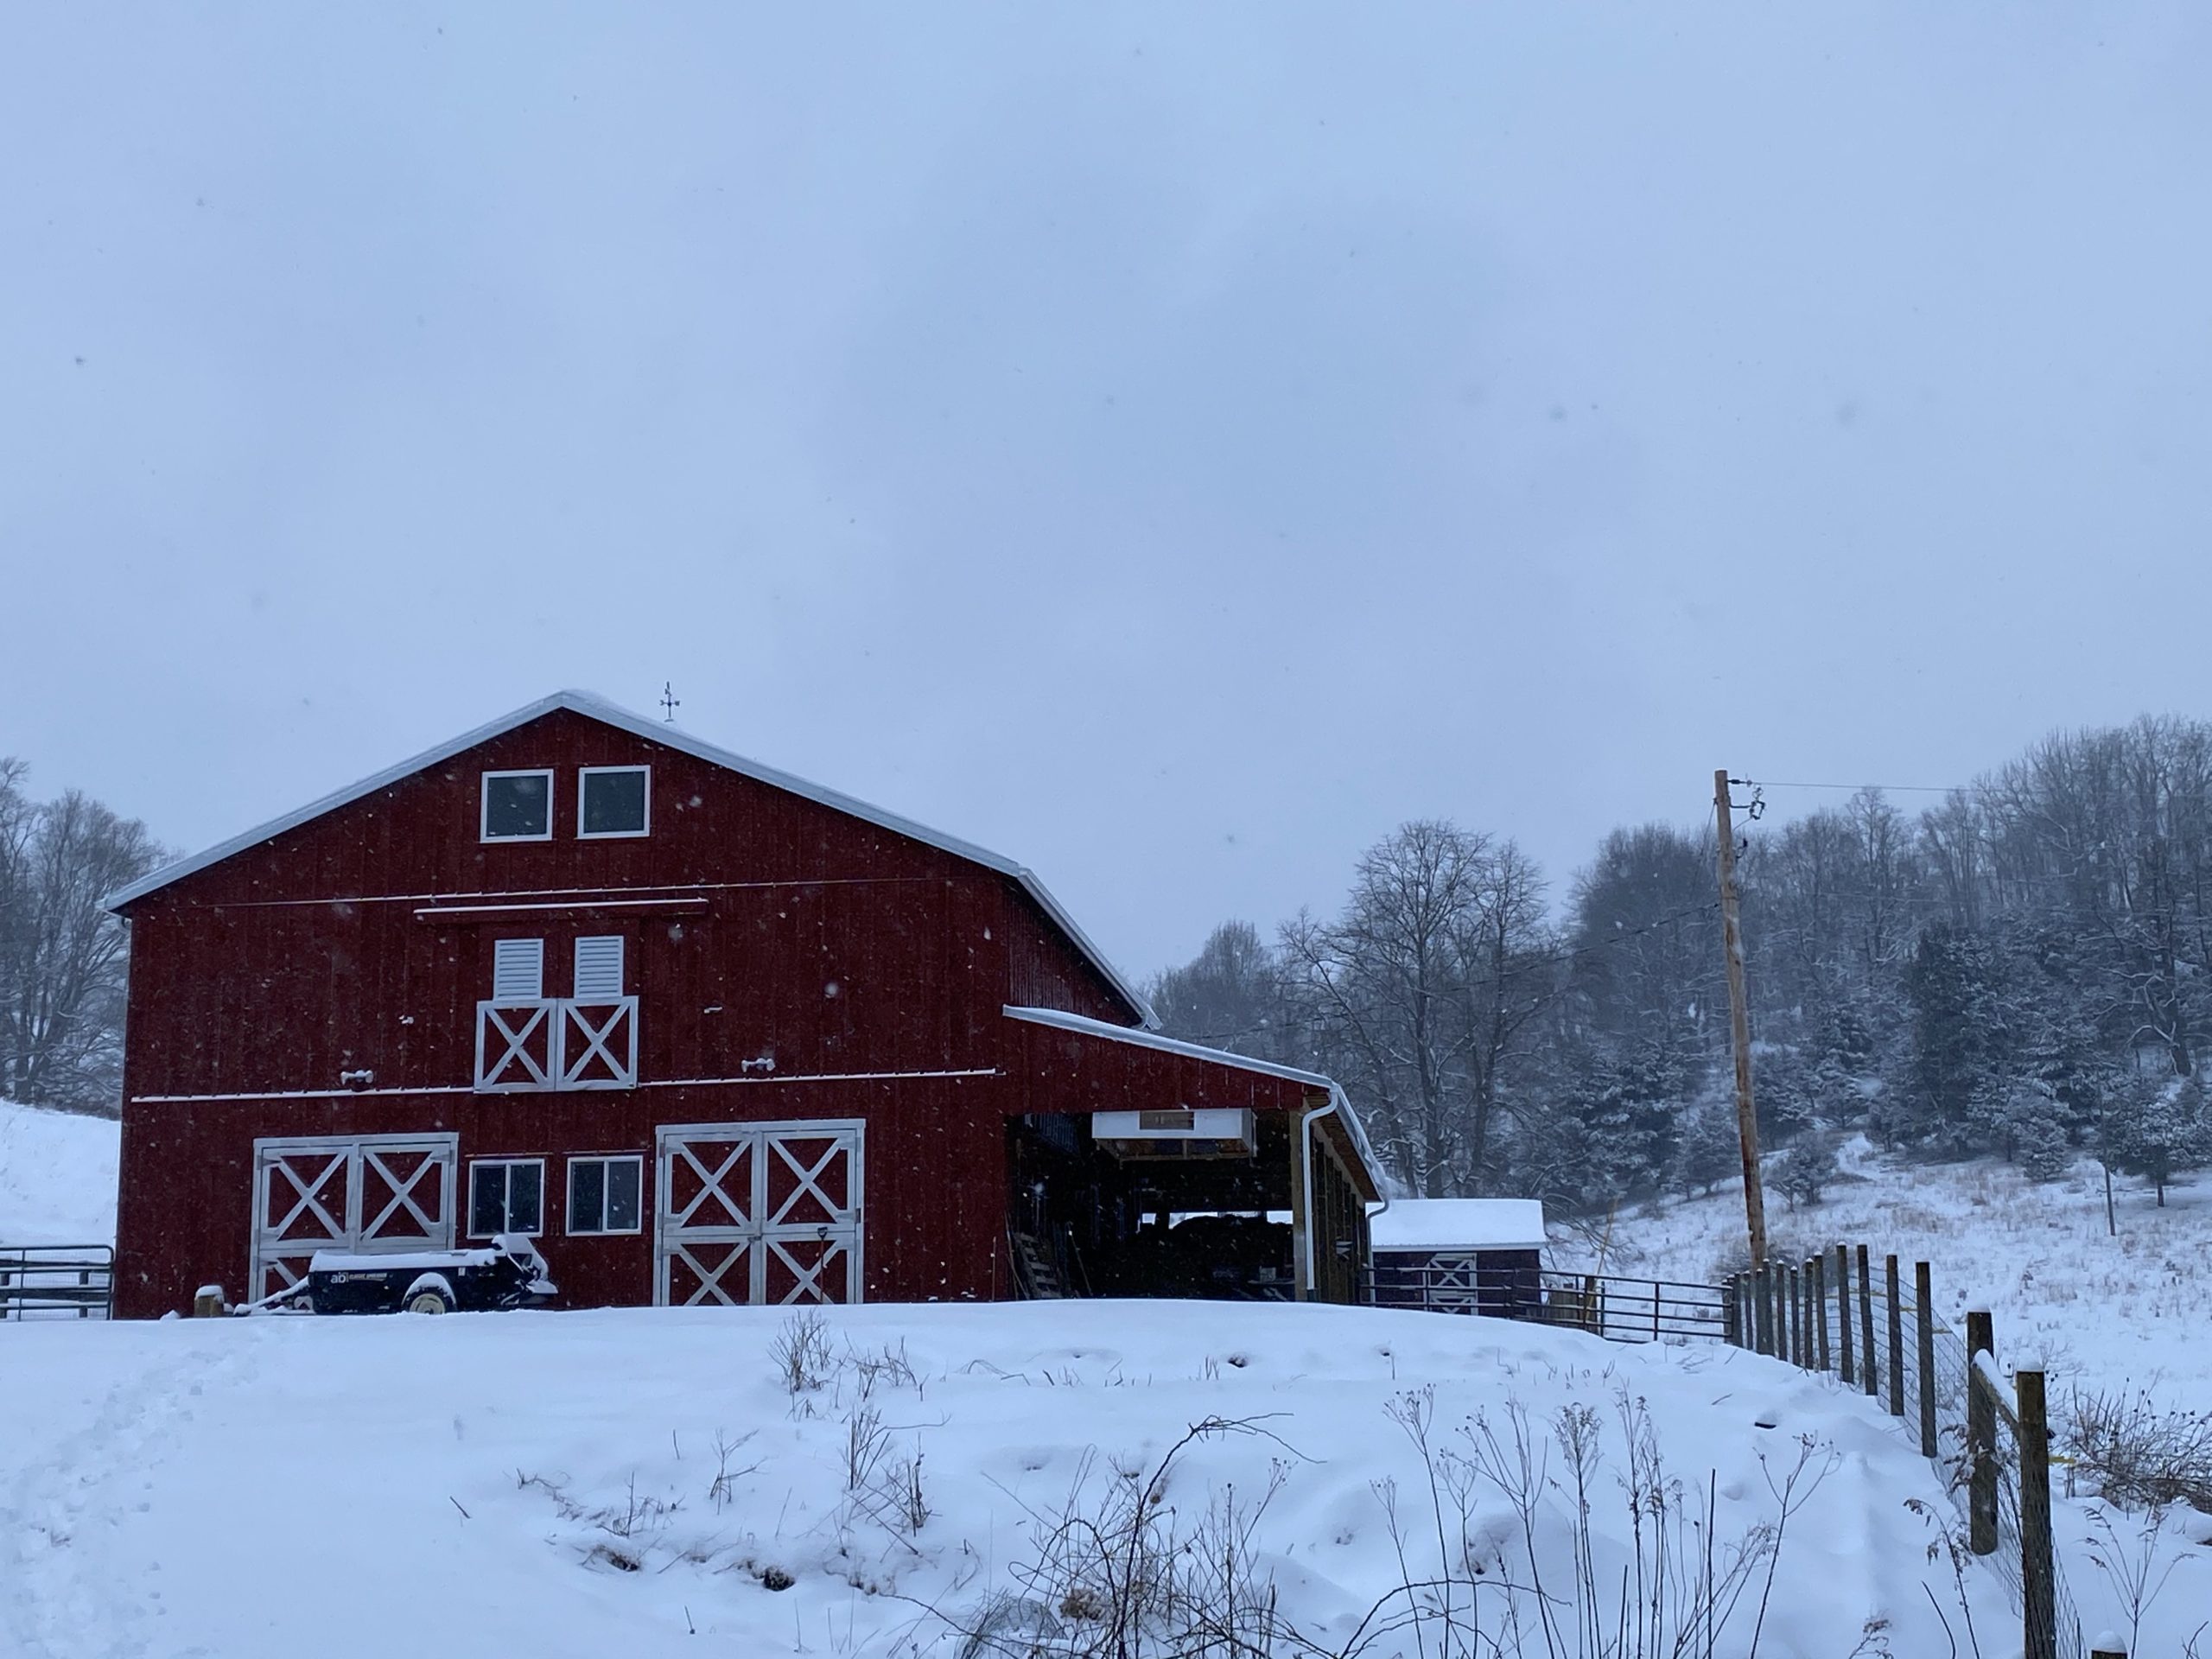
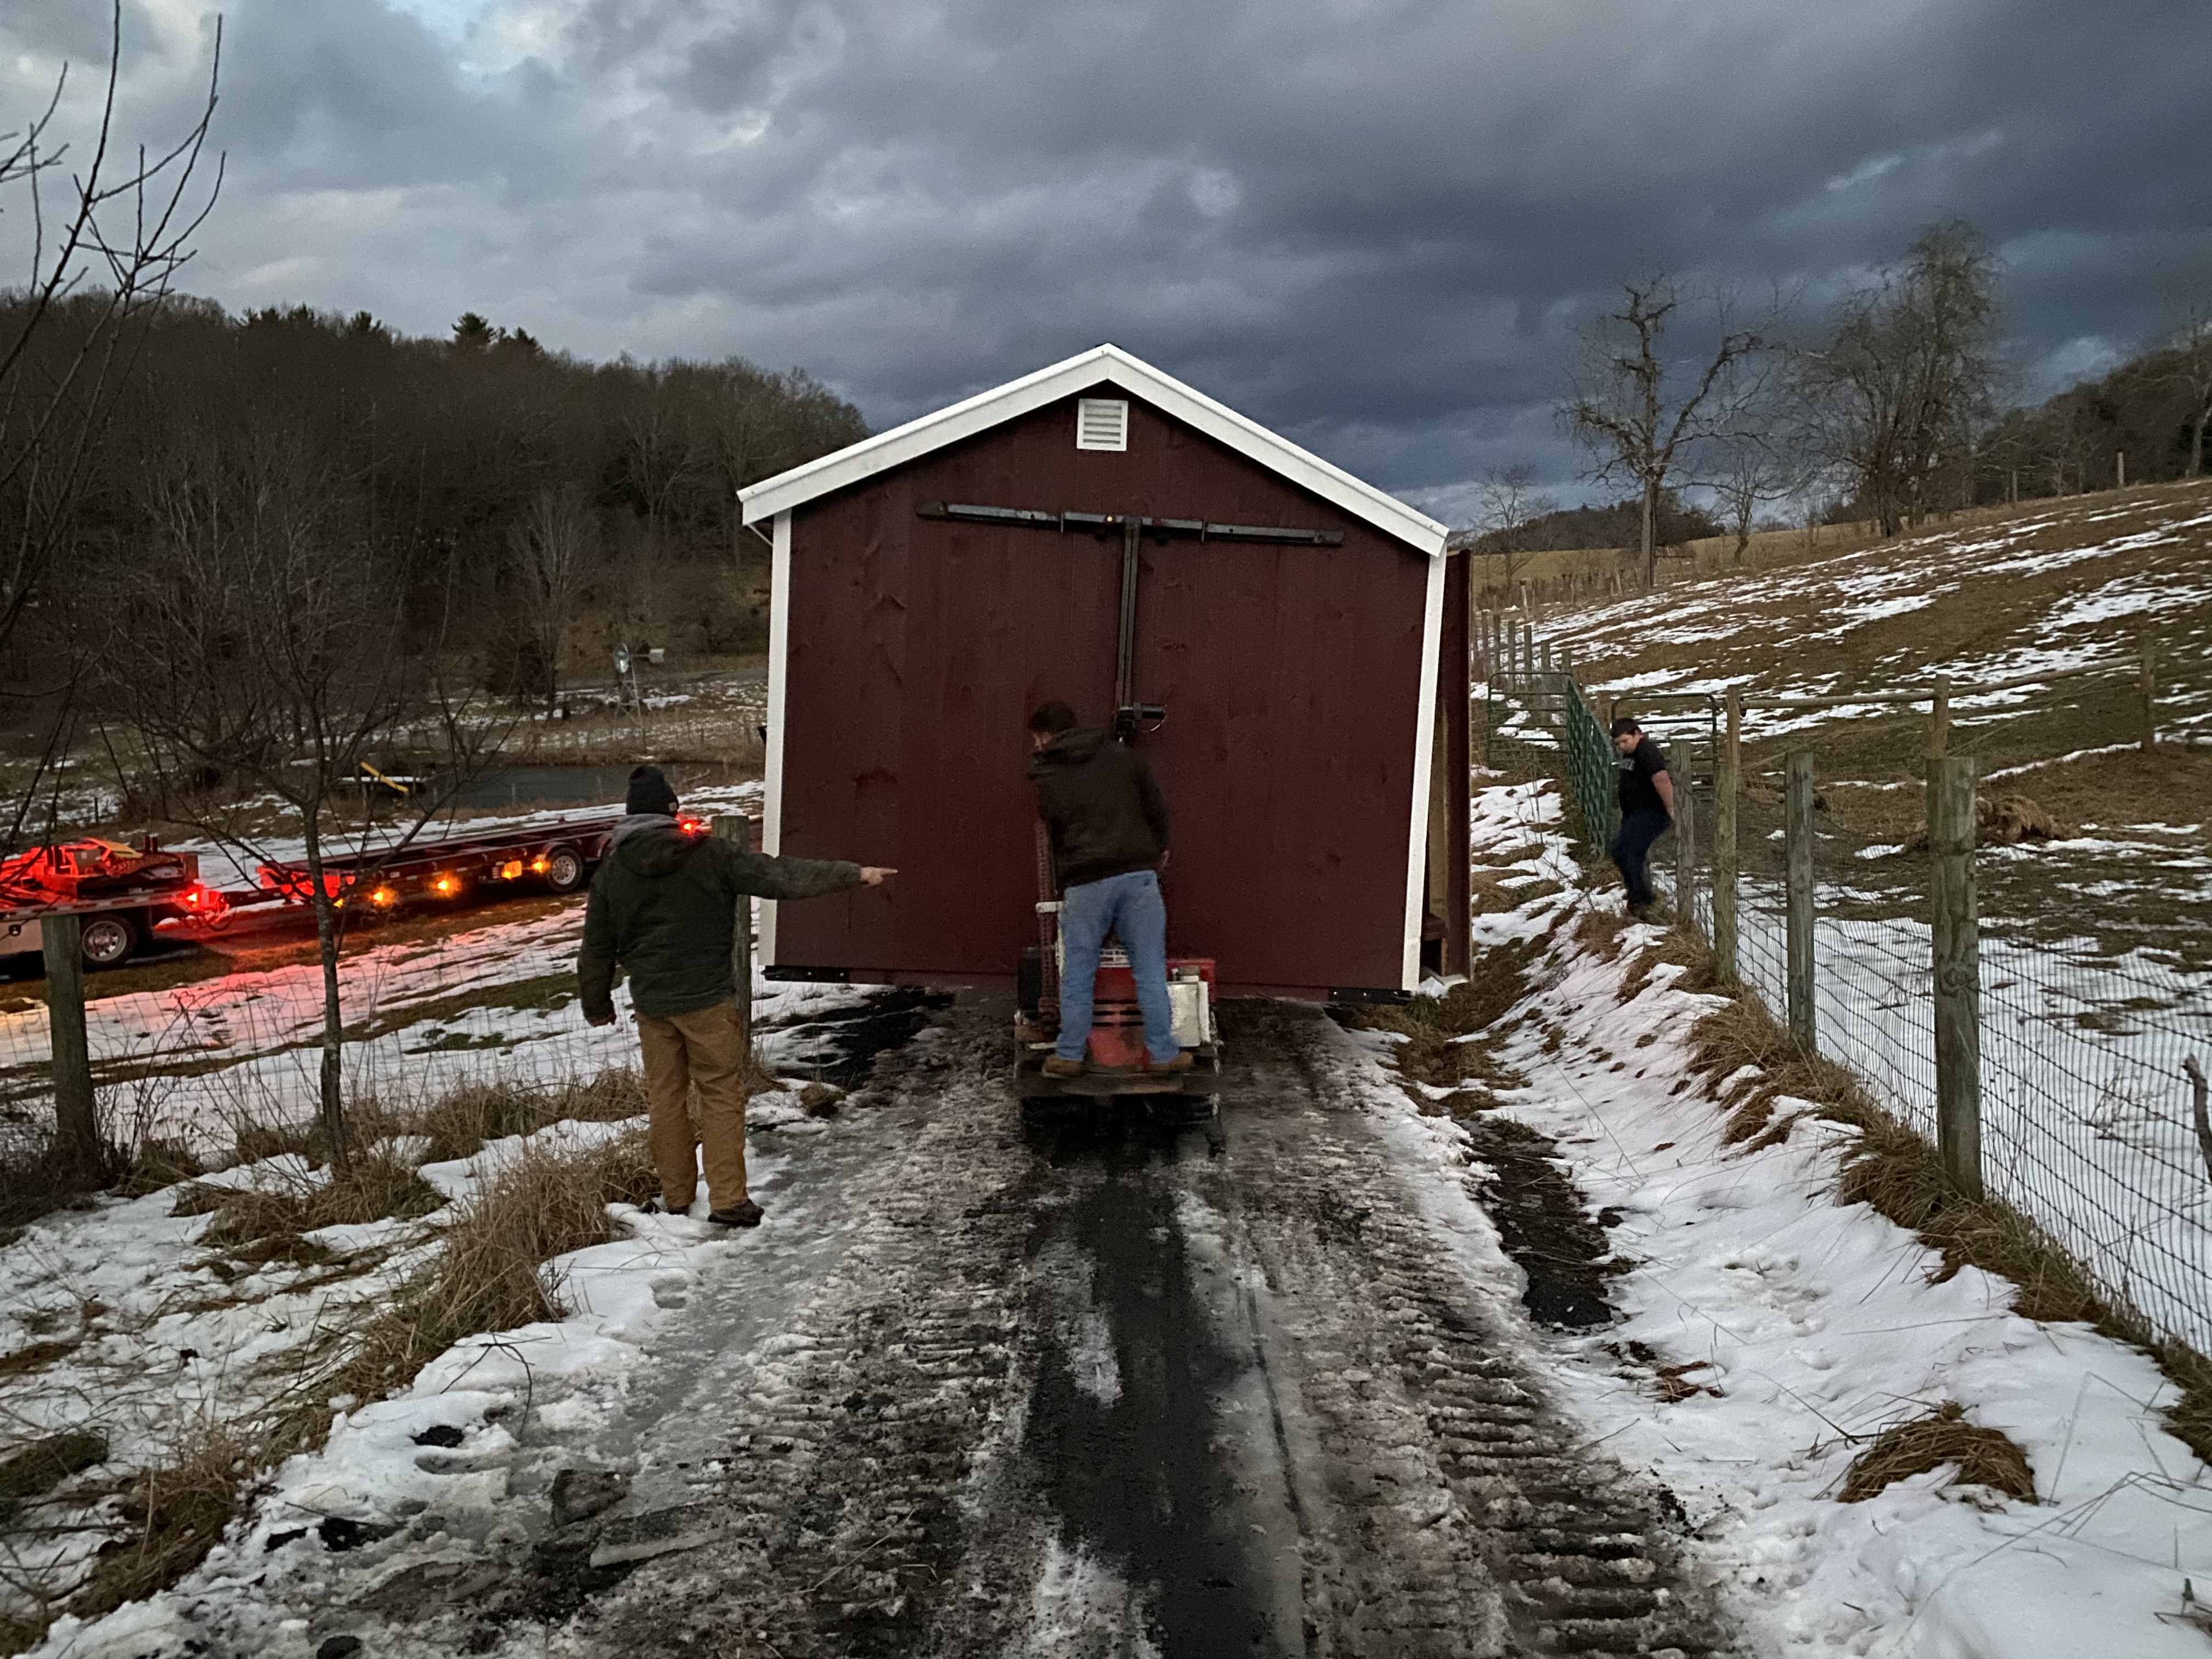
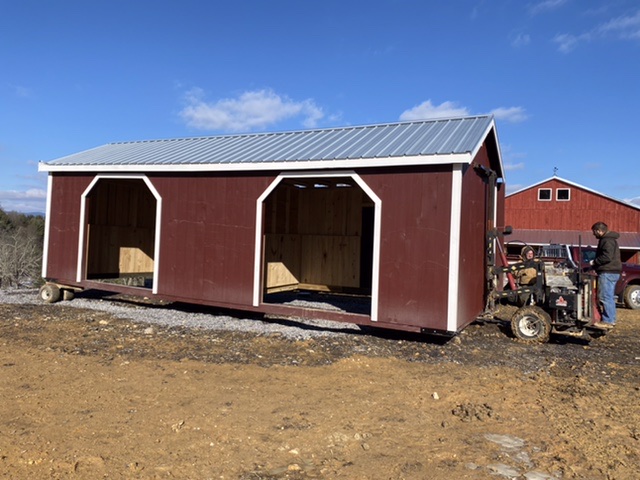
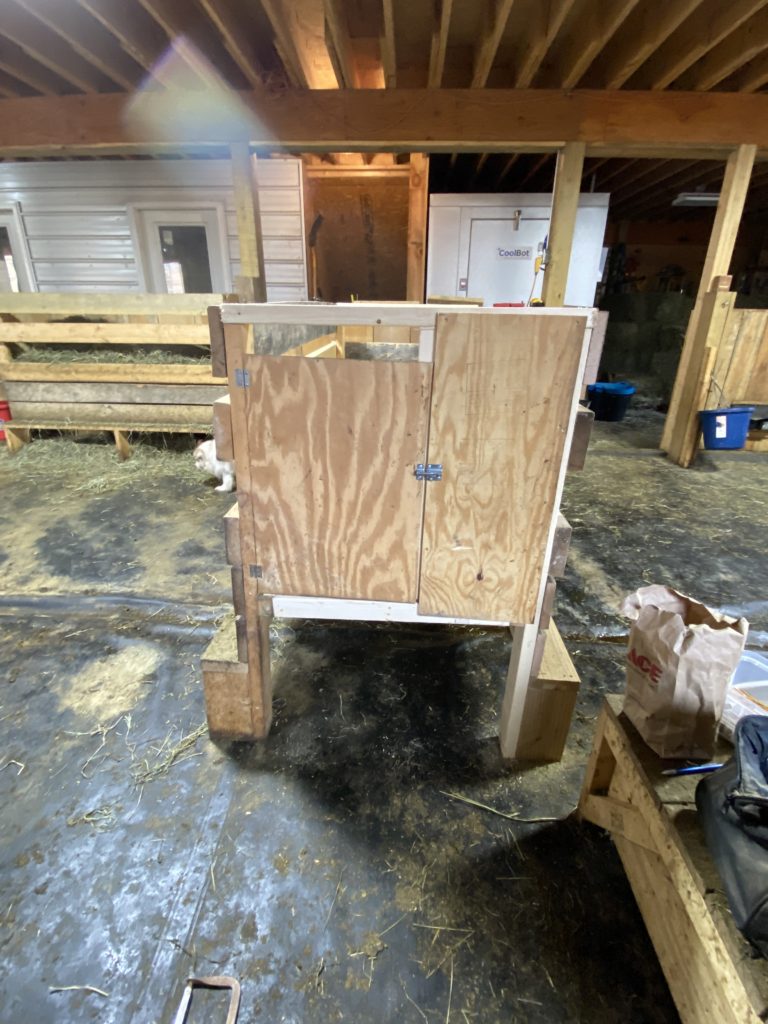
In late December, we had many adventures, not the least of which was the delivery of a new shed. I was SO praying that this shed would come before we left on our mid-winter break to FL so we could bring Maude home. Kudos to Caleb of Helmuth Builders for NOT giving up on what proved to be a grueling 14-hour delivery challenge!
Pictures below show the painful and difficult “birth” of this building. So narrow were the margins that we more than once got to calling it “the baby” and talking about “the birth canal.”
The building arrived from Helmuth Builders JUST after a big melt, and JUST as the sun was going down. 😬🙄🤷🏼♀️
Caleb (the delivery driver) put the building on a set of wheels on the back and on the front he pulled the building up our hill using his “mule” — the small hydrolic jack you can see in the pictures and video. It was astounding to me how this mule went over ice, thru mud and finally across our (former) riding ring in order to get the building to the site prepared for it.
First, the building went up our hill (we had to tear down our orchard fence on the left in the picture above) to get it past there. Then it had to go across the icy part at the top of the hill.
THEN it had to go between the existing big barn and past the goat porch — which is how far they got after the first 5+ hours of sweat and strain.
All this in the cold and dark. They didn’t give up until one of the mule’s tires blew.
Kudos to Jonathan Eye who came and helped with his skid steer and body until 10 PM that first night, when we all gave it up and went home to regroup for the night.
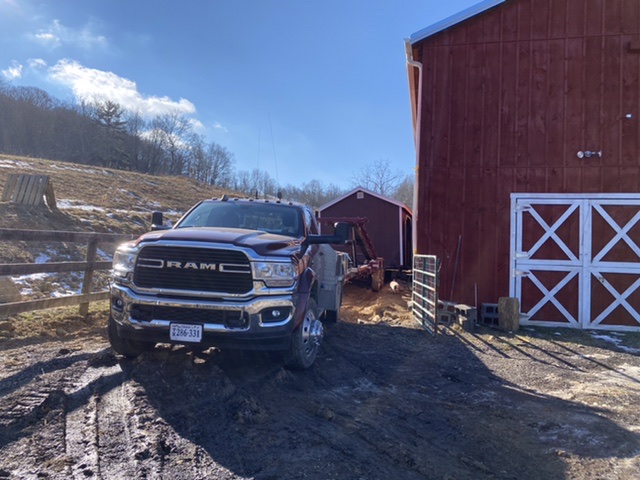
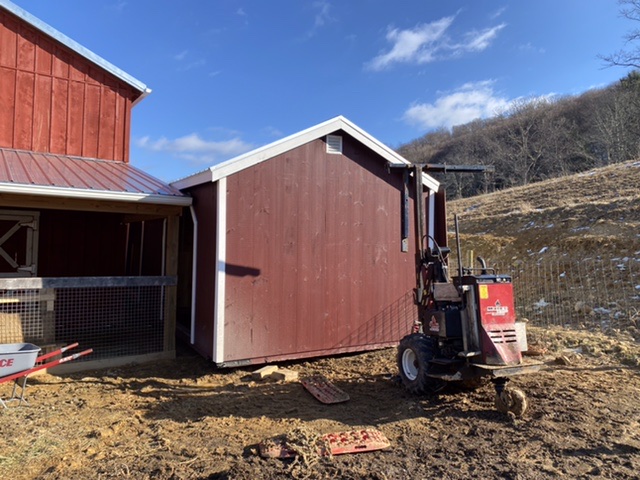
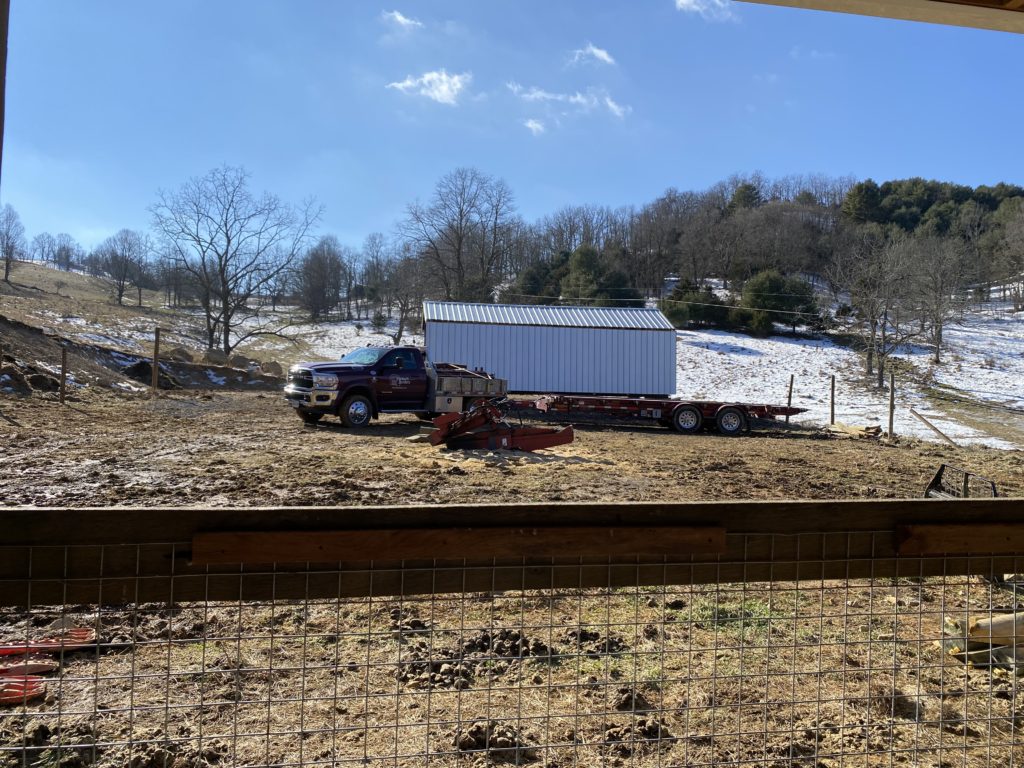
Next morning, it was more ticklish business to get the “baby” past the new barn goat porch, across the (now frozen) mud to the proper site, and then position it in place.
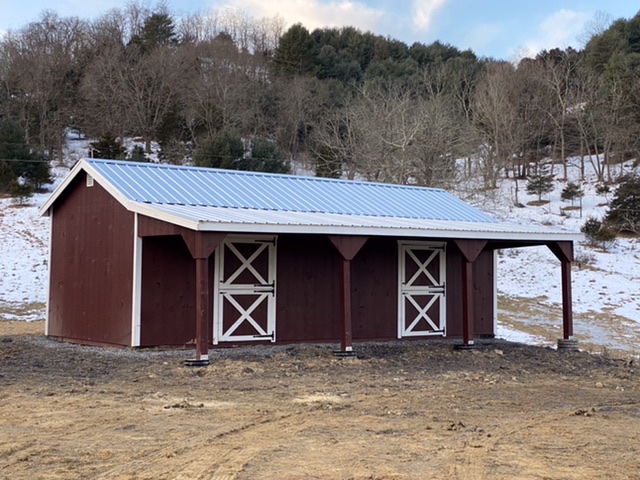
The above picture is of the “field side” where animals can use it as a run-in shelter. We plan to add gates as needed so that these can become holding stalls as well. Each has a door opening into the “ring side” of the complex.
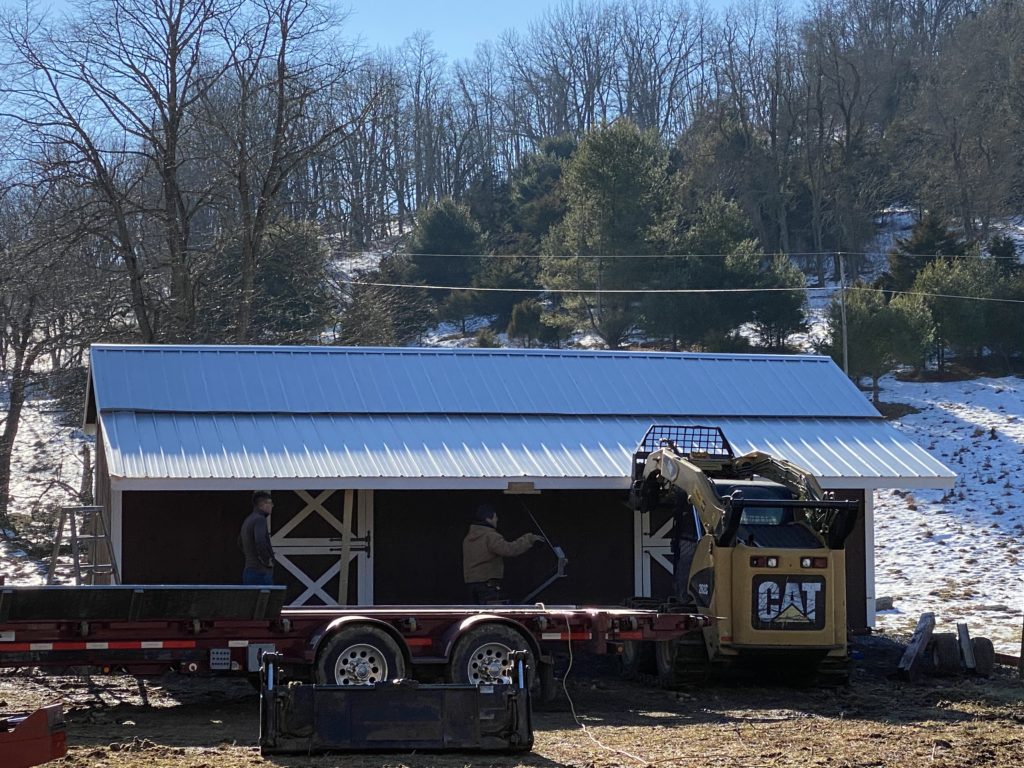
After placing the building correctly, the delivery team had to erect the overhang that had hung by the side of the building on a giant “hindge” when it was in motion. They put four supportive posts in place where there were pre-existing piers poured, afixed trim, etc. Again, they finished after dark.
Putting up the overhang took two men working hard from noon until dark!
SO: we have a great new shed.
Again, so many thanks to Caleb and Jonathan and a good God who made it all possible!
I am relatively new to goats. This spring will be our third kidding season. As I reflect back on 2020, two success stories stand out, and I wanted to post about them to give hope to others, and give thanks to God, Who enabled us to bring full healing to two of our kids.
Listeriosis and polio in goats are both deadly diseases, left untreated. They present with nearly identical symptoms, so the typical approach is to treat for both of them simultaneously. Listeriosis can cross to humans, so you need to wash hands after treating sick goats. In case you’ve never had either of these, I’ll briefly define them.
“Listeriosis is caused by the bacterium Listeria monocytogenes and is commonly seen in cooler climates [though our first case was in August]. These bacteria can be found in the soil, food sources, and even the feces of healthy animals. Most commonly, this disease of sheep and goats is observed as a result of feeding moldy or spoiled hay or silage.”
You treat listeriosis with massive amounts of penicillin, given in shots. Because these bacteria cause a neurological disease yielding deadly paralysis, you need to push the bacteria-killing penicillin past the brain/blood barrier to defeat it. Some people give the shots every six hours around the clock. Our vet directed us to give it twice a day, AM/PM.
We didn’t have moldy hay in our barn, but our goats forage daily in a large pasture, so in the humid days of late summer, our 10-week-old kid, Dandy Lion (right), could have gotten it in the field.
Or… he could have had polio. “Polioencephalomalacia (polio) in ruminants is caused by a thiamine deficiency and/or sulfur toxicity. Other causes include improper feeding, feeding too much grain, or anything that disrupts the health and well being of rumen microbes, such as chronic or acute acidosis or indigestion.”
The treatment for polio is to give large doses of Thiamine (a type of vitamin B) injected sub-Q. Polio is relatively easy to cure if caught early, but since both of these diseases present the same, and it’s important to act immediately, we treated Dandy for both simultaneously, under the direction of our vet.
We think that nine-month old Bridget (left) was possibly stressed by being forcibly weaned, and that her stress brought on her susceptibility to her listeriosis/polio battle.
I felt really badly that two of our animals came down with this disease within a few months of each other, and I earnestly asked my vet if my management was at all at fault, and he said “No. These bacterium are everywhere.”
Symptoms and Treatments for Dandy Lion
So, if you’ve never seen it, what are the symptoms of listeriosis/polio?
With Dandy, during morning chores one day, I noticed that my normally bouncy, friendly little buckling was sleepy and listless. He looked punk; he looked “off.” I noted it, thinking it might be coccidia, and moved on.
But, that night on barn cam, he was standing with his head jammed into a crook in the goats’ sleeping benches. When I went up at 2 AM to help him (thinking he was actually stuck) he stumbled away from me as if drunk and dug his head sideways into another corner.
We waited until daybreak, and then contacted mentors and our vet. After gaining an ides of what it was, we started pumping penicillin and thiamine into him.
Since he was young and really bad, we also had to tube feed him. It takes about 4-7 days of treatment fo them to be fully healed, so they need to be hydrated and fed, or the disease will win.
The idea of tube feeding terrified me at first. Our vet talked us through the process by phone, but it was watching YouTube videos that really helped us out.
We found that, in practice, with a 10-week-old kid tube feeding is not hard, especially if the kid is really out of it. If you mistakenly get the tube down the windpipe (which we never did) they cough. If they don’t cough, you’re good!
We ended up tube feeding this little guy four times a day, giving him four ounces of milk each time. It got to be routine, amazingly, and now I can do it easily. But starting it was scary. I’m just writing this to say: YES, you can if you must!
We also made Dandy into a little pin cushion: we gave him 10 ccs of penicillin morning and evening for about five days. I hated it; but again, the alternative was death.
Part of Dandy’s response to his pain was to STAND for three straight days (as in the picture above) with his head jammed in a corner. He would NOT lie down to rest. We tube fed him, isolated him to a small area for his safety, and gave him shots for four to five days (I can’t remember the exact number).
PLEASE NOTE: We isolated Dandy for his safety. You do NOT have to quarantine for these diseases since the bacteria are everywhere. However, we did use gloves and wash hands because Dandy was drooling and listeriosis does cross to humans.
At nights, we put his mom in with him for comfort. She needed to go out during the day to eat, but at nights we put him in with her. He would try to nurse but not be able to suck the teat because his brain had lost that connection. He would need to re-learn it, or not be able to drink, and thus live.
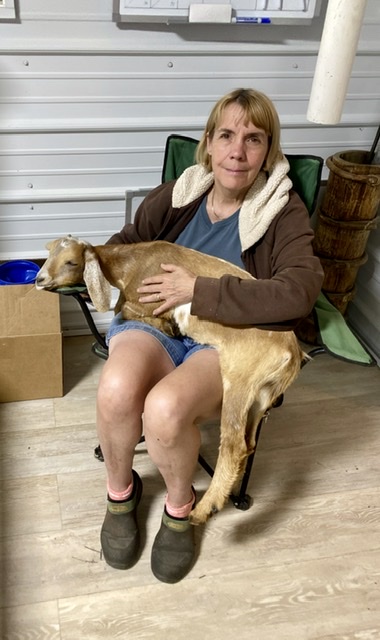
I watched him day and night (on my barn cam) and he never layed down. This worried me. After he’d been on his feet for three days straight, I decided to just FORCE his little body to rest. I sat in this chair for three hours on the fourth day and just let him sleep in my lap. I also did the same that afternoon for more than an hour. He really did seem to get better from that time on, and that night I saw him lie down with his mom.
After about five days of treatment, Dandy was definitely on his feet and moving around normally, but he still couldn’t nurse his mom. This worried me so much! He did start eating hay, but wasn’t nursing. I worried about dehydration.
Finally, on the sixth day, I saw Dandy take a LONG drink from a bucket of water and I dissolved into happy tears. He was old enough to wean from milk and eating hay. If he could drink from a bucket, he would live without tubing.
As it turns out, one of the strengths of the mammalian brain is that it can reroute itself to re-learn tasks that are lost from injury to the brain. So it was with Dandy. We kept him another two weeks beyond what we would normally have before he went to his new home, and in about 10 days, he had figured out how to nurse again! (It was just in time for us to send him home with his new family, and he had been trained to the bottle, so they were able to baby him with milk feedings for another month to help him regain his lost weight.)
Symptoms and Treatment for Bridget
We were so grateful that Dandy was healed through this process, and it gave us confidence when, on November 4, during morning chores, 10-month-old Bridget started the behavior in the video, right (click on the triangle to view the video, and be patient while it loads).
Note the tongue hanging out the left side of her mouth, the slobber, and the rubbing of her mouth on surfaces.
We knew something was badly wrong, and began immediately with the penicillin and thiamine. We contacted our vet, and he agreed on the treatment.
Bridget was much older than Dandy had been, and it was fall, where the foliage was dying down. She was too old for us to safely tube, and she was not as sick as Dandy had been, in terms of behavior. She was walking, eating, and drinking. She just could not put her tongue in, and her cud got caught in her cheek.
In her case, we asked our vet to come out and make sure that it wasn’t a dental issue, or maybe a thorn caught in her cheek or throat. He checked her thoroughly and determined that it was most probably early listeriosis/polio.
Thus, Bridget became our second pincushion for another week or so. She was eating and running with the herd the whole time we were treating her. She had plenty of energy. She never had the twisting of the neck or the dazed “out of it” expression. She laid down with her mom at night, and also ate out of the manger from time to time at night on cam.
The issue with her was that, each morning, in the bedding (and also in the mineral dishes) we found regurgitated cud. LOTS of it. At first I thought it was scours, but then I would see her poop normal, black goat berries, and this “scour” had texture to it and was very green and didn’t smell bad. It finally dawned on us that it was drool! All night long, as Bridget chewed her cud and sought to process her food normally, her mouth paralysis was preventing her from swallowing her cud back down to where her the rest of her digestive system could finish processing it. We worried about her losing weight day by day and bought an animal-size scale.
We started to weigh Bridget and found that she was losing weight. Though her rumin could process 80% of the fatty acids of her feed through its walls (thus, she was not dying quickly), we were thinking that if she became weak or wasted away to pitiful proportions, we would have to put her down. Having fought so hard for her, and having a lot invested in her bloodlines, I was really sad and praying hard for her to be healed. Morning by morning, there were several large piles of cud drool in her bedding, and on her mom’s back from sleeping near each other, and some in those mineral dishes. SIGH. (It was both gross and discouraging.)
Having seen Dandy’s brain reconnect, though, I kept waiting to see if her brain would repair the paralysis damage. But, I also worried that it was taking so long. After six weeks of drooling illness, I was seriously thinking of putting her down, and really depressed about it. At that point, though, Eliya Elmquist really encouraged me that one of her does had taken a LONG time to recover from listeriosis. This gave me peace to wait on the Lord to see what would happen, and to simply give it to Him.
On Christmas morning (almost 8 weeks since she had first sickened), I went up to do morning chores and mucking. I came to Bridget’s bed with a pitchfork, ready to put her drool piles into my muck bucket. There was almost no drool!! Excited, I told Scott about it and waited for the next morning… no drool!!!! I was SO HAPPY and excited. She has been drool-free since Christmas Day.
After a few days of not seeing drool, we weighed Bridget. She had gained 10 pounds in two weeks from her last weigh in! We were SO SO grateful to God for His grace in creating that mammalian brain that had been re-routed to allow Bridget not only to live, but to re-learn how to swallow her cud. Bridget will probably make a full recovery and be bred next fall.
We are thankful, and I hope that this post will encourage you in any battles with listeriosis/polio to hang in there and wait on that amazing mammalian brain if your goat has some lasting after effects.
So, tomorrow is November 1. It’s starting to be freezing temperatures at night, but I’ve been tracking early morning temperatures, and they are consistently 15-20 degrees higher inside my barn than the outside temps. Of course, it’s still warming up to the 60s during the day, with lots of bright sun. So, winter isn’t really here—yet!
If you follow this blog, you know that I had planned to have my girls on bare tables this winter. The reasoning was that pee would go down through (which it does) and I could clean off poo each day (which I now do) and they would be fine. The photo at the right is first thing each morning. Here’s where I detail the table construction.
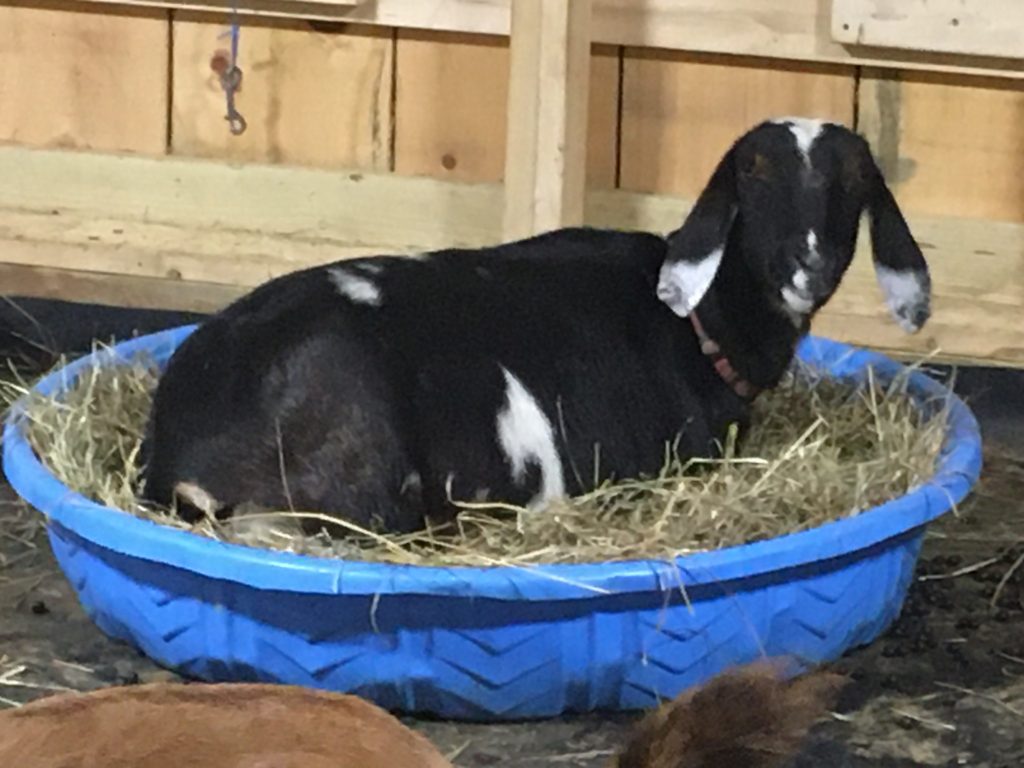
Last winter was a mild one, and I used the kiddie pools, which worked well for warmth, but were difficult to clean out in the dead of winter. (I had to clean them out because pee was trapped in them and they became heavy and yucky within 10-14 days.) I have a friend in PA, though, who used bare tables for her does and had no problems last winter. BUT: it was a mild winter there, too. I wanted less heavy lifting in bad weather this year, so I decided to follow my PA friend’s lead, but wasn’t entirely sanguine about this plan. I had given myself the option of hanging radiant heaters over the tables, but upon pricing them, found them well out of our budget. So, I was unsettled.
The Dilemma
Then recently, a good and kind neighbor of mine (with a lot more experience with goats than me) had me come over and look at her barn, and talked to me about the benefits of deep litter. She had seen my blog posts and she believed that my goats would suffer from being on bare tables—that they would be cold and possibly get arthritis over time. I went away from our conversation thoughtful, and then prayed about her advice.
Now, I knew about deep litter before my neighbor spoke to me. We successfully use it with our chickens. But with goats, I do not like bare dirt floors. Been there, done that. We have clay for dirt, and the pee puddles as if the goats were on cement. And, I do not like cleaning out deep litter from mammals. In fact, my barn is designed such that if I had dirt floors, I could drive a tractor through it and clean that way (as opposed to the back breaking chore of using pitch forks and wheelbarrows). But, I chose to use rubber roofing over my clay floors instead of deep litter in winters.
I have had it for over a year, and I love this rubber because I can squeegee it daily and sluice it with water when it needs it and it gets really clean and the barn smells sweet because the pee runs out of the barn in our handy gutter. It takes less than an hour each morning to muck. I do it while my husband milks the goats.
In the picture at the right, that floor will be dry in 20 minutes or less.
BUT: I would not want my goats sleeping on the bare rubber floor. While the tables’ wood gave a decent R factor of insulation, the rubber on dirt has none of that. And then there was the cold air underneath the tables. Would they insulate the goats enough, being elevated? My neighbor’s advice kept rattling around in my head and heart, and I felt like I should heed it, but I didn’t want to give up that rubber floor!
My Solution
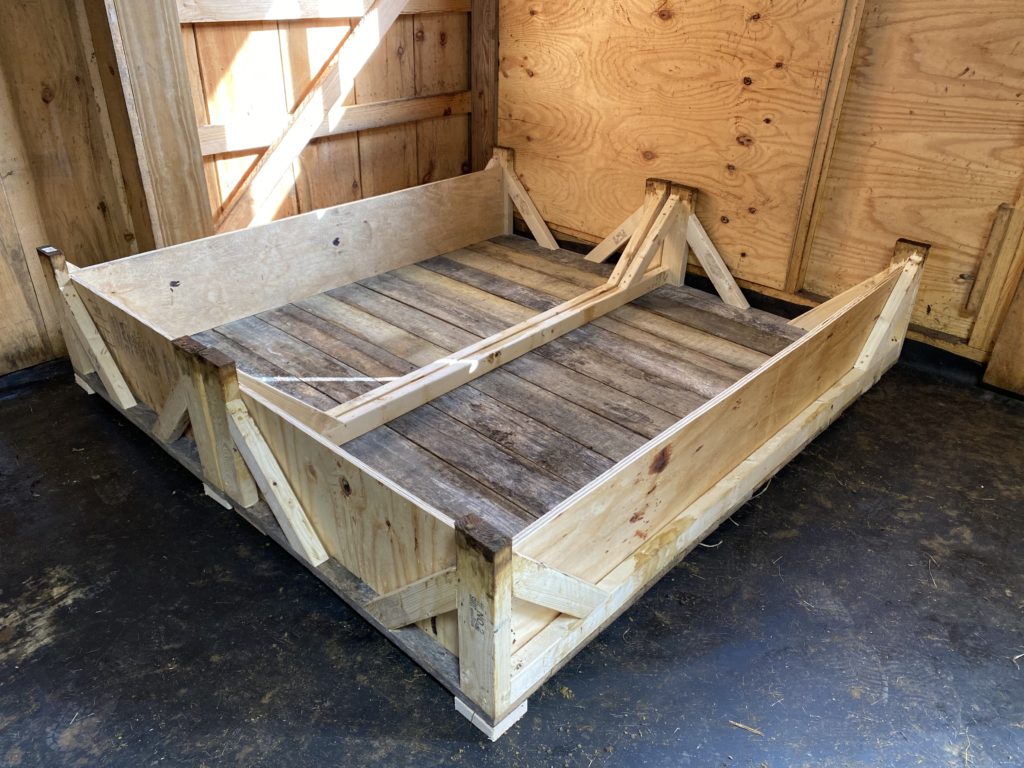
Deep litter boxes (instead of pools or bunks—the new experiment!)
After much thought and prayer, I had an idea. I decided to turn my tables upside down for the winter, building plywood sides that would keep hay in for bedding. This is similar to kiddie pools, but the cracks in the tables‘s boards allow pee to run out under the box, down the sloped rubber floor, and into the pee gutter that I now like and use.
We put a light topping of bedding over the poo each morning (deep litter) but do not (as with pools) put absorbent pellets in the bottom to trap the pee. Because the tables are rigid, we can simply elevate them over the sloped rubber floor. Note that we put blocks under the downhill side (front in these pictures) so that pee can run out from under the beds.
Construction step 1 is pictured at the left. Steps 2 and 3 (building plywood sides and then filling them with bedding) are below.
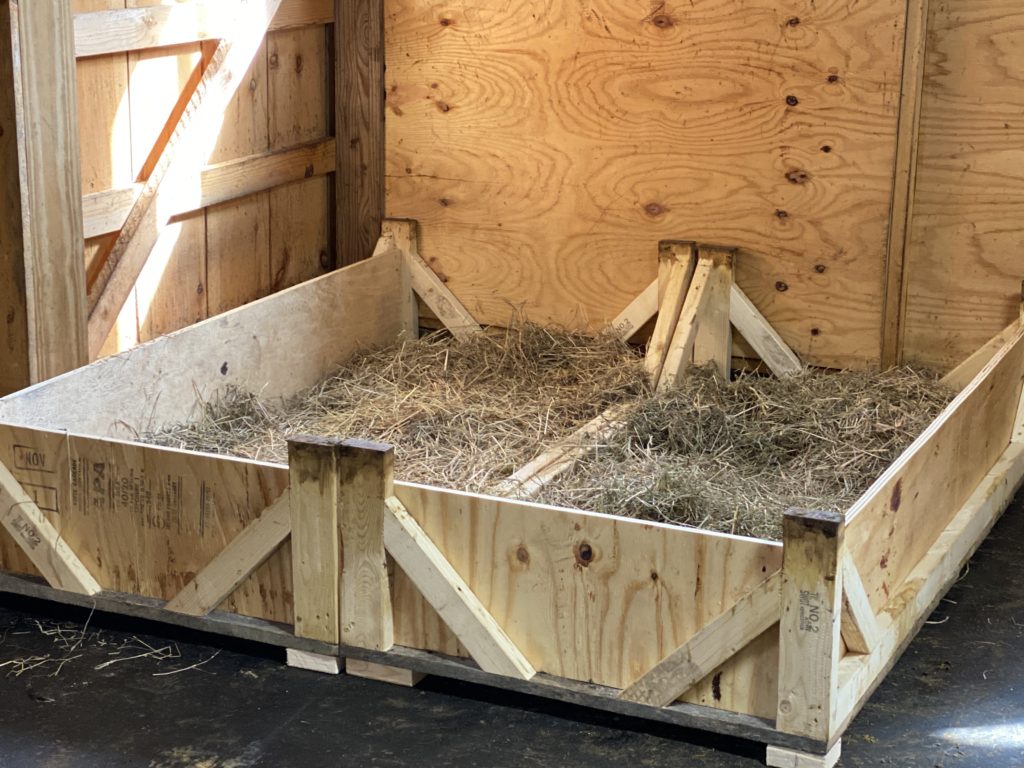
These plywood sides become aprons after I flip them again in spring (to keep little kids out from under them).
With sides attached… bunks are still separate.With hay on the bottom. Cozy!
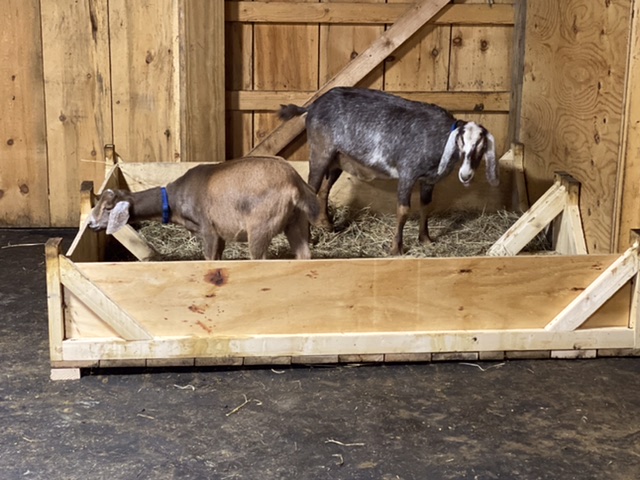
We built it in an hour yesterday, and then waiting to see how the does would vote with their hooves! Where would they choose to sleep? Bare tables or deep litter boxes?
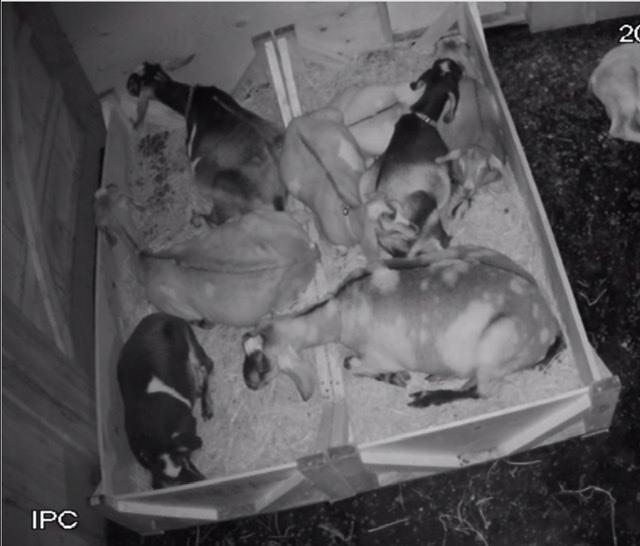
Spoiler alert! This prototype “litter box” was a tremendous hit. The left picture below shows mother and daughter exploring the possibilities before lights out last night. The one on the right was taken on our barn cam at 6:15 AM. There were 9 does in the box right before I snapped this picture, 2 does on the bare benches nearby, and one on the rubber floor next to the box. Clearly, the does had shown their preference, and my neighbor was correct.
Bluebelle and Briar Rose exploring last night.6:15 AM There were 9 in here just a minute ago!
So, this morning, my husband and I spent a couple of hours sawing up plywood pieces and repositioning the tables—upside down.
(Can I say again how MUCH I love modular solutions? SO glad that we didn’t build them into walls or build stalls in this barn!) These “litter boxes” aren’t screwed together; they are heavy enough that they stay put without it.
This is how it looked when I’d finished screwing the plywood sides in place, and putting in bedding.
Just a few quick notes below, and then I’m done.
One thing I quickly realized this morning was that we’d made an oops putting the trial bunk (pictured up above) in that corner. The problem is that this is where our kidding stalls will be erected in late January, and I’m hoping to not have to move these litter boxes until early spring. So we moved the trial box to become the closest of the three pictured right above.
When we moved that trial box, I saw that if I used hay that I cleaned out of the bottom of our mangers, it would have lots of fine “hay dust” that will sift down under the box during the night. Because I don’t want to impede the flow of pee out from under these boxes, I made sure to use our round bale bedding hay, which is more like straw, rather than use waste hay from our mangers.
And here they were on November 1, looking so cozy. Makes my heart happy!
UPDATE IN 2025
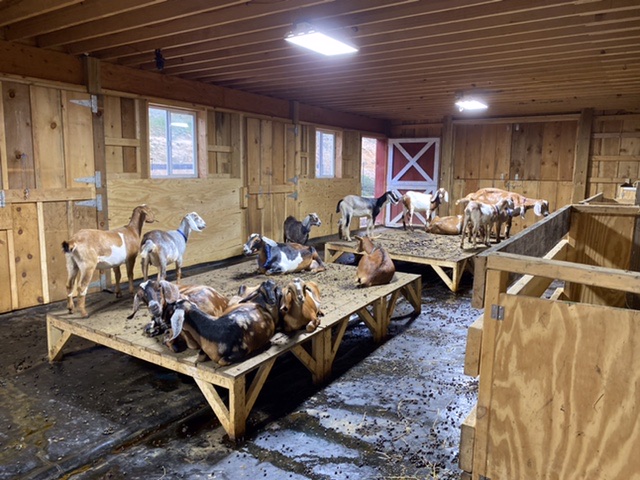
This is an old post: we now have a solid wall of side-by-side tables like these as our herd has grown. They all still love them, and what’s not said above is the fact that we use them as deep bedding sleeping (and later kidding) bunks.
So, daily, we sprinkle used hay on top of pee and poo, and gradually, from early Nov to mid-January, the level of the hay rises. Chemically speaking, the hay/poo combo composts, adding warmth. Then, in mid-January we usually have a thaw, at which time we empty these (now full) bunks and start over with bedding.
By the time kids start to arrive in early February, there’s maybe 8″ of bedding, and we allow the does to kid in them. We then clean the section of the bunk that got hit with birth fluids and goo, and continue to bed daily with a thin layer over pee and poo. At the start of April, after all kids are born and the weather is truly warming up to no freezing night time temps, we flip the tables back up. The skirts around them keep the kids from getting under the tables when they are sleeping platforms.
You know how it is. You try one thing, and it’s good. But then it has problems. And you think, “There has to be a better way!” If you follow this blog, you know that I’ve tried floor bunks with deep bedding and pools with deep bedding atop our rubber barn floor. There were definitely pros to these, but there were cons as well.
The pros were that they kept our girls warm, and they nestled into them with their growing kids. We had enough that there was plenty of choice.
Thing is, the girls did pee and poo in them… so, maintenance. Sigh. The bunks got too heavy to muck at all easily. The pools, we had to drag out every week or two (some pools were more popular than others) and then redo them: pellets for absorption of pee, PDZ powder, and then a starting layer of bedding hay. (We bought year-old hay for bedding only.)
Pools are okay… They really are! And I still recommend them. BUT: they’re work, and we like to minimize work where we can! They also have the expenses of pellets, PDZ, and bedding hay. So, we’re trying something new: tables.
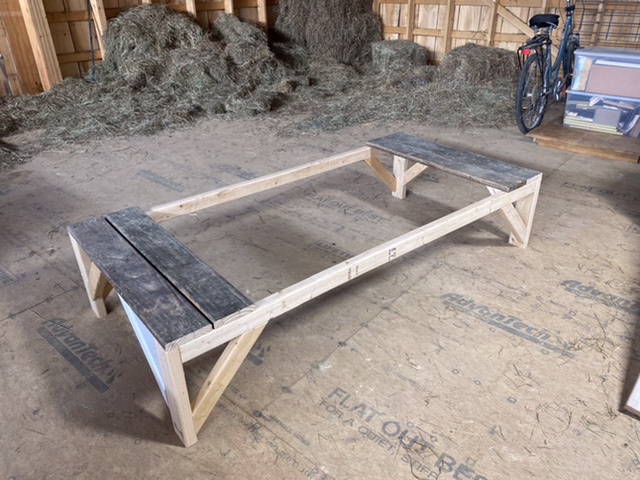
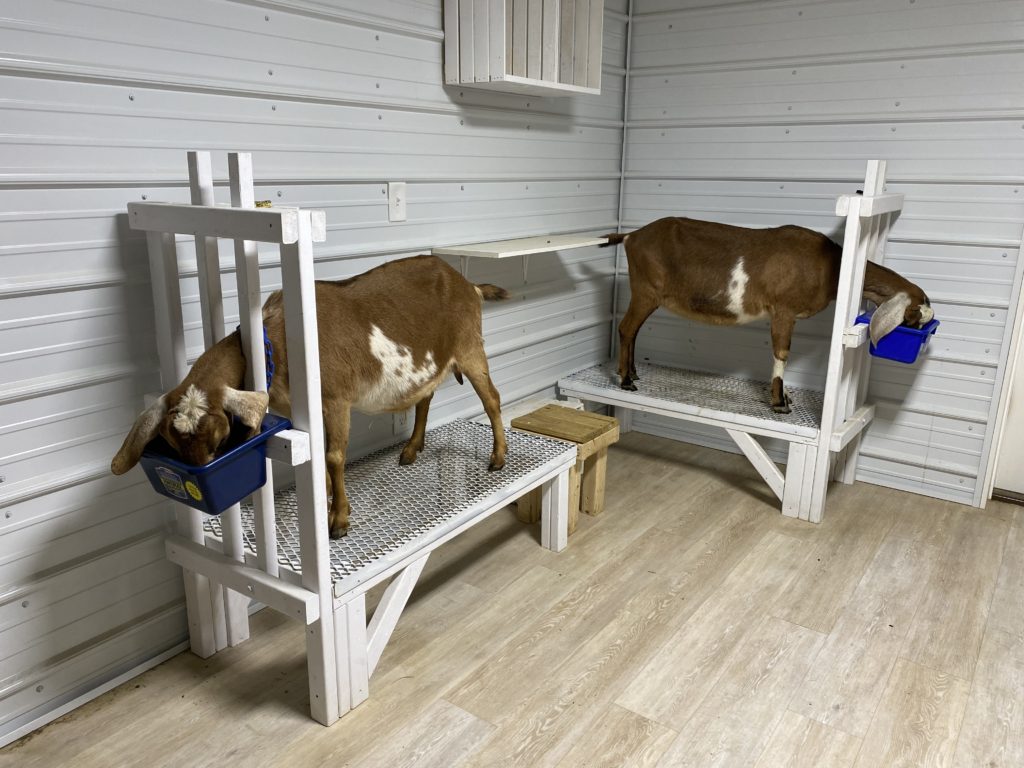
What are Tables?
Some people call them bunks. Ours are more like tables, so that’s what we call them.
We built them all identical and freestanding, so we can move them around in various configurations… because, if you’ve been following us for any length of time, you know that “modular is us.” We have configured them all in a row, or we have put them (more successfully) into blocks. (See pictures below.)
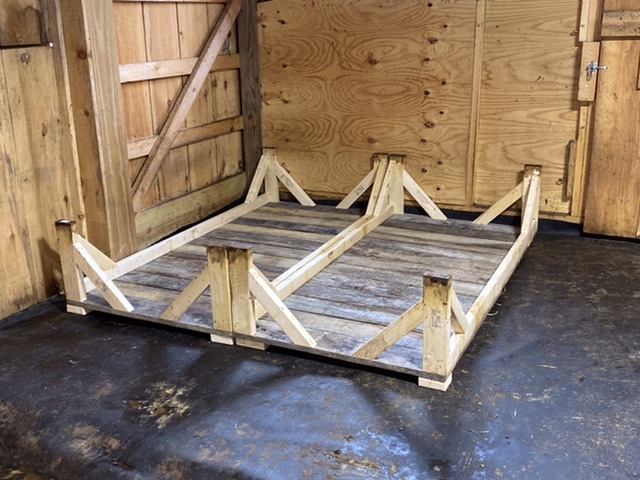
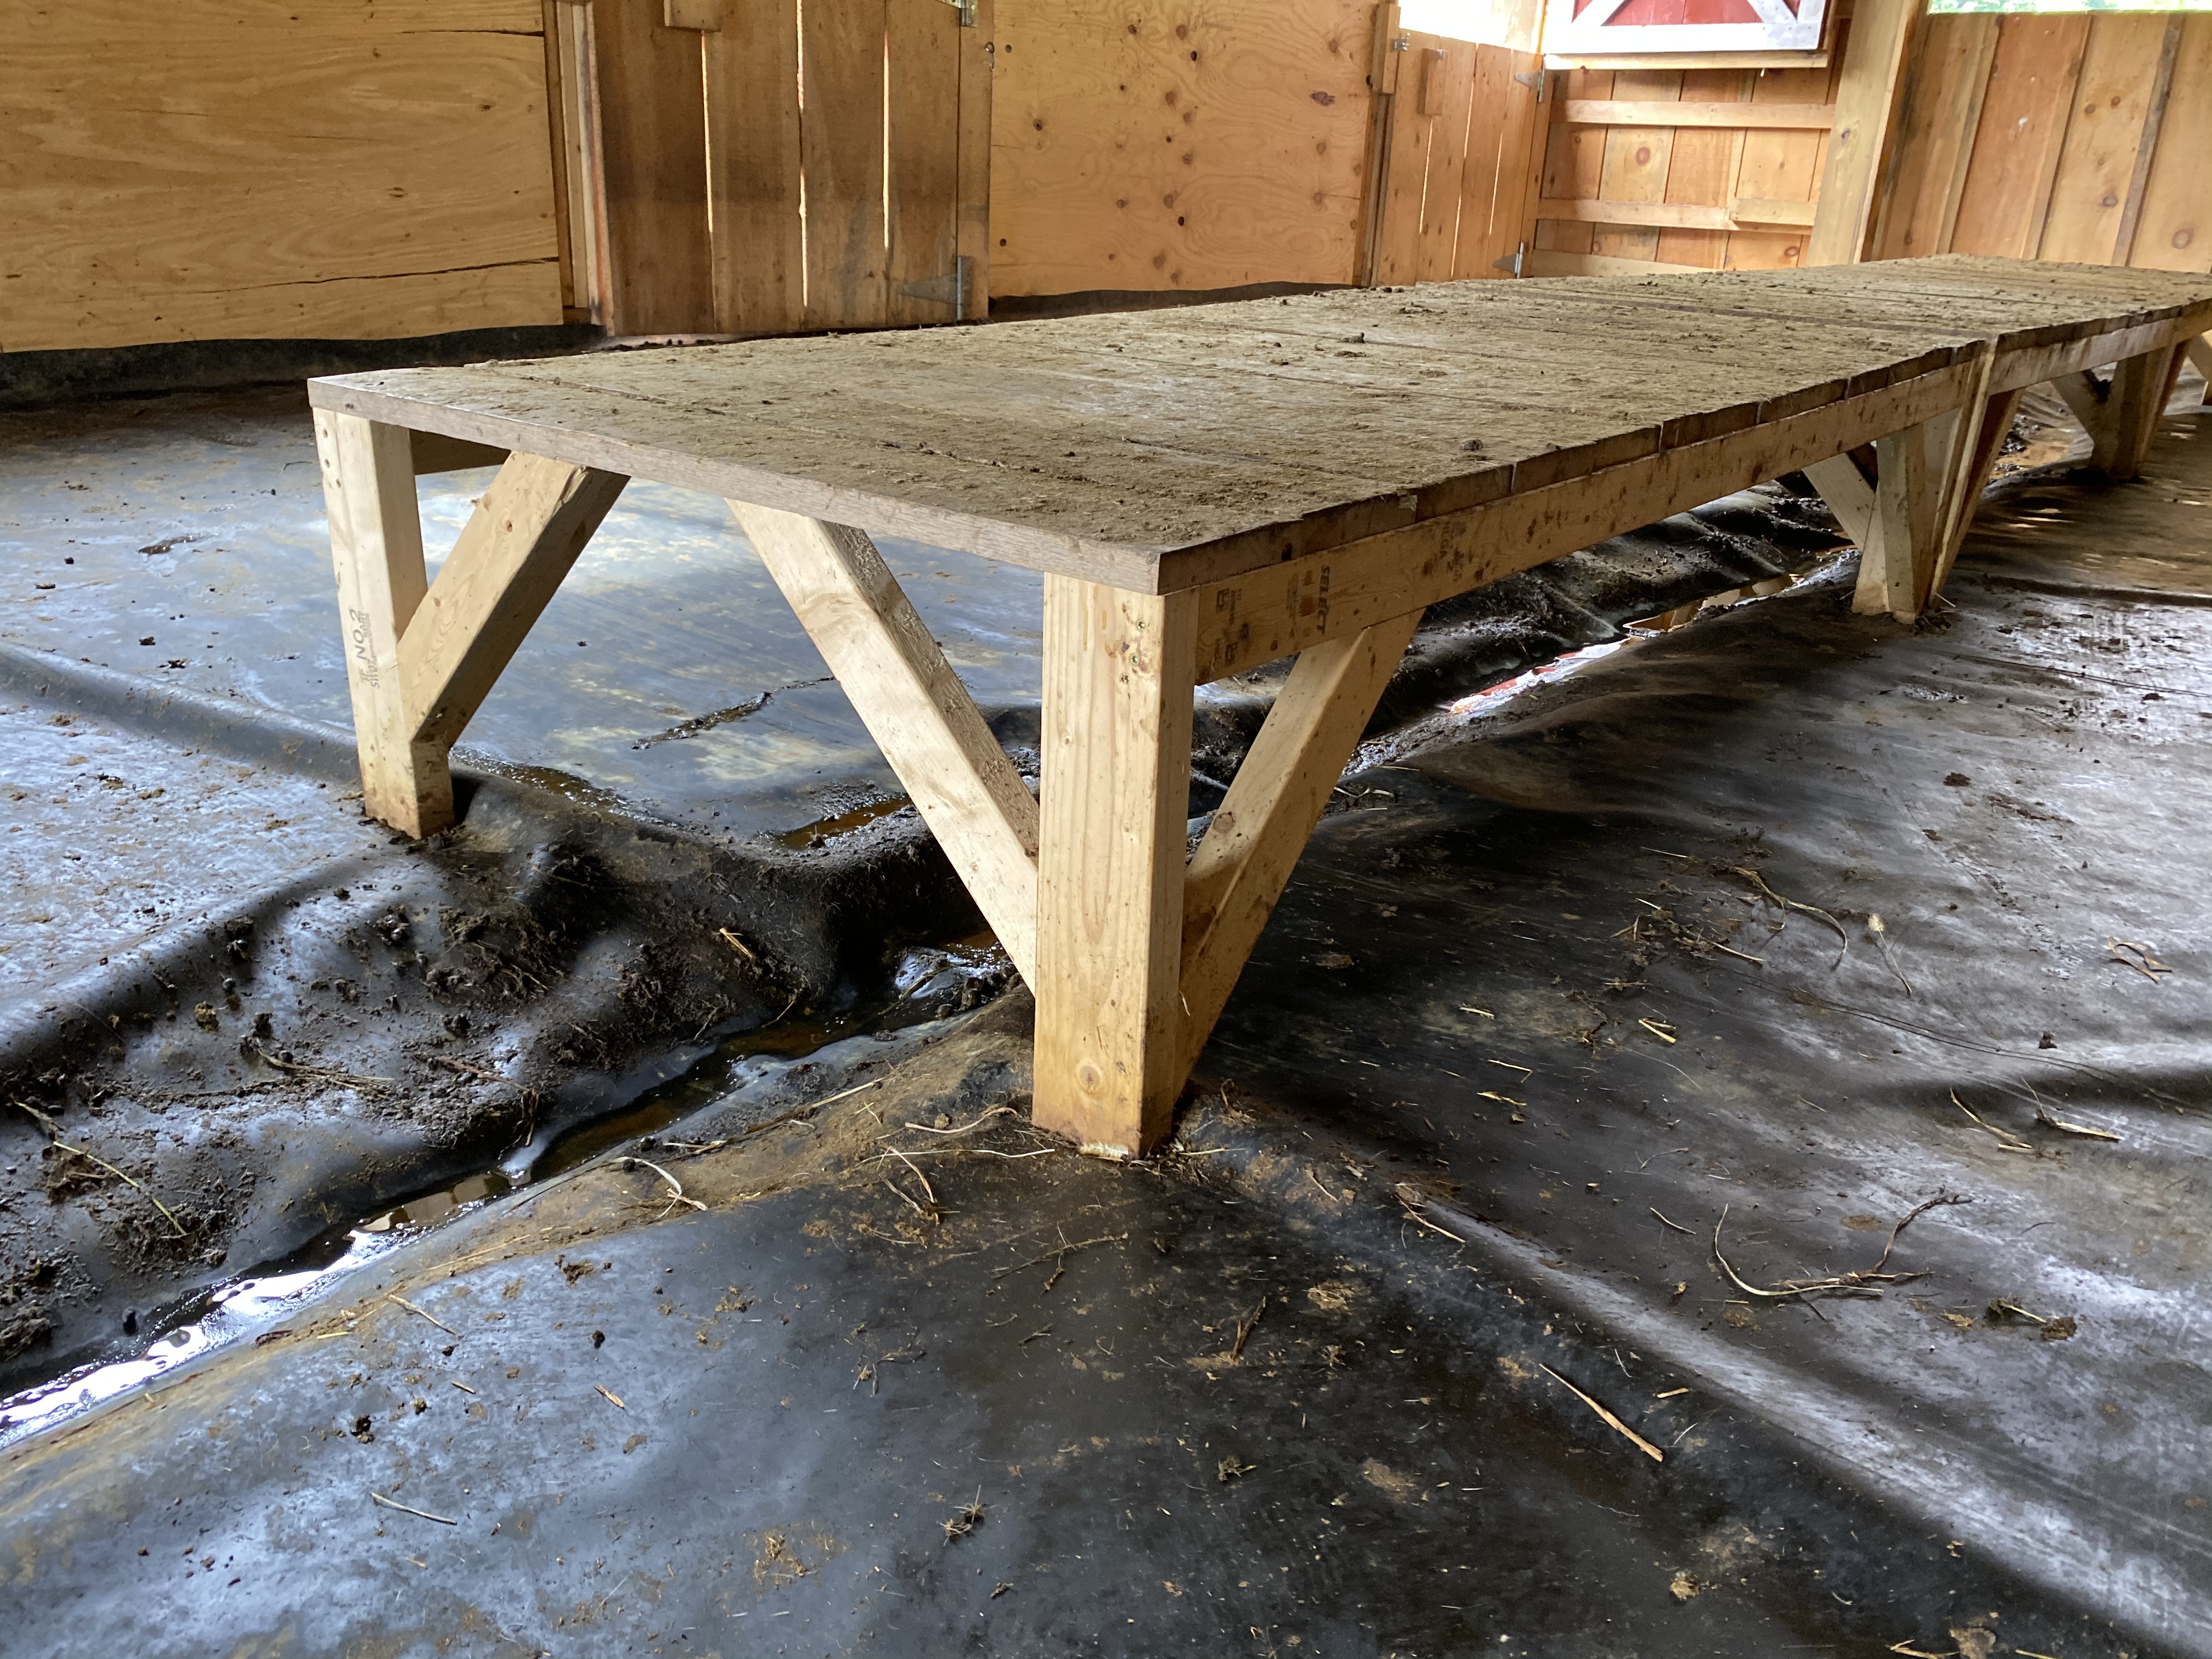
This picture shows the basic framing. The table top is 6’ x 3’. The framing is 2 x 4 legs that are 15” tall, with 2 x 3’s for the braces and horizontal struts. We have been using old fence boards for the surfaces.
I have found, by trial and error, that it’s best to keep the seams between boards snug. The goats will pee on these tables, but the pee will go down through tight seams, and the poo will not, which is beneficial on the back, because there’s less to bend and scoop when mucking.
Here’s the finished product, before goaty hooves (and hinds) have touched it.
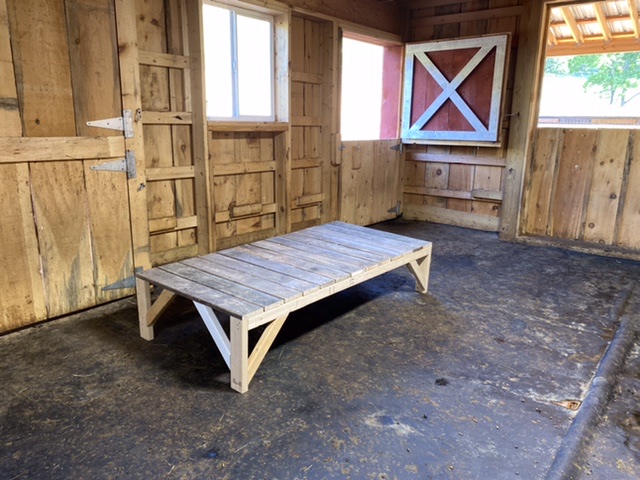
As I said above, at first we put the tables in a line… this picture is taken first thing in the morning… all the girls are waiting to be milked.
As you see, they do poo on the tables at night. But, their udders seem to be just as clean in the morning as they were with pools.
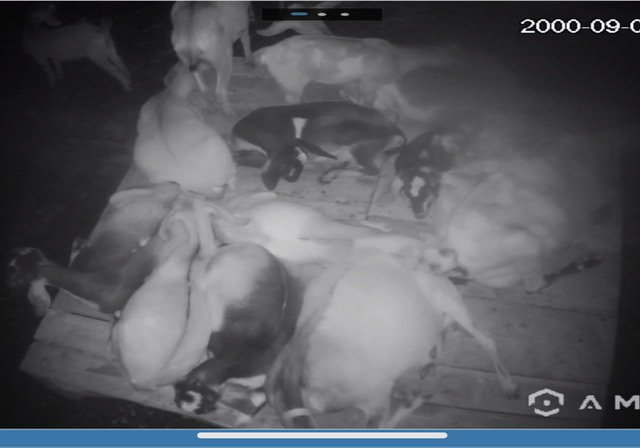
Recently, we changed these tabes to be side by side in a square configuration. This is a night picture via video cam. You can see that it’s a pile of goats, grouped in families… I just love this picture!
Some of the does don’t want to sleep on the tables, but it’s still warm weather. We believe that the wood will be warmer than the rubber floor come freezing weather.
We don’t think we’ll need to bed with hay, but we may use heat lamps in the coldest weather, mounted above these tables.
In previous posts, I’ve explained that we chose rubber roofing material (all one piece) to cover the dirt floor of the barn we built in the summer of 2019, and written about various ways that we’ve found of cleaning the floor and economically bedding down our goats.
This post continues that series. It is comically subtitled “Piddle to the Sea.”
The Challenges
As I’ve explained, there are pros and cons to rubber floors. I have LOVED the fact that I can muck it every morning and keep it squeaky clean, because urine and poop do not seep into underlying dirt, but are removed daily. I have loved that it smells good in my barn. I have LOVED the fact that I’ve had no trouble with mites or cocci (one case among 25+ kids this year).
The only thing I have not loved is how long it took me each day to muck, and the unsuitableness of the tools I employed to do it. The main problems have been puddles and too-soft poops (the kind you get in the spring when goats first go out on pasture).
We have tried the following approaches:
Sweeping up berries with a broom, and allowing hay that falls from the manger to absorb most of the pee, while bedding the goats in bunks (that had to be dumped every week or so, and then re-bedded).
Using a broom to sweep up, but then employing a heavy-duty shop vac to remove urine, puddle by puddle, while still using pools.
Using a small, plastic squeegee/broom to get up the berries, then using the shop vac, puddle by puddle.
With all these approaches, morning mucking was taking 1.5 hours daily for a 48’ x 18th space.
The Breakthrough
My eldest son, Nathan, who is 39 years old, often helps us care for our goats when he visits. He was contemplating the situation, and we were discussing it one day, when he made a suggestion that turned out to be brilliant. He suggested terraforming.
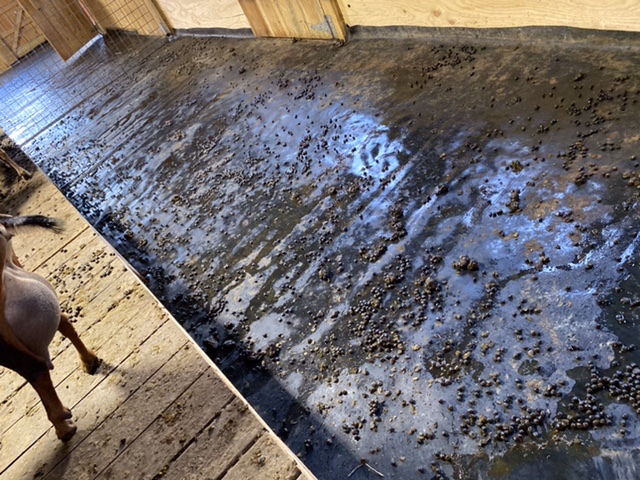
Our barn was not leveled correctly by our excavator before it was built. Our fantastic builder had to compensate for a 10” drop over 48’ from front to back. He made that drop invisible to the human eye, but what it meant when it came to the pee on our rubber floor was that urine did run downhill and tended to puddle deepest towards the middle of the area.
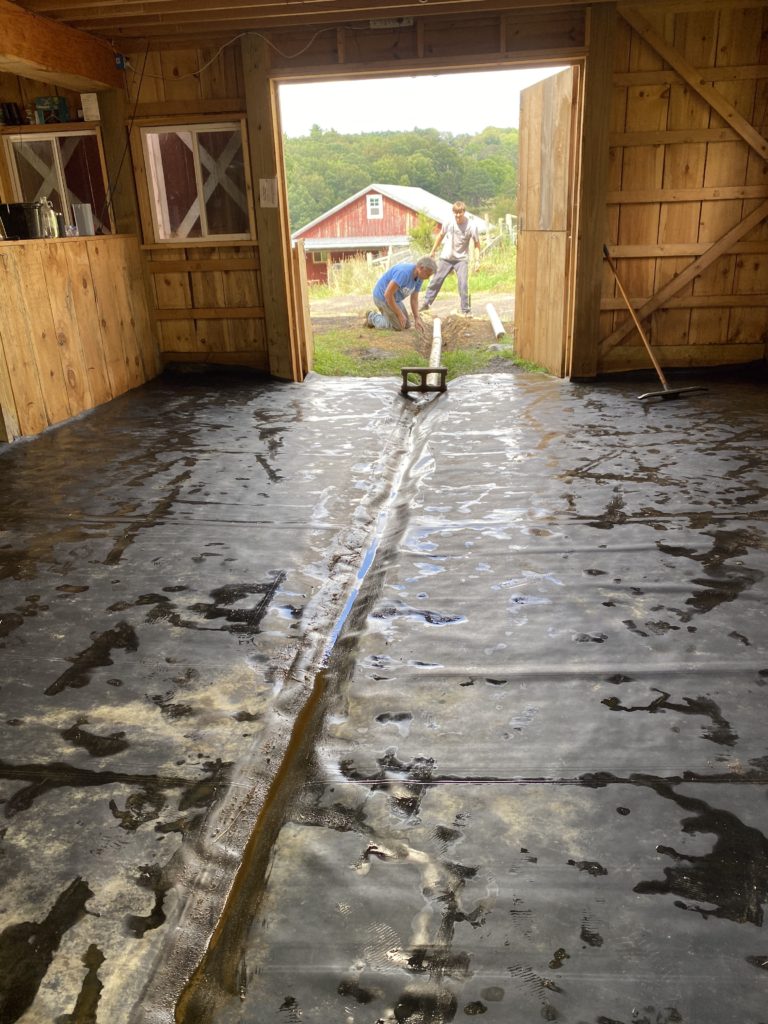
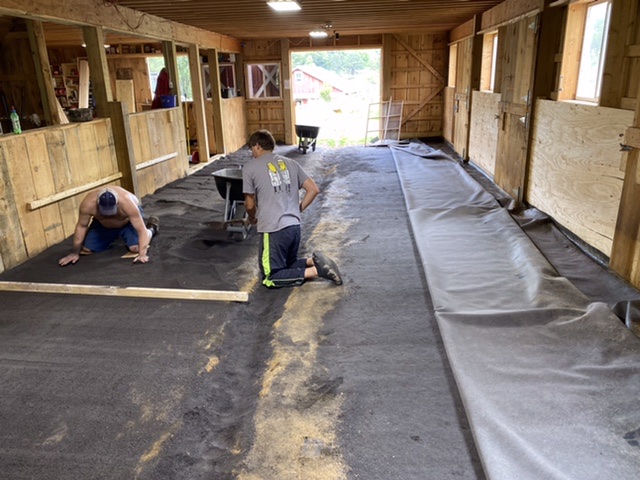
Nathan’s idea was to peel back the rubber (which has never been attached to the sides of the barn), use our tractor to dig a center ditch, take out all the rocks in that dirt, and then spread it—plus some of the black sand that we had left from the original laying of the floor—on both sides in order to slope it yet more steeply to a central gutter.
The Process
We gathered five adults on a Saturday morning to tackle Phase I of the project. It had to be done in one day, because of human schedules and the need of the goats to have shelter at night. Phase I was to do the right side of the barn. Phase II was to remove mangers and do the right side.
In Phase I, we dug the center ditch about 8” deep using a tractor. This depth caused wrinkles in the rubber after we put it back. These wrinkles then inhibited flow in the gutter where they pinched, and berries got caught in those pinches.
We gave it three weeks of testing before doing Phase II. Initial results were impressive. Each morning, there were no puddles! The urine flowed gently downhill on the left side, and the (mostly dry) berries remained where I could sweep them up with my newly discovered industrial-sized squeegee.
After about three weeks, our crew reconvened to do the other side of the barn. In Phase II, we made the center ditch far more shallow. It works VERY well. It gets deeper and deeper as it travels downhill from the back of the barn to the front, thus making good use of that original 10” overall drop. It is less than an inch deep at the back of the barn, and maybe 6” deep at the front, but the overall drop makes the flow strong.
Below is a gallery of images that show the following:
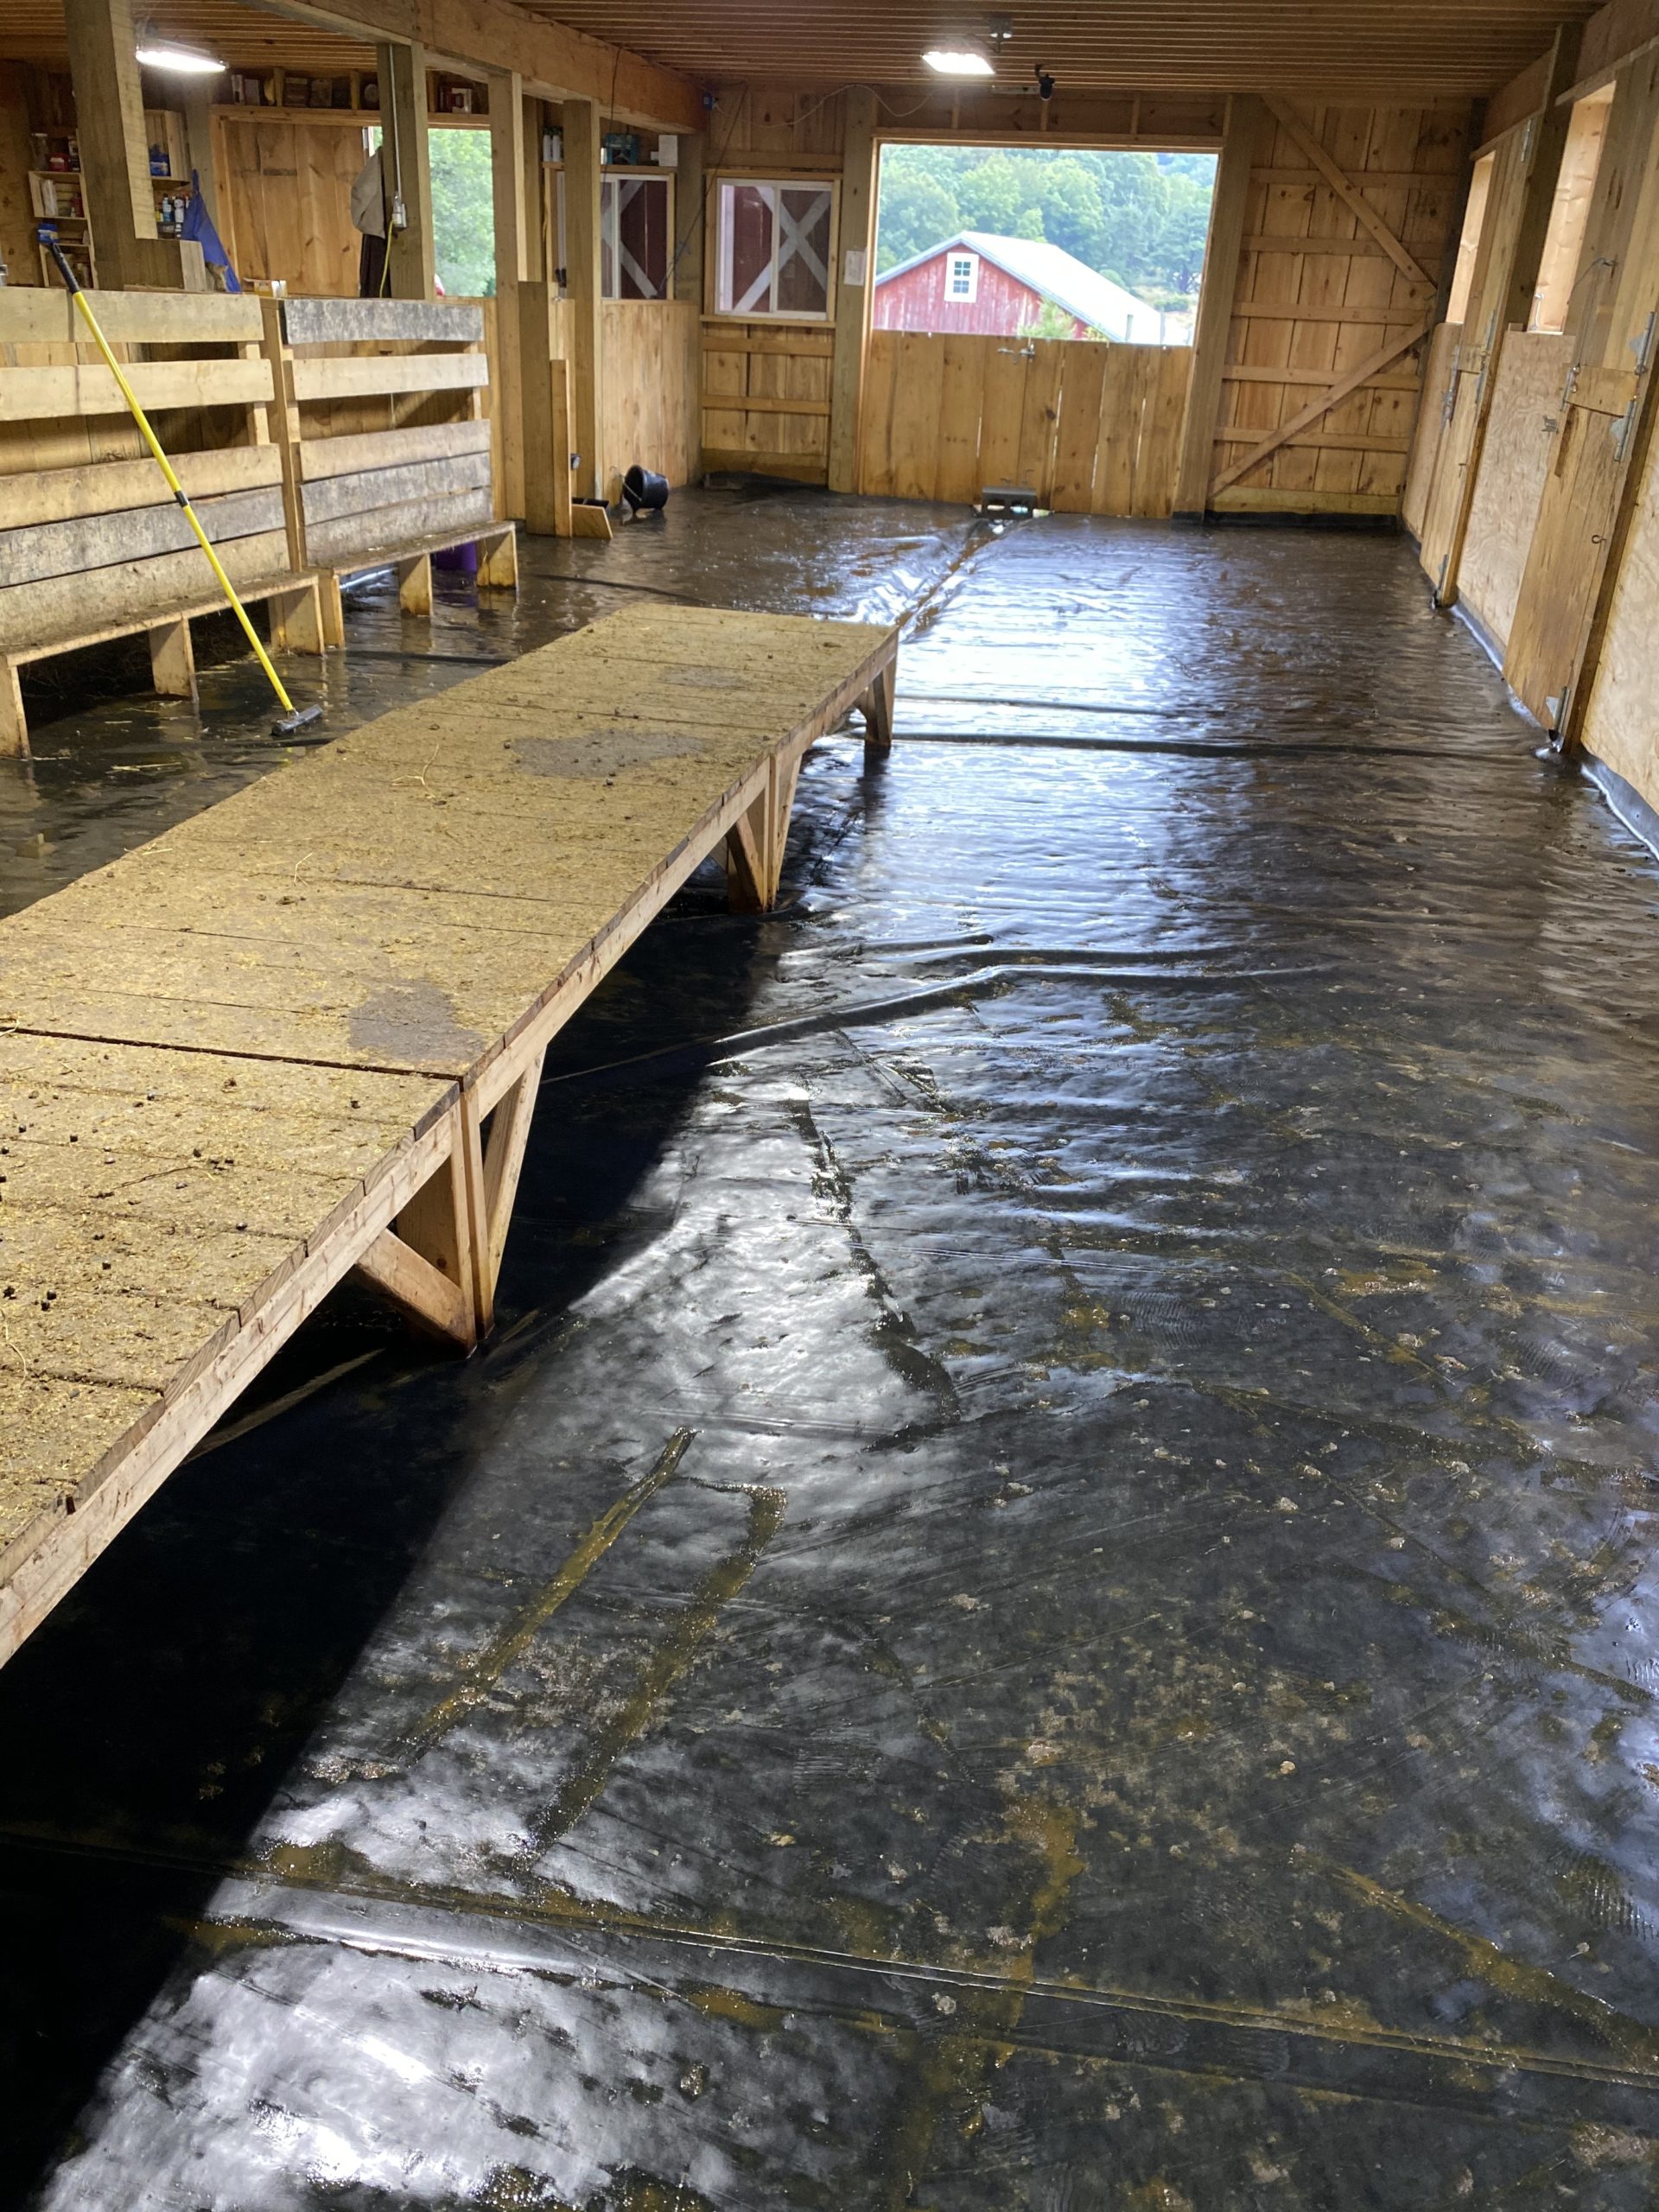
Picture #1 is after Phase I and before Phase II. (As you can read in my next post, we replaced pools with tables.) Notice how the rubber is wrinkled, especially in the gutter. That’s because we made it too deep in Phase I.
Picture #2 is us working to slope the second side of the barn (Phase II) to the central gutter. It also shows us filling in the central gutter with black sand to ultimately make it more shallow.
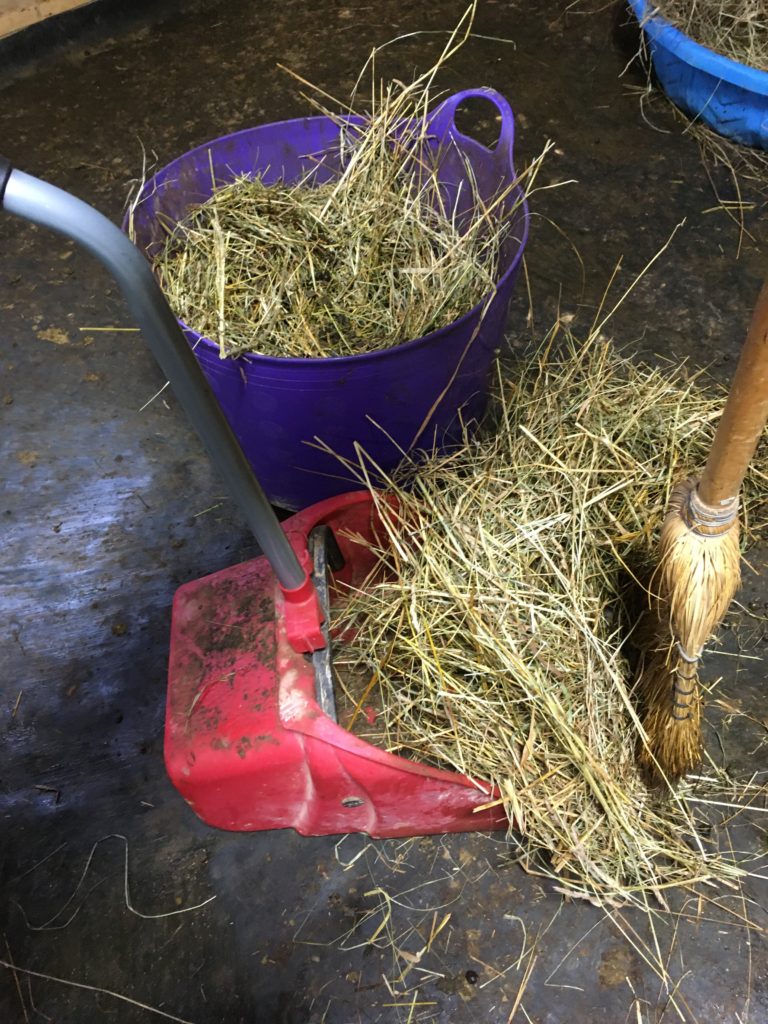
Picture #3 shows how the floor looks each morning. The urine has run down into the central gutter and out of the barn. The berries remain: easy to use an industrial-sized squeegee to scoop together, then pick up into a muck bucket.
Picture #4: shows the cleaned floor, about 45 minute work. Scooping up berries, sluicing with remaining water bucket liquids, and then squeegeeing water off the rubber, into the gutter, to clean it thoroughly.
Wrinkles that resulted from ditch being too deep after Phase 1.
Phase II: filled in center ditch and sloping black sand from outside to inside.
We have had a building hay crisis at Storybook Farm. We got a delivery of what looked like excellent hay in the fall, but as we’ve been going through it, about 1/5 of our square bales have molded! (We have a brand new barn with an excellent hay loft, so the hay had to have become damp somehow before it got here. Luckily, I buy locally, and the farmer who made it has 100 bales on reserve for me, so I have more on the way if we get a break in the weather. But I digress.
It was the combination of the concern about hay shortage and the crazy amount the the precious hay that I was sweeping up each morning as I muck our rubber-floored stall that made me decide, “ENOUGH IS ENOUGH. There has to be a better manger that saves hay!”
We just couldn’t afford to throw out any more!
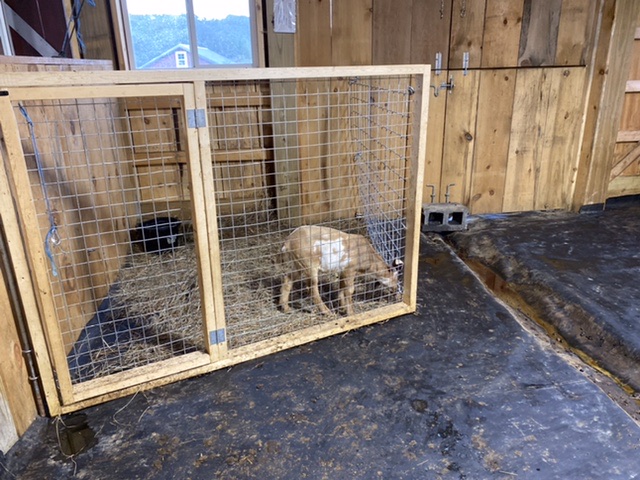
One of my biggest problems (besides waste) has been that, because we dam raise, little kids get into most mangers and do “the pee and poop dance” there. So, I was looking specifically for a solution for a group of mixed-aged does. I have kids that are 5+ weeks old, one that is 6 months old, three that are 9 months old, and then full-sized senior does—who range from small to large Mini-Nubians. Indeed, one of my does is almost the size of a standard Nubian.
These were my challenges going in, but I couldn’t be more pleased with the solution that I’ve found!
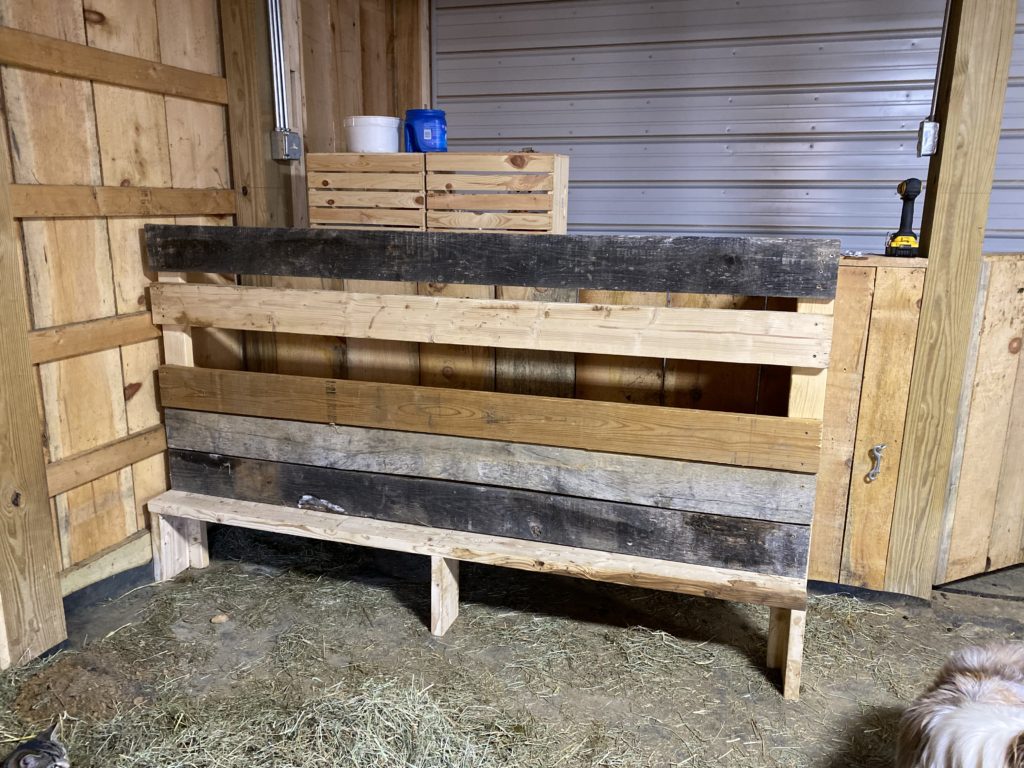
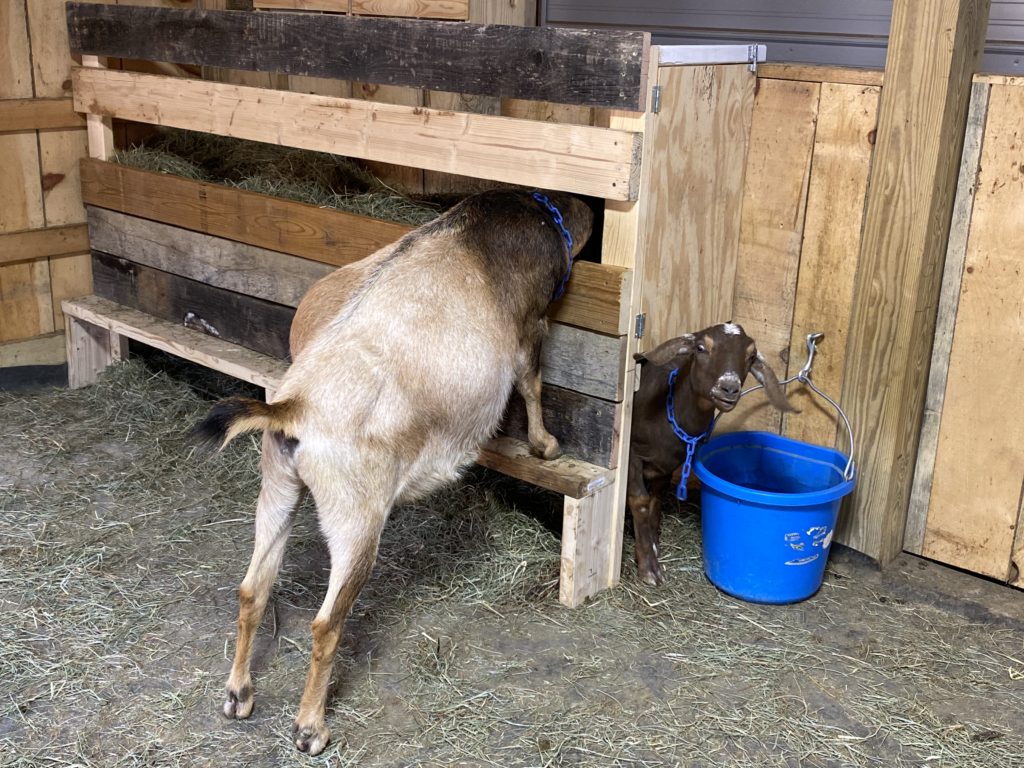
Fair warning: this manger solution is not for horned goats. That said, there are enough of us out there with disbudded goats that I think it’s worth the share. The above picture is the “before” shot. The picture at the right is the “after” shot.
I want to give a big shout out to the designers of this manger: creds to Thorcrest Farm in Canada for this outstanding design. From what I read, they’ve been tinkering with it for 25 years. They raise show-quality standard Nubians, but I followed their exact directions (using screws in case I needed to make adjustments) and so far, it’s working like a dream with Mini Nubians.
Some kind soul posted this picture of one of Thorcrest’s farm page posts, and the build was super easy. It took me (with a bit of help from Scott in a couple of places) about four hours to build from scrap wood found around our farm.
Below are pictures and videos (just hit the triangle even if there’s not a preview picture) of our does using the manger, and beside each one are comments that answer common questions that I’ve received on the Internet about this manger. Enjoy!
This video shows the step, which is about 5” deep. Skylark (at 5 weeks) can just balance on this step, but her tubby little body is too wide for her to turn to eat or to jump into the manger. YAY! Problem solved about kids playing in the manger!
She can, however, reach the manger from the floor. That opening is 2.5’ up from the floor, so she can’t just jump in. And, when the does eat it down to about half full, she can’t feed from it. But, since littles are still nursing and don’t need a lot of hay (and because they have their own hay in their creep pen, this feeder is just fine for her.
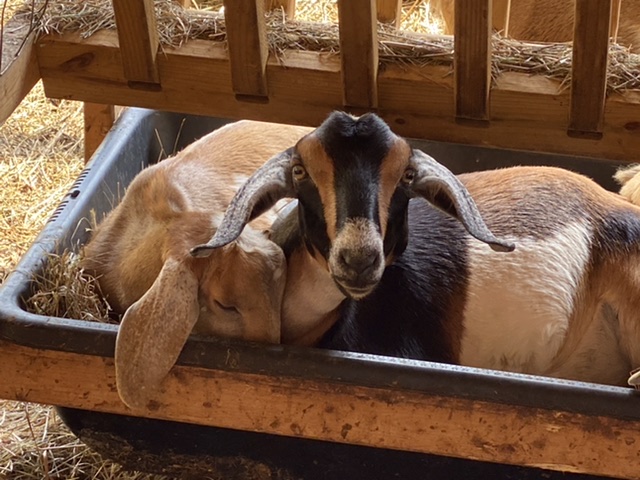
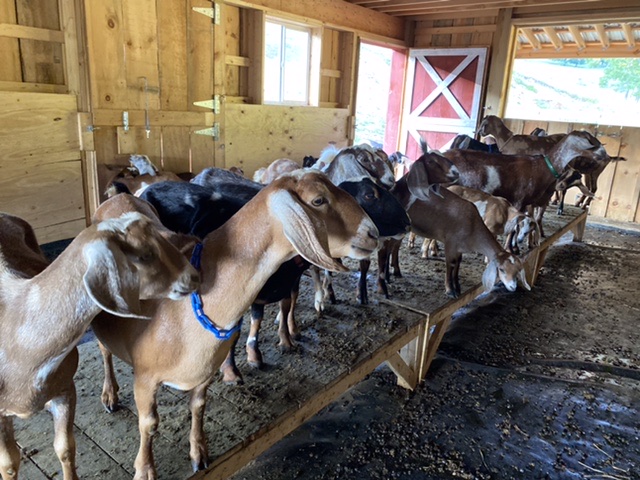
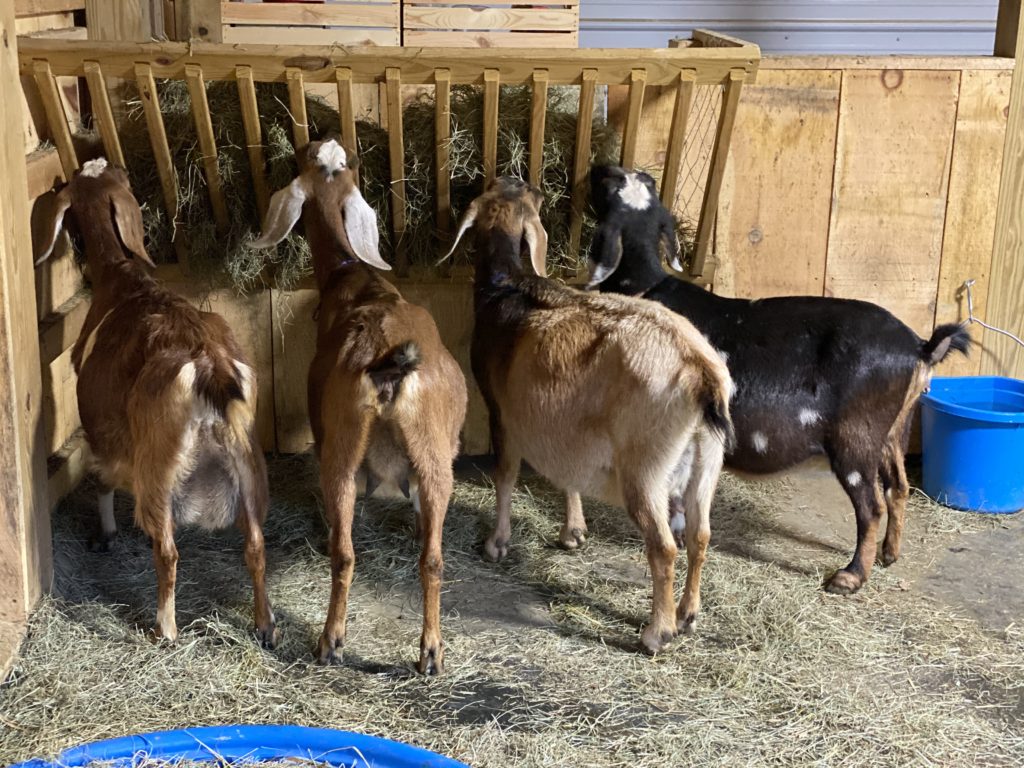
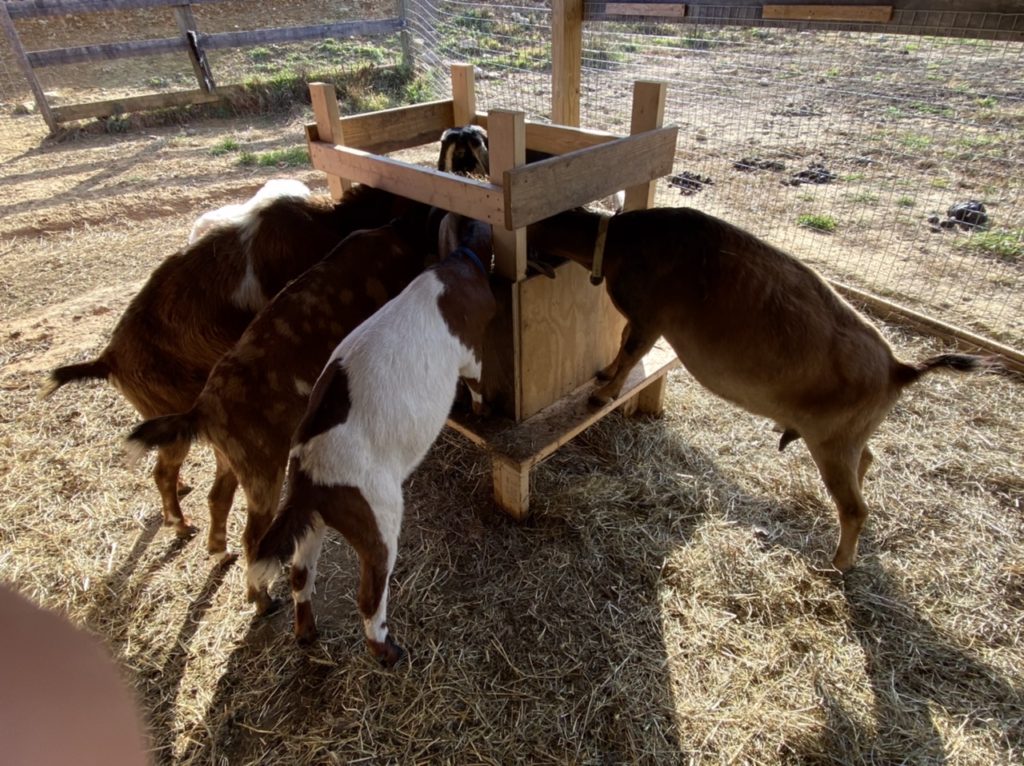
The picture (below right) shows does of three ages using the manger together. The doe at the right is a mid-sized, adult Mini Nubian, and can eat with all four feet on the floor. The doe in the middle is 6 months old, and easily reaches into the feeder. The doe on the right is six years old, quite pregnant, and is chowing down with her lips reaching to the bottom of the trough.
Note that the actual hay section of this manger is only 9” deep, so when feeding, throw in enough batts (flat) to fill only to the level of the lower edge of the opening. DON’T overfill it! If you do, they will “grab and go,” creating spills (also known as waste)!
I’ve been asked about the possibility of goats slipping on the step and hanging themselves. From my observations, this is highly unlikely. Small goats can get their heads out quickly, and larger goats can eat with all four feet on the floor if they are skimming the top layer of hay.
When a goat steps up on the step, she’s standing on four legs and perpendicular to the feeder. If she gets butted, she moves a bit, but has time to get her head out, and usually has one foot on the step even so.
Also someone asked if the does pull their heads out and waste hay that way. My answer is, “it depends.” MOST of the time, they leave their heads in and browse and munch. SOME of the does are nervous, and pull their heads out to look around. But, overall, there is SO MUCH LESS hay waste. I’m thrilled. THIS is the “after shot.” Below is the “before.”
Our plan is to build three more of these feeders for our goat space, replacing the feeders seen in this video. I think it’s clear why by now!
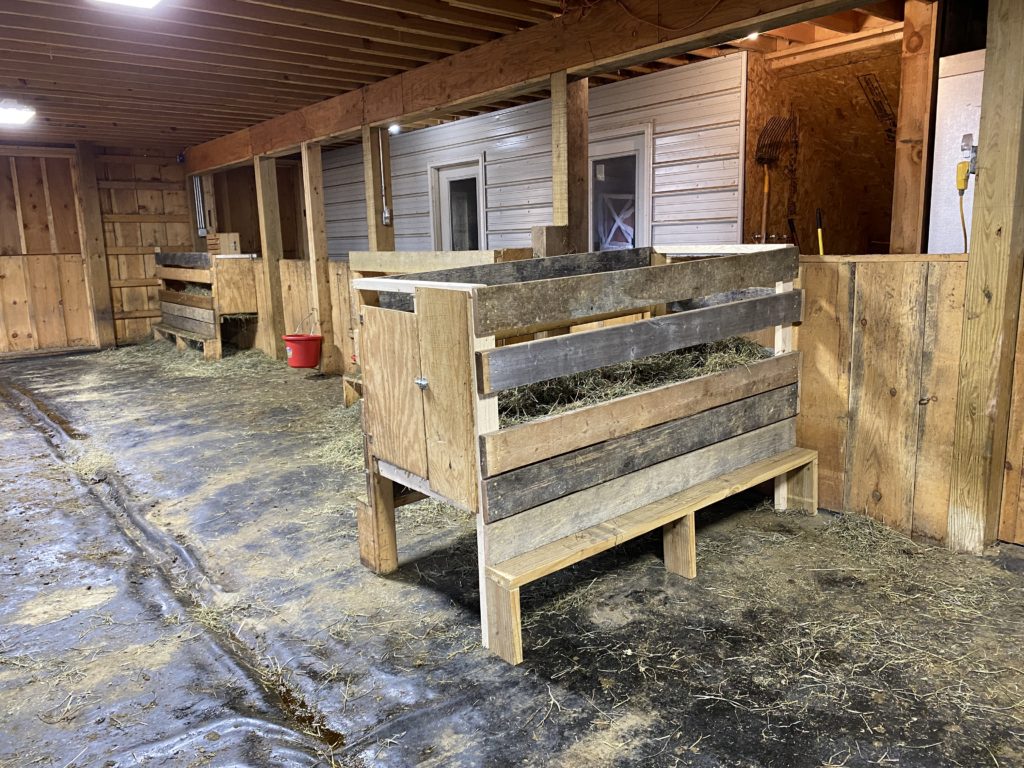
Final picture. Here I show that there’s a great space under this manger for kids to use as an away space. I sweep hay that does drop down to the floor (minimal) under the manger most days, and they can snuggle into it for a nap.
Note the end of the manger: we put a door on ours so that I can clean it out. With any manger, I’ve found, there’s a build up of tiny leaves and sticks that needs to be cleaned out from time to time. This little door makes that simple.
We also built a freestanding (therefore portable) version of this feeder. Details and more pictures are HERE.
And more recently, since we were running out of wall space for mangers, we began to convert our wall mounted ones to freestanding two sided ones, still with all the same great features. All we had to do was duplicate the side construction, and then put end boards on to stabilize it. We kept the cleanout door. It’s such a great feature.
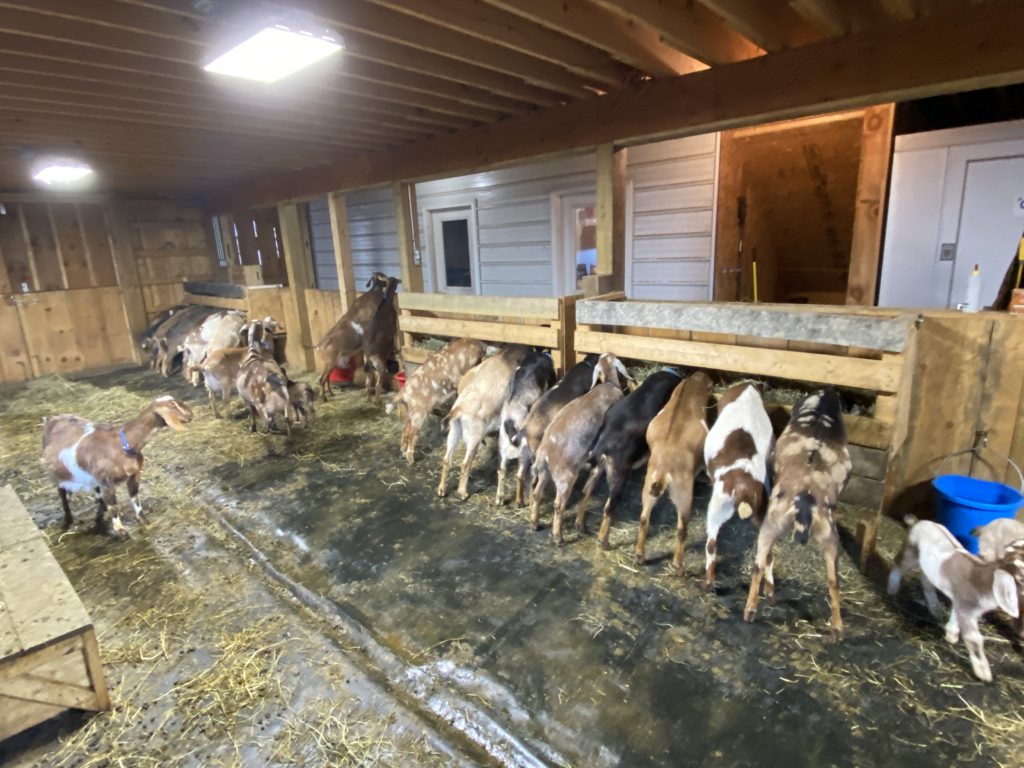
This change now doubles the number of goats that can eat at one manger. Interior width is 32″: enough to lay two bats side by side down the length of the manger (which is six feet). To get an idea of how many goats this can serve, I include a picture from last week of them all crowding around to get at the hay we had just fed. This gives you an idea of why we needed to convert these mangers to give more linear feet.
Gallery of pictures below. it is the manger on the right in the first picture that was converted.
It’s 2020, and for those of you who are local to Storybook Farm, it’s time to launch our herdsharing program!I am SO excited about this!!! If, after you read this article, you are interested in sharing our herd, please sign up for the monthly newsletter from the box below. (Most of this post is excerpted from this month’s Herdshare Group newsletter.)
What is a Herdshare?
In many states, West Virginia included, it is illegal to buy raw cow or goat milk. However, there is no law against a person drinking raw milk from his/her own dairy animal.
But, what if you don’t farm, or can’t keep a cow or goat, but want all the wonderful health benefits of raw milk? WV law provides you an opportunity to purchase part ownership of a dairy animal, which then entitles you to consume milk from her. You, quite literally, are sharing the herd with the farmer and other raw milk lovers. At Storybook Farm, we raise only dairy goats, so we’ll talk about only goat milk for the rest of this discussion.
In a herdshare agreement one first pays a one-time fee per share of a goat. Each share makes you a part owner of the herd, and thus entitles you to a set amount of milk from your herd per week.
Because you now are part owner of one (or more) goat(s), you must also pay a farmer a monthly fee for boarding your goat(s), caring for the goat(s), and milking the goat(s).
The herdshare owner thus obtains (but does not purchase) the milk from his/her own herd. This arrangement is similar to arrangements of owning a share in a condominium (a timeshare), or to a CSA share for farm produce.
Additionally, some farmers also offer “value added” products, where they will turn your milk into cheeses or yogurt, for instance, for an added fee.
How Does it Work at Storybook Farm?
Farm herdshare agreements (which are legally binding contracts) vary from farm to farm. Here is how we intend to start our program for our first year at Storybook Farm.
First, the cost of a share in this first introductory year will be $25 per share. This is the cost of ownership of one share of the herd, and entitles the shareholder to 1/2 gallon of milk weekly and one truckload of manure, suitable for preparing garden beds each spring.
If you want to consume more than a 1/2 gallon per week (or get more manure — LOL), you can purchase two or more shares. We will have a total of 30 shares to offer in 2020.
The monthly board expense for the goat(s) per share will be $12.00. There are four weeks in the month, plus a few days. Some months are five week months. The board fee averages out to $2.50/week per share.
There will be modest start-up fees. The herdshare owner will need to purchase at least two (2) half-gallon mason jars (with lids) for distribution purposes. These will cost $3 apiece.
Storybook Farm will work out with each member of our herdshare how best to transfer the milk. Some will need to pick up at the farm; others can get delivery in/from Franklin, WV. Each week, herdshare owners must return a clean 1/2 gallon jar per share to the Farm for fulfillment of their milk allotment, unless they are receiving value-added products instead. (Obviously, since each shareholder owns two jars per share, you can return the empty jar(s) when you pick up each week’s milk.)
Storybook Farm will be offering Feta cheese, Chevre cheese, Mozerella cheese, and Greek-style yogurt as value-added products. Thus, if you wish to convert your weekly milk allotment to any of these products, you will add the cost of processing only. The end prices of these products will be similar to what is purchased in Franklin grocery stores from cow’s milk, but, of course, superior in terms of healthiness, freshness and taste!
Milk Comes with Babies!
Speaking of milk, we confirmed that 7 of our 9 adult does are pregnant! For those who are interested, our Breeding Plan and due dates are here: https://storybookfarmwv.com/breeding-plan/. Why not go there now and choose the doe of whom you’d like to purchase a share?
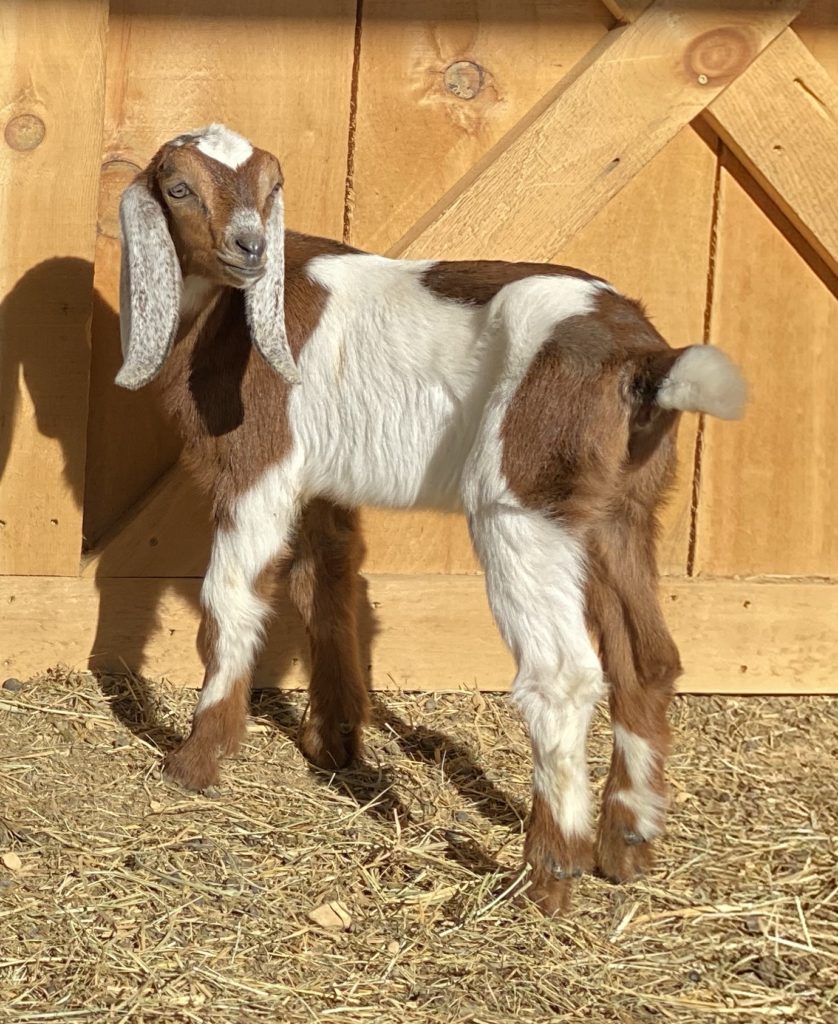
You may notice (on that page) that we’ve already kidded out Sparrow. Her kids (below) came on December 9 (making a busy month along with preparing for our family of 22 people for Christmas). Sparrow gave us three gorgeous doelings. You can read all about them here.
Sparrow’s three girls
Help Us Spread the Word!
If you are local to Storybook Farm (and/or Franklin, WV, where we’ll be making deliveries) you can join in! Please forward a link to this post to friends and family who would enjoy becoming joint herd owners.
In next month’s Herdshare Group’s newsletter, I will be detailing the many benefits of goat milk and giving a tour of our state-of-the-art milking facilities. I’ll also discuss ways that we will be making our milk as safe and sanitary as possible, including getting the herd tested for TB and Brucellosis in early March. Milk distribution will start in late March.
I plan to send an email to this group monthly, at the least. My goal is to inform you of events that are of interest to those who partner in our herd, or are considering doing so. In busy months where our herdsharing is in high gear (from late March through early September) we may be sending updates or information more frequently.
Those who follow this blog regularly will remember that we purchased Echo Hill’s Sparrow last July as a foundation doe of our new herd. (We had previously purchased Sparrow’s son, Rigel.) Two days before we were to pick her up, Rigel’s sire broke through electric fences to mate one last time with his lady love. (So romantic!) Bethany Bisherat gave me the option of canceling the sale, but I love Sparrow and Rigel was great, so I went through with the sale.
I couldn’t be happier that we made that choice! Sparrow is a beautiful, refined doe, who easily earned her milk star last year and, as Bethany put it last February, “turned into a Holstein”! Her udder is capacious and her teats are soft. She is a joy to milk. She is docile, sweet, and has proved to be the most attentive and patient of mothers.
The Kids Arrive
Of course, the icing on the cake is that she gave us three beautiful copies of herself to populate our new herd! We were amazed to be blessed with three doelings. The video below is of them only hours old. Mom is patiently still washing her new kids; Maggie (far right) is learning to scratch herself while standing up!
In keeping with our practice, we have thematic names that help us remember blood lines. Since Sparrow is a bird, her doelings needed to have bird names. First born was Chickadee, then came Skylark. We thought we were done. There was a significant time lag while we waited for the placenta–but lo! A third doeling, Magpie, was born. (Then, two placentas!)
I have since learned that a goat’s womb has two “horns.” Each can house multiple kids. It’s probable that Chickadee and Skylark were in one horn, and Magpie (Maggie in the barn) was alone in the other. This would explain why Chickadee and Skylark are smaller than Maggie, who is the longest and deepest of the sisters. Chickadee and Skylark have moonspots.
Meet Them One by One
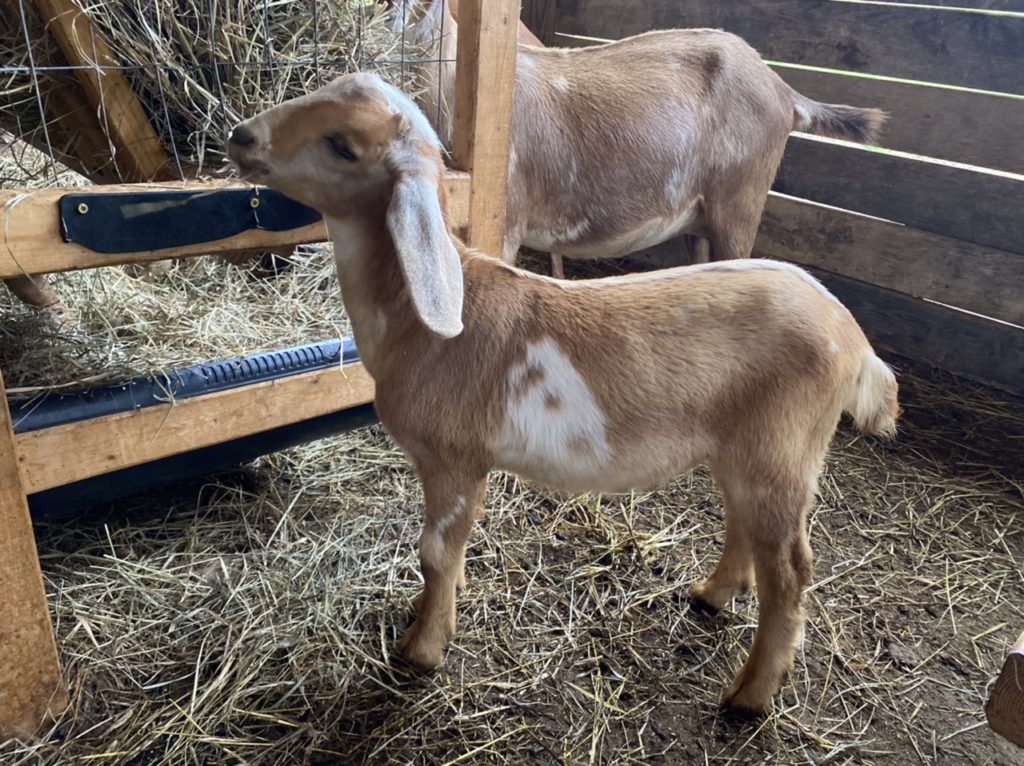
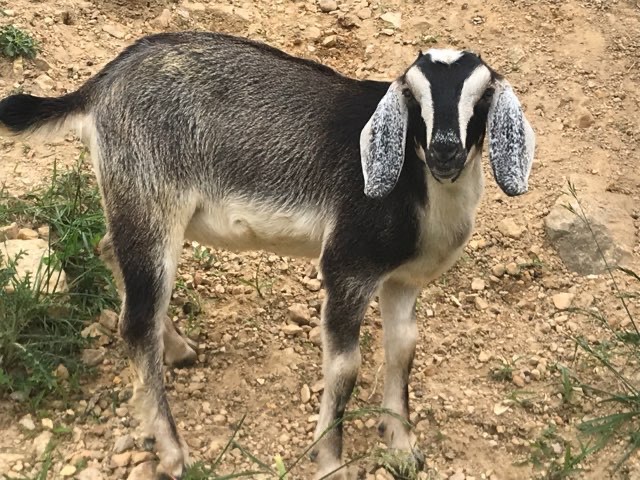
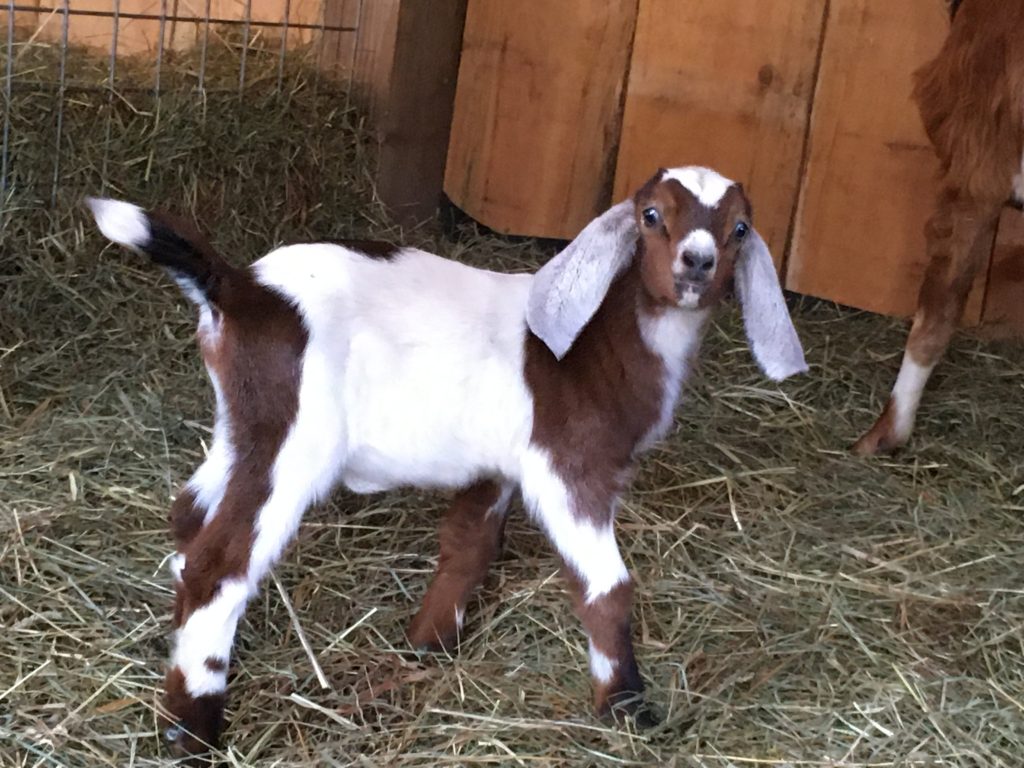
This is Chickadee, hours old. She is mostly brown, with some white and many moonspots. I so love her ears and breed character! She was firstborn, and the smallest by quite a bit.
This is Skylark at 3 weeks old. She has a very pretty, feminine face, and is both deep and long.
At first glance, she’s hard to distinguish from her younger sister, Maggie. The way we most quickly tell is that the spot on her back is not connected to the brown on her side, she has moonspots, and there is no black on her legs.
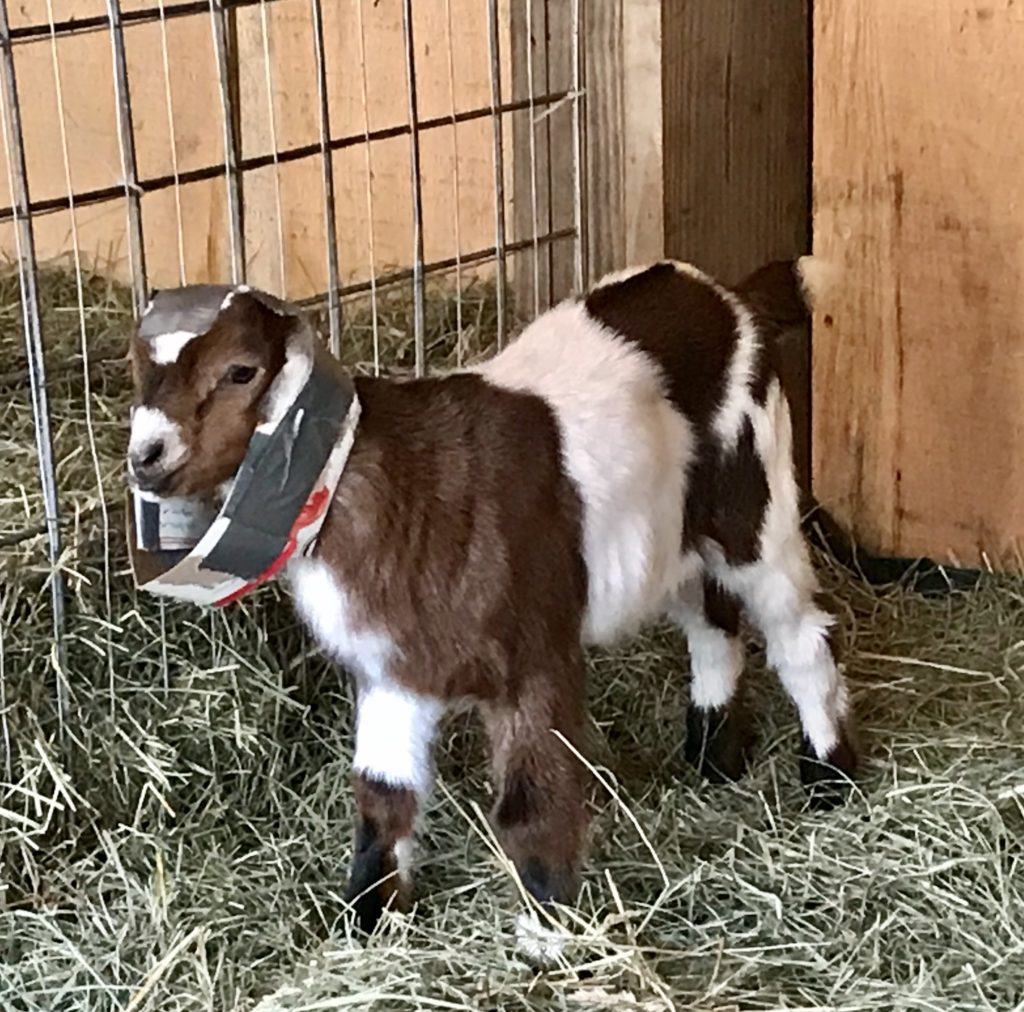
Below is a gallery of Maggie shots. She is the third born and biggest of the three sisters. Viewed on her right side, she is hard to distinguish from Skylark, but from her left side, the brown markings form almost a map of North and South America!
After two weeks, a friend online pointed out that she was folding her ears back (bottom left). This is a fault if left unattended. Thus, we devised a “hat” for her to train her ears. It needs to stay on for about two weeks. Naturally, she loses it regularly! We then tape it back on. She’s really good about it; it’s mostly lost when she battles her sisters for a drink from Mom’s two teats.
Maggie’s right side
Maggie’s front
Maggie’s folded ears
Maggie’s corrective cap
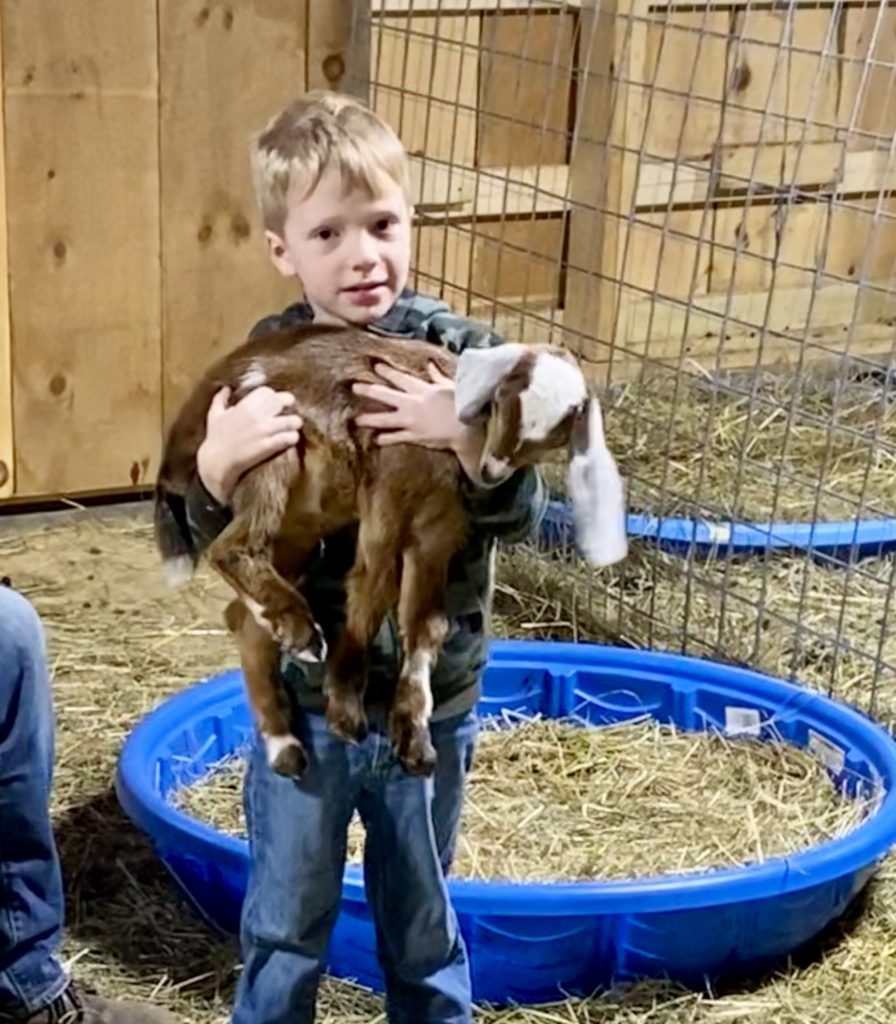
Of course, the biggest joy of having baby goats is sharing them with our grandchildren!