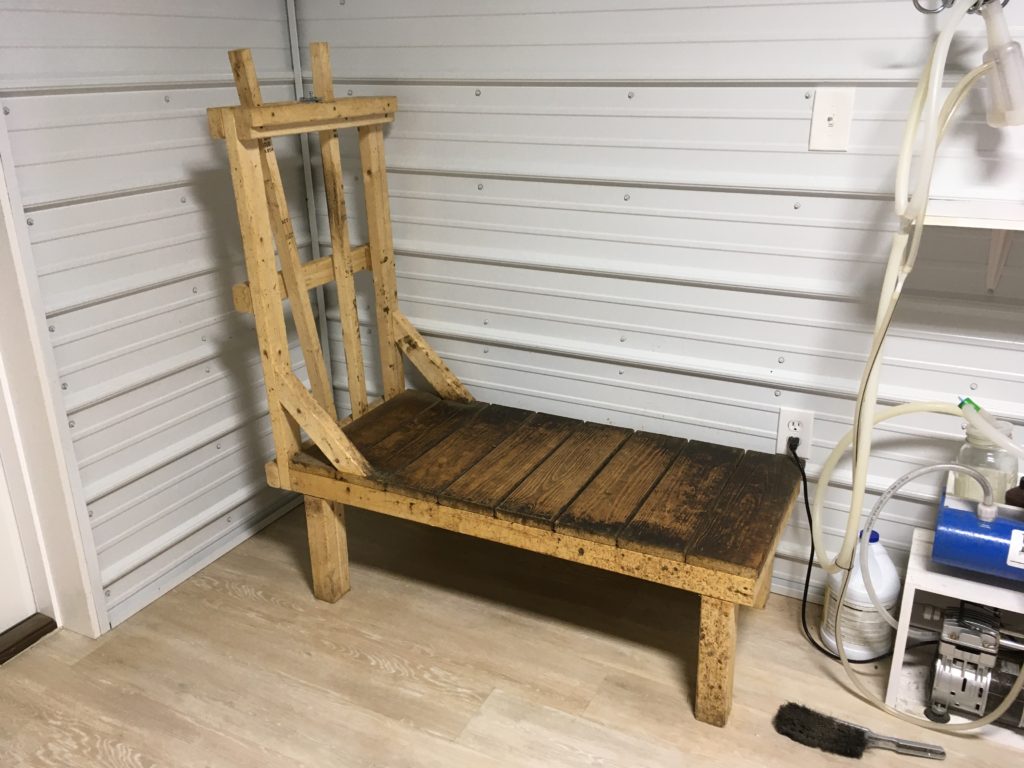
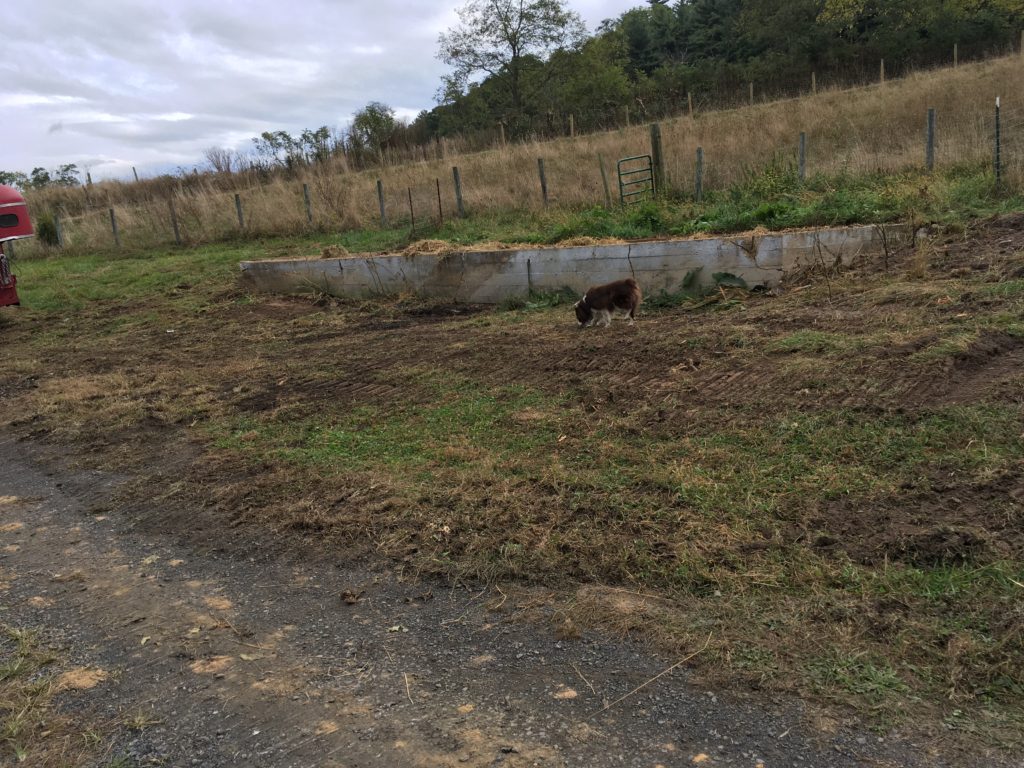
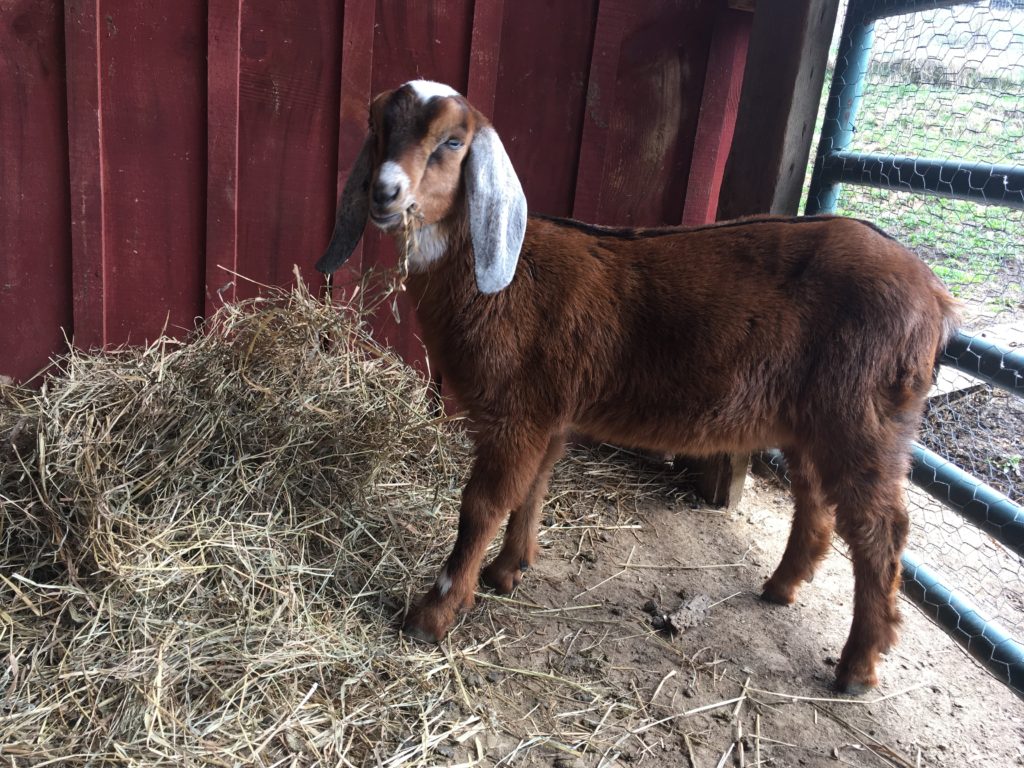
When I first started with goats, I purchased two milk stands made of wood. They have served us well, but they bother me because, even though we wash them down with bleach and soapy water every day, they never look clean. I just know that dirt (and germs) are seeping into the wood, and while the milk never comes in contact with them, they still bother me, especially when seen in relief to our new milking parlor!
I decided to upgrade our milk room stands and use these two older ones elsewhere for things like clipping, hoof trims, the buck house, etc. In all, we’re making four new stands for the milk parlor.
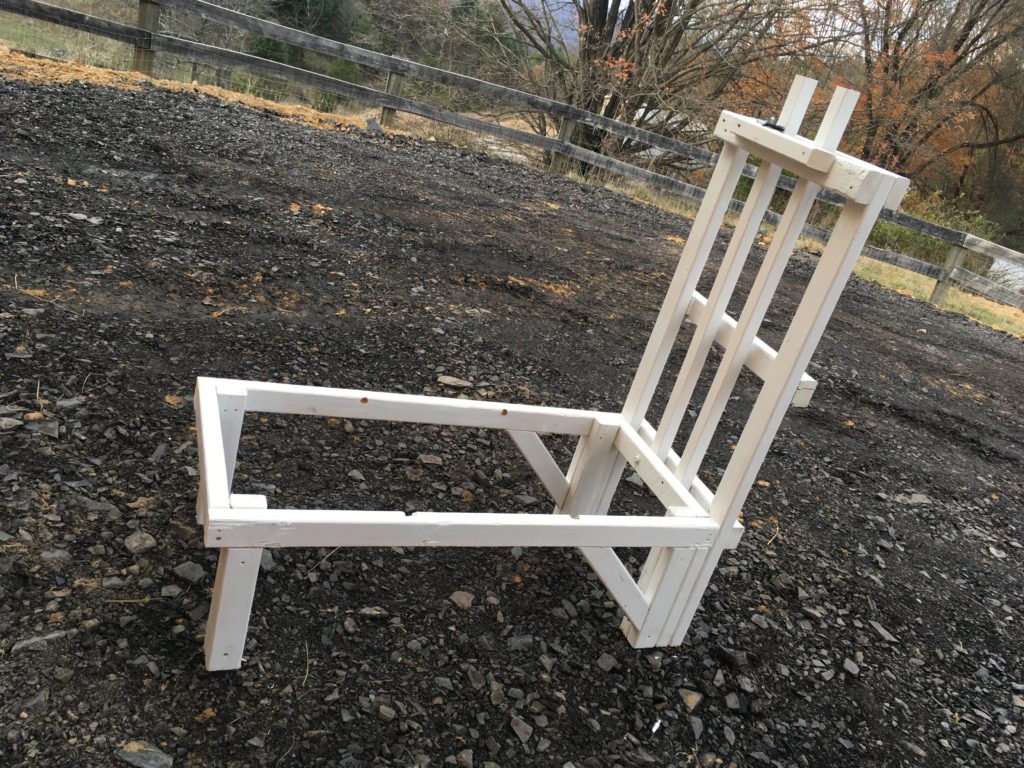
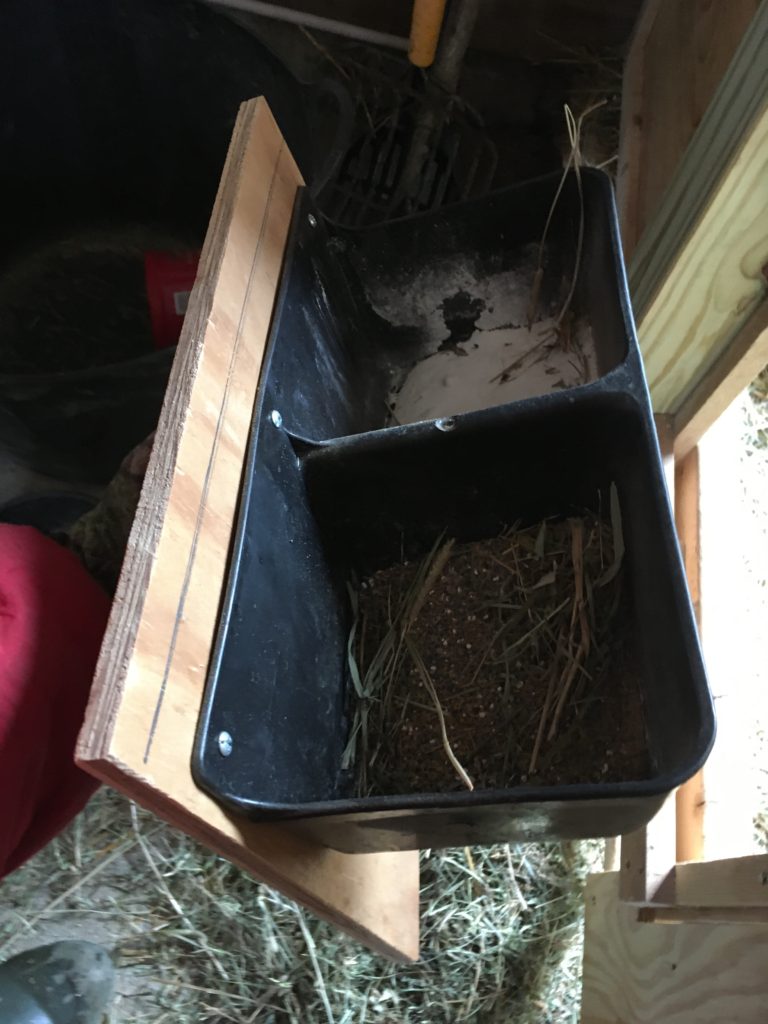
The first thing I decided was that I wanted metal mesh stands, because I could hose them off, and the dirt would fall through them to the floor. Good luck! Each one costs $200+ (not counting shipping)! We weren’t going to pay that (no money left after barn building—LOL) so I thought of making a heavily painted white wood frame using the same basic design as our original ones, but getting a local welder to make metal floors that will fit onto the wood frames like shoe box lids. They are thus removable for cleaning.
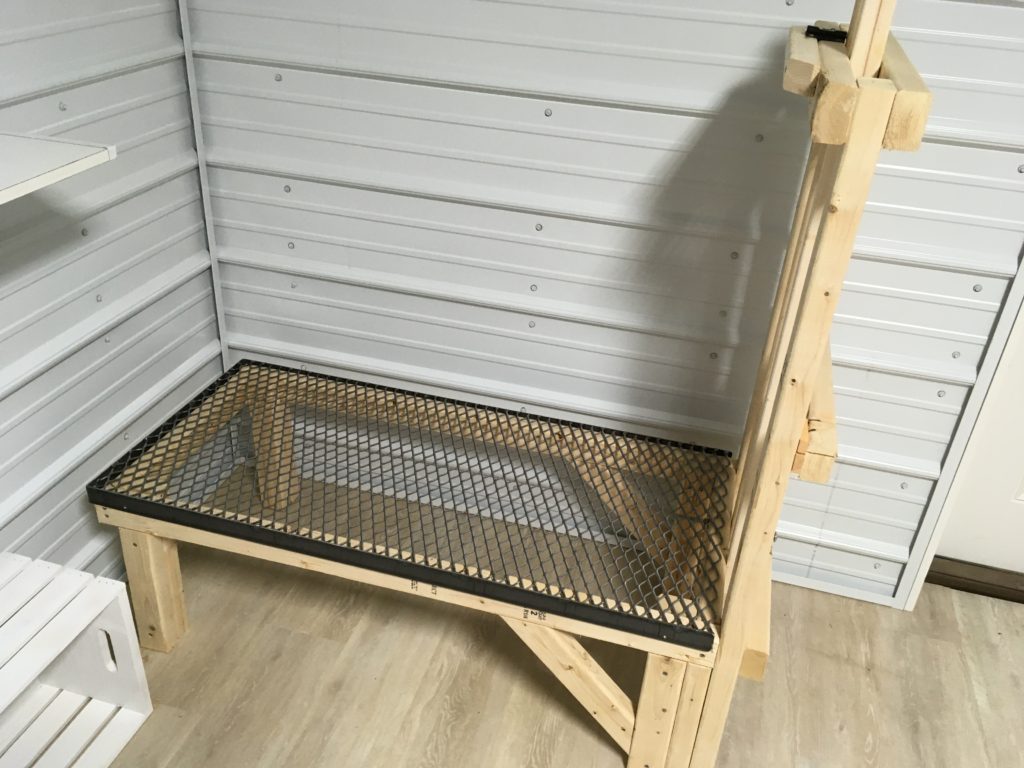
I found a local welder who made them out of expanded steel, #9 (which means that the diamond-shaped holes are 3/4”), and raised (not flattened) for extra traction for the goats.
It cost me $60/stand to have these fabricated. Then, we built the wooden parts and tried the new floors on for size. They fit perfectly!
So far, so good!
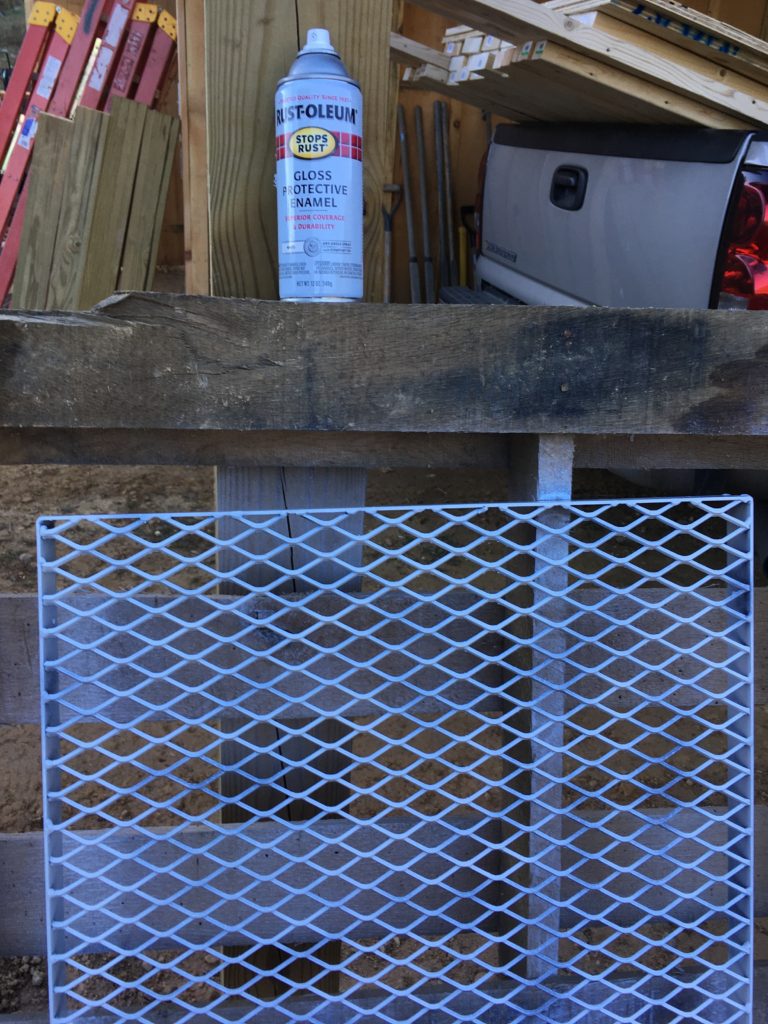
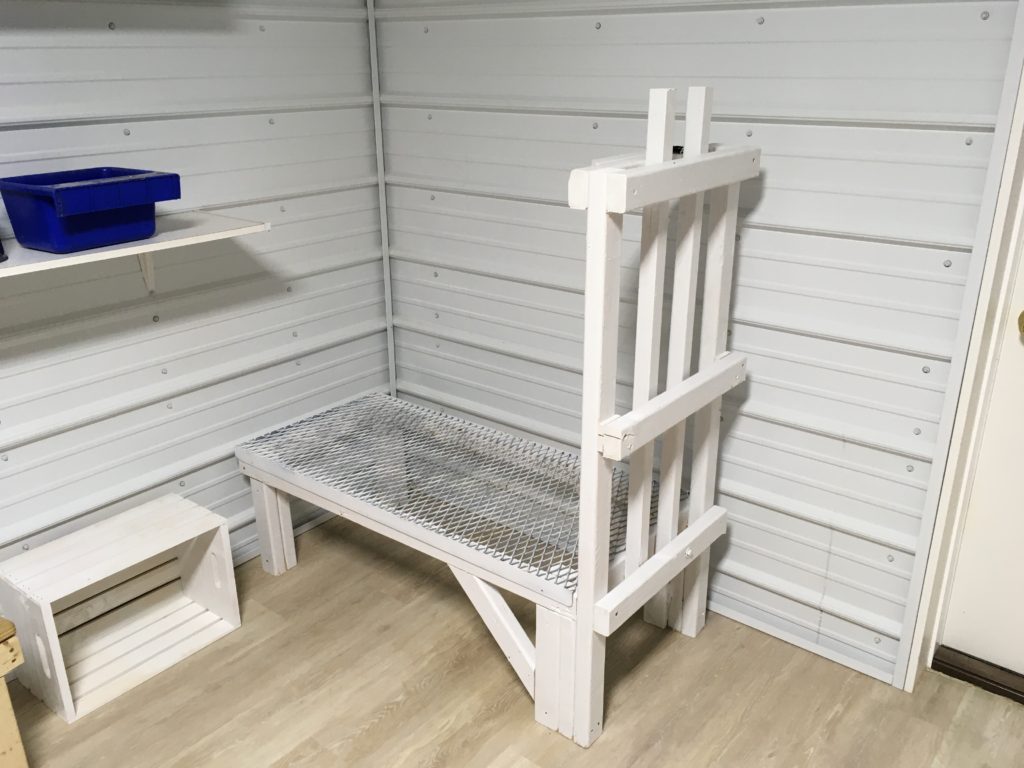
However, in researching this approach, I discovered that the steel, left unpainted, would rust. 😢 So, of course I had to paint them.
This was not at all difficult using spray paint.
I used Rustoleum brand high-gloss white—again, working for that washability! I sprayed both sides of the metal floors.
After the floors of the stands were each spray painted with two coats, I took the wooden part of the first stand outside and used a brush to paint it.
It was more labor intensive than spraying, but the high gloss paint went on nice and thick with a brush—which was important to me for washability in the years to come.
That’s about it! I love how they look in our new milk room, and they are working just as I wanted them to: the dirt drops through them, and the raised expanded metal gives plenty of traction for my does as they jump up and down.
Sometimes, it’s the little things that make daily life a joy or a hassle. For quite awhile now, one aspect of goat herding that had me stumped and frustrated was how to dispense minerals and baking soda. Goats need daily supplies of these two essential elements, but keeping their containers clean, free from moisture, and available to the goats without contamination was a bridge to far for me for months. Now, I finally have two solutions that are working for me, so I thought I’d share.
First, I may not have picked the best container for dispensing minerals and baking soda, but this one (I got it at Tractor Supply) was what I had. (I have seen people use PVC pipes, but I’ve tried those with chicken feed and they were a PAIN to clean, plus the feed got moist and caked. So, I went with these for minerals/baking soda.)
This container comes with three holes for screws so, being new to goats, I promptly screwed it to the wall and filled it full of minerals on one side and baking soda on the other.
Then the problems began. First of all, if you’re new to goats, please know that goats LOVE to put their feet on things mounted to the walls. Sometimes they use them as a leg up to jump out of their stalls. Sometimes, they just want to see over the stall edge, so they plant their feet on whatever they can, or hang them over the edge of the stall. These mineral dishes are perfect for such goaty antics. As you can imagine, it only takes one goat using the dish with its feet to soil the whole stock of minerals/baking soda! 🙄
If they don’t stand in these dishes, then they poop in them! I have found little “love gifts” in these dishes time and again! Then, there are the flying goats, like my Meda. She is small and agile, and LOVES to simply launch herself into the air and come to a perfect pose on top of ANY protrusion, of ANY depth. I am amazed at where she can jump and how she can balance! And, of course, one of her favorite perches became these mineral dishes.
Finally (and this is true with all mineral feeders) there is the problem of moisture building up in the minerals/baking soda. This moisture can actually host coccidia! These feeders, screwed to the wall, are really hard to clean properly! You can’t dump them; you have to scoop stuff out. You can’t spray them with the hose. I got some Clorox wipes and tried to empty and wipe them down periodically during the humid summer months, but it was always a pain to do and never yielded satisfactory results.
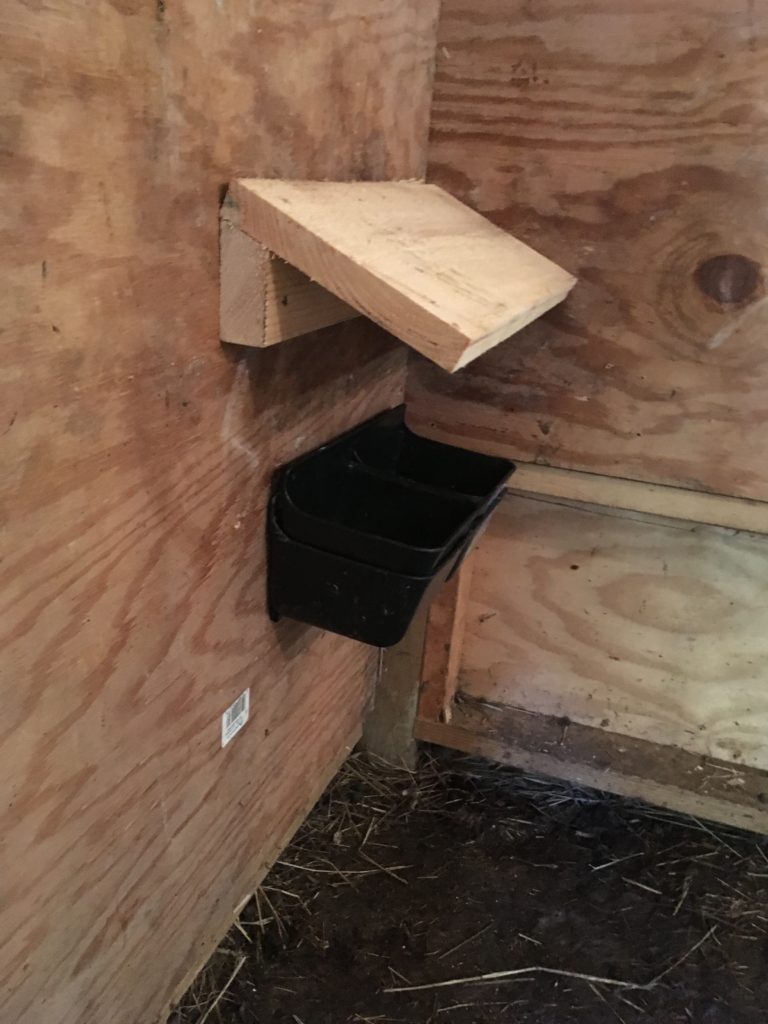
Frustrated, I asked around on goat groups, and someone suggested that I put a topper board (or canopy) on over it, as in this picture.
I thought this was a terrific idea!
It HAS solved some of my problems. Once I put these on, the goats no longer poop in the dish. They also don’t stand on it to try to see over the stall wall.
On the other hand, this mineral canopy hasn’t slowed Meda down.
Every morning, she rockets around the stall and launches herself onto it, does a little tap dance, and then leaps into the stall, rockets around, and leaps back on top of it again.
She’s amazing. She moves so fast that my camera’s shudder speed can’t keep up with her!
So, while the wooden canopies did help, they actually made it harder to clean! I ended up buying duplicate feeders and nested one in the other so I could pick out the top one, clean it, and then put it back. That was okay, but gee—buying two for each place I needed them seemed excessive.
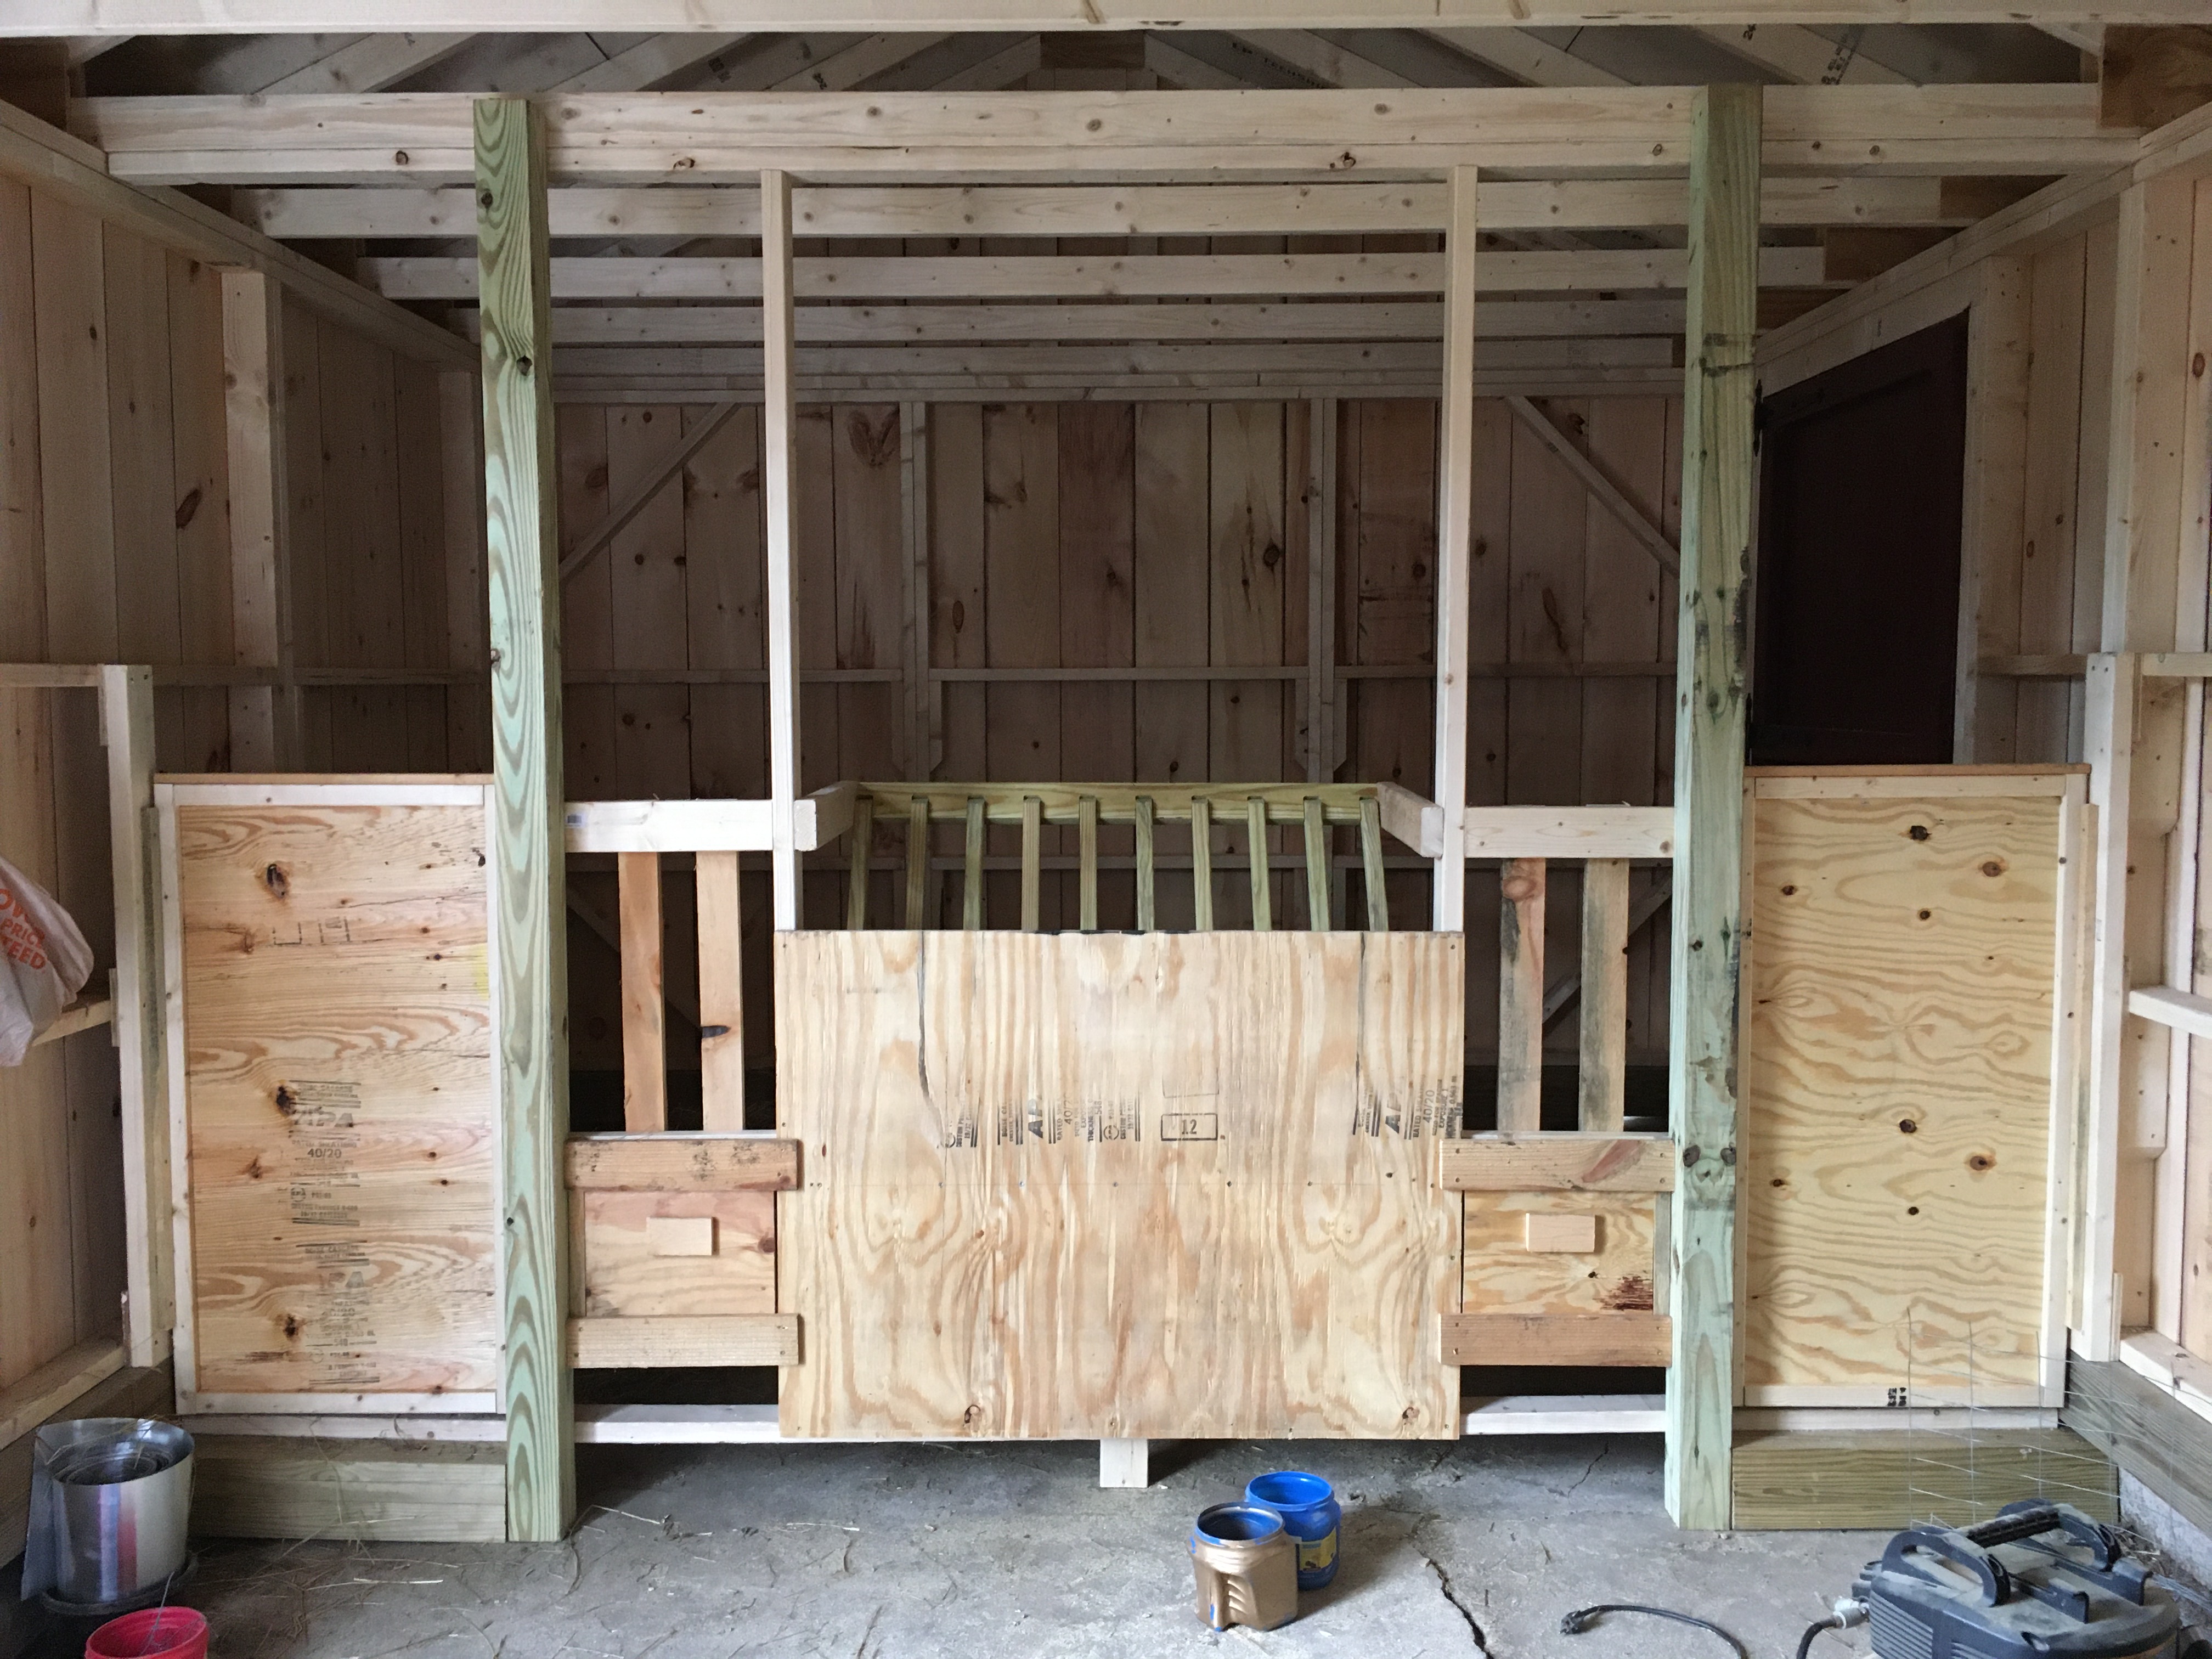
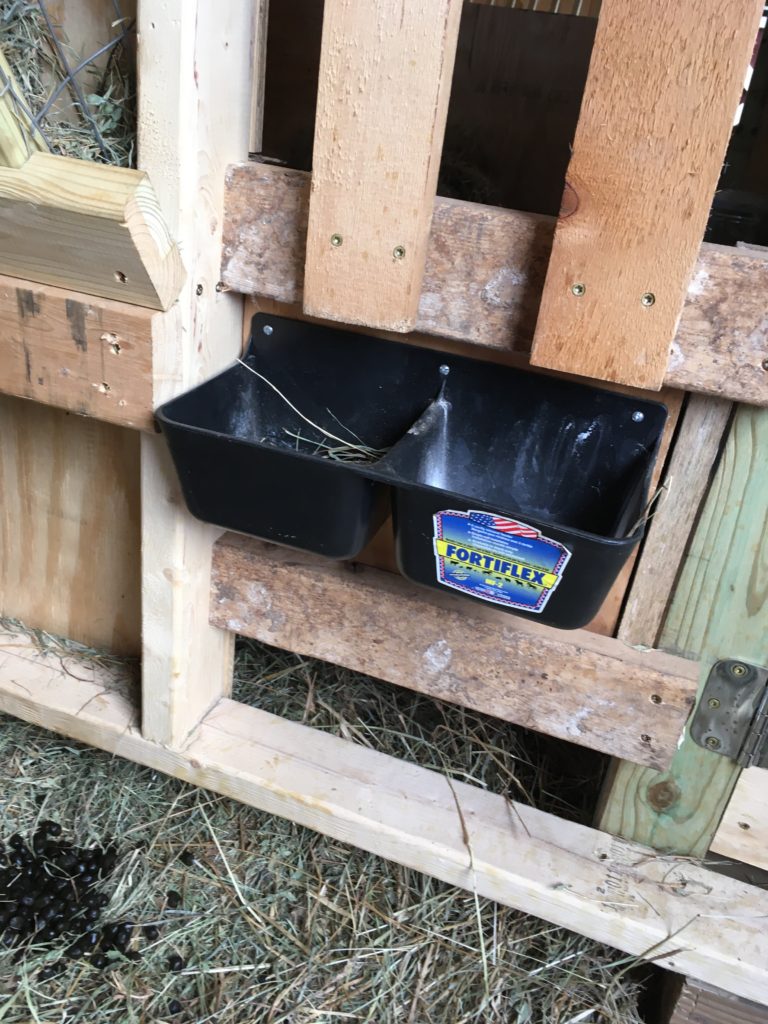
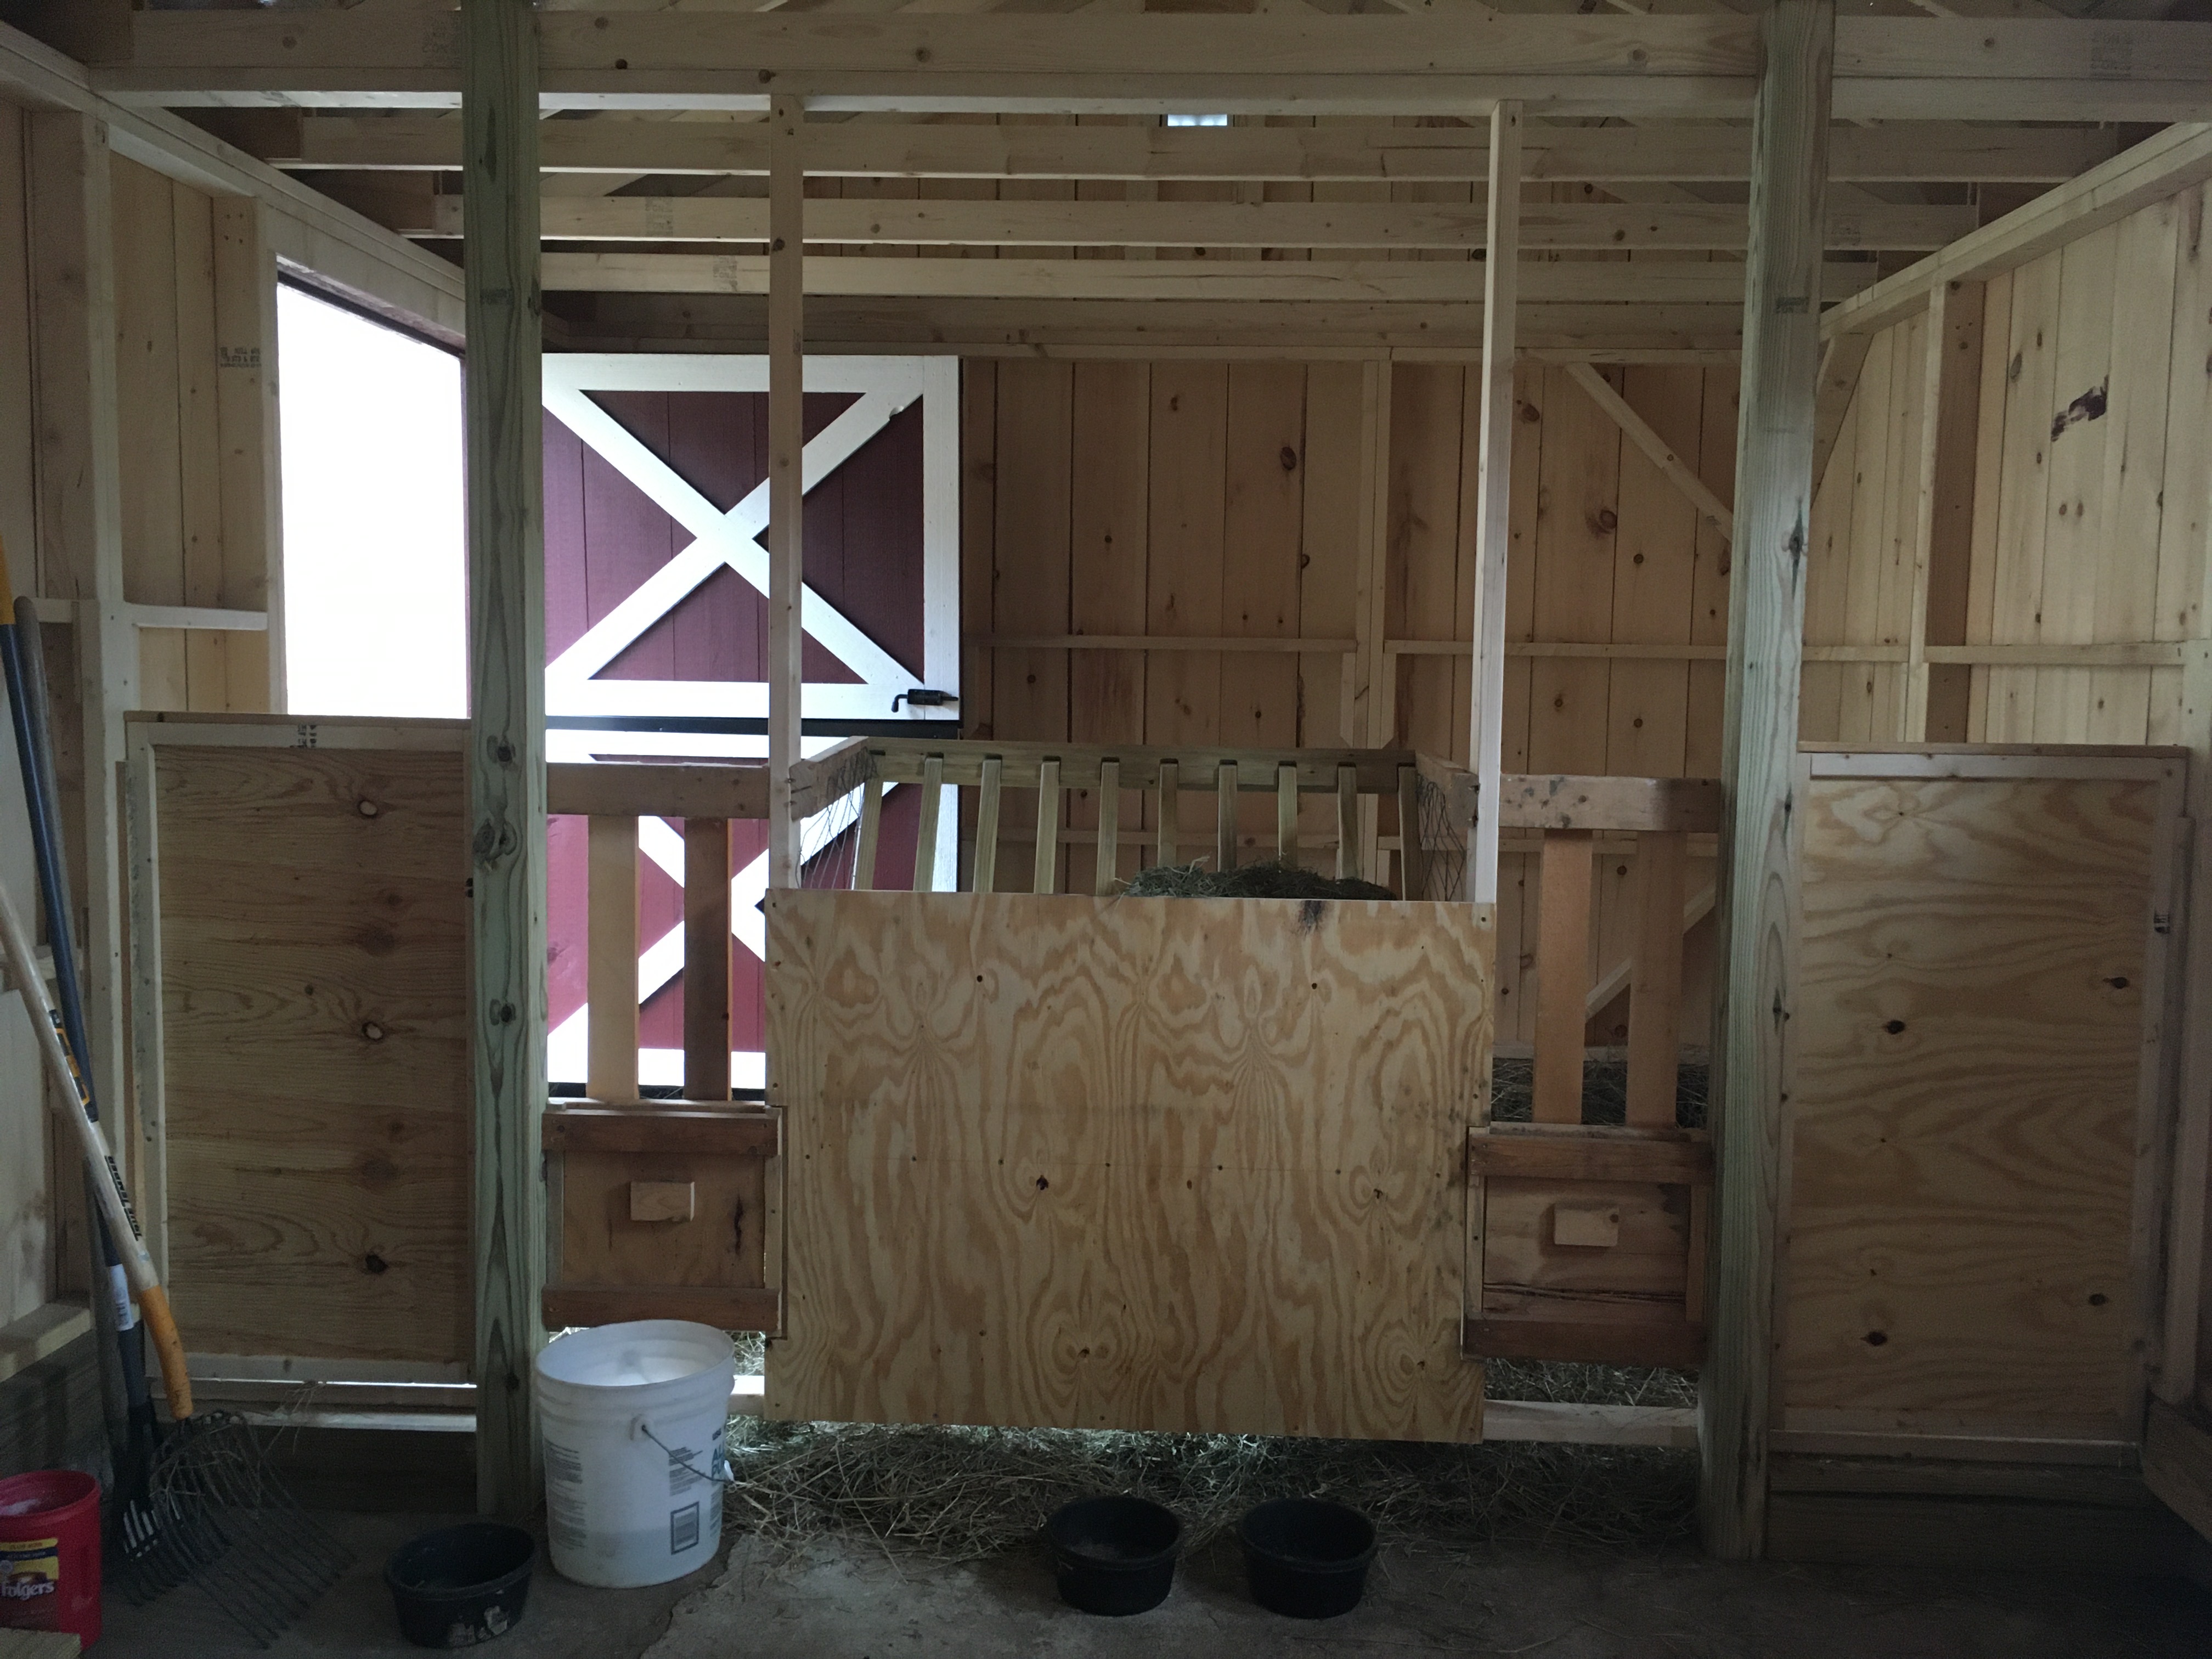
Then, recently, we built stalls in our new prefab buck shed, and I think I have finally solved this problem! If you’re read my previous post on the buck stalls, you’ll know that I have two of these mineral dishes in each stall, in case I want to divide it.
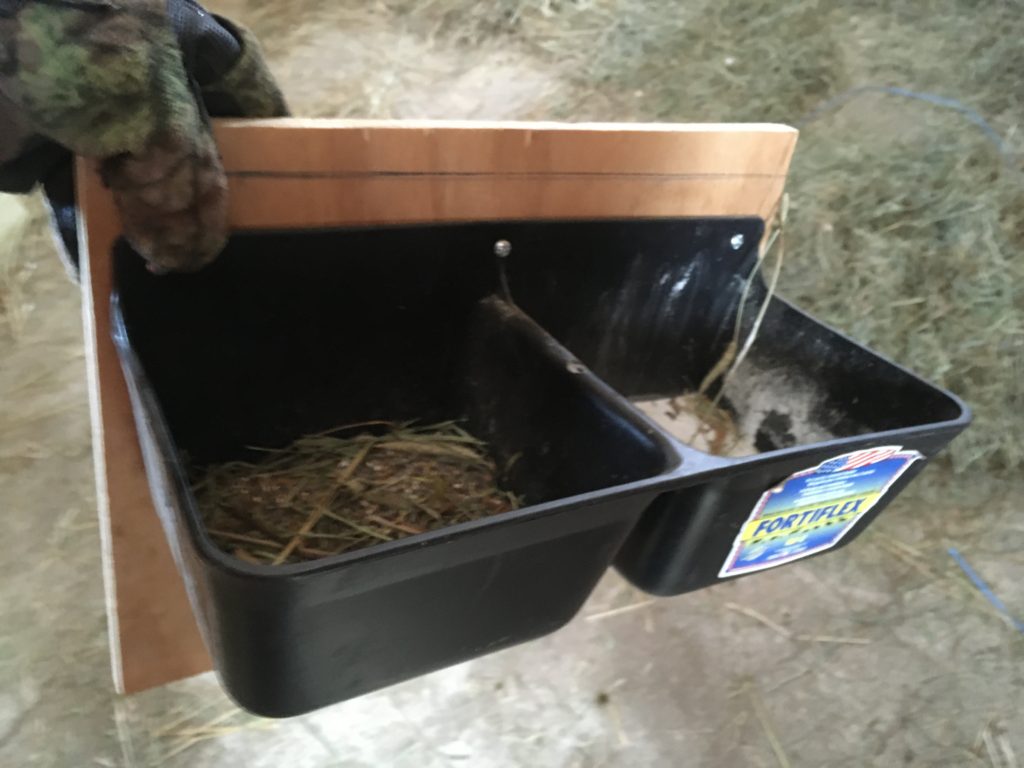
Pictured at the top of this post (and on the left below) is one of the new stalls from its outside. Pictured on the right below is the same stall from the inside. See those mineral dishes? They are not attached to the solid wall! Look closely at the left picture. You see those squares below the open, slatted walls? Those are the removable boards onto which the mineral dishes pictured on the right are screwed!
Stall from outside
Stall from inside
The feeders are attached to a piece of plywood, that then inserts into slots. From the OUTSIDE of the stall, I can grab the handle on that plywood, lift the plywood out of its slots, and thus remove these dishes to dump them, clean them with a hose, refill them—all the things!—and then put them back!
So far, the bucks don’t stand on them. If they start to do so, I’ll put on a canopy as above. But for now, I just am reveling in the ability to remove, refill, and clean these dishes.
As I said at the start of this post: it’s the LITTLE things that can get to you day after day. I’m glad I have one less little thing niggling me now! 😍
Below are more shots of this setup, just in case you want to duplicate it.
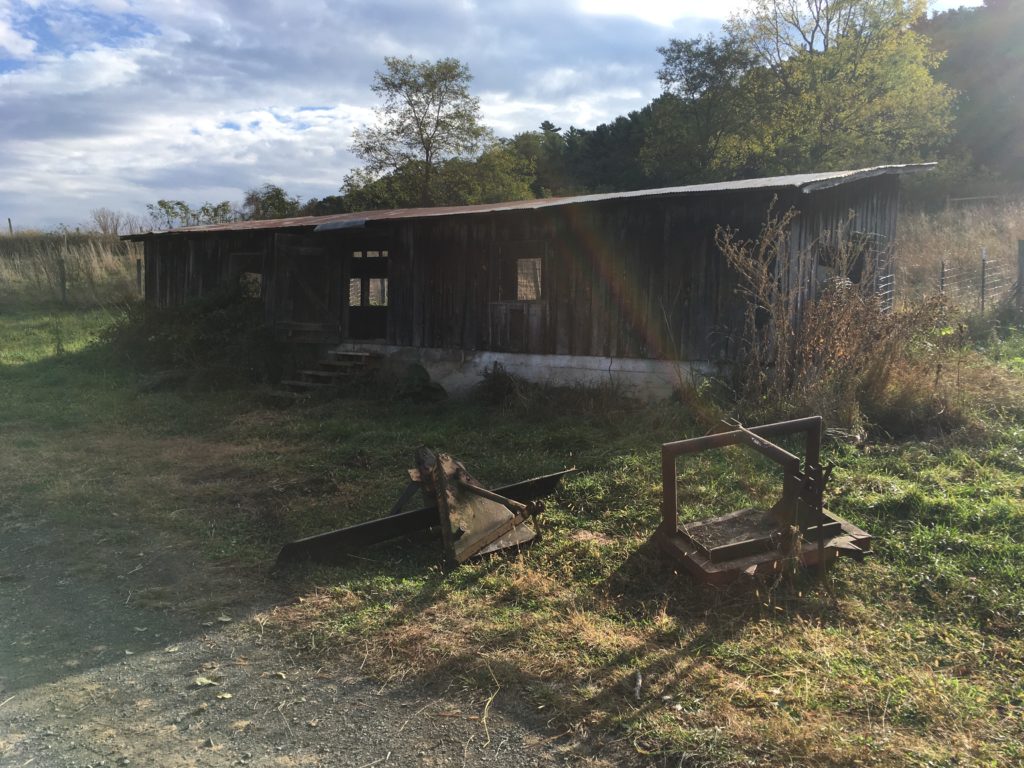
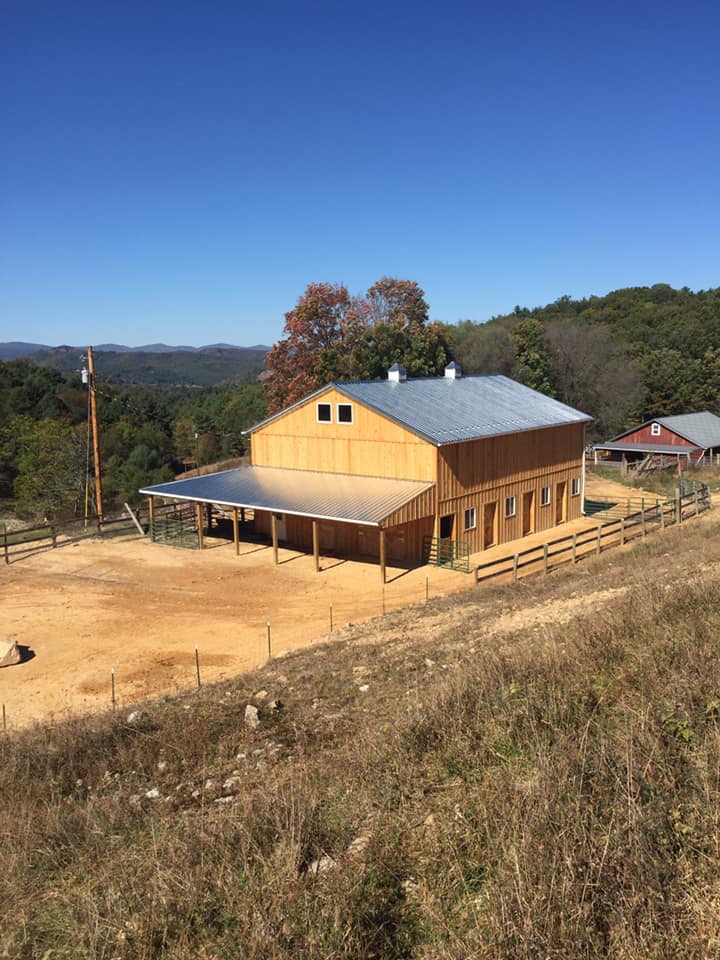
To complete our momentous year of building out our farm, we tore down our sixty-year-old shed and imported a pre-fab building to place on its foundation. This post shares the details of the new Buck House, inside and out!
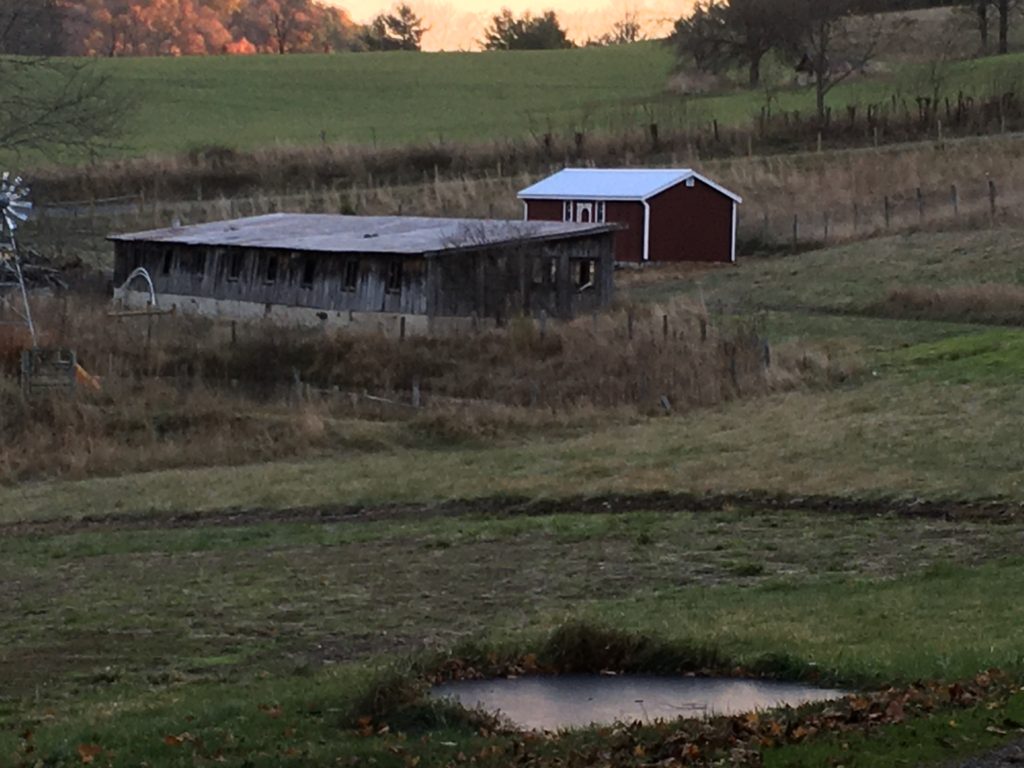
This is the old shed. It was here in pretty much this same condition when we bought the property in 2011 (eight and a half years before this post). The roof leaked, the wood was rotted through, and it was ugly. We called it the Lesser Eyesore –because it sat next to a building in similar shape and three times its size, called (naturally enough) the Greater Eyesore.
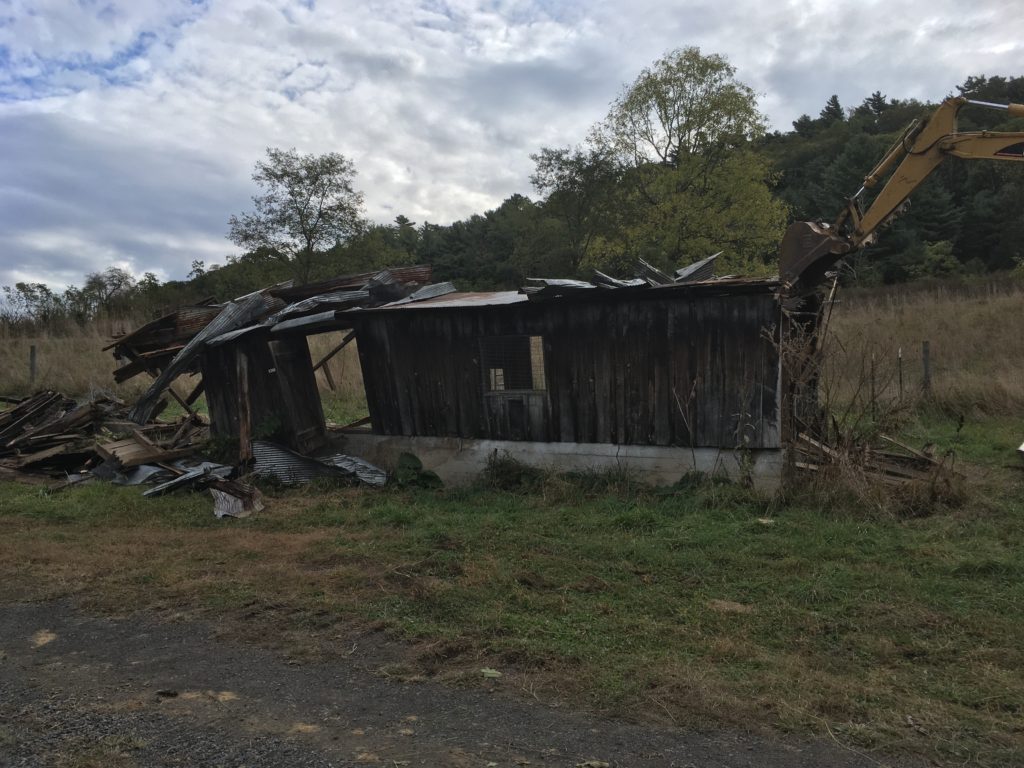
In mid-October, Charlie came and knocked it down in about two hours with his excavator.
After Charlie finished, we were left with a cement foundation which, though not perfectly square or plumb, was good enough to support a new building.
Our bucks had been staying in this shed until recently. So, there was plenty of leftover bedding to remove from the foundation.
We had Jonathan come in with his ‘dozer and scoop dirt out from behind the foundation so that water would drain away from it instead of into it.
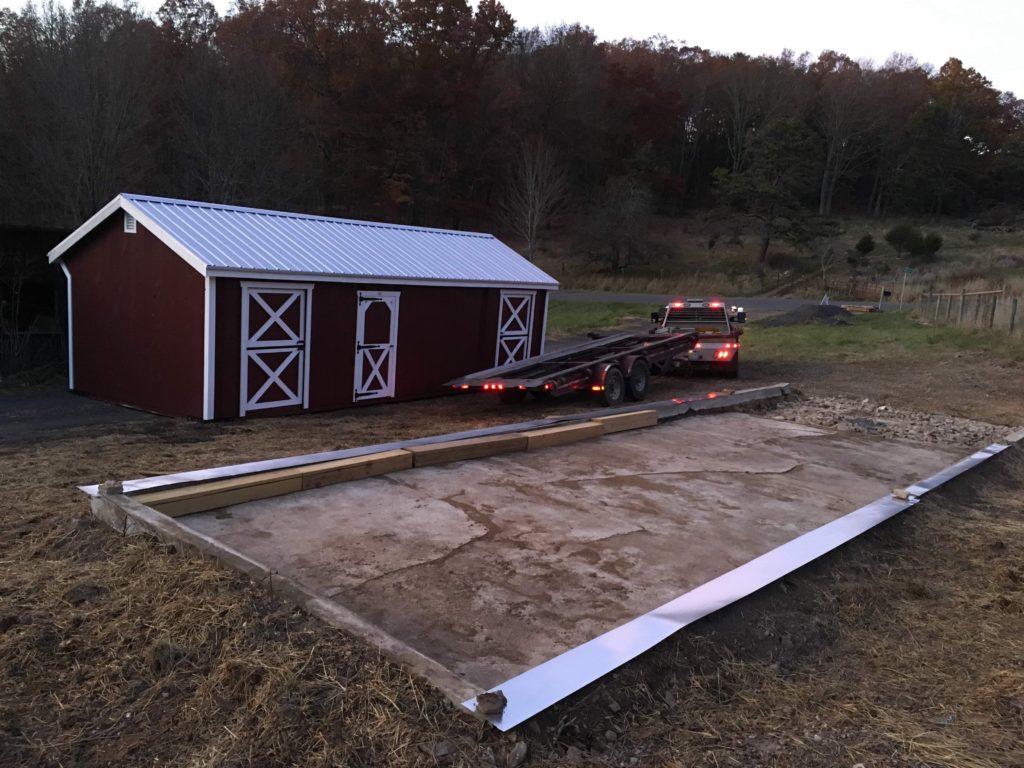
Then we examined it and figured out how to get the new building on it. Finally, on November 4, here came the building (late) at dusk.
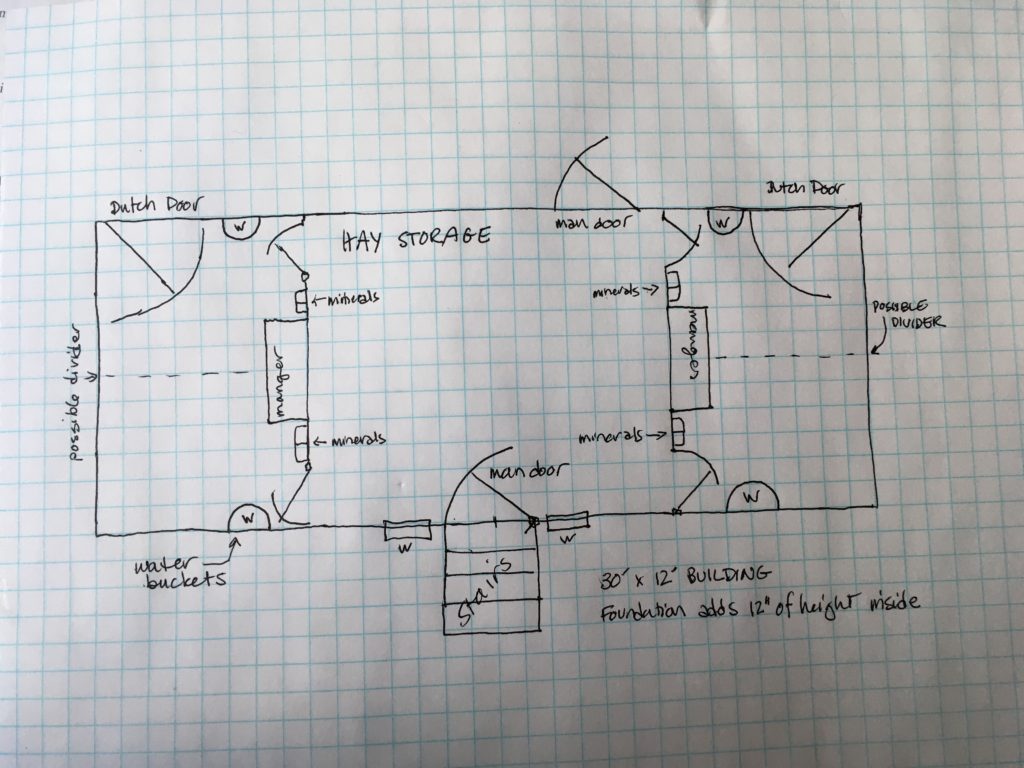
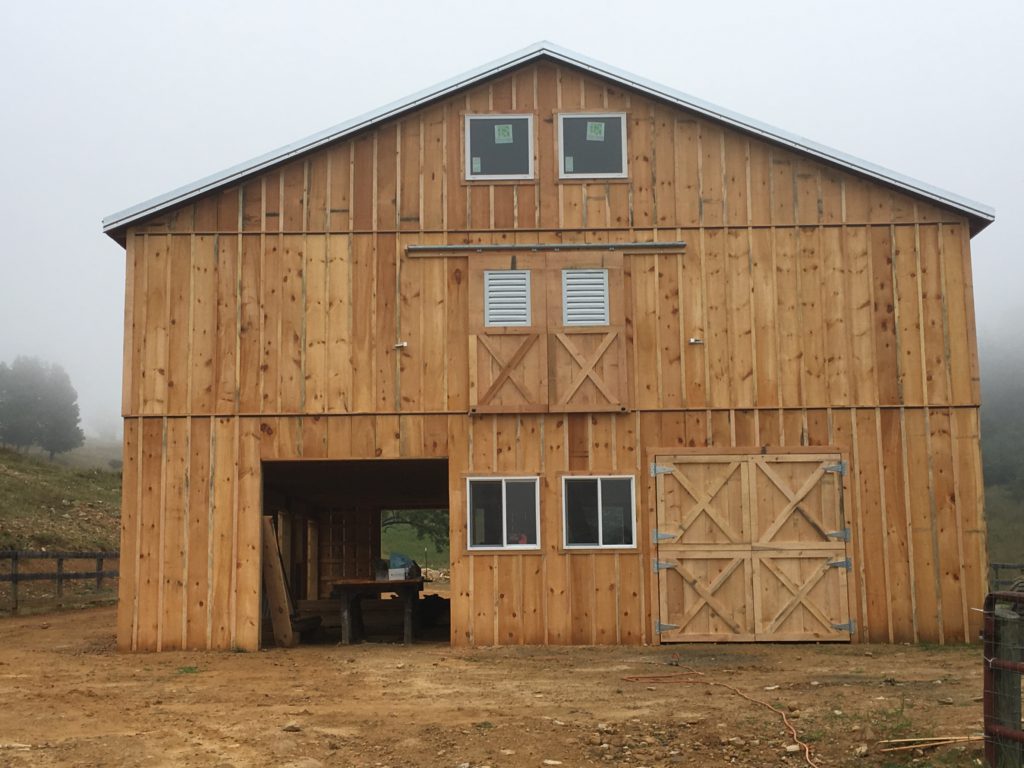
In this shot, you see the back of the building. It has two dutch doors on either side, and one man door offset in the middle.
We had to set the building in the dark, but when we awoke the next morning, there it was, next to the Greater Eyesore (which is soon to be torn down as well).
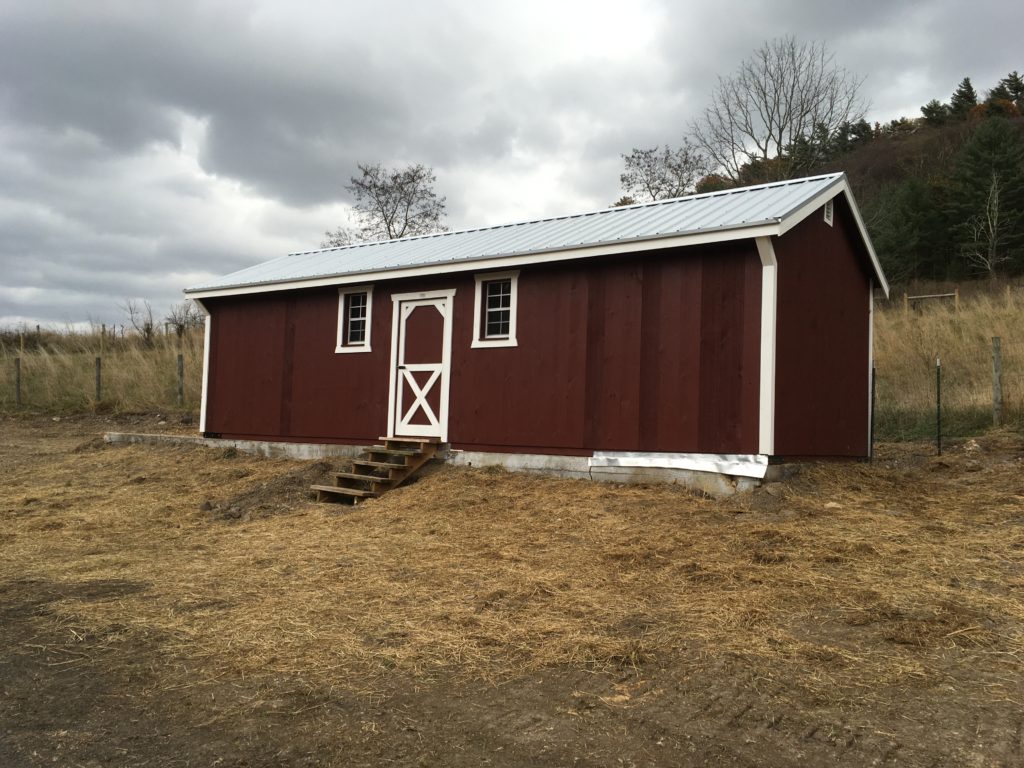
Though the foundation was 40′ long, we elected to only replace it with a 30′ building. It is 12′ wide, just as the old one was.
We seeded around it, re-attached the steps up to the front door, and began to go to work on the interior.
The building was only a shell when it came. Our friend Kenny implemented my design for the interior. He did a great job. Let me explain to you what you’re looking at in the next shots.
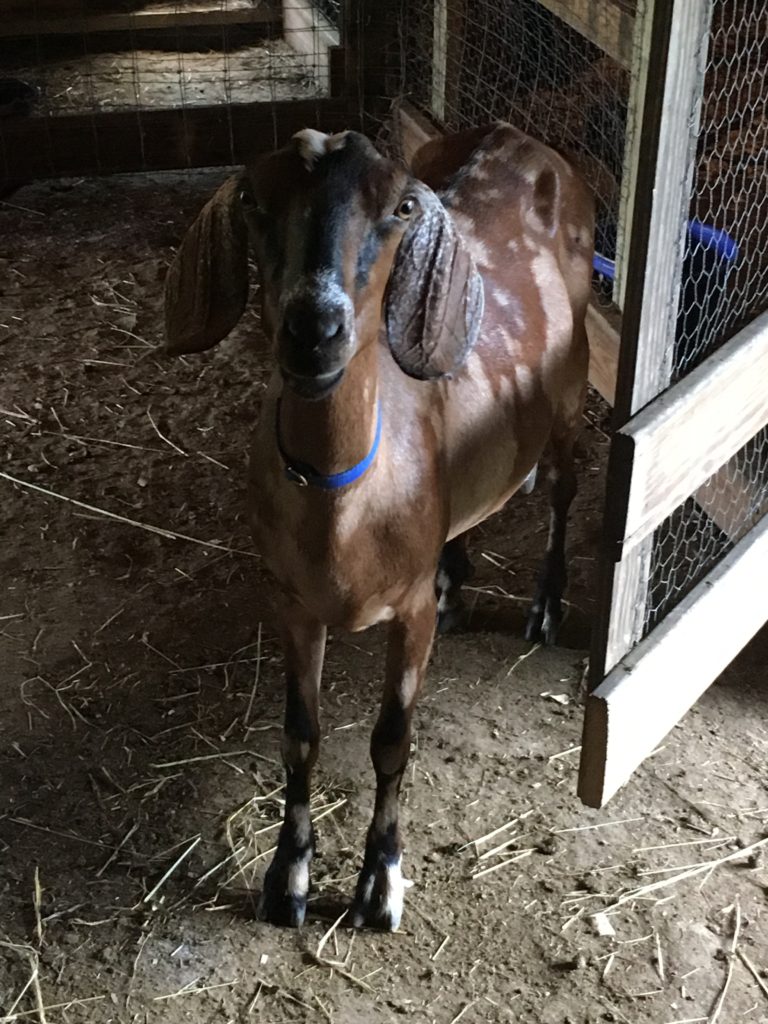
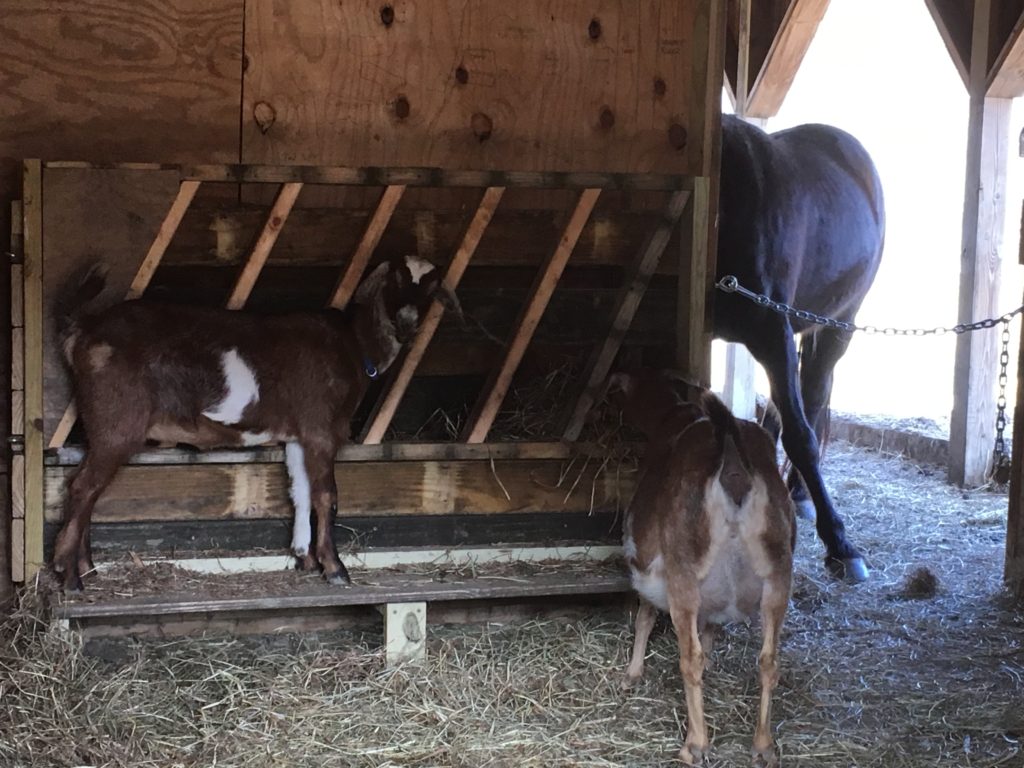
We currently are at capacity for bucks. We have two pairs: a younger set and an older set. They will be rotated through as our herd becomes saturated with their genes.
The buck house is designed to house four bucks, either in pairs or singly, depending on their ages and health needs. Above is pictured the floor plan; at the right is a picture of the left side as you face the buck house.
Stall Features
Each of the end stalls are 9′ x 12′. Each cozily houses two full grown Mini Nubian bucks each. The bucks go in and out of the dutch door at the back of the building.
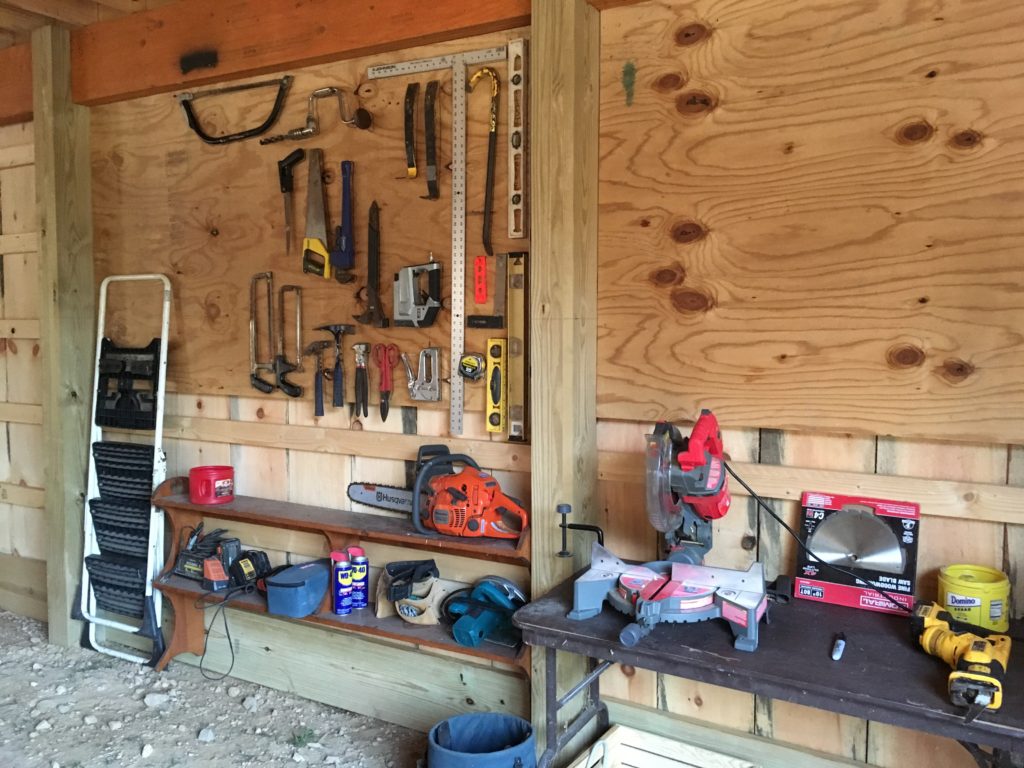
In between these stalls, inside, is the human area that we call “the Lobby.” This 12′ x 14′ area is where we keep feed, minerals, mucking equipment, tools, meds, a milk stand for hoof trimming or restraining a buck, and hay. Daily, I can feed, give minerals/baking soda, and hay without entering the stalls at all. To give water, I open one of the doors inwards, and it becomes a shield of sorts between me and the animal within as I give water. This is very handy for when the boys are in rut!
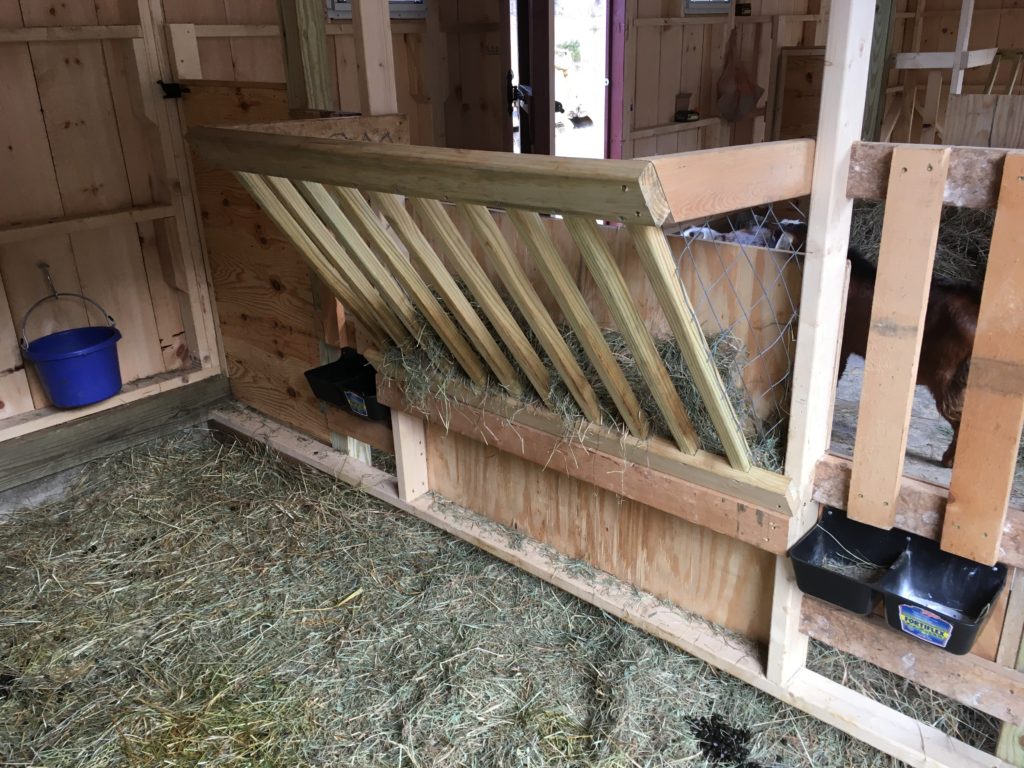
These two end stalls each have a central manger, flanked by two mineral dish inserts (lower) and panels above for viewing (we can see in; they can see out). Then, on either side, there are doors that open in.
If desired, because of fighting or health issues, or unequal sizes of animals, we want to divide them further, we can split the above stalls from front to back down the middle of the manger, creating two separate stalls on each end: four in all. The split stall pictured on the up top would let the buck on the right directly into the field, but the buck on the left would need to come through the Lobby and out into his field.
Thus, this house gives us 2-4 stalls, depending on our needs. We have no power out in this shed, so I purchased some rechargeable, batter operated, LED closet lights that are motion activated for winter feeding in dark hours. So far, we are loving this new Buck House!
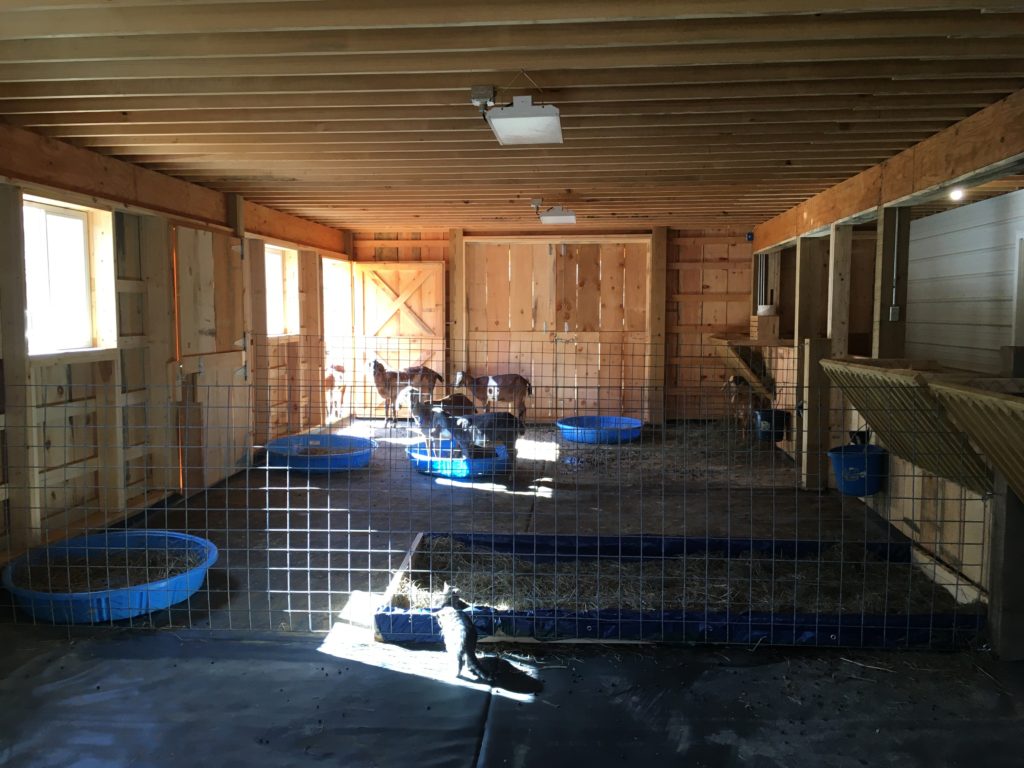
As I explained in more detail in Part 1, the ground floor is divided exactly in half. 18′ x 48′ is dedicated to space for the goats. As I explained in a previous post, that space is modular: there are four stall doors to the outside (as you see in the picture above) and four stall doors on the interior ally. We divide the goat stall space using goat/sheep panels that can easily be installed or removed.
18′ x 48′ of goat stall space
On the right of the picture above, you can see mangers built between the doors. If you look closely, you can also see white-painted steel roofing material mounted on the wall. That same steel roofing shows in the picture on the left. It sheathes the milking parlor and cheese making room. These take up about a quarter of the entire barn’s downstairs space.
Cheese Making Room
If you enter that door pictured above, you will be in the cheese making room. It is quite small: 12′ x 8′. It is a one-person space that opens into the milking parlor as well. It is designed as a clean, heated space where one may make cheeses and store goat’s milk.
We will work clockwise around the cheese room, noting features.
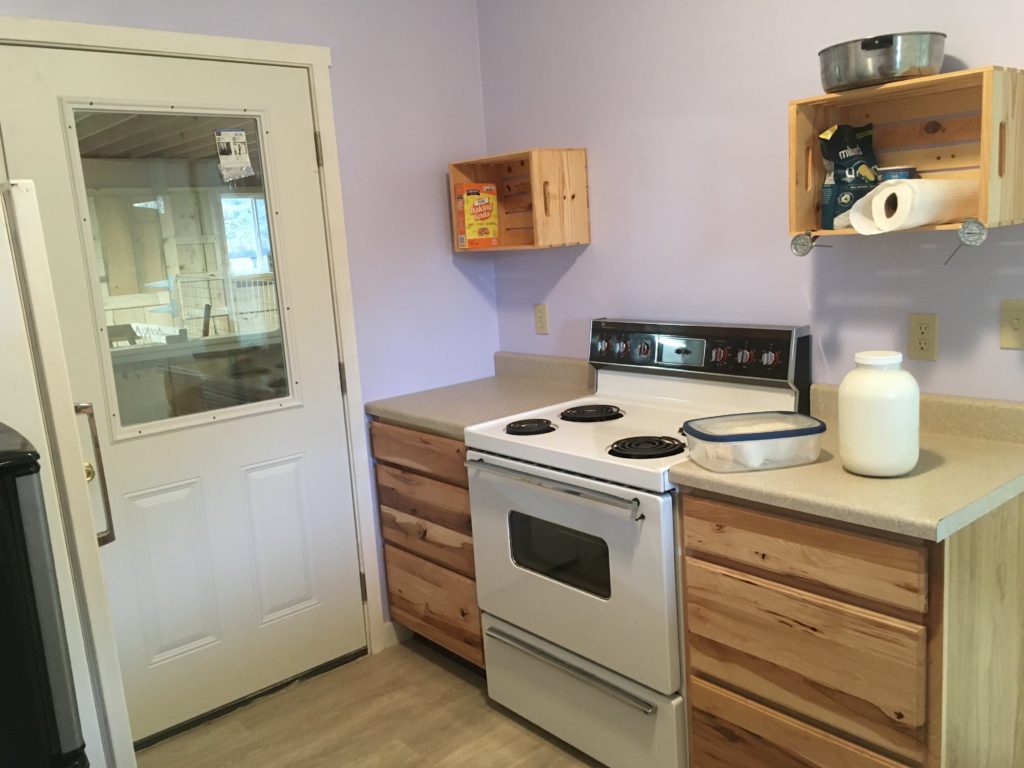
First, the door to the barn’s interior has glass so people can watch cheese being made if they stop by, and so that we can communicate easily. The cabinets and counters were found at Lowe’s. The stove was bought off Craig’s List for $50. And the crates that we use here and in the milk parlor were bought on sale for $6 each, delivered free, from Michael’s.
Continuing around, you see the door opened to the milking parlor beyond. Note the door from the milking parlor to the outside (for orientation later). Also note the floor: it is luxury vinyl (not because goats need luxury, but because it is waterproof and has a commercial durability rating. It looks like wood, too, which means it is textured. It’s easy to sweep and wash, which we do twice daily after milking. It is in both the milking parlor and the cheese making room.
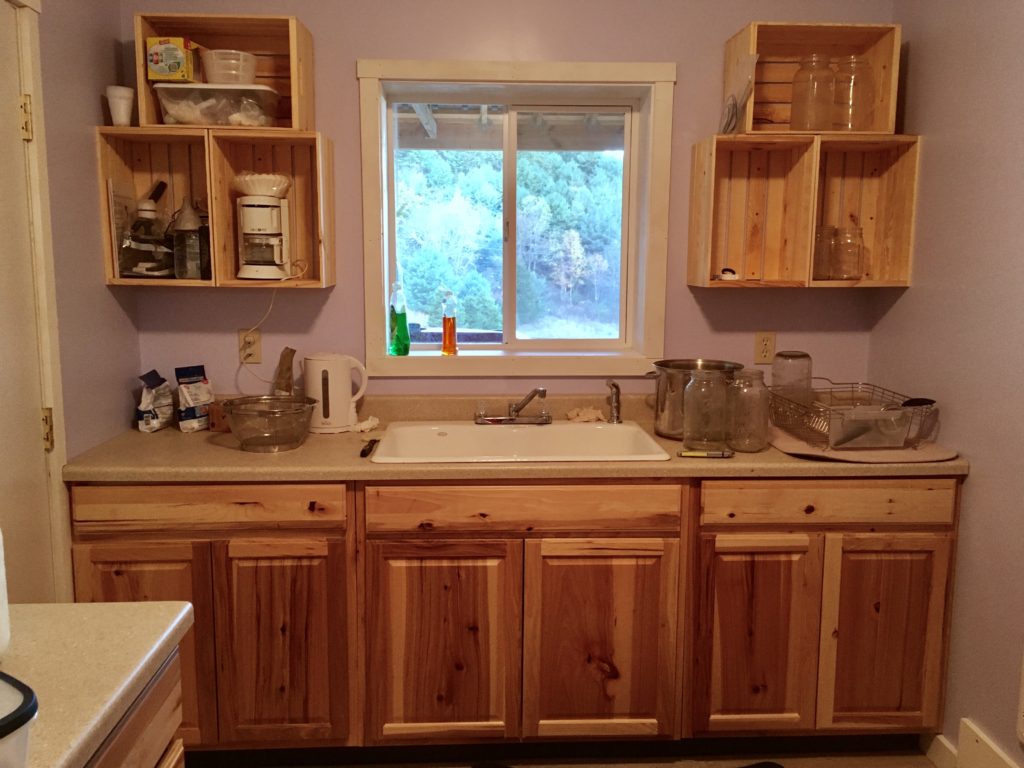
Now, if you close that door to the milking parlor above, you see the sink area. The view out the window is of the mountains–so beautiful!
I designed lots of space for keeping oversized pots and pans below in this area, and again, crates replace upper cabinets.
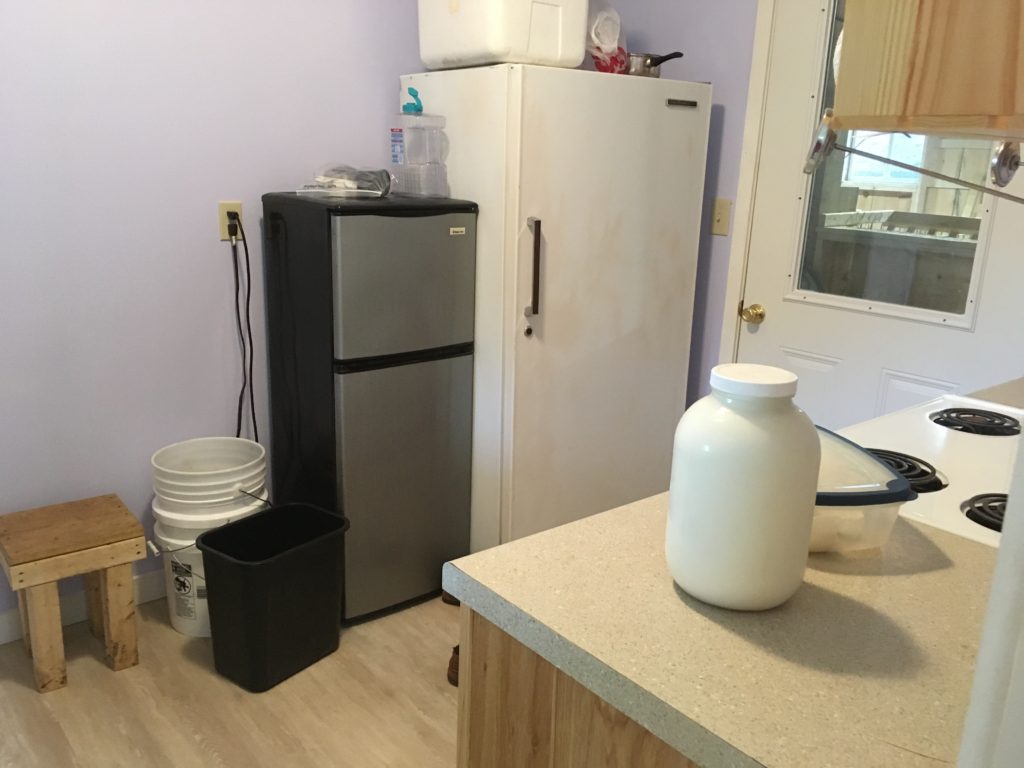
Now, I have pivoted again. You see the jar of milk, and the door we came in by, and I am standing in the milking parlor door.
You can see an empty space where we place our cheese presses, our current small refrigerator (we are looking for a full sized one on Craig’s List now), and our upright freezer that was a Craig’s List find.
Notice the small stool down low on the left…
We love our 8 barn cats, all of whom are feral, and were born in our barns. They are great mousers! But, we have had two problems since acquiring goats. Problem 1) They were always in our old milking parlor–startling or annoying goats while milking and making things unsanitary. Problem 2) When it is zero degrees outside, I am too softhearted to leave them to the elements, so I bring them inside to my bathroom. They make a MESS of it, since they’re not trained to the litter box.
For these two reasons, it was important to me when designing this barn, to solve these problems. The milk room backs up to the staircase, so I decided to create a “cat lair” under the stairs. I had the most interior, low portion partitioned off, and created a cat flap exit into the barn from that space for them to use.
Inside my nice, clean cheese room, next to that stool and near the floor, is the cat feeding flap.
This flap, when opened reveals the cats’ food/water dish that slides out into the room. This way, if we want to give the cats some milk or whey, we can, without them entering this clean space or bothering the goats while milking.
Above the cat flap is the room’s heater, and above that (not pictured) is a switch on the wall that solves the second of my two cat problems: what to do when it’s really cold out. The switch operates and outlet inside the cat lair. I plug a heating pad into it–the kind that doesn’t have an automatic shutoff that we use in our chicken house for MHP brooders–and when it’s cold, we can flip the switch and the pad will be on for cats to pile onto and stay warm. (I will sleep soundly knowing my cats are comfy.)
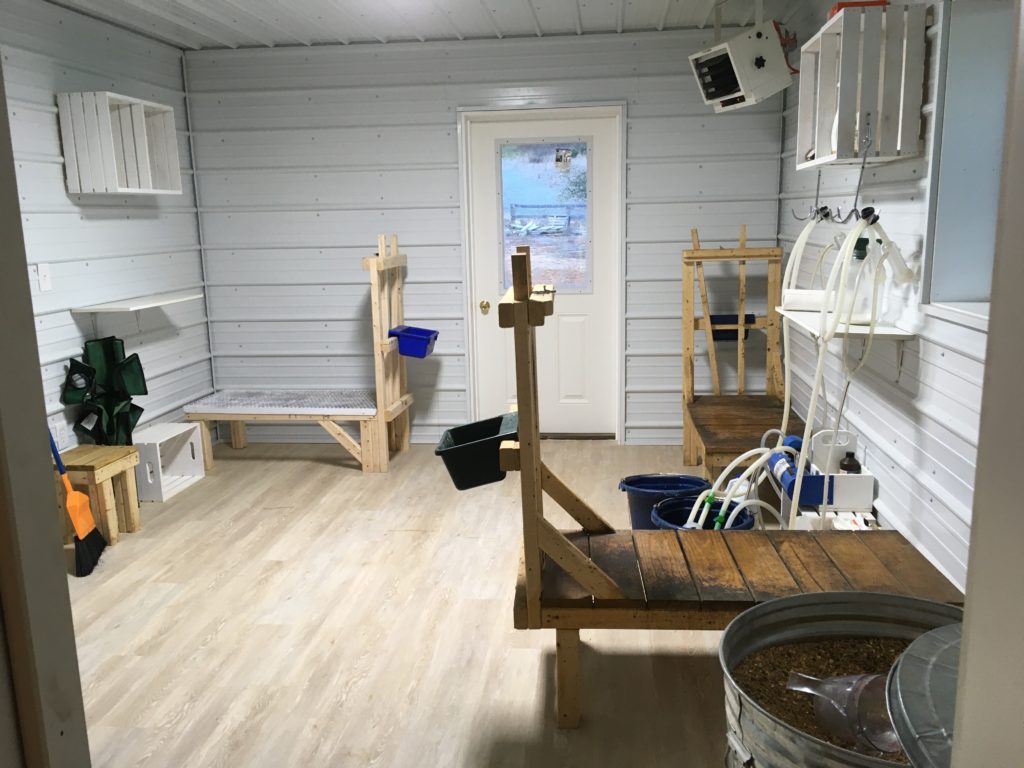
Milking Parlor
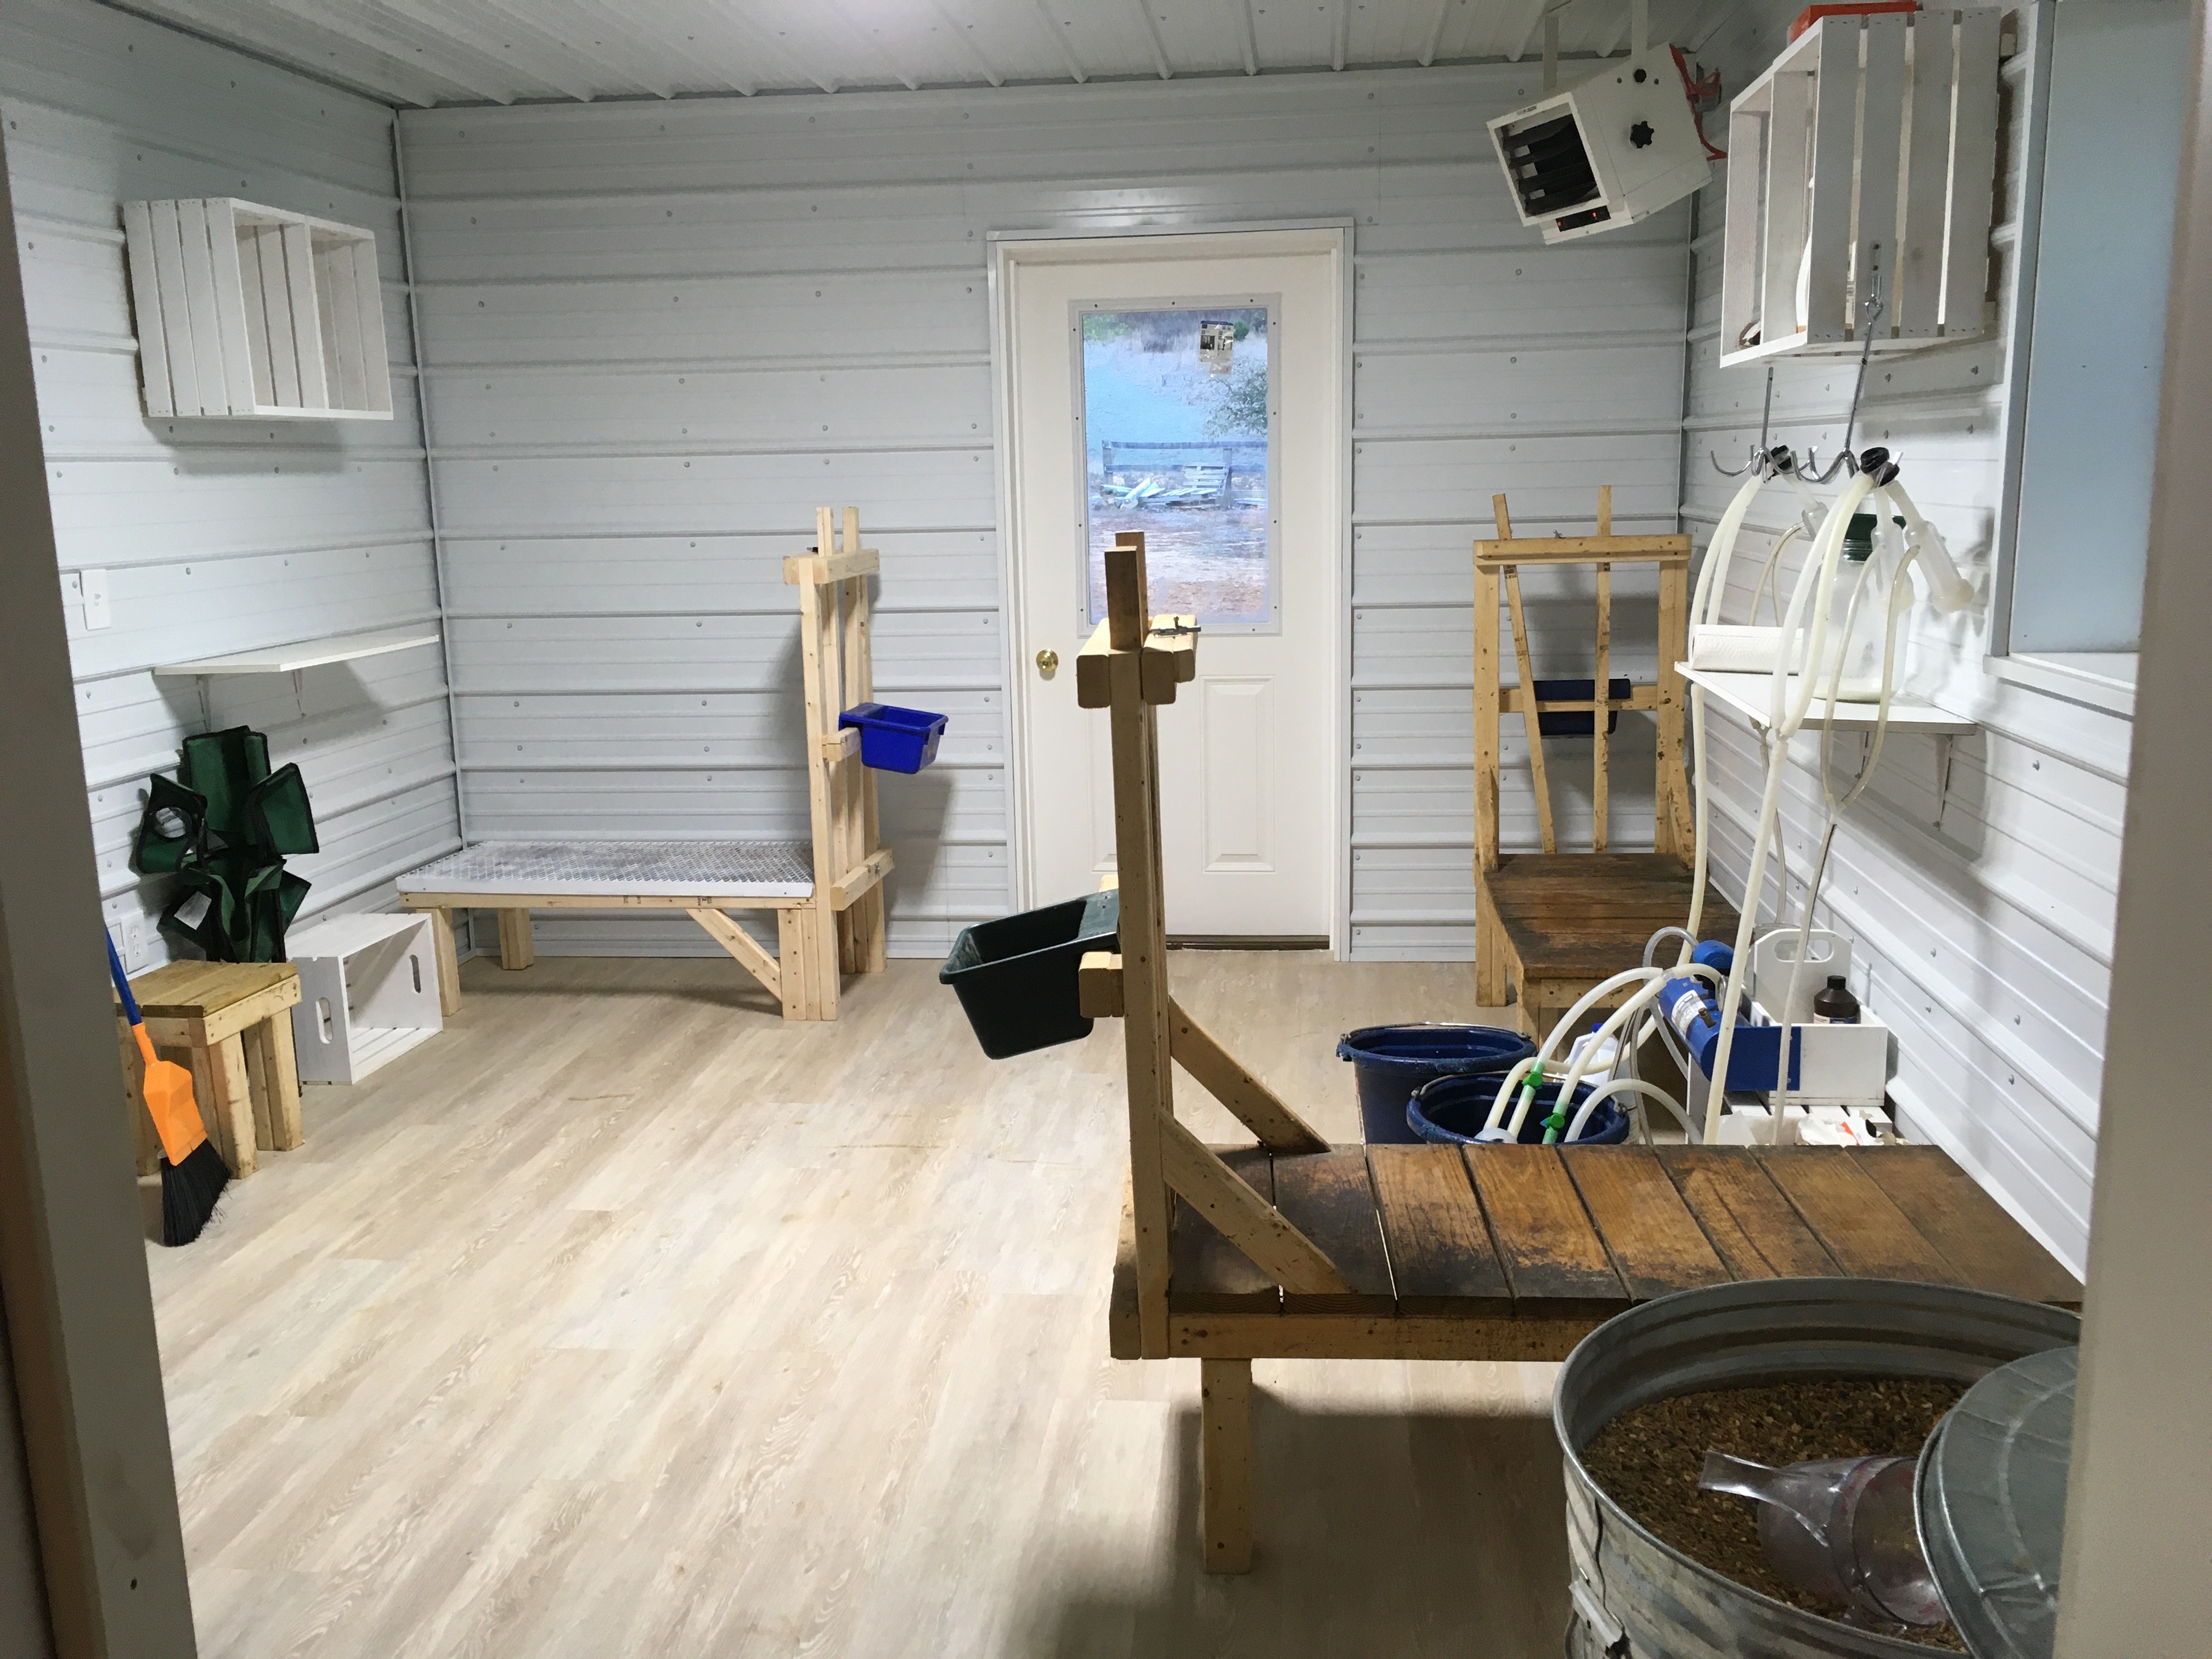
Our milking parlor is designed with cleanliness in mind first and foremost. It is sealed off from the barn and the outside, and insulated top, bottom, and sides. Up in the corner at the end on the right in this picture, you can see a shop heater that keeps the room above freezing.
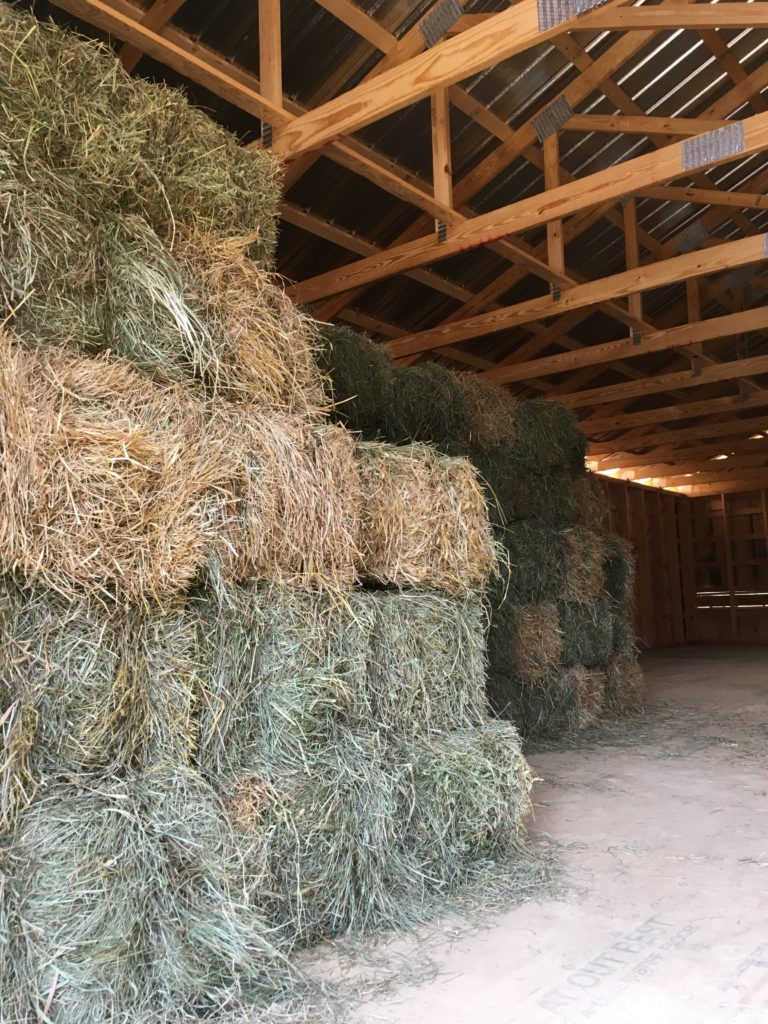
We have room for four milk stands and two milking machines in this room. We are currently transitioning to from wooden stands that you see pictured here to wood/metal stands that we are making.
Other features to note: we again use crates (painted white so we can see when to clean them, and so that dirt can’t sink into them as readily). The room is (obviously) lined with metal roofing painted white. This is a highly durable finish that we can wipe clean with a rag, and that the goats cannot damage.
Also note the door to the outside. There’s a door to the left (like the cheese room one), which is where the goats enter. They are milked, and exit to the yard (under a roofed overhang) when they are done.
In the foreground of the picture above, note that there is a feed bucket on the right and a black shelf unit on the left. (You’ll see them again in the next picture, where I move to the opposite angle.)
Okay, so now you see the bookshelf units. This is where I get to store all my animal medications that I’ve always had to store in the house in winters (a LONG walk from the animals).
You now also see on the right the door to the interior barn ally where the goats enter this room, and that’s the door back into the cheese room on the left.
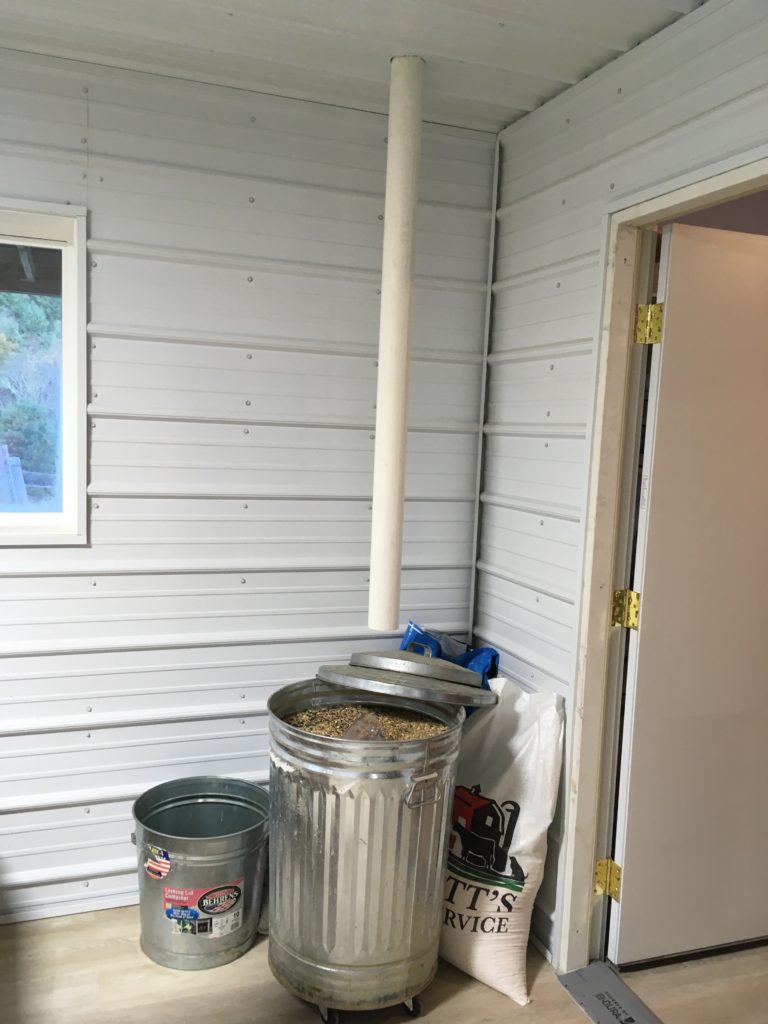
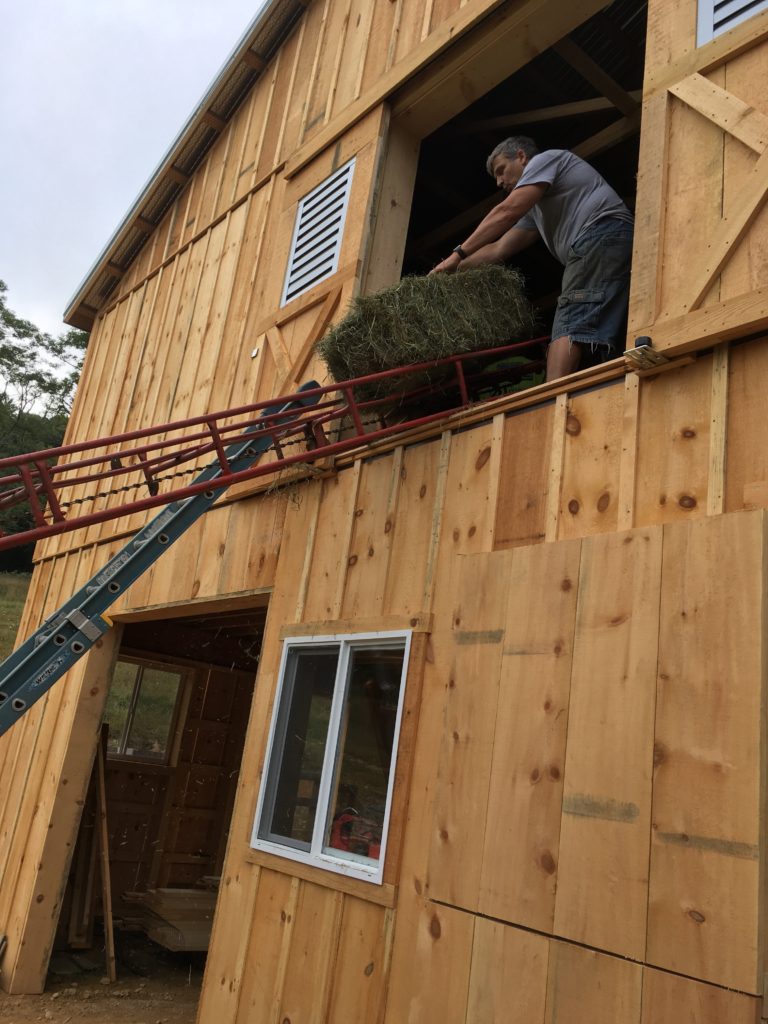
Just a few more features to note and then I’m done. The PVC pipe that you see comes through the ceiling of the milking parlor. This is because we store our grain in a caged, mouse resistant (is anything mouse proof???) room. After we mix it up there, rather than carrying it down, we position the grain can under this chute, and pour it down, saving lots of effort.
The grain cans are on rolling plant stands, so during milking, we move them closer to the feed dishes on the goats’ stands.
We are loving the relative peace and cleanliness of our new milking parlor. Our next post will be about how we are upgrading our milk stands to be easier to clean and more sanitary. If you’d like to become part of the Storybook Farm community and receive monthly newsletters, sign up below!
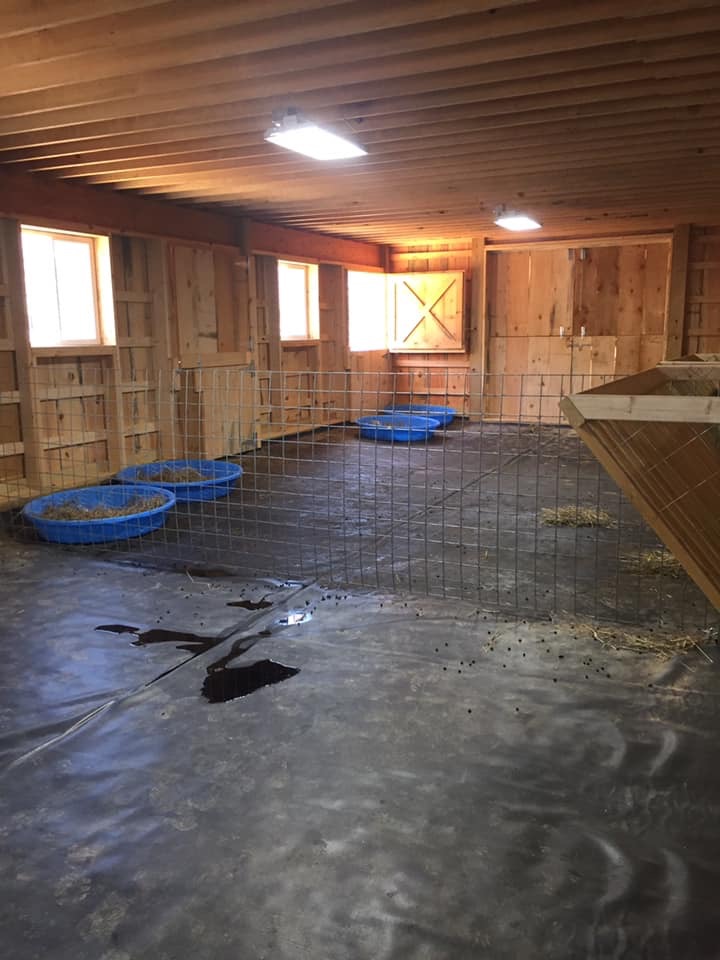
Well, we started in the second week of July, and we moved our does into their new space on Saturday evening. They’ve now slept in their space for three nights, and already we’re making tweaks and modifications. But, as my son Mike is fond of saying, “no plan survives first contact.” This post is mostly about the animal part of the barn.
Let me share some pictures of what we now have, and explain as I go what we plan to modify. This is PART 1. If you want to see our milking parlor and cheese making room, click HERE.
NOTE: I do all this in the hopes that some of the ideas that I’ve had will inspire you with ways you can maybe solve problems or improve your own setup. As goatherds, we’re always learning, right?
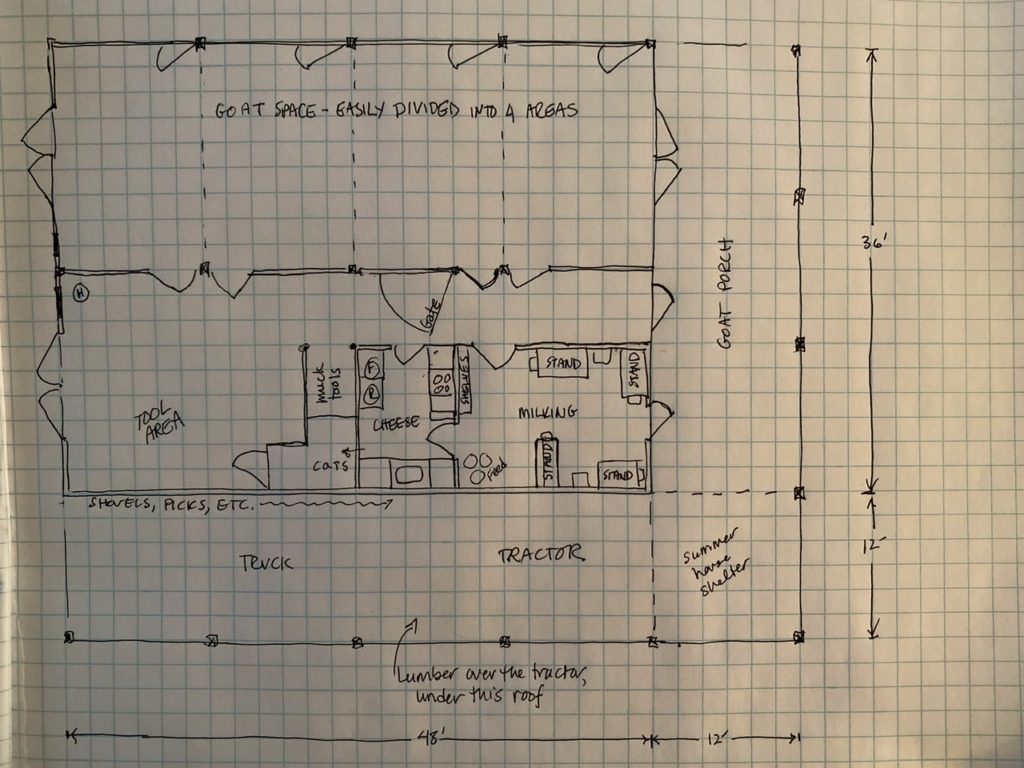
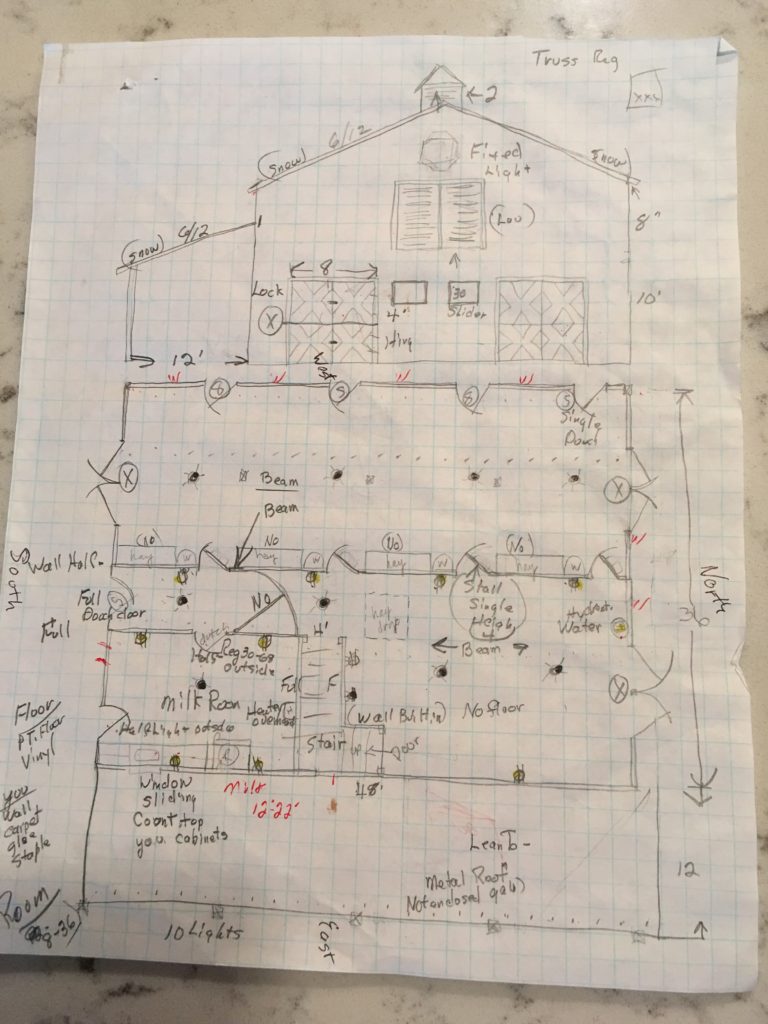
Below is the floor plan of our barn, just to orient you. This post is about the Goat Space, near the top of the drawing, where we have an 18′ x 50′ open space. This space can be divided or left open as the seasonal needs of our goats dictate (see more on this here).
Barn Floor Plan
Choosing, Prepping For, and Installing the Floor
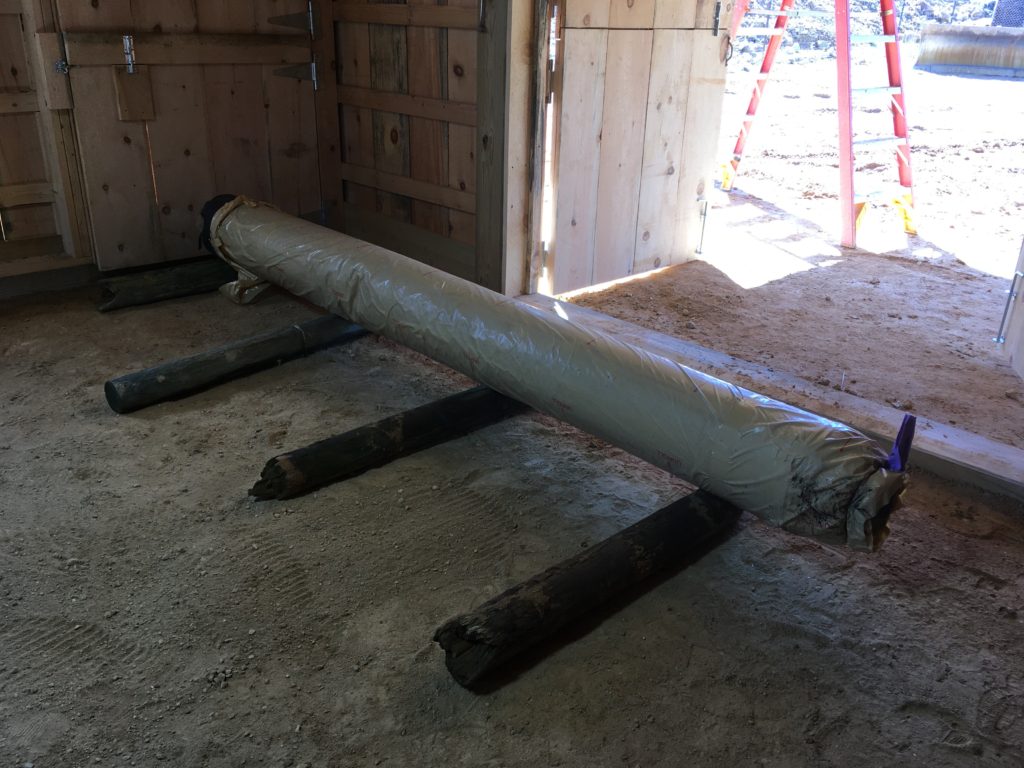
I have had goats on dirt floors, and it’s not my preference. I don’t like how much pee gets into the dirt, and how stinky it gets, and how ruts form that become veritable ponds of pee. So, I opted for a single sheet of rubber roofing that covers the entire goat space: 17′ x 47′. No pee gets thru!
Rubber roofing is WAY cheaper than horse mats. Goats are WAY lighter than horses! So, we opted for the heaviest duty roofing material that we could find. It is only about 1/4″ thick, but it seems to be plenty thick for our little goats (non of whom is more than 120 lbs.).
The first step was moving the roll of rubber roofing. It was NO JOKE. This 50′ x 20′ roll (doubled in half so the roll was 10′ x 50′, weighed at least 800 lbs. I brought it home in a pickup truck from the roofing company, but from there, it took three strong men to muscle it from the truck to the rollers, as you see in the first photo below.
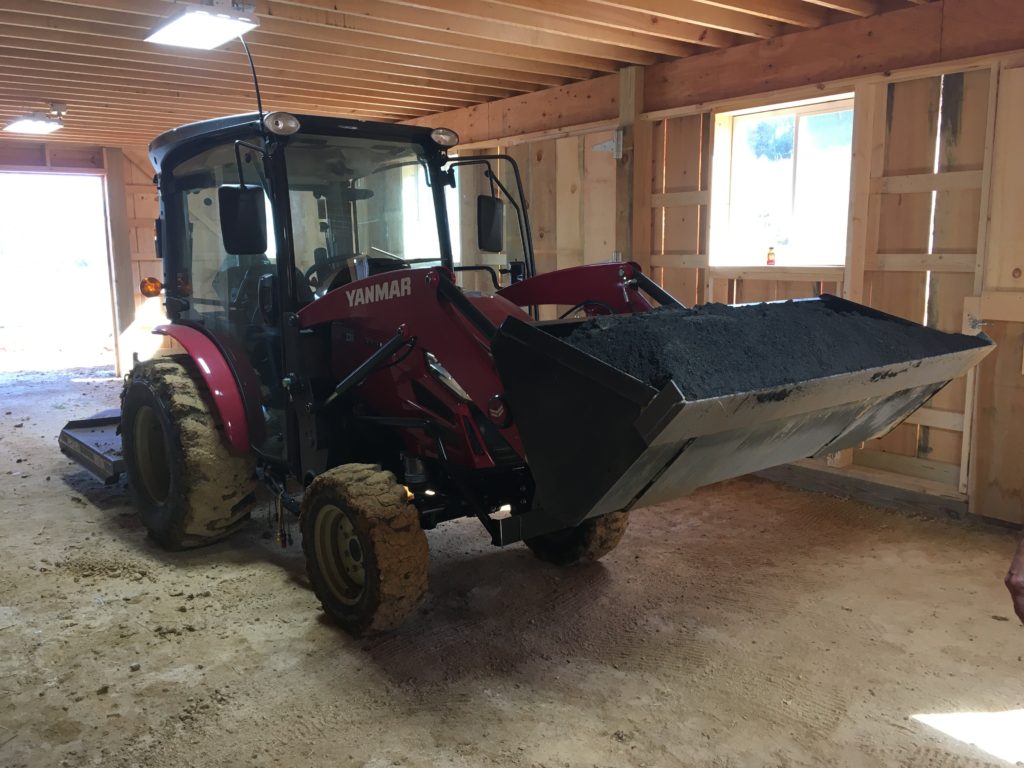
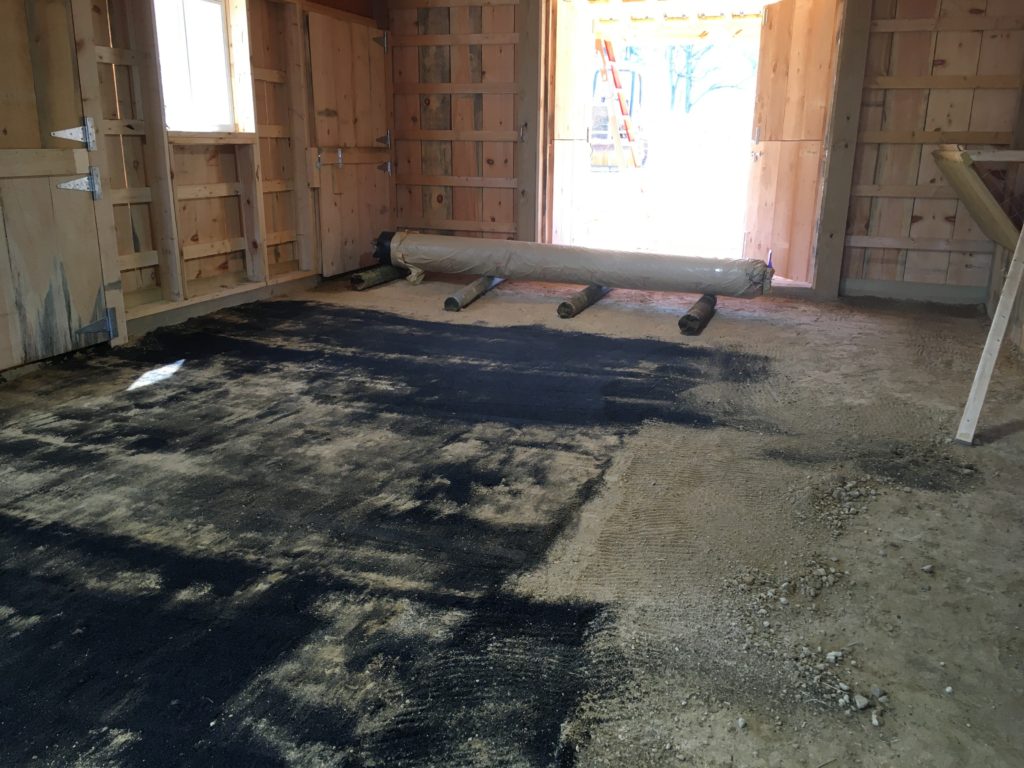
Then, we had to prepare the underlayment. Scott spent about two days doing this. We first raked the entire area with a garden rake, removing stones and carting them off. Then he began to level it with a 2 x 3 board from front to back on the left side (in front of the roll). I meanwhile drove our tractor with 5-6 loads of black sand. We used it to continue to level the area, filling in divots and smooting the area over and over.
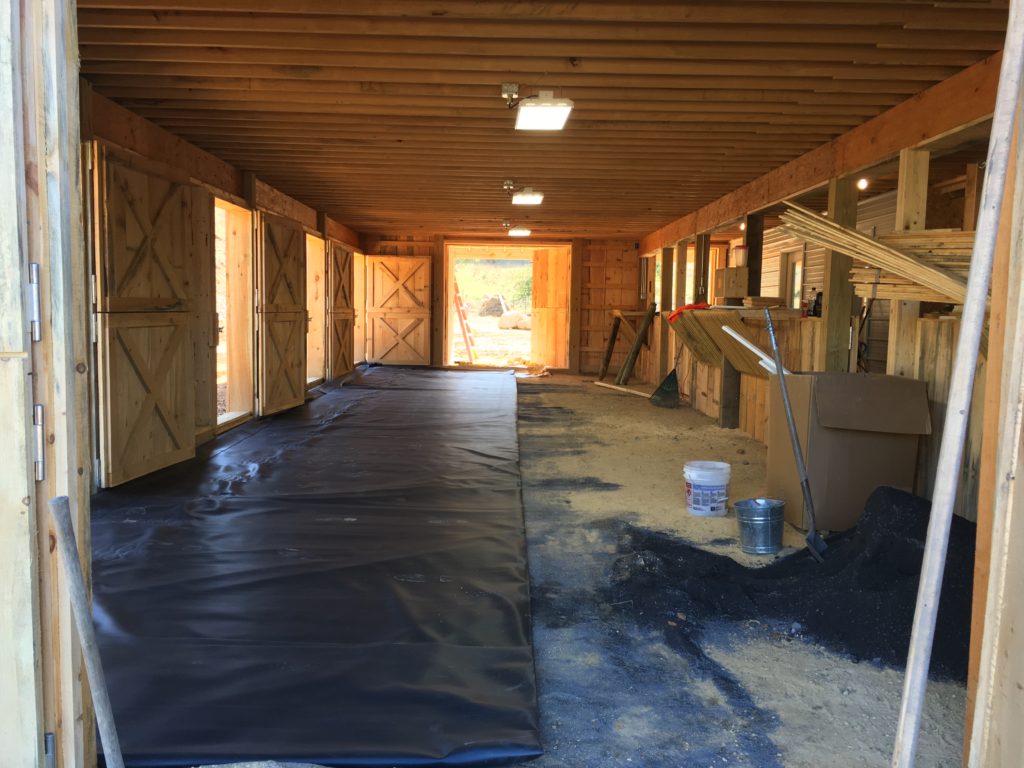
Finally, (last picture) we unrolled and (with the help of visiting friends) we all got into those four doorways and PULLED together to properly position the left half of the entire piece.
Positioning the HEAVY rollCarting in black sand.Smoothing the underlaymentUnrolled left side!
We then did the same exact process on the right half of the area.
Bring in the Does!
Here is a shot of the does exploring their new space for the first time on Saturday evening (10/12/19). In this first shot, I’m standing on the right side of the space, looking towards the exterior walls.
What you also see here, if you look closely, on the left, is a goat panel divider. More on this later.
In the picture below, I’ve reversed direction to be looking towards the interior of the barn. Same space. Obviously, we have built in mangers and water buckets. There are four doors here as well. They all lead into the center aisle beyond that half wall.
Here again, you see that same goat panel. It is heavy duty, like a calf panel, and it is removable, secured to the walls by means of large eye hooks and carabiners. Obviously, this panel divides the space. We can thus have four “stalls,” using three dividers in all. This proves to be economical and modular, and also keeps the whole space open. This means that we can see everything, and the goats can see one another when we need to separate them.
Pros and Cons on the Flooring
So far, I have things I like and don’t like about this flooring.
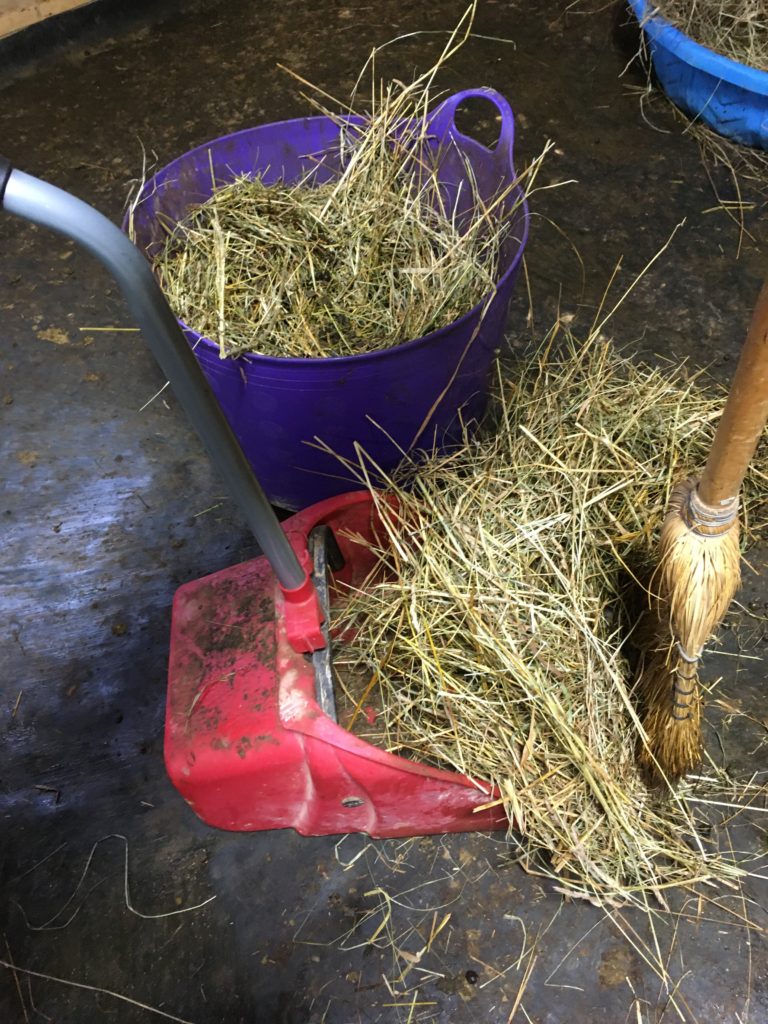
What I LOVE is the ease with which it cleans up, and the fact that no pee is seeping into the dirt underneath. Each morning, we feed and milk our does, and kick them out for the day (while the weather stays warm.) I sweep up the pee and goat berries with a straw broom, and then transfer them to my muck bucket by means of a terrific scoop that I bought at Tractor Supply.
What I haven’t loved so much is that the pee pools during the night, so that (without any bedding) the goats lie in berries and pee at night. (Everybody say “yuck”!)
However, each day, the does also drop hay under the manger that stays clean and dry. I’ve found that it’s easy to sprinkle some on the pee puddles, step on it for good measure, and then sweep it into my shovel scoop.
For the most part, my girls choose to sleep in those kiddie pools, especially in winter or, in summer, outside.
NOTE: A year later, we did some terraforming, where we peeled back the rubber and ditched the center of the barn to an outside drain. It took some trial and error, but we love how our floor drains now, and how easy it is to muck.
In the summer, a bare floor at night is fine, but we’re also preparing all of our barns for winter now, and so we decided to address two concerns (staying dry and staying warm) with one solution.
Here in the foreground (which is in the second stall), you see the new “bunk” we made. It’s just 2×6’s screwed together and then a tarp over them. I put down a layer of horse pellet bedding, PDZ, and then hay over top. I will use the deep bedding method in this bunk, and the rest of the floor can be dry. So far, it’s working perfectly.
To see an even more recent approach, check out or goat table bunks, HERE.
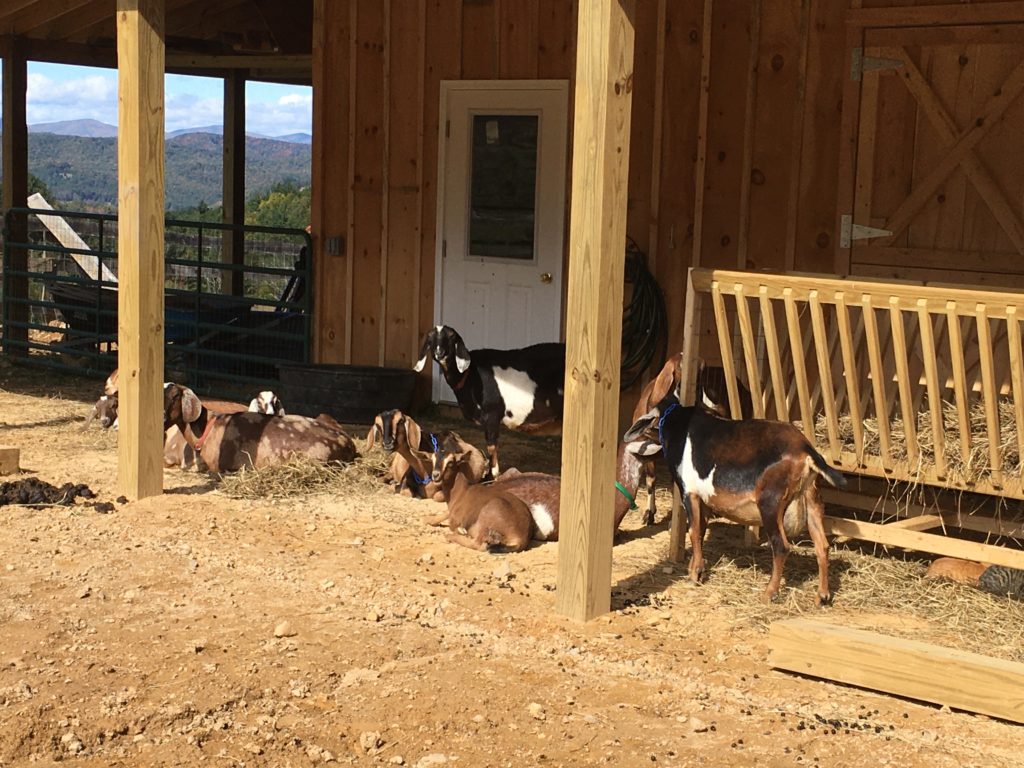
So, that’s it for the floor. I love the large, open, sunny space (the picture right above this is taken at about 10 AM, and you can see the sun pouring in). We allow the does into the first stall during cold or blustery weather so that they can get in out of the wind. The rest of the time, they can choose pasture or hang out on the back porch…
Just hanging out and gossiping on the porch…
Feel free to tour our milking parlor and cheese-making room! And we love to read comments, especially if you’ll share what you do about bedding in your barn, and how you like it!
We also have other posts that detail modifications and additions that we’ve made. I link them here for quick clicking.
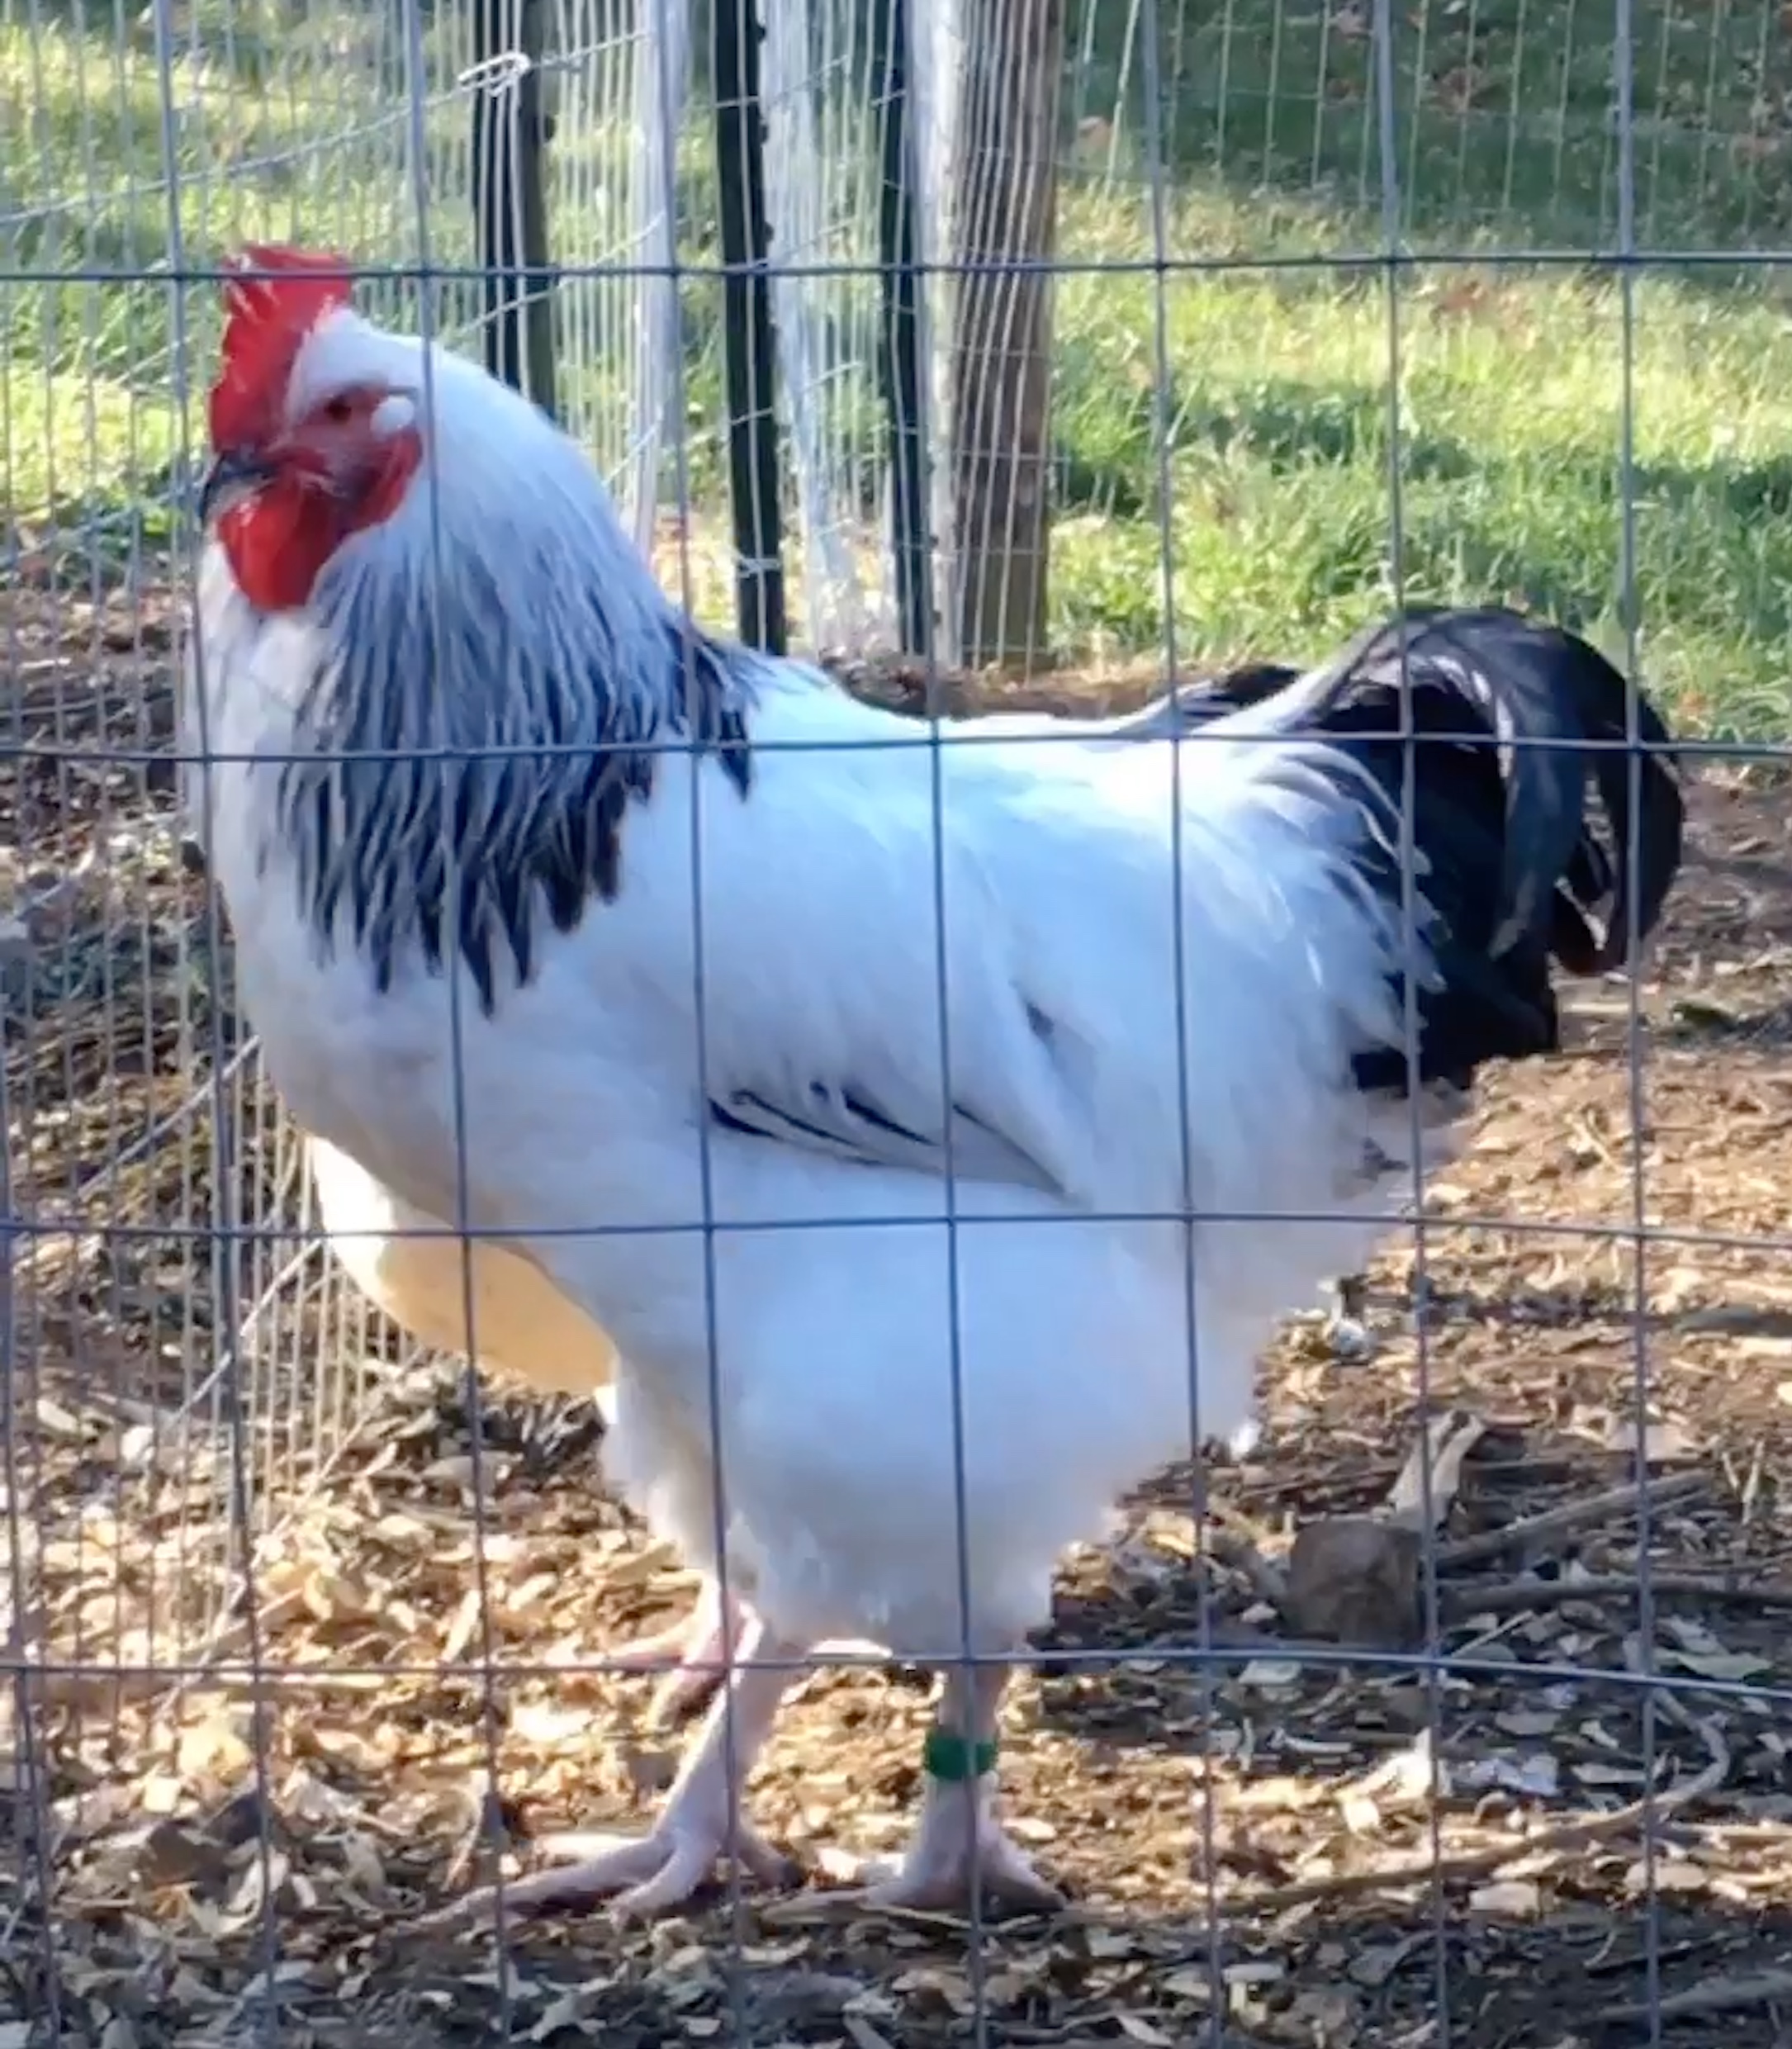
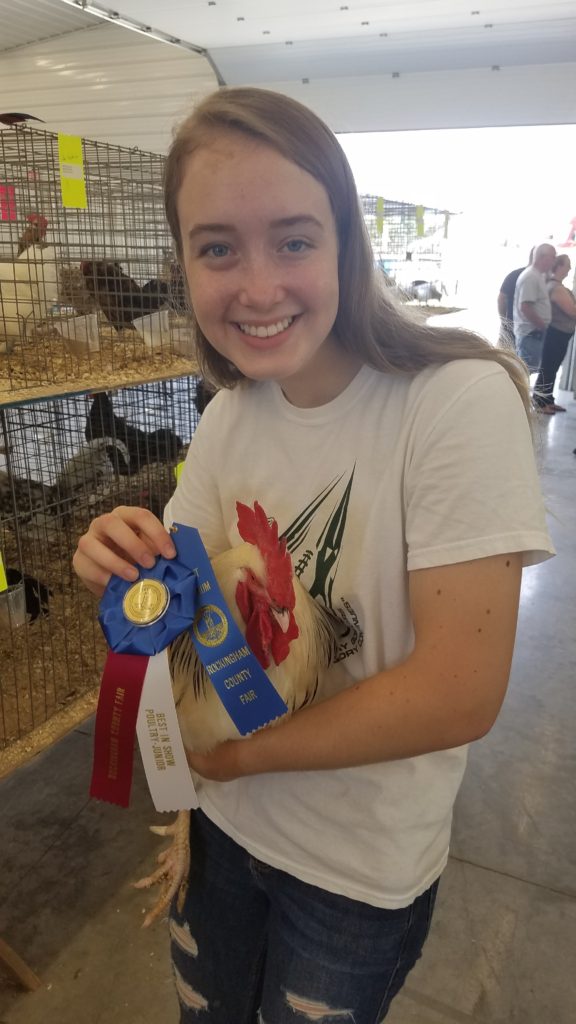
This past spring, a woman named Pirjo contacted me. Her daughter was in her last year in the junior division and wanted to purchase some chickens for show purposes. She wanted Ameraucanas, which I did sell to her, but she also bought my big, beautiful Light Sussex cock, whom we called “Buddy-son,” since he was the son of an older cock we had called “Buddy.”
She wrote me recently to say that her daughter won the Grand Champion award of the junior division in her show with Buddy-son! Pirjo wrote, “Best in show, judge said it wasn’t even a close contest! He was also the most admired and photographed bird in the barn. He really did great. And I must say, he is happy to be back home! Thanks for the great birds. They all did well.”
For me, her daughter’s happy face made saying goodbye to this beautiful cock worth it. But why did I sell him? Buddy and Buddy-son are gorgeous: big, robust, and fertile. There’s just one little issue with them: they are “split to Coronation.” What does that mean?
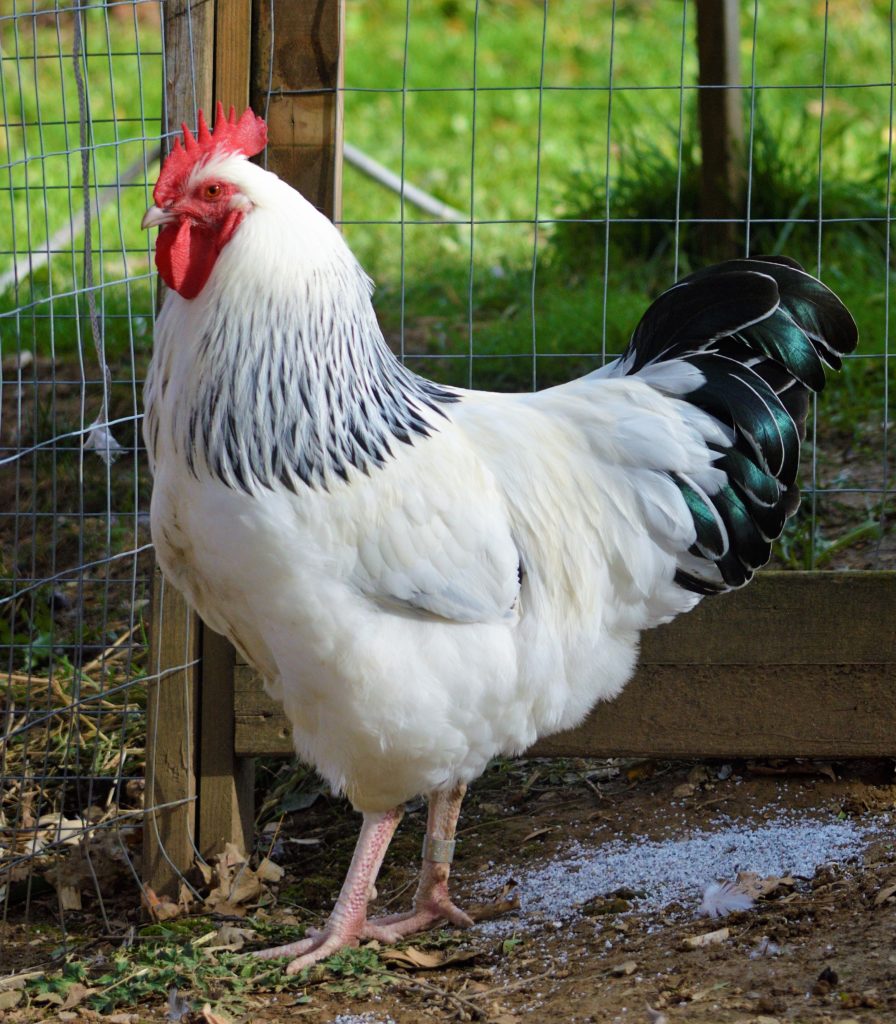
The Coronation Sussex (pictured on the right above) has the same color pattern and egg color as the Light Sussex, but with lavender in place of the Light Sussex’s black. This color pattern was created for the coronation of King Edward VIII of Great Britain in 1936 – an event which never took place because Edward abdicated in order to marry a divorcee before he was officially crowned.
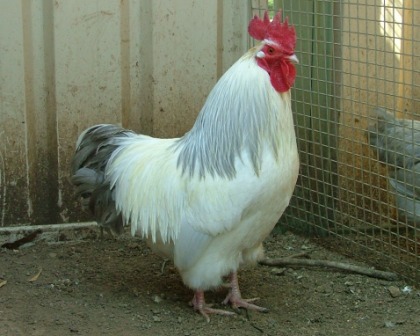
Coronation Sussex are a rare and beautiful variety of the Sussex breed: they are docile, large, and lay very large to jumbo pinkish, brown, or tan eggs (depending on the hen). The Coronation pattern is recessive; to oversimplify, like blue eyes in humans, a bird must carry two recessive Coronation pattern genes to look like a Coronation Sussex. A bird that appears to be a Light Sussex (with black markings on hackles and tail feathers) can mask Coronation genes. The only way to find out if a bird is “split to Coronation” is to breed him with either a bird known to be split, or with a full Coronation bird. In the first instance, 1/4 of the offspring should show the Coro pattern; in the second, half (statistically) will be Light Sussex and half Coro.
To return to my story, Buddy and his son were both drop-dead gorgeous Light Sussex males, but as we bred this past year, we hatched about 80 Light Sussex eggs from these boys and another cock from a different line that we thought was a pure Light Sussex (with no Coronation genes hiding underneath). About 1/2 of these chicks feathered out to be Coronation Sussex. This means that all their siblings and cousins that appear to be Light Sussex are either split (they carry the Coronation gene, but we can’t see it) or they are “pure”— they carry two of the genes that yield the dominant Light Sussex pattern.
We were both surprised and a bit downhearted to realize that, aside from pair mating and hatching LOTS of chicks next year, there is no way for us to tell if we are selling pure Light Sussex chicks ongoing. So, when Pirjo came this spring looking for show quality birds, I gladly sold Buddy-son to her! He won best in show, proving that he has what it takes to be a winner! He has a good home, and we have his wonderful genes in our Coronation lines moving forwards.
What this means for us going forwards…
As we look to hatching in 2020, we plan to move all of this year’s Light Sussex birds out and concentrate on our Coronation Sussex and our Marans (wheaten, blue wheaten, and black copper varieties). We will also not be continuing with Ameraucanas in 2020. We are, in general, downsizing our chicken operation because of our new involvement with our Mini Nubian goats.
It has been an exciting spring at Storybook Farm in 2019. Life has been bustin’ out all over. Now that it’s officially summer, I have time to post some highlights from our busy, busy spring!
Cats
I’ll start with the cats: we had two cats give birth to kittens this year. Each had three kittens. The first had two girls and a boy; the second had two boys and a girl. These are two from the first litter, named Phantom and Tiger Tigress. (Sadly, their eyes have since turned green.)
The first mom, Katnis, had her babies under the house in and inaccessible spot. When they were about six weeks old, she moved them to the barn. She was a first-time mother, so we wondered how she would do, but she proved excellent and produced two black male/female kittens and a female mini-me: tiger striped with green eyes, pictured above.
The second litter was born about six weeks later, to Patches. She chose to deliver in our most remote shed where we store boxes to be burned. From Day 1, I knew where they were, but we didn’t move them for about four weeks. They are pictured right about a week after moving. Patches had one ginger boy and a tiger striped boy/girl pair.
Chickens
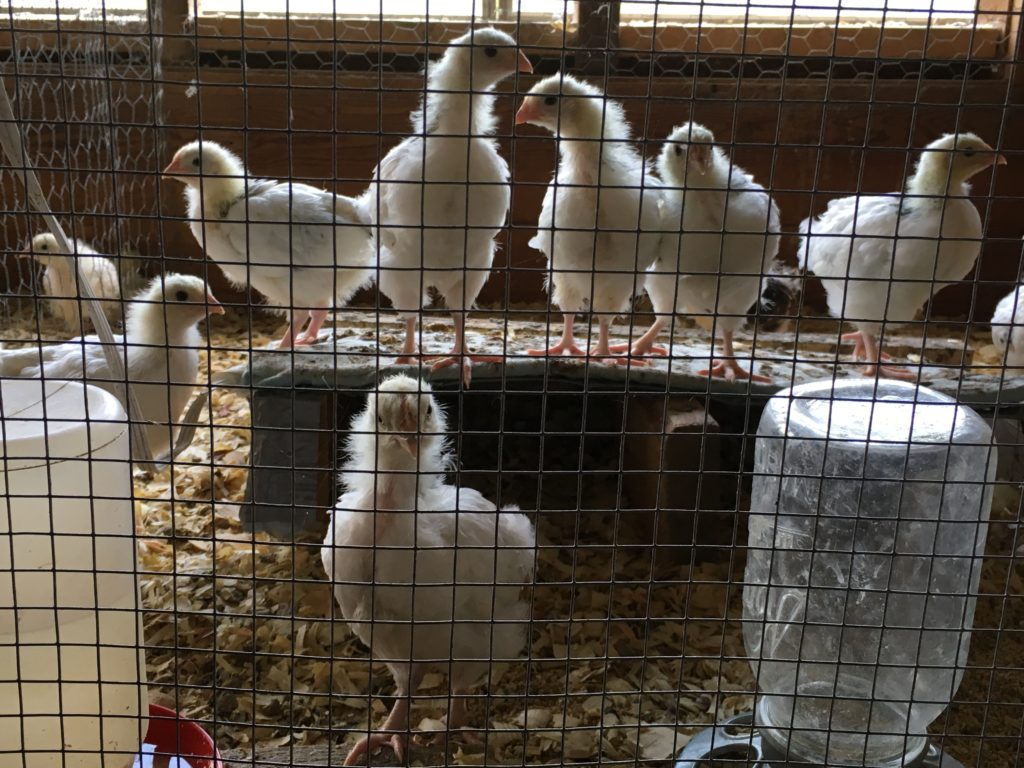
Next, chicks. We hatched about 100 chicks this year, mailed out many, and saved ourselves about 70 replacement birds. We hatched wheaten Marans, Light and Coronation Sussex, and black and blue Ameraucanas.
It’s taken us four years to get our infrastructure right, but we had it working very well this spring, and are happy with the results!
Goats
Next I should list the most challenging animals of the spring: goats. The learning curve for gathering a herd was straight up, but God gave me great mentors from around the country via the Internet, and one nearby neighbor.
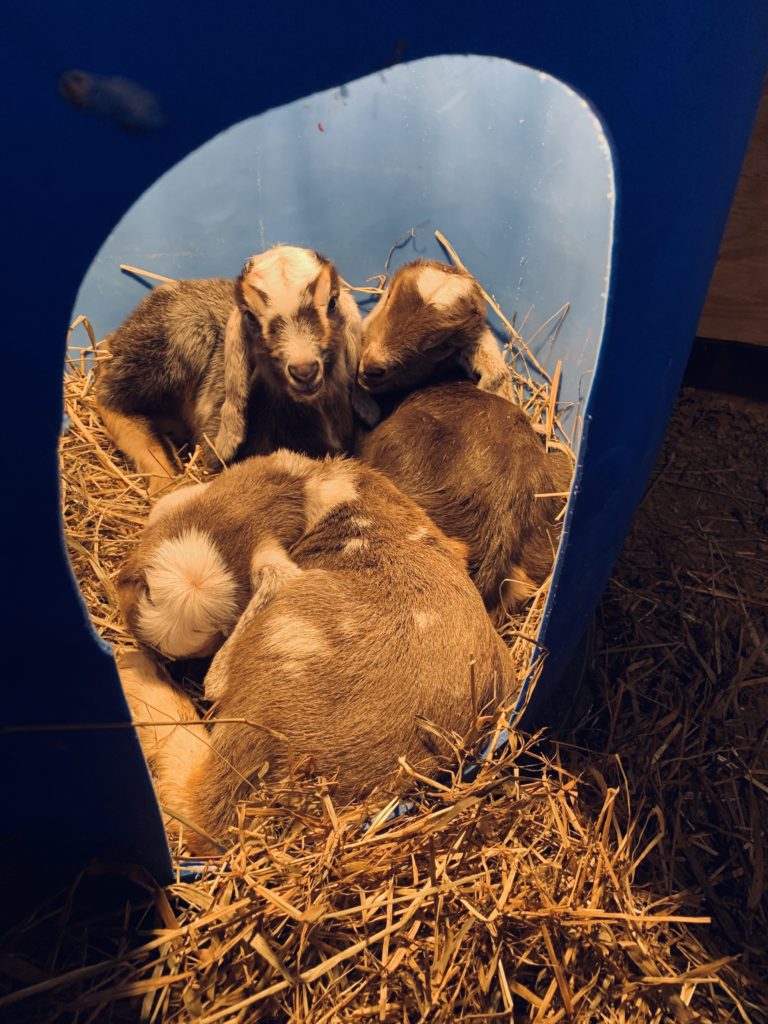
We started by purchasing a three-year-old pregnant doe, Buttercup, who kidded on April 2, blessing us with three doelings.
One almost didn’t make it (and you can read that story here), but they have all grown into lovely, strong animals who are affectionate and beautiful.
Our second goat, Milky Way (or Milcah) also came to us pregnant. She was only nine months old, however, and she was caught late in heat, so she did not deliver until June 8, 2019. The delivery of boy/girl twins was easy enough, but we were concerned for a bit that she wouldn’t accept them. However, she proved a very attentive first time mom! Pictures of Milcah and her kids are below.
We also acquired two young bucklings, who will be our herd sires in 2019.
Green Gables E Asher *B
Bellhouse’s Rigel *B
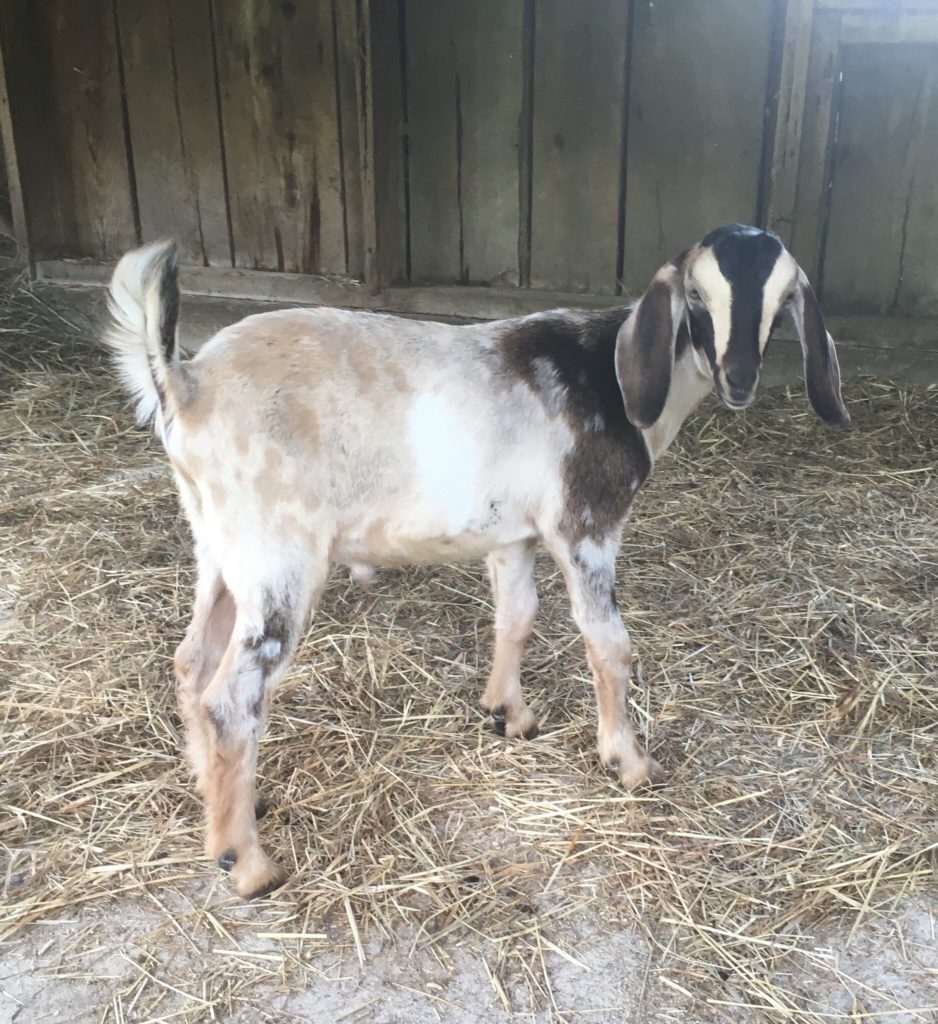
Last May, we traveled to Michigan to pick up these two does in milk: Mimzie (in front) and Twyla. They are sweet girls and great producers! Twyla freshened for the second time this year, and Mimzie for the third.
Last of all, we imported a favorite of mine: Skillman’s Star. She is three years old and the grandmother of Milcah’s twins. She is also Milcah’s half sister, since Irine Skillman has been doing serious line breeding for a number of years.
Star is a gentle, tall, and graceful doe who brings milk stars and maturity to our little herd. If the babies get lost from their mother, Star is there to call to her and remind her to wait for those babies, or come back to get them!
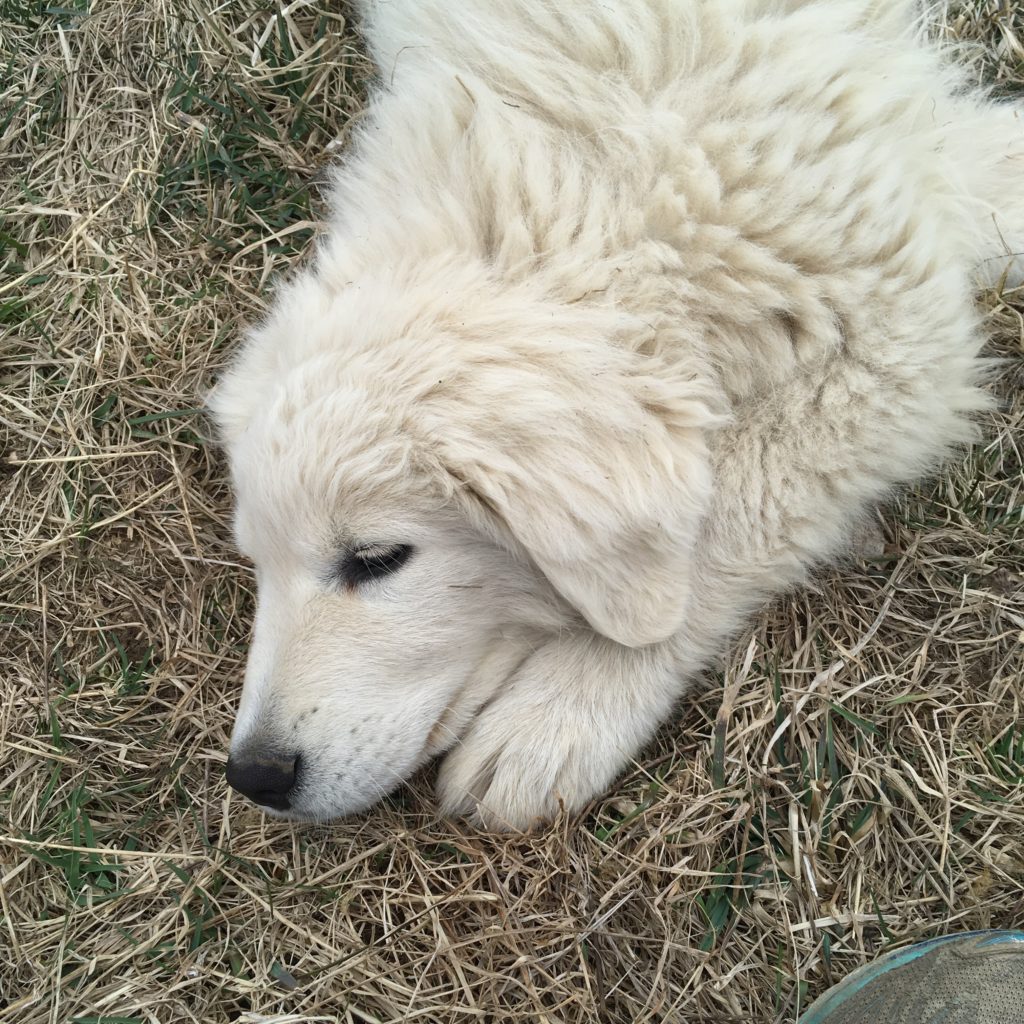
Guardian Dog
Few goat herds are complete without a Livestock Guardian Dog to keep them safe from predators. Though it will take Heidi two full years to grow up enough to be fully trusted alone with them, she currently lives among them in a pen and run. We brought her home in March as a 12-week-old puppy, and she is growing more beautiful (and gentle) every day!
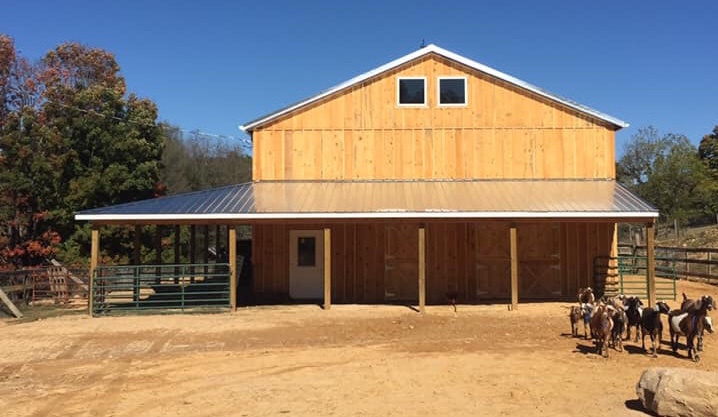
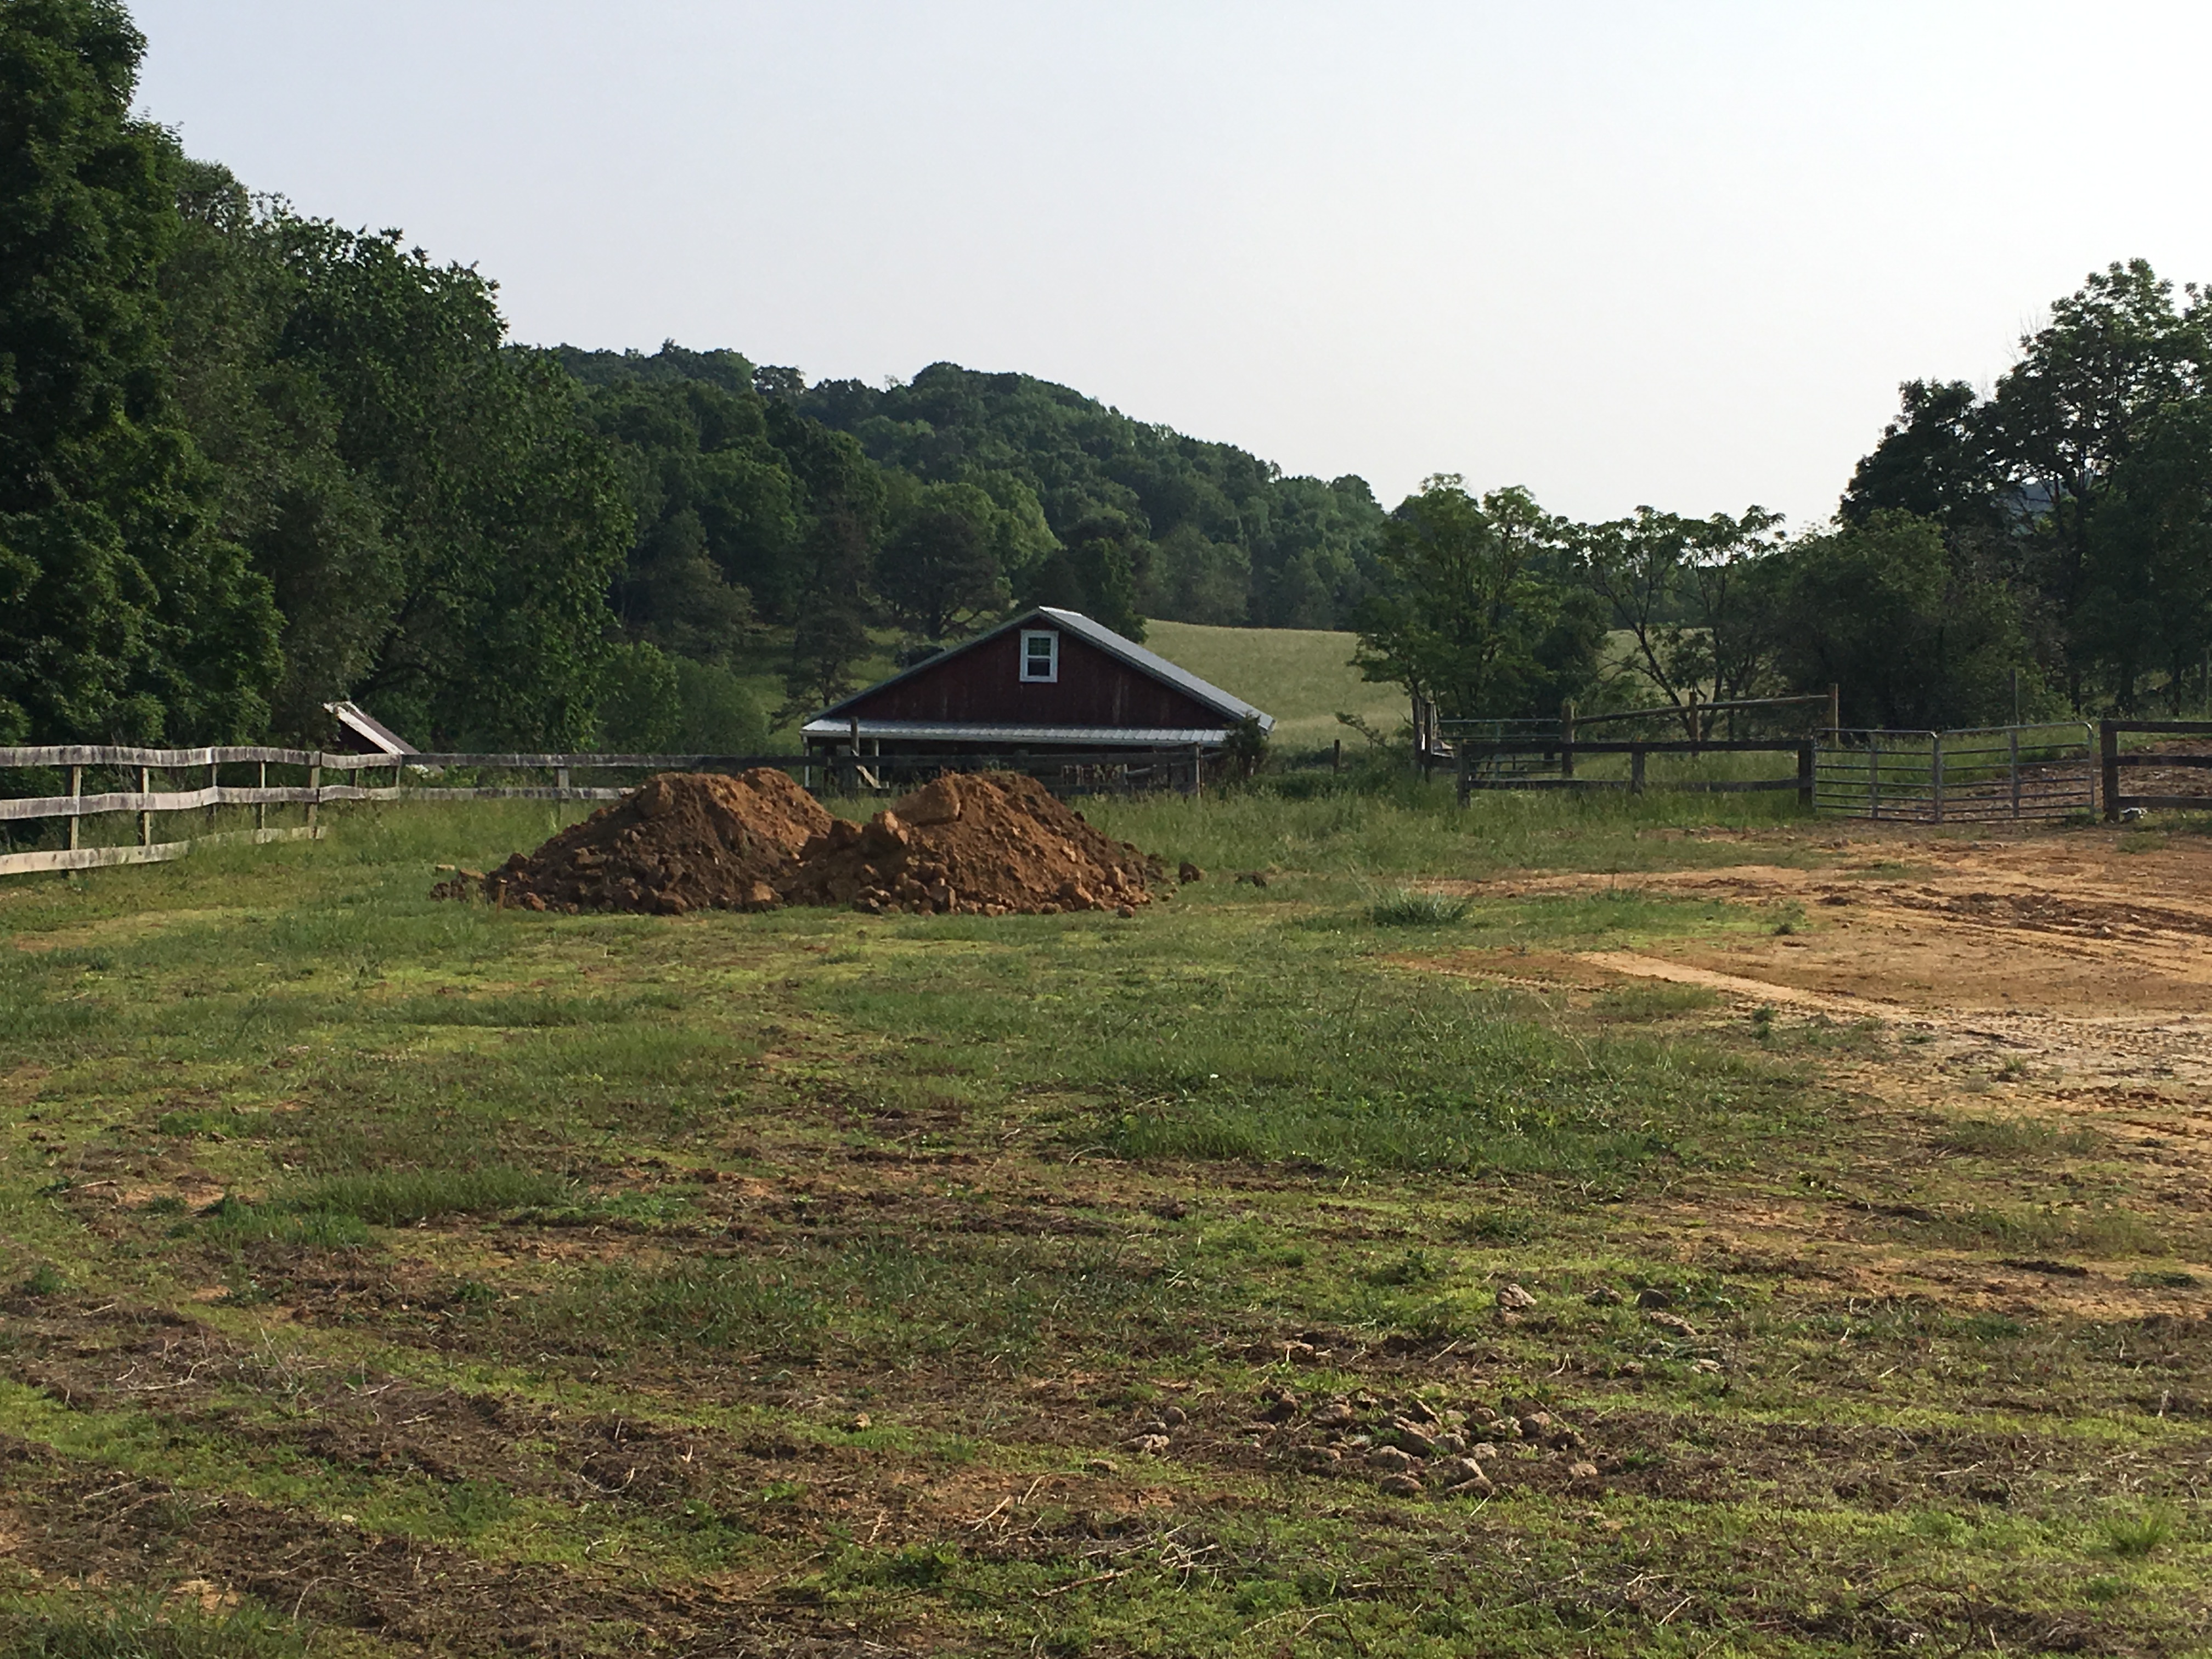
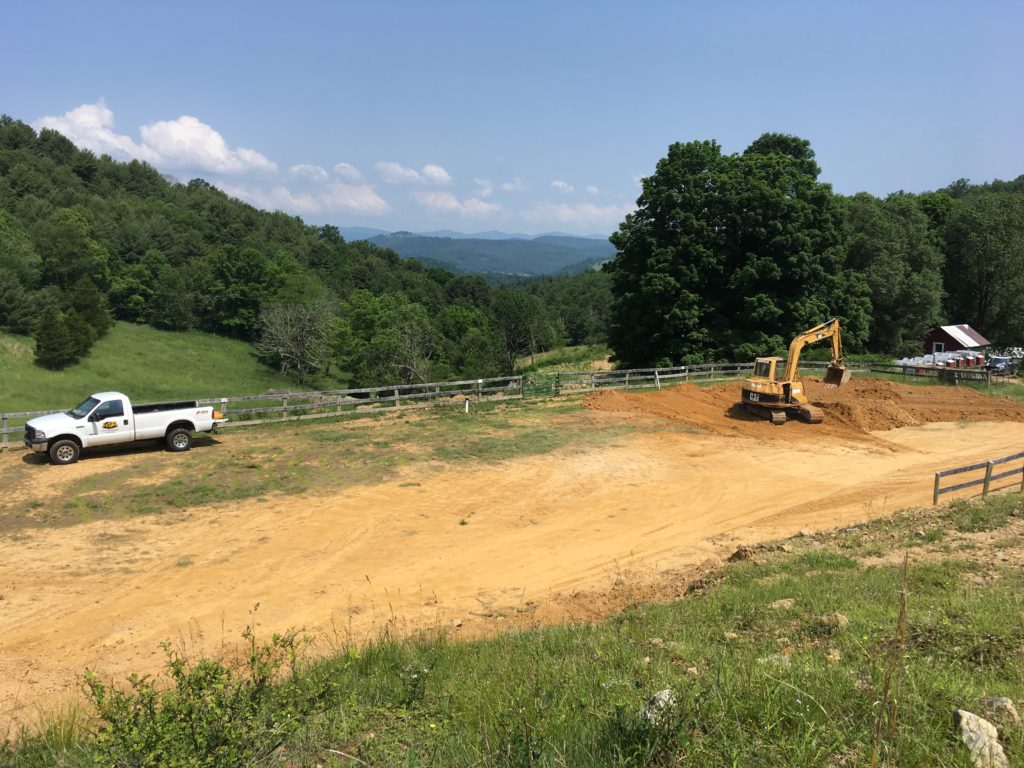
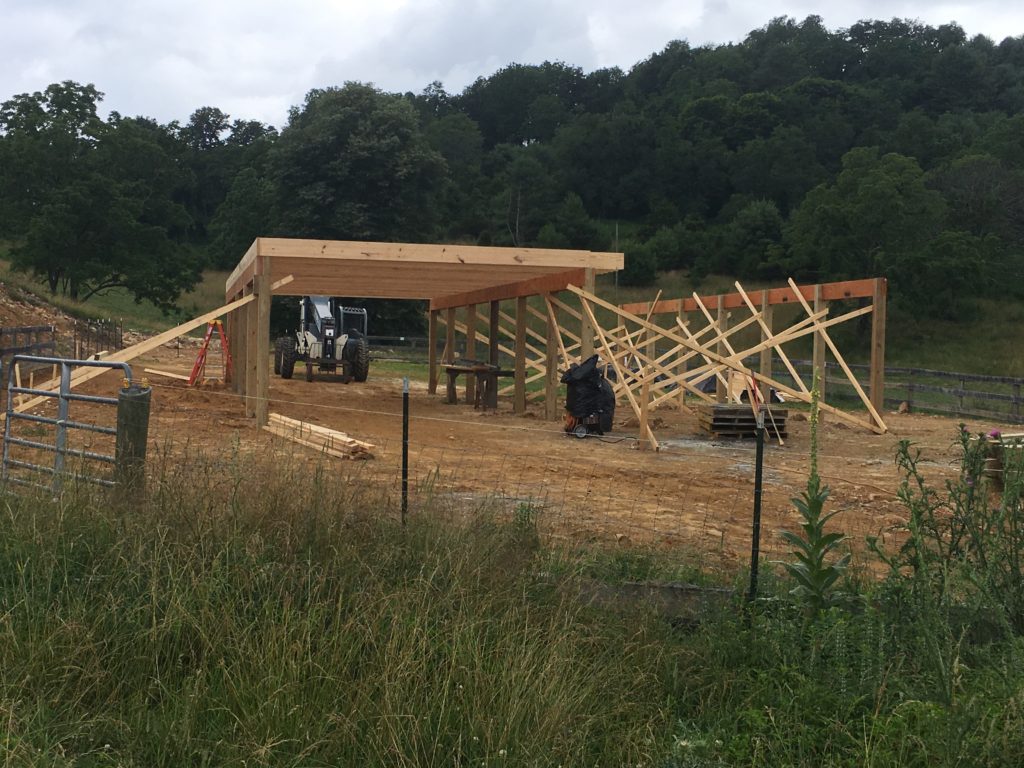
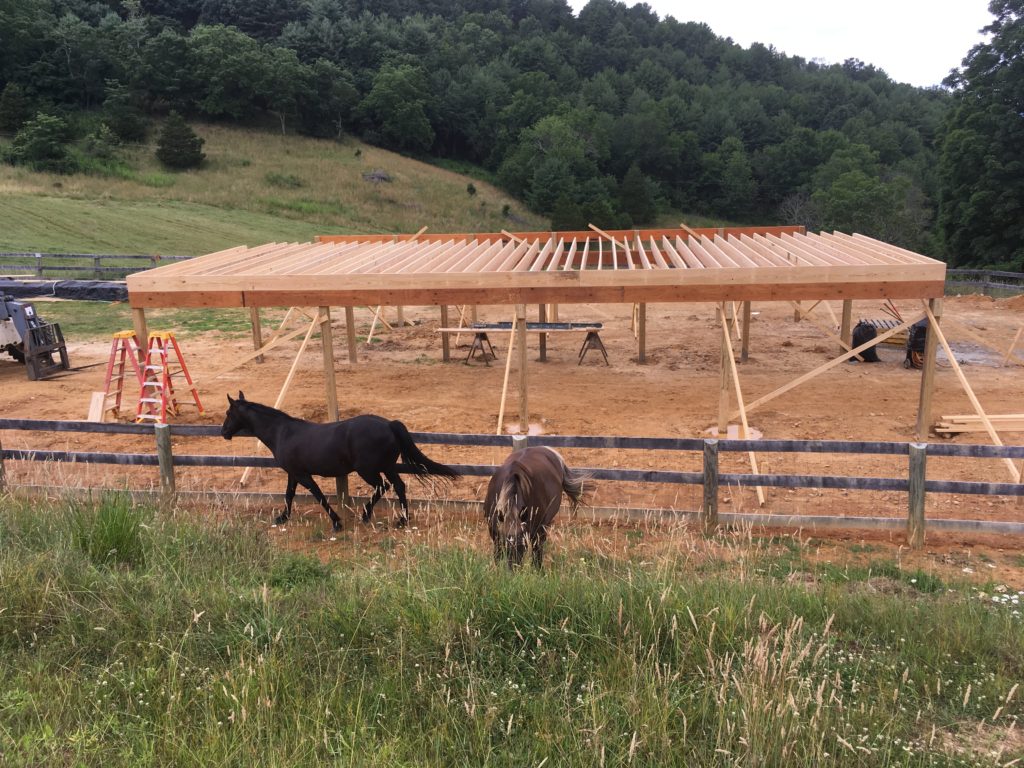
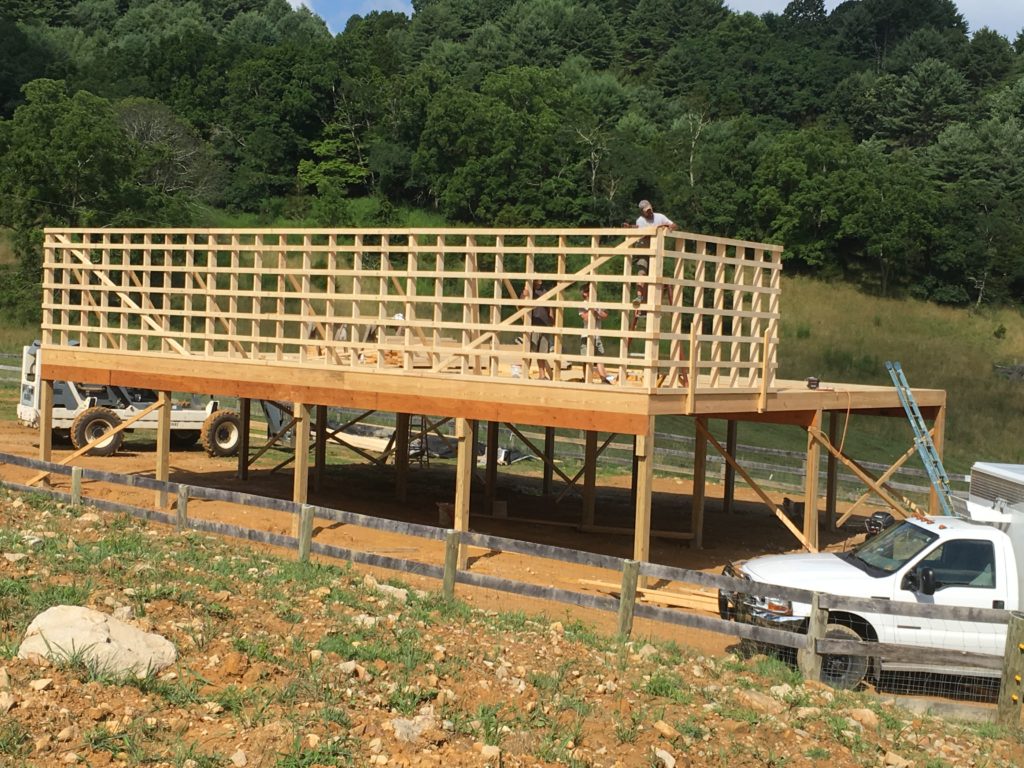
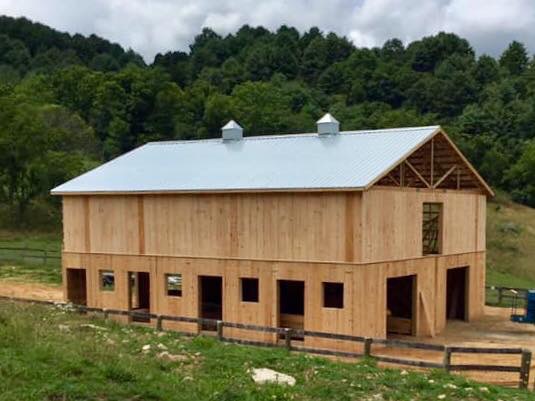
We are breaking ground on our new barn starting Monday. I am beyond excited. It’s going to be a two-story pole barn: 48’ x 36’, with a 48’ x 12’ shed on one side where we plan to park our tractor and truck.
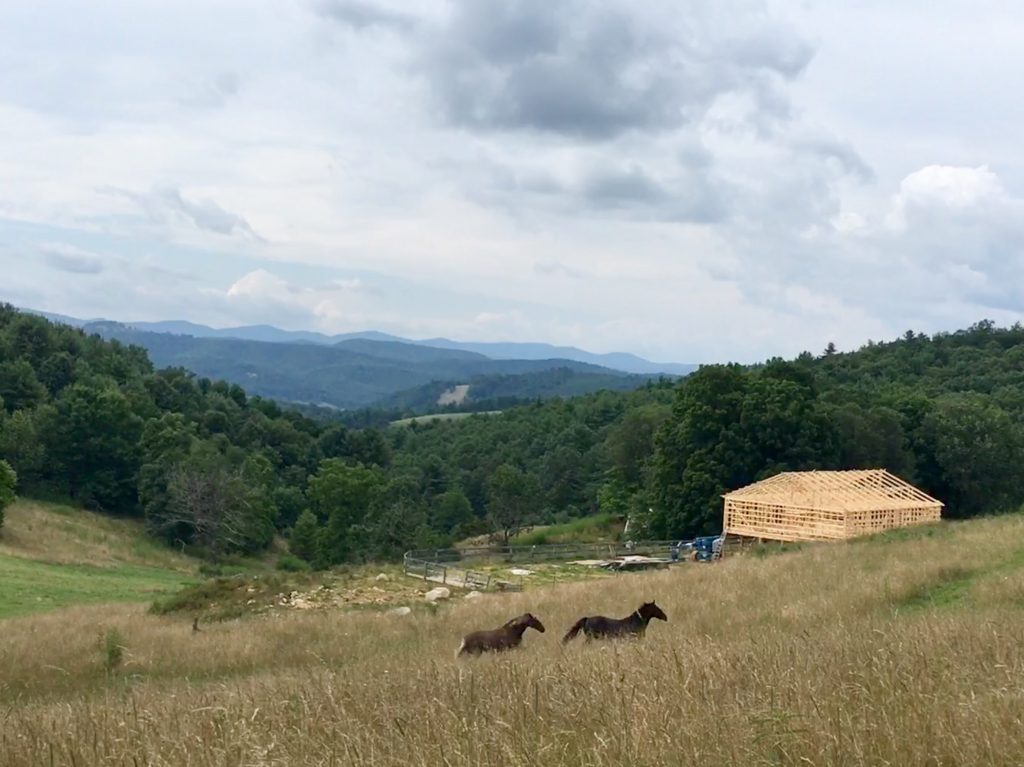
We are building it inside our existing riding ring, that we excavated years ago for horseback riding. With my age and osteoporosis, I don’t ride much any more. But, if the notion takes me, I can ride around this new barn. Meanwhile, the goats will enjoy a large indoor space, a larger outdoor flat space, an incredible view of the mountains, and 30 acres of fields, brush, woods, and terrain. What’s not to love?
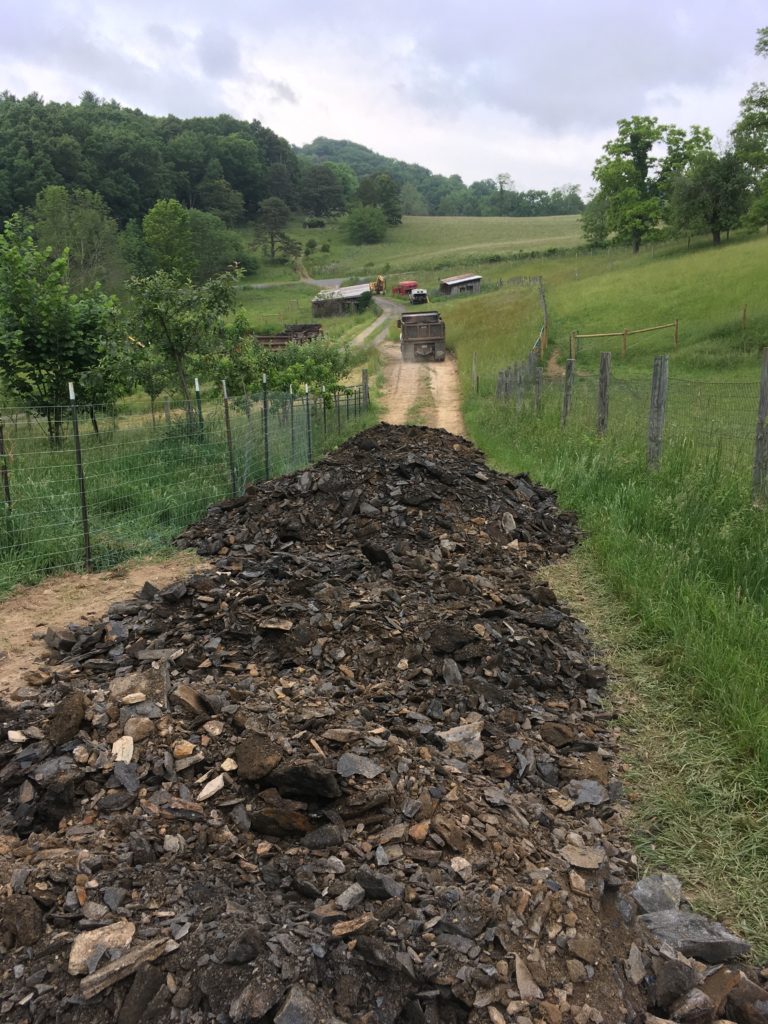
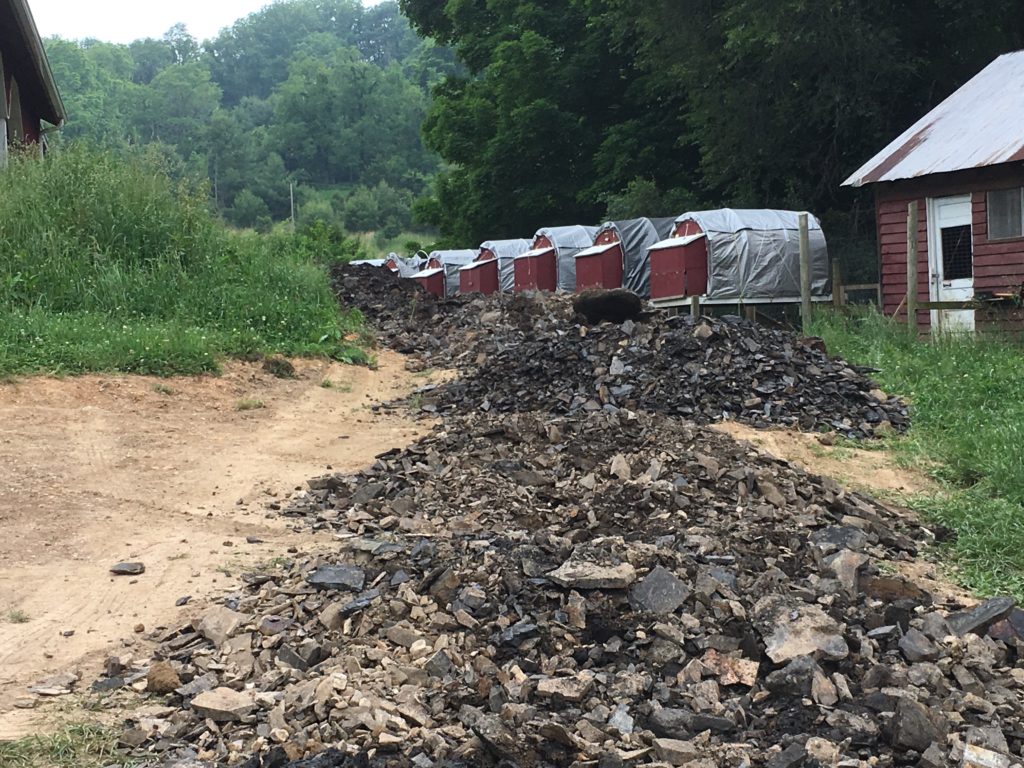
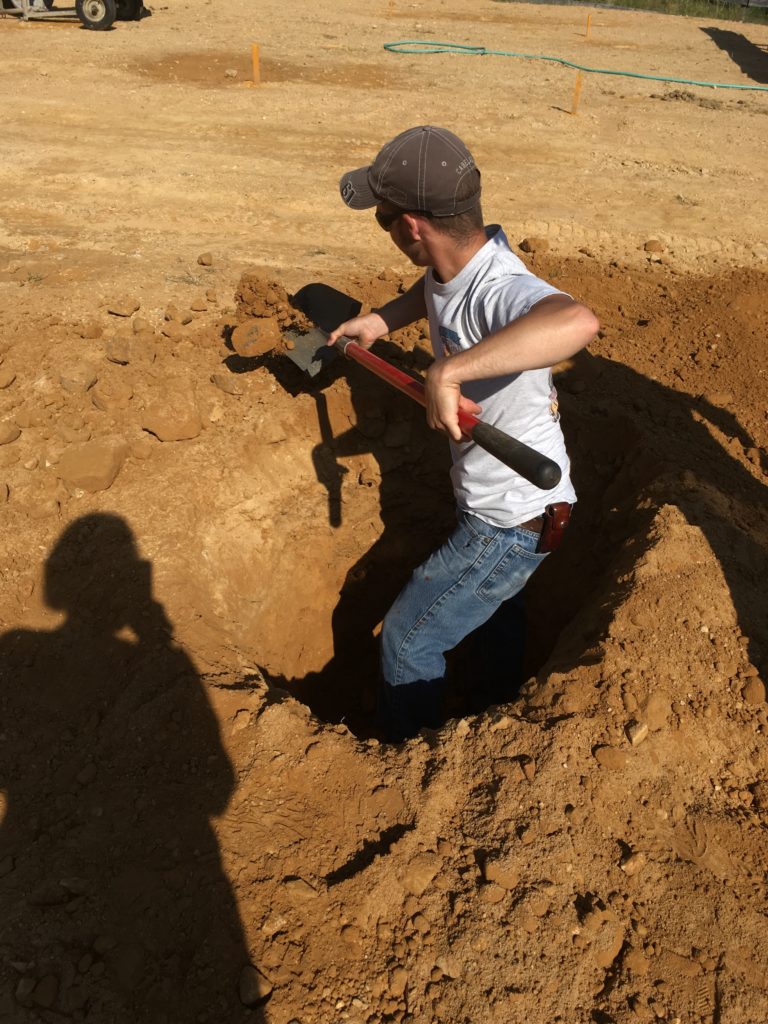
In these first pictures in this post are mostly of stuff you’ll never notice when the building is done: my contractor’s copy of our floor plan above, the excavating that we did to make the site level for building (also above), the improvements to the road up to the ring that we had to make so delivery trucks can make it to the site (that’s what all the slate is for), below.
Shale: 10 dump truck loads
MORE shale, heading up past our chicken coops to the building site above.
And last (but not least) a picture of a very hot husband who was trying to get a cool drink on a break from putting up temporary fencing to keep the animals out of the construction zone for the summer… but somebody got to his pitcher of water as he was telling me about his progress!
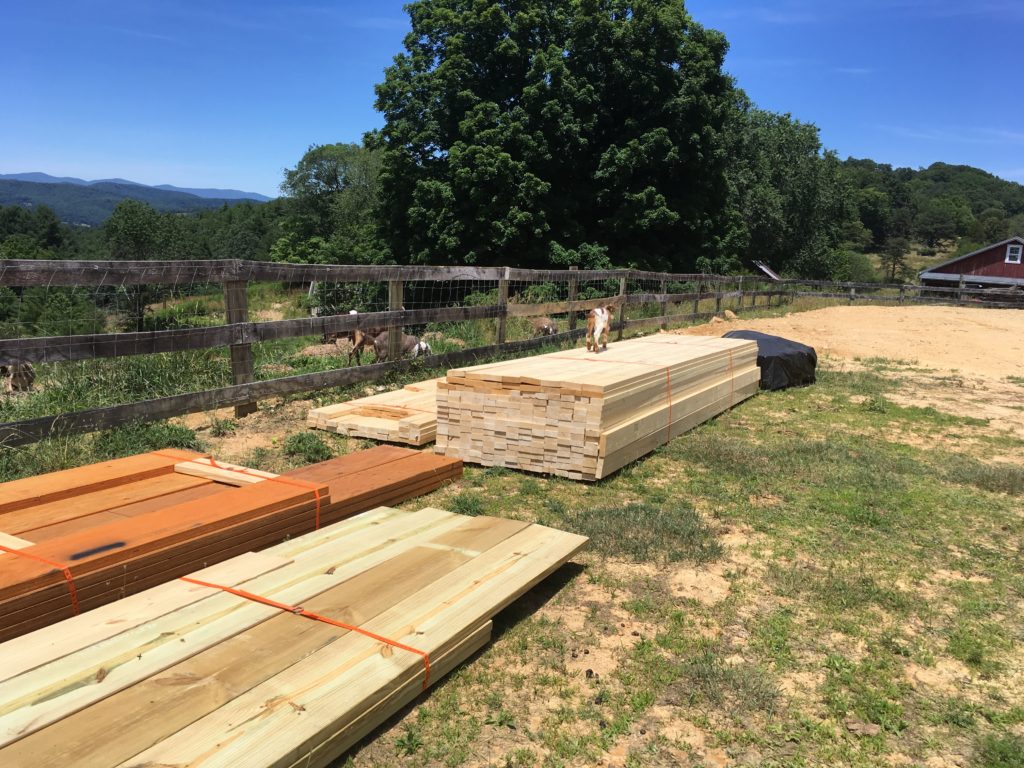
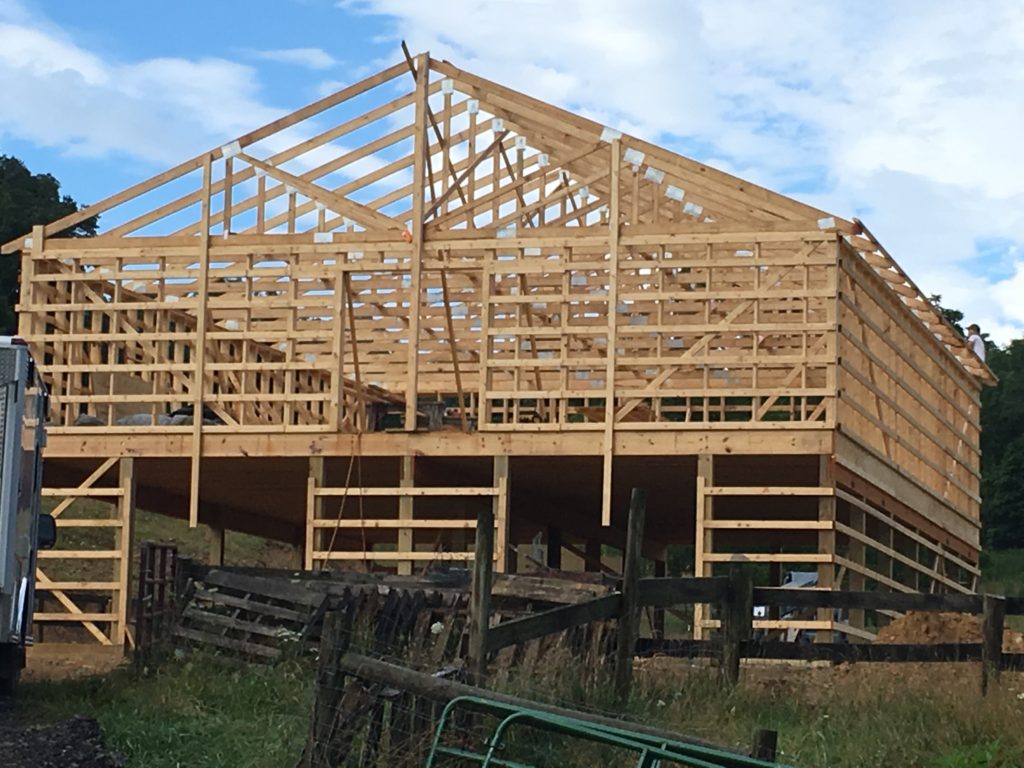
After all the prep work, it was early July when the lumber arrived and things starting looking like there really was a new barn coming! The following pictures summarize the construction, but don’t capture our gratitude for all the skill, craftsmanship, and sweat put in by Chris Lambert.
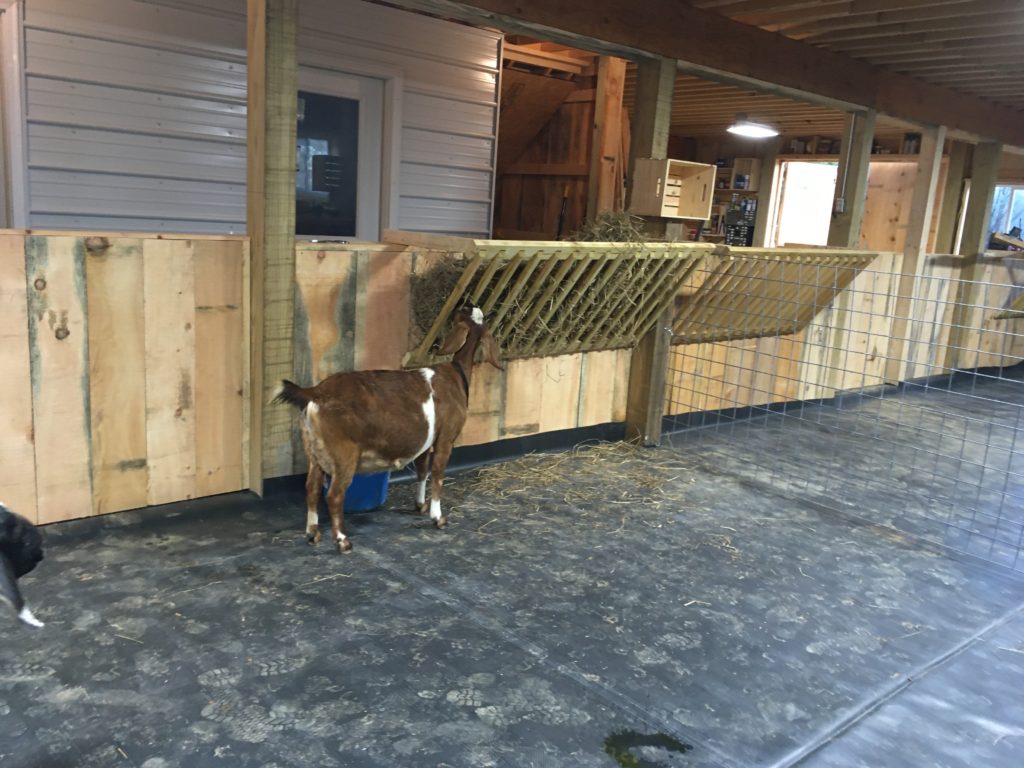
We are new to goats in 2019, and whenever I (Marcia) am new to anything, my first step is to research a topic up, down, and sideways. In researching the best way to build a manger, I ran across several references to Harvey Considine, and his book that detailed a hay-conserving manger design. Sounded good to me! So, I looked it up online, watched YouTube movies of contented goats eating peacefully from them, and set out to build one.
The idea with this design is that the slats are far enough apart to enable the goat to step onto the step and reach her head into the manger and pick her favorite portions, letting the extra fall back into the manger instead of onto the floor, as with many other designs, where the goats pull out more than they can chew and thus waste hay falls to the floor.
This is what mine looked like when I got done… sort of.
I say “sort of” because before that goat on the step on the left got here, it worked great. The goat on the right, a pregnant 3rd freshener (Buttercup) used it exactly as designed. She stepped up, put her head through the slats, and munched away. However, when the little, younger, slimmer, and more flighty goat (Milcah) arrived, she literally went through the slats and into the manger, then jumped out of it in her panic. It was amazing!
So, the picture above is actually the second revision that we made to this manger. First revision after Milcah came was to put 4” square wire on behind the slats. But that defeated the whole purpose of the design, and because the box was deep, and the front slats were not slanted back, the does could not reach much of the hay. SIGH!
So, we revised again, putting two boards horizontally behind the grill, as you see in that picture (if you look hard). That worked really well, until Rigel came. 🙄 Rigel was 9 weeks old, a handsome herdsire-to-be, and he immediately went through even this space and into the manger to hide from the older does. SIGH!
So, we took the manger out of the stall and tried other methods… a square wire basket of 2” X 4” openings mounted on the wall (same issue with not being able to truly browse the hay, so not eating it) and putting it on the floor in low feed tubs. Rigel loved that one. He could sleep in it! 😖
Rigel wasn’t the only one! By now, my Buttercup had given birth to three bouncing baby doelings, and once they were up on their feet, they were even more likely to get inside of our original (twice modified) hay manger.
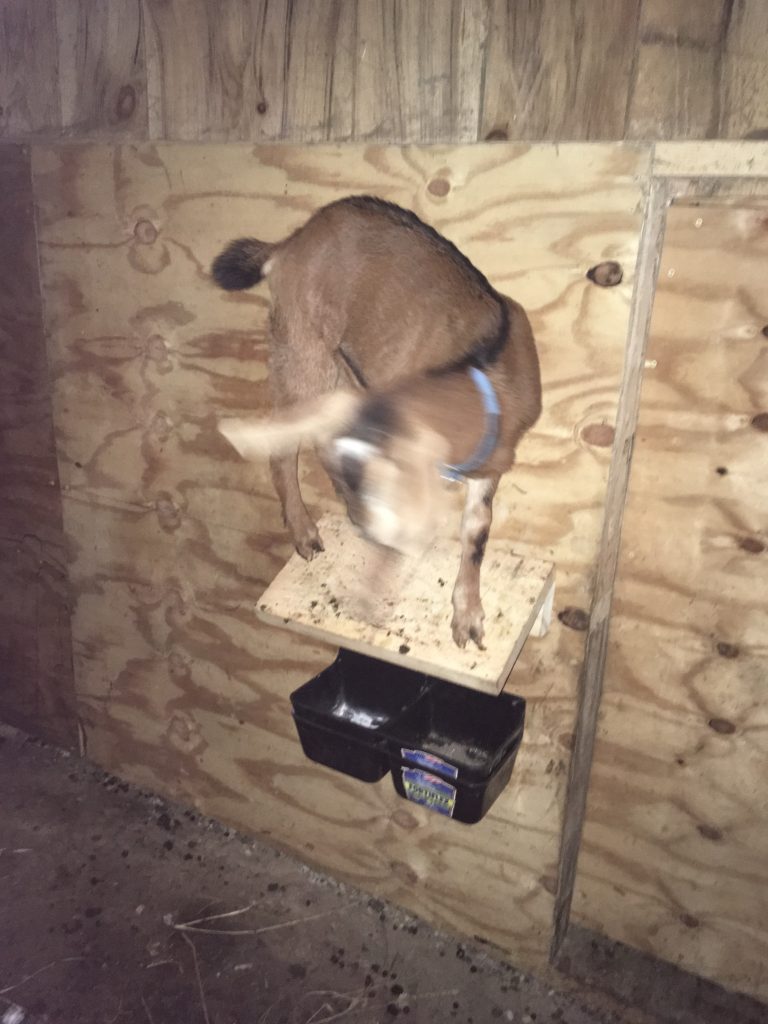
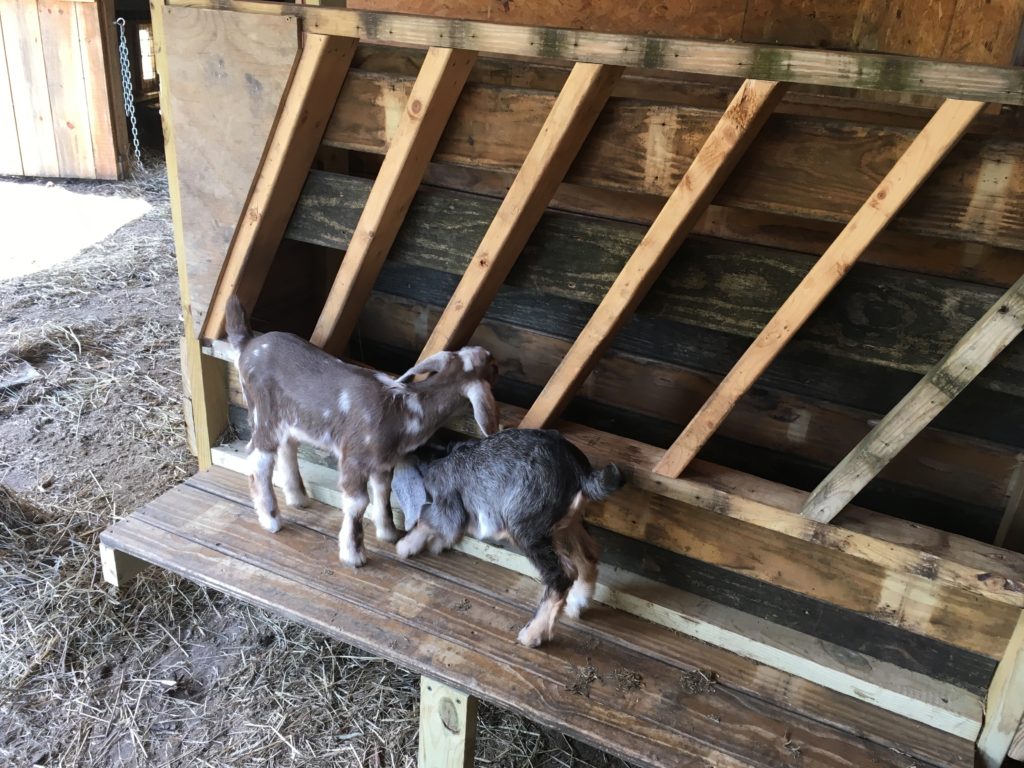
So, I went back online to my goat community and asked for help. From the replies to my post, I gained the inspiration to rework my manger with smaller slats spaced with 3” openings (too small for these little kids’ heads) and slanted from lower (back) to upper (forward) so that the hay would fall into the resulting tray.
Here then is our fourth revision (and we hope our final one, but stay tuned!).
If you have any animals in your barn, you know the feeling of wondering if everything’s okay, and yet not wanting to suit up to go check. We’ve all been there! If you breed animals, it gets worse around birthing time. And that’s just the middle of the night. Anxiety can escalate when “life” takes us away from our barns for hours or a day and we have animals due to give birth.
The Problem
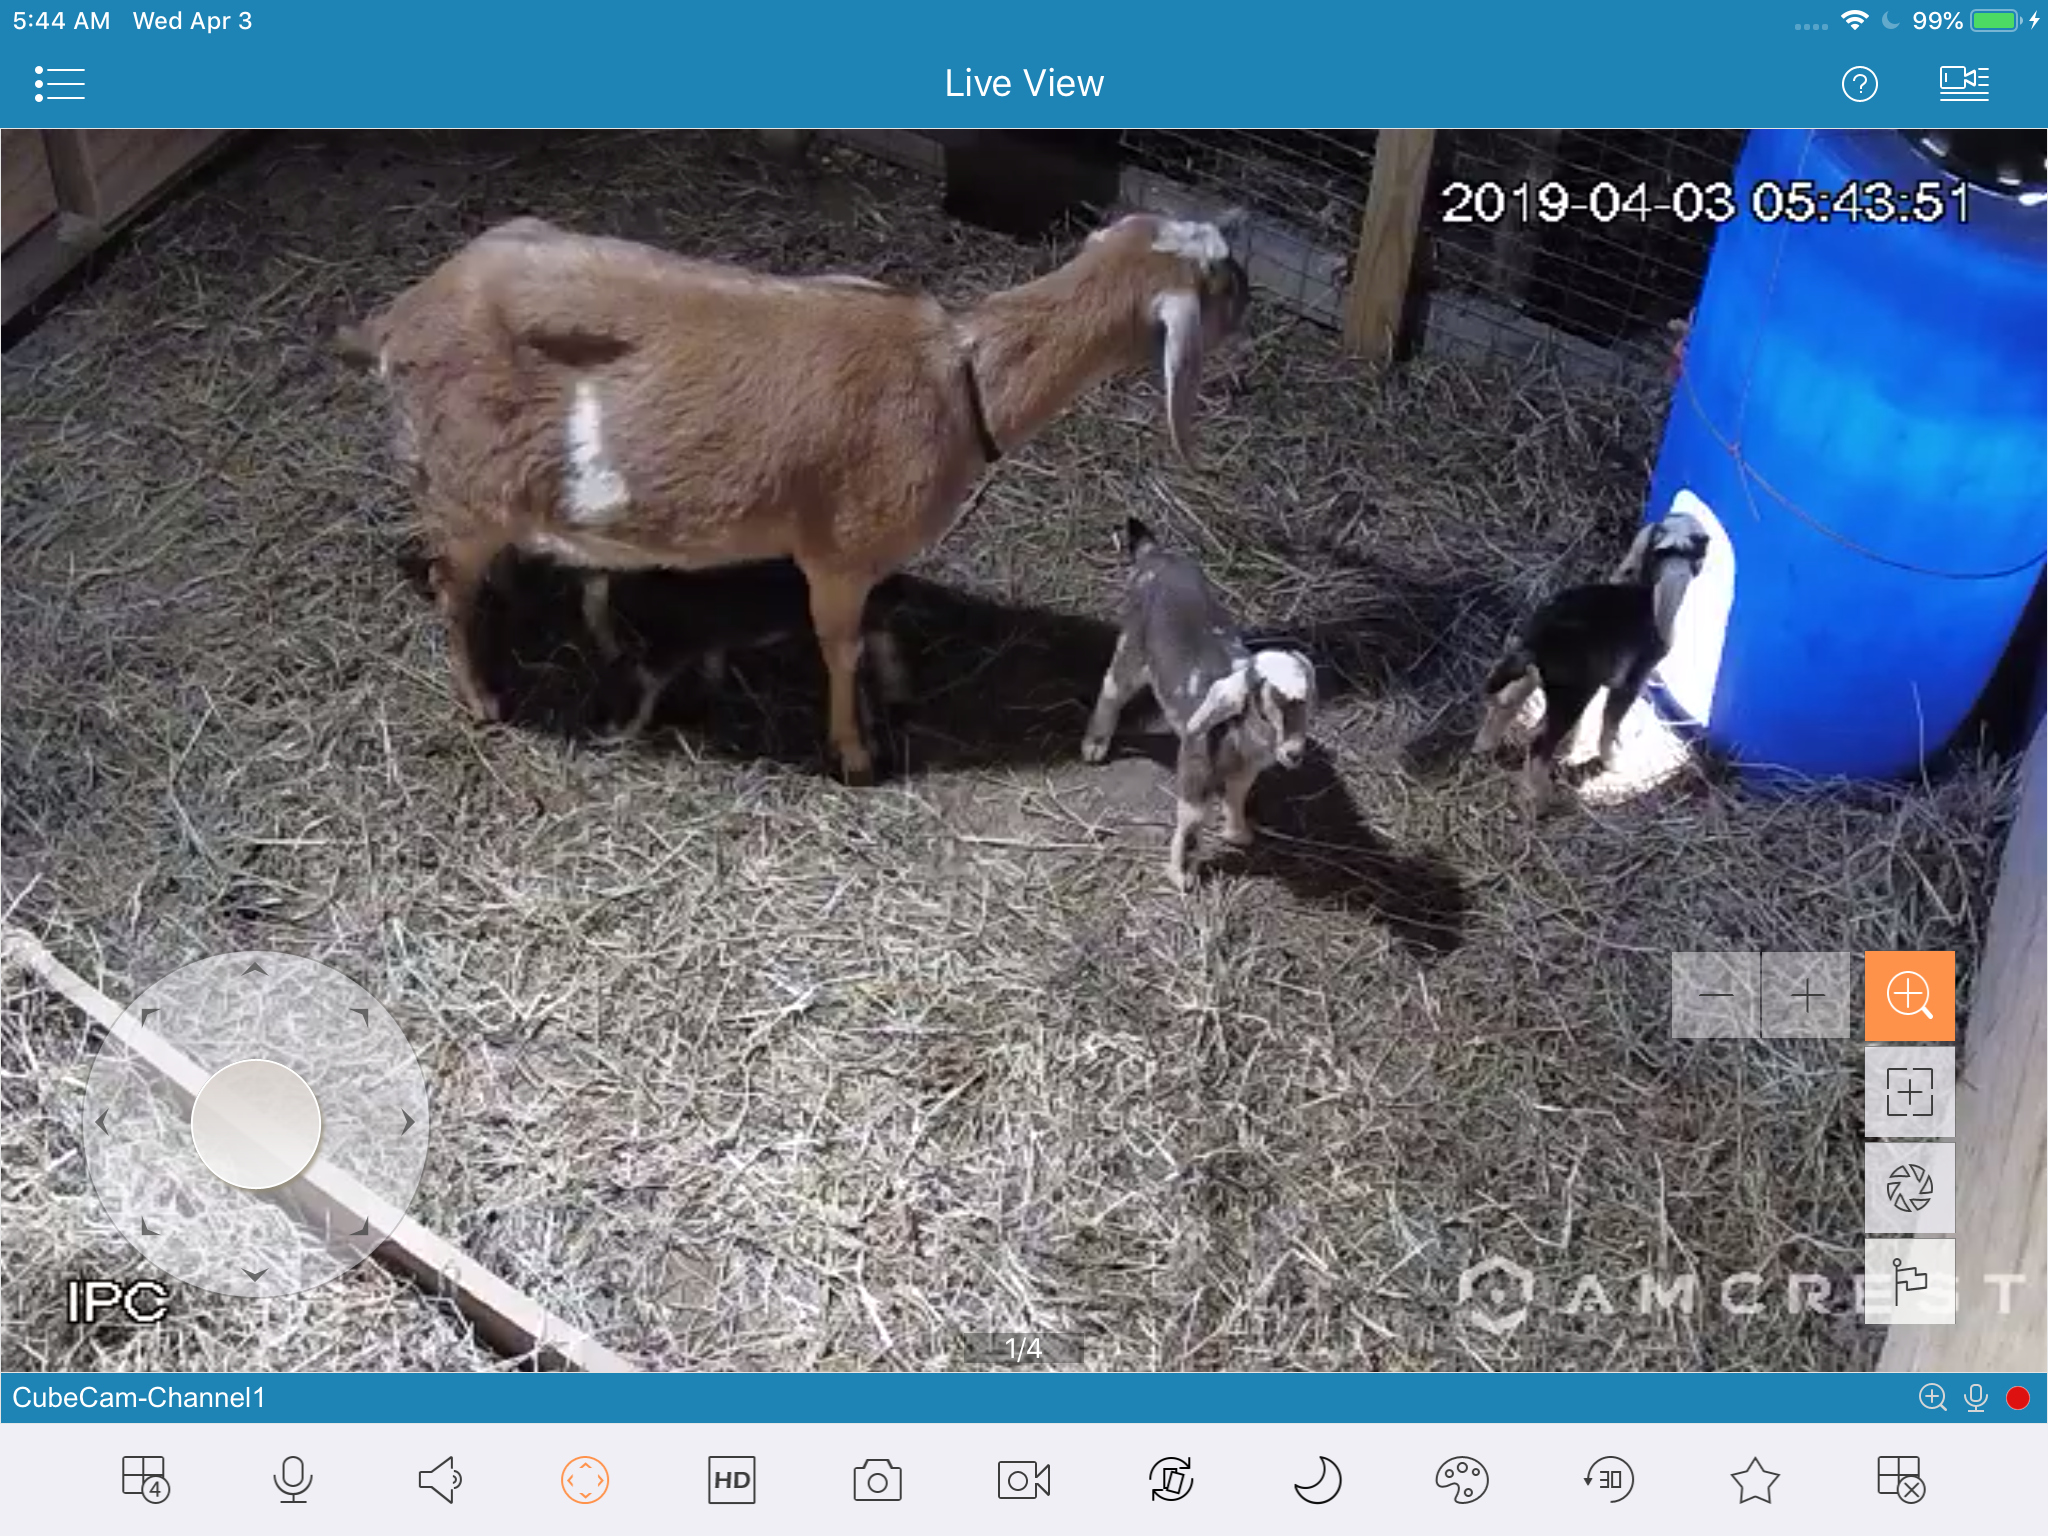
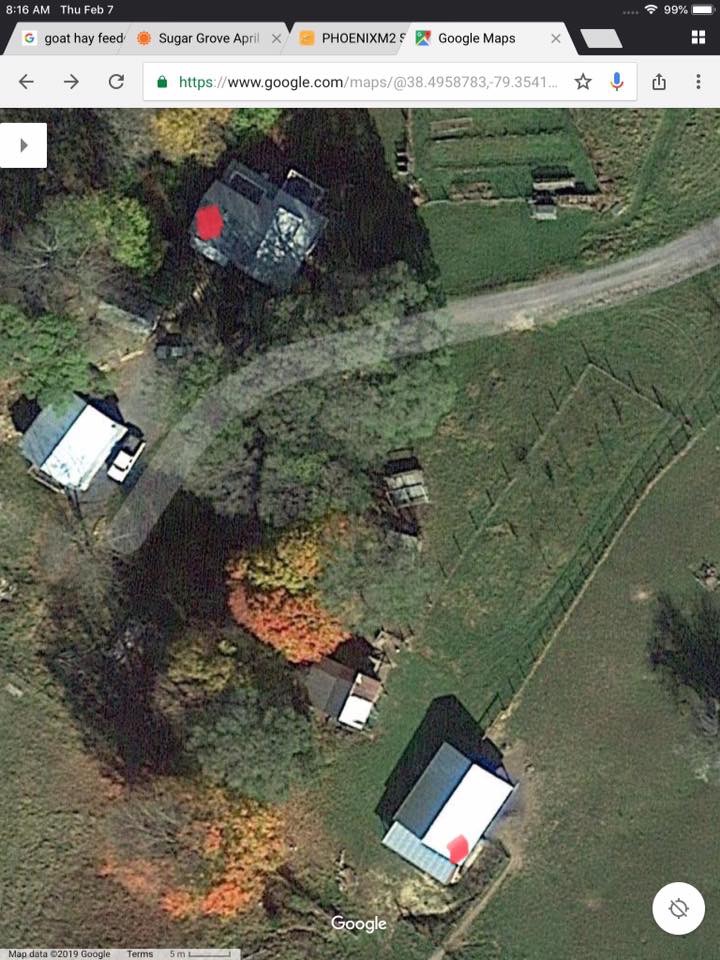
I am a new goatherd, and my barn is 250 feet uphill from my house. In this photo, the red dot on the building at the top is my bedroom (under a metal roof) in my farmhouse. At the bottom of the picture is my barn, and the red dot is our kidding stall.
It’s cold on a mountain farm in early spring, when the kids usually come. Plus, I have real trouble getting back to sleep once I’ve suited up and checked the barn. When kids are due, I’ll want to check that bard 2 to 3 times between dusk and dawn, and then also during the day.
How I WISHED we could get WiFi to the barn… or maybe a baby monitor… or, well, ANYthing that would give me some peace of mind with kids coming soon.
My husband is tech savvy, but not particularly handy. We also didn’t have a lot of money to devote to this project. And, given the distance, metal roofs, and the fact that we don’t even have cell phone coverage here, I felt really dismayed. What if I would have problems with a doe kidding? I couldn’t even call anyone from the barn and have them talk me through it! 😬 The prospect really scared me.
So, feeling that I couldn’t be alone in this quandary, I made a post on the Mini Nubian Goat Breeders’ FB group. A wonderful man named CJ answered me and gave us the specs for the system we have now detailed below. I can now see and hear my barn through two cameras at any time of the day from anywhere where there’s WiFi. I couldn’t be more thrilled, and I’m delighted to share the details with you!
The Solution
NOTE: NONE of the links below are affiliate. We’re not making anything on these links.
THREE KEY COMPONENTS: We ordered three items from Amazon. They were:
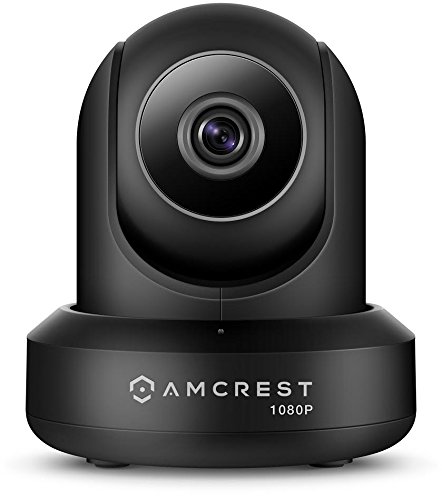
Amcrest ProHD 1080P WiFi Camera 2MP Camera. This camera will pan 360°, tilt 90°, allows for 2-way audio, and allows digital zoom 4X. So, I can see and hear everything going on in my barn. The night vision is super sharp!
Note that there are other camera options that are sealed; in a dusty barn, this camera may have a shorter battery life. Price at this writing: about $60, with free shipping from Amazong Prime.
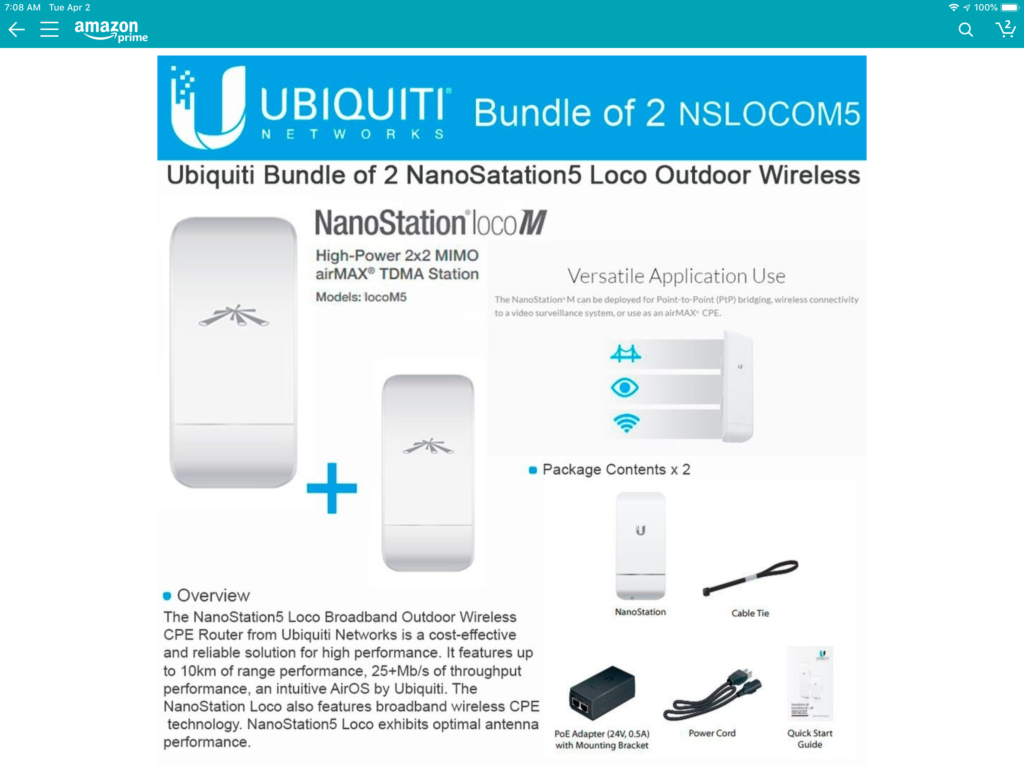
Ubiquiti Nanostation Bridge. Think of this as an invisible cable that carries the WiFi signal from point to point. These have to basically be placed in a line of sight from eachother, but their published reach is 5 kilometers! Our 250 ft. distance was a piece of cake. These were $127.
WiFi Access Point. This is the device that plugs into the bridge and then provides WiFi for the entire barn area. (If you don’t already have WiFi in your house, get two of these.)
In our case one of these broadcasts a great signal for several acres, which means I now have cell phone over WiFi, and can talk to goat mentors if I get into birthing difficulties! This was $82.
ETHERNET CABLES: Each of the items above came with a single, short Ethernet cable. It turned out that one can need two cables per item. We had several short Ethernet cables lying around the house, and wound up using four of them. If you need to run cable through your house, you will have all the materials you need to make your own patch cable. If you don’t, you can buy patch cables here. They cost about $2 each and you can get them in bundles of five.
These purchases were all we needed for the digital connection from house to barn. But we had to do a little bit of wiring because our WiFi is on the wrong side of the house for a connection with the bridge. For that, I had to buy 100’ Ethernet cable and two special tools: a data tester and a cable crimper.
Step by Step:
Here are the steps to complete the digital connection, without the details for running cables from one side of the house to the other, which involves holes in walls and crawling around in the attic. 🥺
Open the WiFi extender, also known as an “access point.” It looks like a smoke detector. If you have WiFi in your house, plug it into your WiFi router, using the “power over Ethernet” powerpack. Plug a computer into the WiFi router, using a patch cable. The included directions will tell you how to configure the WiFi extender. If you don’t have WiFi but do have Internet, you will need to watch this YouTube video to see how to use it to provide WiFi in your home.
Unplug the WiFi extender from the WiFi. We won’t need it again until we set it up in the barn.
Open the camera package. Follow directions and plug it in. Follow more directions and download an app to your phone or tablet. Follow more directions to activate the camera. Make sure that you associate the camera with the WiFi you plan to use on a regular basis (we have more than one WiFi connection at our farm, so the camera is on the one Marcia routinely uses).
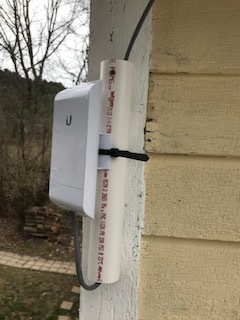
Open the Bridge package. There are two identical devices. One will be set up as an “access point” at the house; the other will be a “station” at the barn. They both are designed to be zip tied to a vertical pipe. We used 1.5” PVC to mount it—see picture below.
Plug one of these two identical devices into the house WiFi router, and follow directions to set it up as an access point. Give it a unique IP address (I used 192.168.1.21, and suggest you do the same). I marked this number inside the plastic housing with a Sharpie so I could tell them apart later.
Unplug that and plug in the second device. It wants to be set up as a “station.” I used IP address 192.168. 1.22 and marked it on the inside of the removeable plastic housing that encloses the connection points.
Plug the “access point” (device 192.168.1.21) into your WiFi router with a cable and point it at the barn.
Take the “station” (device 192.168.1.22) to the barn and point it at the house. Plug it in!
Plug the WiFi extender into the “station” at the barn.
If everything went right, you should now have WiFi at your barn. (If it didn’t, leave a comment below and we’ll try to help if we can.)
Plug the camera in at the barn. It should work.
Here are pictures of the installed hardware:
This is the “bridge” unit, installed under the eaves of the farmhouse. The cable goes up through the soffit, across the attic to the other side of the house, and down through the wall to where our WiFi router lives.
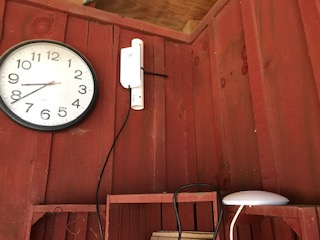
The other end of the bridge is in a nook of our barn. The WiFi Extender is on a shelf.
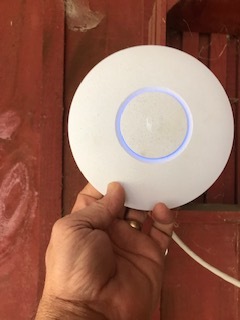
This is the WiFi Extender. I have the hardware to attach it to the ceiling some other day.
Post Script
We just had our first kidding at Storybook Farm: God blessed us with three beautiful doelings. The feature picture above is during their first night. I was SO glad to be able to peek at them as I awakened in the night to see how they were doing! Barn cams rule!
If you were helped by this post, please know that we LOVE to help others find their path with goats. We offer a monthly newsletter that includes free information (and recipes). Sign up using the form below if you are interested!