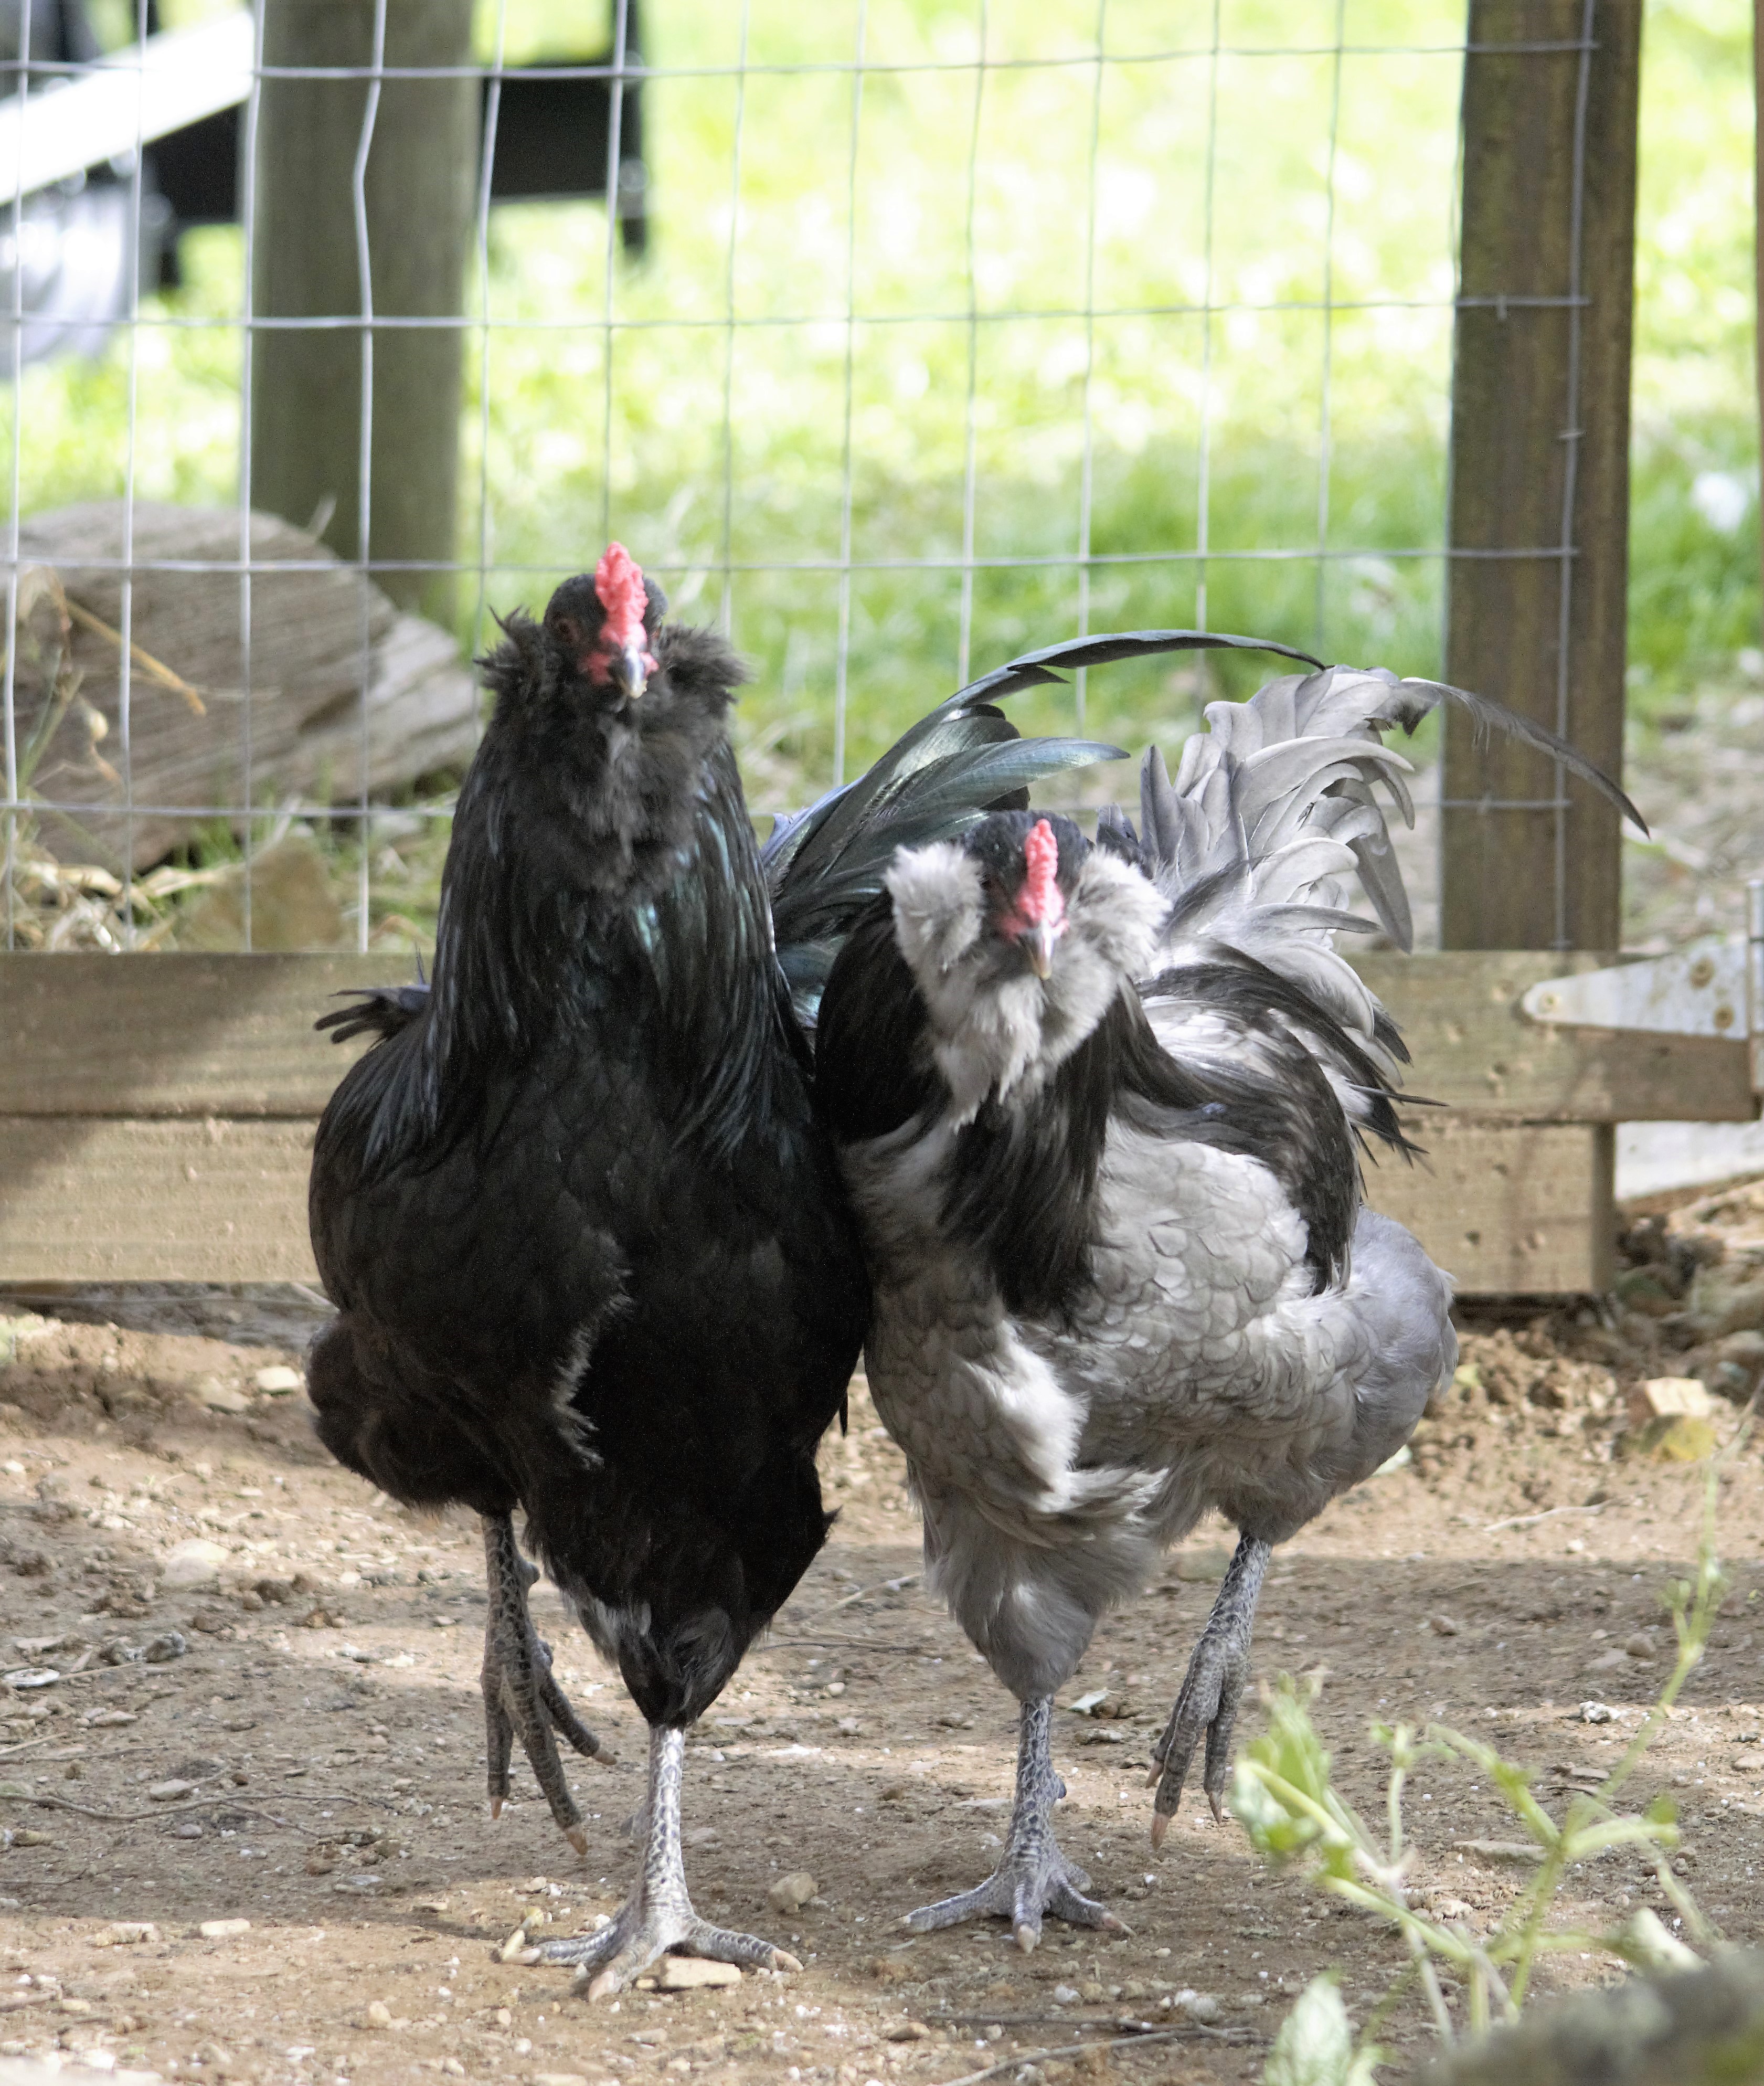
All this year, I’ve been growing out my new Ameraucana breeding stock, and they have turned out so nice! I am beyond thrilled!
Splash Pullet
In case you’re unfamiliar, the Ameraucana is a relatively new breed of chicken, having only been accepted by the American Poultry Association in 1984. They have quickly gained popularity, however, and are bred in a number of color varieties. We breed blacks, blues (which are both APA approved) and also splash. This last variety is a fun change from the more run-of-the-mill color schemes among chickens (see a picture of one of our splash pullets, right). Our original stock came from the show-stopper lines of Paul and Angela Smith in Texas.
Here at Storybook Farm, we raise four breeds of Large Fowl. By far, our favorites for personality, egg color, and overall cuteness are the Ameraucanas! They are not large birds as compared to our Light Sussex and Marans, but they are quick, bright, and funny. I love their feathery muffs that half hide their faces, while their expressive eyes peek out at you and twinkle merrily. Ours are curious, but shy. I have known people to make real pets of them, however, with a little effort–and a fair number of treats!
Three Beautiful Boys: Black, Splash, Blue
Ameraucanas are layers of large, blue eggs–the color of robin’s eggs! Their feather colors are beautiful: the blacks have a deep green sheen. The blues have delicate lacing on their feathers. The splash are a funky mixture of black and white. If it’s a fun factor you’re after, you’ve come to the right place with Ameraucanas!
We managed to raise three beautiful boys this year. Our black cock, especially, is large and lovely, but the other two are great as well. Because we have one of each, we can mix and match with our four blue hens and two splash hens to get all three color combinations. In case you’ve never learned this before, the “blue” gene is actually acting to dilute black coloration in feathers are achieved by breeding differing colors together. Chicks inherit one of a pair of genes from each parent. The combinations that result give the following colors in chickens:
When there is no blue gene present in the pair, any black markings will be normally colored (i.e. they will appear black)
When there is one blue gene present in the pair, any feathers that would have been black on the bird will be diluted to blue (which can appear as anything from a slate gray to a darker, colonial blue color).
When there are two blue genes present in the pair, any black will be diluted to (blue splashed) white. This variety is called “splash.”
We are so looking forward to being able to offer hatching eggs and day-old chicks from these parents in the coming 2019 hatching season! First, we have to brave the cold, but we are praying that they’ll all come through just fine, and we’ll have lots of beautiful babies to share come spring! If you’d like to reserve chicks for 2019, please email us today.
I have decided to use a time-tested method of gathering information about my laying hens. It’s called trap nesting. Using one of various methods, you trap your hens as they enter their nest boxes individually to lay, and then manually release them afterwards. Thus, you can identify without a doubt which hen laid which egg, and keep highly accurate records. It is a bit labor intensive, because traps must be checked every couple of hours since hens get quite thirsty after laying and are eager to exit the nest.
There are a myriad of reasons for trap nesting practices. Here are a handful of them:
Find out how consistently (or if?) your hens are laying.
Identify your best layers so that you breed them, and thus over time, increase overall egg production in your flock.
Link eggs with specific hens when seeking to breed for egg color enhancements in the flock (very handy when breeding Marans for those darker eggs, for instance).
Identify eggs with specific hens when doing flock mating. Thus, you can house more than one hen with a single cock, yet know exactly which specific paring produces exactly which eggs. Then, you can label and incubate and tag chicks and know with certainty what your blood lines are.
Find out who your egg eater is (it might be a rat!).
There are more, and I am undertaking trap nesting for all these reasons. This is the first post on this topic, and I anticipate sharing more as I go down this road. This post is about my build.
Chez Poulez converted
I have an old building that came with my farm when we bought it, seven years ago now. It was a tractor run below and a grain storage building above. The whole thing is about 24’ x 18’; the lower half (12’ x 18’) has long been converted into a coop for my layer flock. This part of the original building had been outfitted with a 3’ x 18’ corn-crib extension, which was partitioned off from the main space, so we didn’t use until this year. The extension has a central door in the 18’ lone wall; thus, the crib has a left side and a right side. Last winter, we put a pop door into the left side and created some sheltered roosts.
Before demolition
This summer, I’ve broken into the right side to create improved nests with (removable) trap door flaps. This is that right side before I began demolition. We had faced it with some 1/2” plywood because the first use we made of this space was for my horse. So, this was her kickboard.
It took some doing to remove this plywood, and under it were ancient (really tough) boards that were held on by rusted, tough old nails. It was definitely good exercise to pry all this wall apart.
Corn crib exposed after demolition.
After I got all of these boards off, I was confronted with verticle studs, which were of varying depths. I had to decide whether to replace these with a new header or leave them as they were. I decided on the latter because, well, I’m no carpenter, and these are chickens. 😬
It’s not easy to see, but the floorboards of the crib section were loose, and some were rotted. I removed, cleaned, and then put them back. In places where they couldn’t be used, I patched them with new boards, and then put down a layer of 1/4” hardware cloth. This was followed by some insulation, and then a tilted floor of plywood. (I tilted it from back to front in the hope that eggs, when laid, would roll forward to where I can more easily retrieve them.
Wire over dividers; 2nd tier floor
I then constructed 12” high dividers that were 24” deep, and 1” x 2” supports for them that are 15” tall in the front. These then support the 2” x 3” beam that runs across the fronts of the boxes, forming the lip for the second tier of nesting boxes. All in all, there are 14 boxes: 7 below and 7 above. (On the roof of the second tier, we now store bales of shavings—and trap rats. 😏
On the lower tier, there is a 4”-6” space above each divider, between nesting boxes. I originally intended this to be only 3” at the most, and was content that no hens would hurt themselves trying to get through them, but as the 2” x 3” cross beam was laid in place, the vertical space increased. We ended up putting 1/4” hardware cloth down the length of the boxes on top of the 12” dividers so that the hens would not seek to exit the boxes on the sides after being trapped.
In the picture above, you can get an idea of the slope of the roll-away nesting boxes. This is both the ceiling of the first tier and the floor of the second tier. You can also see the 1/4” hardware cloth that we inserted to keep hens from exiting through the space.
Finished: 14 nest boxes
Finally, all the nesting boxes were constructed, and it was time to create the trap doors. I used 1/4” luan, embroidery floss, a jigsaw, a staple gun, finishing nails, and Velcro in constructing these. In my next post, I’ll detail how I designed them, and how they operate, but for now, here’s a picture of the first three set into place: boxes # 2, 4, and 6. They are on the lower tier, and are numbered right to left (since we enter the coop on the right side).
Below is a close up shot of #2, set and waiting for a hen to enter.
This post will tell about a hard left turn that I took this week in my chicken keeping practices. Let me start by quoting three wise sayings:
Anonymous Proverb: “You learn something new every day.”
King Solomon famously wrote, “There’s nothing new under the sun.”
The Apostle Paul wrote, “I will show you a more excellent way.”
This post will offer echos of all of these.
You Learn Something New… If You’re Willing to Learn
I love learning new things about keeping chickens, even though I’m four years young in the hobby. To this end, I’m an avid researcher. One of the best resources for me (especially since I lack a mentor in real life and live on an isolated mountain farm in WV) is the community called Backyard Chickens. There is a wealth of experience and a wonderful supportive, welcoming atmosphere on the forums at backyardchickens.com. When I first started keeping chickens, it was my daily (often hourly) go-to spot; nowadays, I often go there for recreation or just to surf and learn.
So, after I discovered and built my first Hover Brooder, I was excited to share about it with that community and added a post to an existing thread about brooders. In response, a wonderful, experienced, and kind chicken keeper, named Diane, commented on my post. She supported the Hover Brooder I had built, but also related that it was possible to raise chickens outdoors without heat lamps and in a way far more natural to the rhythms of life and growth of young chicks that God originally ordained.
I am so glad that I had the humility to explore her method, even though I was at the time so excited about my own.
There’s Nothing New… Or Is There?
Broody Hen
It’s new to me, but the method that Diane introduced mimics the way that God created the brooding process for chicks. (Diane will be the first to share that it’s not her method; her post about this method was the one that caught a lot of eyes, has remained active over years, and still has her present on it to answer questions—again and again!) This widely known, modern adaptation to natural brooding is generally known as the Mama Heating Pad (MHP) method.
In the wild, mama chickens set on their eggs (brood them) for 21 days. When new chicks emerge from their eggs, weak and wet, they rest and then dry, and then gain strength, all under the hen’s body and soft downy feathers that warm them from above. Very soon, they peek out from under their mama, and then as she rises to eat, drink, and scavage and scratch for food, they follow and mimic her. If they get chilled, they run back under mama’s fluff to warm up, then reemerge. After about four weeks, they are fully feathered, and too large to fit under mama. They then huddle next to each other and mama as they leave her side more and more.
Completed MHP cave
In a nutshell, with the MHP method a heating pad is placed low to the floor of a brooder pen, over shavings or straw: your choice. The pad is supported by a simple wire frame made of garden fencing (or some use more elaborate supports, like old cookie cooling racks), and covered by an old towel, which is then covered in Press N Seal, for help with keeping it clean.
The theory of this arrangement is that the chicks run under the heating pad and warm their backs via direct contact with it. (The heating pad must NOT have an auto-off feature, or MUST have the ability to DISABLE that auto-off feature).
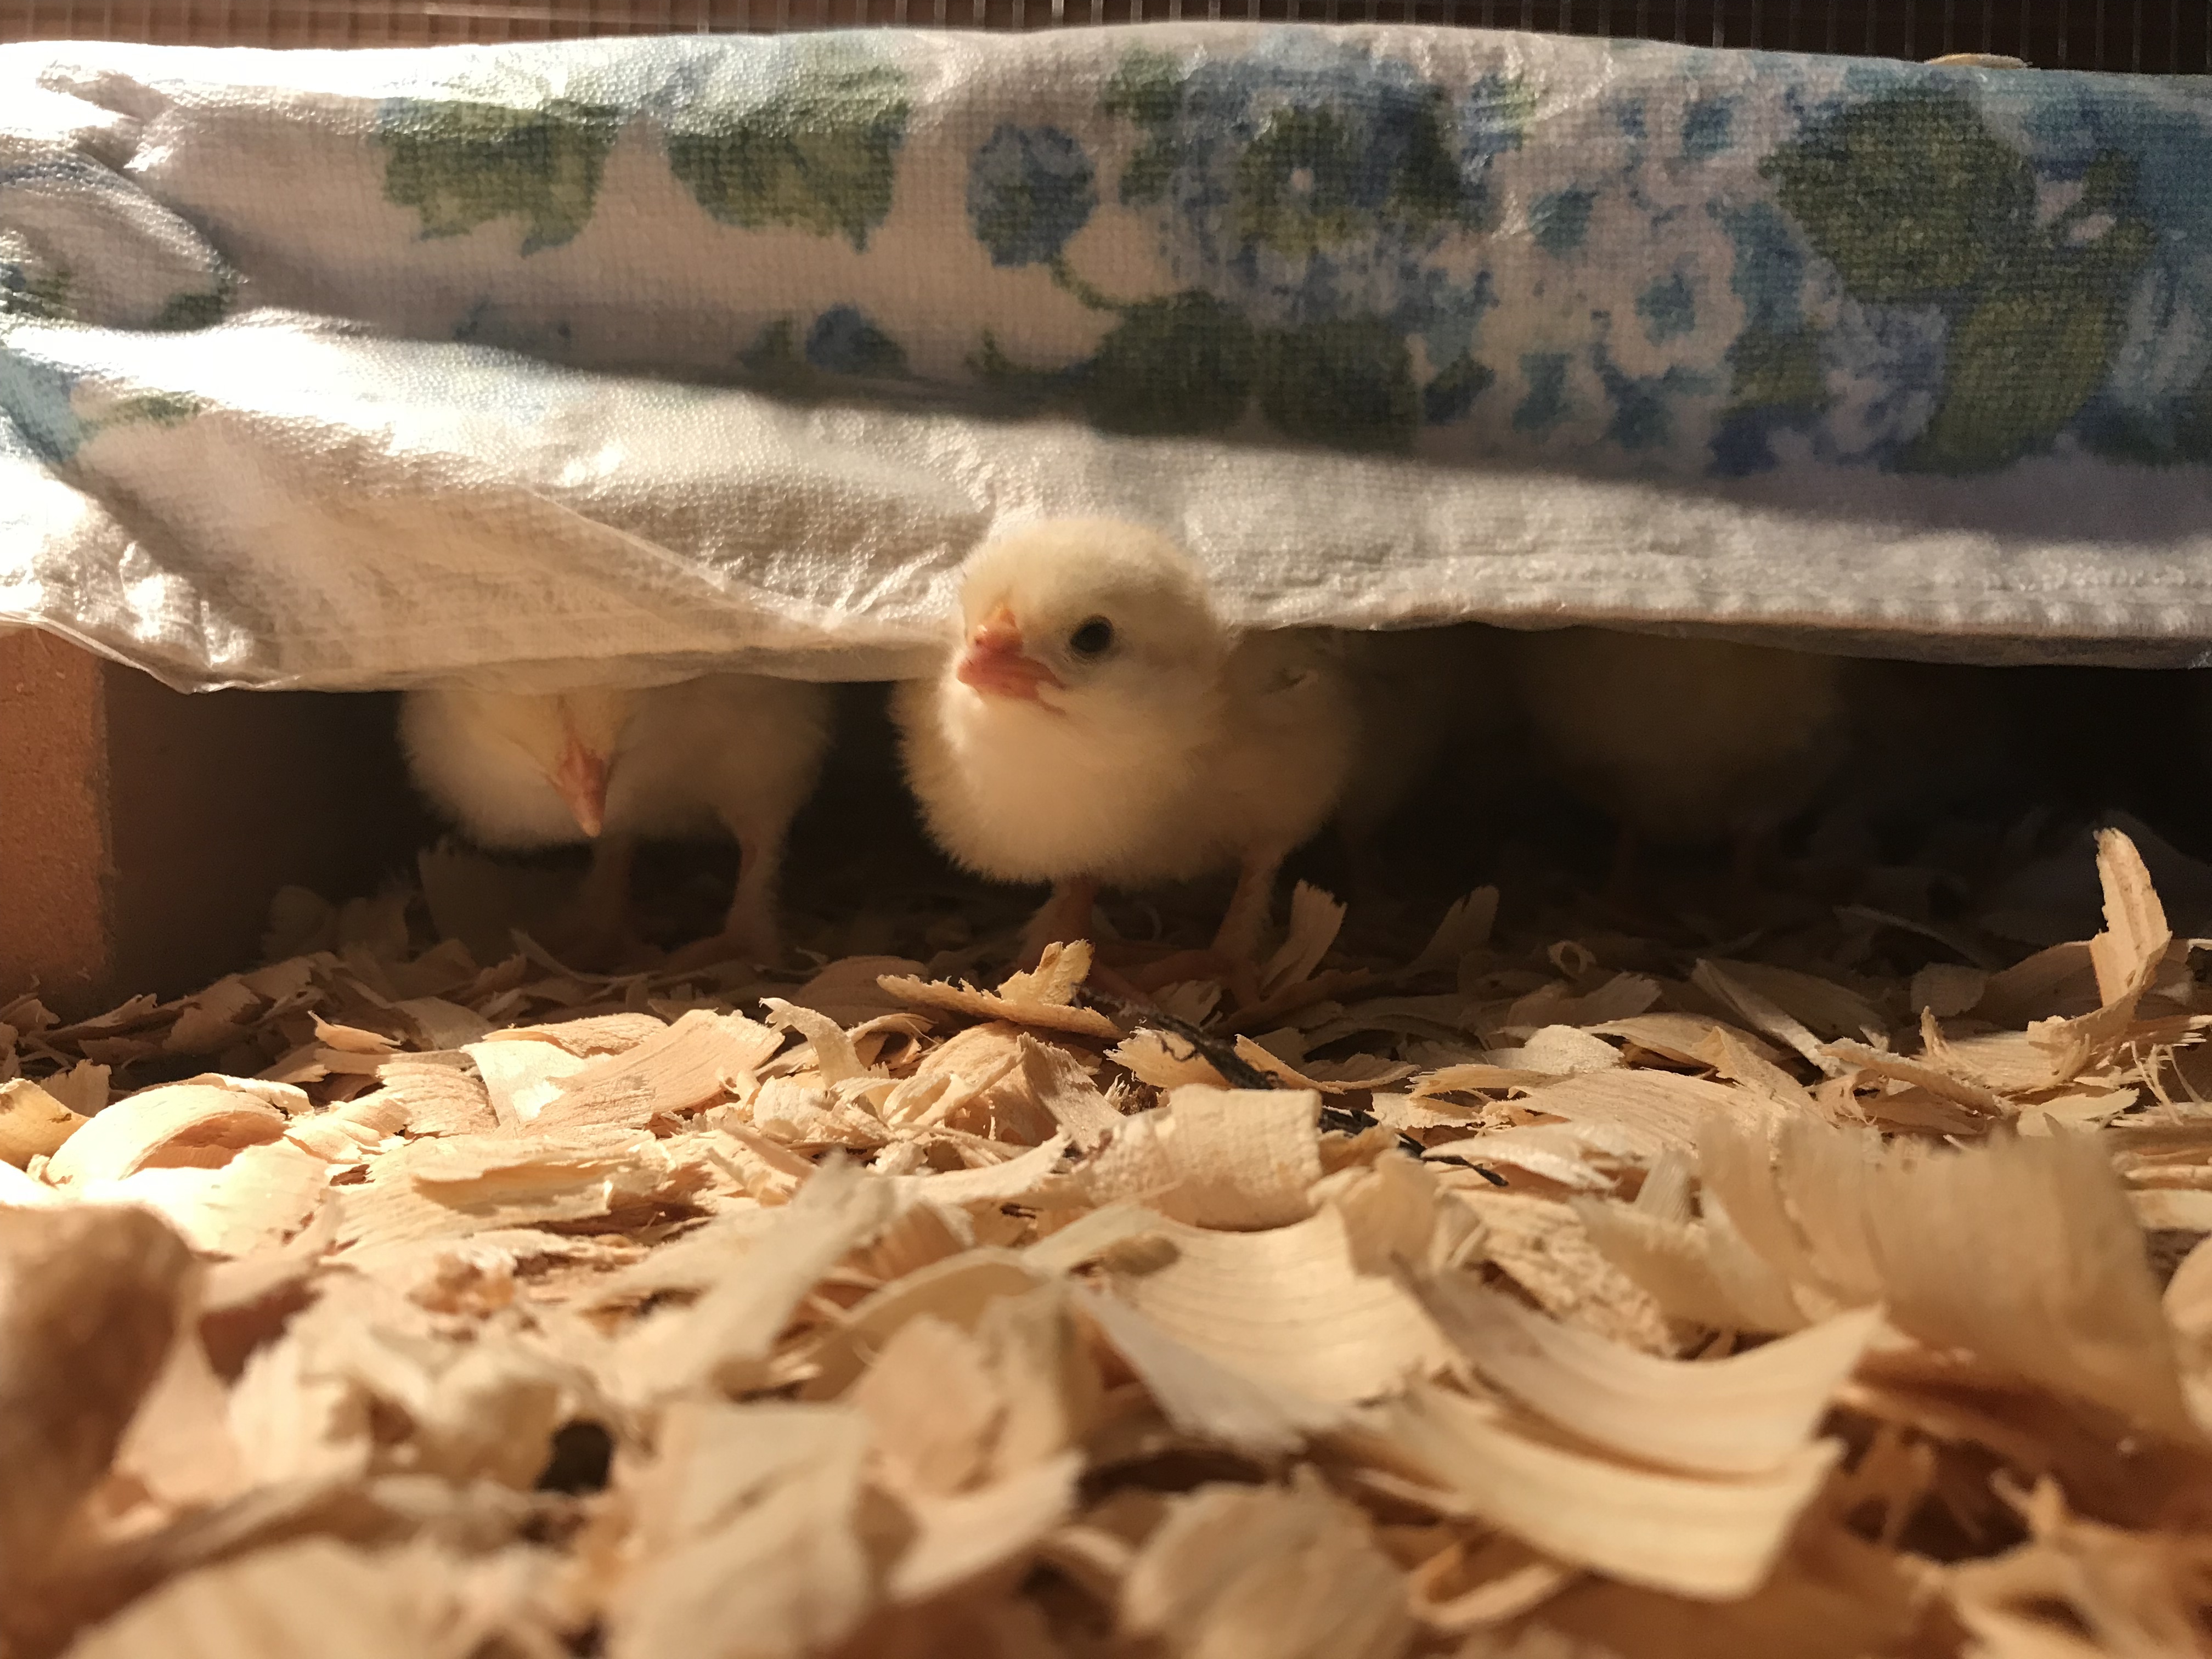
Once under “mama,” new chicks may sleep under “her” as well. After being sufficiently warmed by “mama,” they often emerge to eat, drink, and/or explore their surroundings. As soon as they are chilled, they scurry back under “mama” for another warm up. When ambient temperatures are warm enough, they will also doze on “mama’s” back!
Chicks warming up
As night approaches, and light dwindles, the chicks naturally fill up their crops and bed down under “mama.” Chickens, like most birds, do not eat, drink, or move around at night. They eat and drink heavily before dark, and then roost for the night. Broody hens will collect their chicks under themselves, settle down, and sleep. So will their chicks—warm under her feathers. The MHP simulates all of this: and you have blessed quiet and dark all night long in the brooder.
And, because the MHP does not work by heating ambient airs… either under the MHP or outside of it… but by direct contact with chicks’ backs, this brooder can be used effectively in sub-freezing barn environments, even as mama chickens can brood their young in such environments.
So, while this is a new-to-me method, and is using modern electricity, it is also an old, old approach to brooding baby chicks: about as close as you can get to simulating a true mama chicken without having a broody hen.
A More Excellent Way!
How is this more excellent? Glad you asked!
Let me count the ways!
There is no danger of fire from heat lamps, which has always been a concern to those who use them.
There are no accidental burns from heat lamps, which is great especially when grandchildren are helping with (and/or enjoying) newly hatched chicks.
The MHP method supports the establishment of night/day cycle in chicks which is the most natural to them.
Chicks choose their degree of warmth and/or activity freely.
You can brood in unheated spaces: garages, barns, etc. (They still need protection from predators and drafts.)
It uses less electricity to heat a pad than two heat lamps (for redundancy). This fact also reduces the danger of overloading the circuit, causing a breaker to trip in the night and losing all heat (which has happened to us).
Chicks learn natural day/night cycles; they are not unduly stressed by constant bright light. This has to be as good for them as it is for us: deep night sleeps and active days with eating/drinking has to equal happier, healthier, better adjusted chicks, at least to my way of thinking.
We go through less feed/water as a result of their sleeping soundly all night.
Chicks may feather faster. (I have yet to experience this one for myself.)
You’ll find pictures and information galore there, but if you want a summary, here it is:
The original idea is that you take garden wire (2×4” welded wire is probably best, since it’s more rigid than poultry netting, and yet open enough to allow chicks to get maximum contact with the heating pad) and bend it into a shallow arc, forming a cave of sorts. (Some newer adaptations use a cookie cooling sheet for support, and may use more rigid sides. I did this latter modification with my second MHP; see below.) Again, you want to make sure that the structure slopes upwards from back to front such that the ceiling in the back will be about 2.5” above the shavings (for day-old peeps).
Wire frame properly bent
Over this wire frame, we then put a naked heating pad. Most such have writing on one side, indicating the side you’re to put next to the human body. Put this side down, towards the chicks. Make sure to buy one that does NOT have an auto-off feature, or has the ability to turn off this feature. You don’t want the pad kicking off automatically—ever! (They can be hard to find. Here’s a large model that’s sold on Amazon and at WalMart (and in the picture above, showing what you’ll need). Currently, they sell for around $20 w/free shipping on Amazon. It has NO auto-off feature. I set mine on medium, no matter the ambient air, for day-old to week-old chicks.)
Draped towel and Press N Seal half added
Over the pad, drape a hand towel, large enough to lap over the front and back.
Affix some Press ‘N Seal wrap to the top of the towel (wrapping the sides) as a poop deflector. (After each use of the MHP, you can either wipe this surface, or remove it and redo it to clean up.)
Put the MHP assembly over shavings or straw. It should be that it slopes front to back: make it 2.5” above the flooring in the back, and about 4” above on the front, with the towel falling over the front about 2” as an “awning.”
Cover the sides and back, if desired, with shavings/straw. (Some leave the back open for egress; some close it with a towel and then back that with deep shavings. This latter was my approach. It depends somewhat on ambient air temps and also on how large the hatch is. What you want to avoid is chicks getting trapped inside. My pads are 12” x 24”, and my hatch was 10 chicks: plenty of room for everyone to come and go freely.)
MHP in trough brooder indoors
Cover the top of the MHP with shavings/straw. The chicks will hang out there when the ambient temps are warm, and snuggle/snooze in the warmth of the top of the MHP.
Over time, as chicks grow (and they grow fast) you’ll want to raise the MHP and lower the heat setting on your heating pad. You can raise it by simply putting lumber, stones, bricks, or whatever under the sides of the MHP.
Details About My MHP for Outdoor Brooding:
Outdoor MHP w/heat lamp
I ended up with kind of a hybrid between the original design (just bent wire) and those with rigid frames. We cut a 2” x 8” board diagonally such that each piece was 2.5” at the back and 4” at the front, and 12” long. We put a 23” 2×4 at the back, and screwed the side pieces to it. Then, we attached garden wire to the top, with the pad on top of that.
The 2×4 back was higher than the low ends of the sides, making a lip of sorts, such that the pad cannot slip backwards.
The wire was stapled to the flat tops of the two sides.
Then, I put a towel over the pad, and affixed the Press N Seal to it, and filled in with shavings below, as well as an insulative board, since this pen is off the floor in an unheated barn. The towel was arranged with a generous “awning” in the front, again, to keep heat in and cold air out, and we added plenty of wood shavings under and on top.
Transferring My 5-Day Old Chicks to Outdoor Conditions
Some under; some out
We already had heat lamps installed above the pen, So I warmed up the ambient air with one heat lamp over their food/water, and left it on until 8:30 PM that night. (It’s on a timer: it will be their “sun,”going on each day at 6:30 AM, about an hour before sunrise here.
When I transferred them, I was taking them from ambient 70° airs in the house to ambient 48° in the barn at noon on a sunny March day. The solo heat lamp was my way of making MYSELF feel better… 🙂 Because I incubate hatches every week, I have a series of grow out pens for brooding. And because it’s raised, I also put wooden fence board under the MHP for added floor insulation.
Happily adjusted
I brought the chicks out, starting at noon, and made excuses for sticking around the barn working with adult pens all afternoon, preparing for an expected snowfall and making improvements on my Family Coops. The chicks did great. They went in and out of their MHP cave, ate and drank, and took naps just as they had in the house.
In the morning, at 9 AM, the heat lamp had gone back on and the water was liquid. Two chicks were out eating and drinking, and eight more were cozy under their MHP, hanging out.
Conclusions
In and Out: Their Choice!
For me, there is no way I’m going back to heat lamps, in any form, including the hover brooder I was so proud of last week. 🤗 The only reason I would is if I had too many chicks/hatch to fit under MHPs… and I don’t foresee that in our operation. However, for those who might have that issue, I’m leaving up my post about the Hover Brooder. After all, no one method works for all chicken keepers!
UPDATE: 5 days later…
Chicks are all happy, healthy, and growing! They have been living in our unheated barn while we received 16” of snow, and have had most nights in the low 20°s. Last night was 16°! Chicks were all doing fine this morning.
It’s approaching mid-March, and temperatures on our mountain farm are in the teens and twenties most nights. We expect (and hope!) to have our first hatchlings coming out of their nice, warm shells this Tuesday, and they will go up to the barn after drying off in the house brooder for 24 hours. Brrrrrr!
Brooding in Freezing Weather Outside? Yes, you can!
Plamondon’s schematic
I wouldn’t have even considered doing this if it weren’t for information I learned from this great book: Success With Baby Chicks by Robert Plamondon. The book is chock full of really useful information, much of it gleaned by Plamondon from research done by reading “a hundred books on poultrykeeping at Oregon State University’s Valley Library, and surveyed a hundred years of poultry journals and magazines.”* In this book, Plamondon shares how to build a style of chick brooders that were used widely during the 1940s and onward, but have been largely lost today. He calls them “hovers.”
Plamondon taught me that I could build a hover big enough to warm 200 chickens for under $20 in under two hours. Well, I’m raising far fewer chicks than that… but that’s okay. Plamondon scales his design so that you can build one that warms 50, 100, or 200 chicks. I built one even smaller today: intended for my average hatch of 30 chicks.
As Plamondon explains on his excellent website, that introduces the hover:
The basic facts can be summarized as follows:
Baby chicks need heat, but are very small, so only the heat at floor level matters.
Radiant heat, such as from heat lamps, can keep a chick warm even if the air temperature is cold, but radiant heat alone is expensive.
Heat lamps and reflector floodlight bulbs are the most convenient source of heat. Both types make good brooder lamps.
Heat rises, so it tends to heat the ceiling rather than the floor. Trapping the heat with an insulated ceiling above the chicks (a “hover”) will save energy.
Using a combination of radiant heat and an insulated hover will provide the best of both worlds, using one-third the electricity while keeping the chicks safer and more comfortable.
Winter brooding is straightforward with this equipment.
A lightweight plywood brooder box with two heat lamps can be built in a couple of hours and will last for years.
Our Hover: It Took Less Than Two Hours to Build!
Here are pictures of the hover we built today. We have pens for day-old chicks that are a scant 24” deep, so we chose to make ours 19” x 24” (which is slightly smaller than Plamondon’s smallest design, 24” x 24”).
Pieces cut and ready
First, we cut out legs, cleats, side pieces, and the lid (without corners removed).
Finished “box” of the hover
Then, we assembled these into a box (with no lid) because we are not skilled carpenters and knew our box would not be perfect. We then turned the box over on top of the lid piece and scribed the finished dimensions on the lid. We then cut the lid to fit.
Put shavings here!
It sets inside the walls on, the cleats, 4” down from the top. This is so you can put 4” of shavings on the top of this hover box, giving great insulation to the hover, and further saving energy costs.
Wiring the hover
Then, my brilliant husband wired the hover.
The design calls for two lights (for redundancy in case one light bulb burns out) set in porcelain sockets and mounted in the center of the two 19” sides of the hover. Scott chose to wire them together on a single circuit.
One light mounted
There is no need for a thermometer, or even a light switch, though our porcelain mounts did come with pull chains.
Voila! Our finished hover! Tomorrow, we’ll be plugging it in and filling the pen with shavings. I’ll be monitoring the temperatures to assure that the babies will be warm and toasty, even in freezing weather!
Finished wired hover
My husband used a tuna can to cover the hole where the wires are threaded from the light sockets so that the birdies can’t get to them as they grow larger.
We have taken it up to the barn and installed it with only two 40 watt lightbulbs to start warming up the space. Later today, we’ll grab two higher powered bulbs from our local hardware store: we need a total of 120 watts in this size hover for below-freezing temperatures. See the picture below of the glowing goodness!
Installed hover
*Purchase Success With Baby Chickshere! Find out more details about hovers here.
UPDATE: 10 days later, I can show you an even more excellent way to brood chicks. Read HERE why we never used the hover pictured… though, I’ve left this post up because there are different strokes for different folks, and this remains a viable option.
Well, we have completed the GREAT COOP MOVE of 2018. It only took three days… ONLY~
We moved seven 500 lb. breeding coops UPhill on Saturday morning. Then we rested; exhausted.
Why Did We Move Them?
Coops in the Garden
We built the Family Coops in the summer/fall of 2017. We put them in what had been our garden plot, because we haven’t had a lot of success gardening, and I wanted to be able to keep an eye on my flocks. It was one of those “it seemed like a good idea at the time” things.
It actually was a great location for us, and worked really well. That is, until late January 2018, when we had snow, followed by a brief thaw, followed by torrents of rain. The rain washed all that chicken poo on top of the slick, frozen snow and right into our spring water. Luckily, we have two wells; we were able to switch to the less good, but not contaminated, well.
But we realized that we were going to have to relocate seven heavy coops (made heavier by the recent addition of wooden floors) UPhill.
Our Wonderful Church Family
We live in a rural area where folks still “do” for one another, and where mud is an accepted fact of life. Most people here are farmers. So, when we put out the call, we had three strong guys show up to help lug the coops up the hill. We could not have done it without them literally helping us to carry these burdens, and are so grateful!
How the Move Went Down
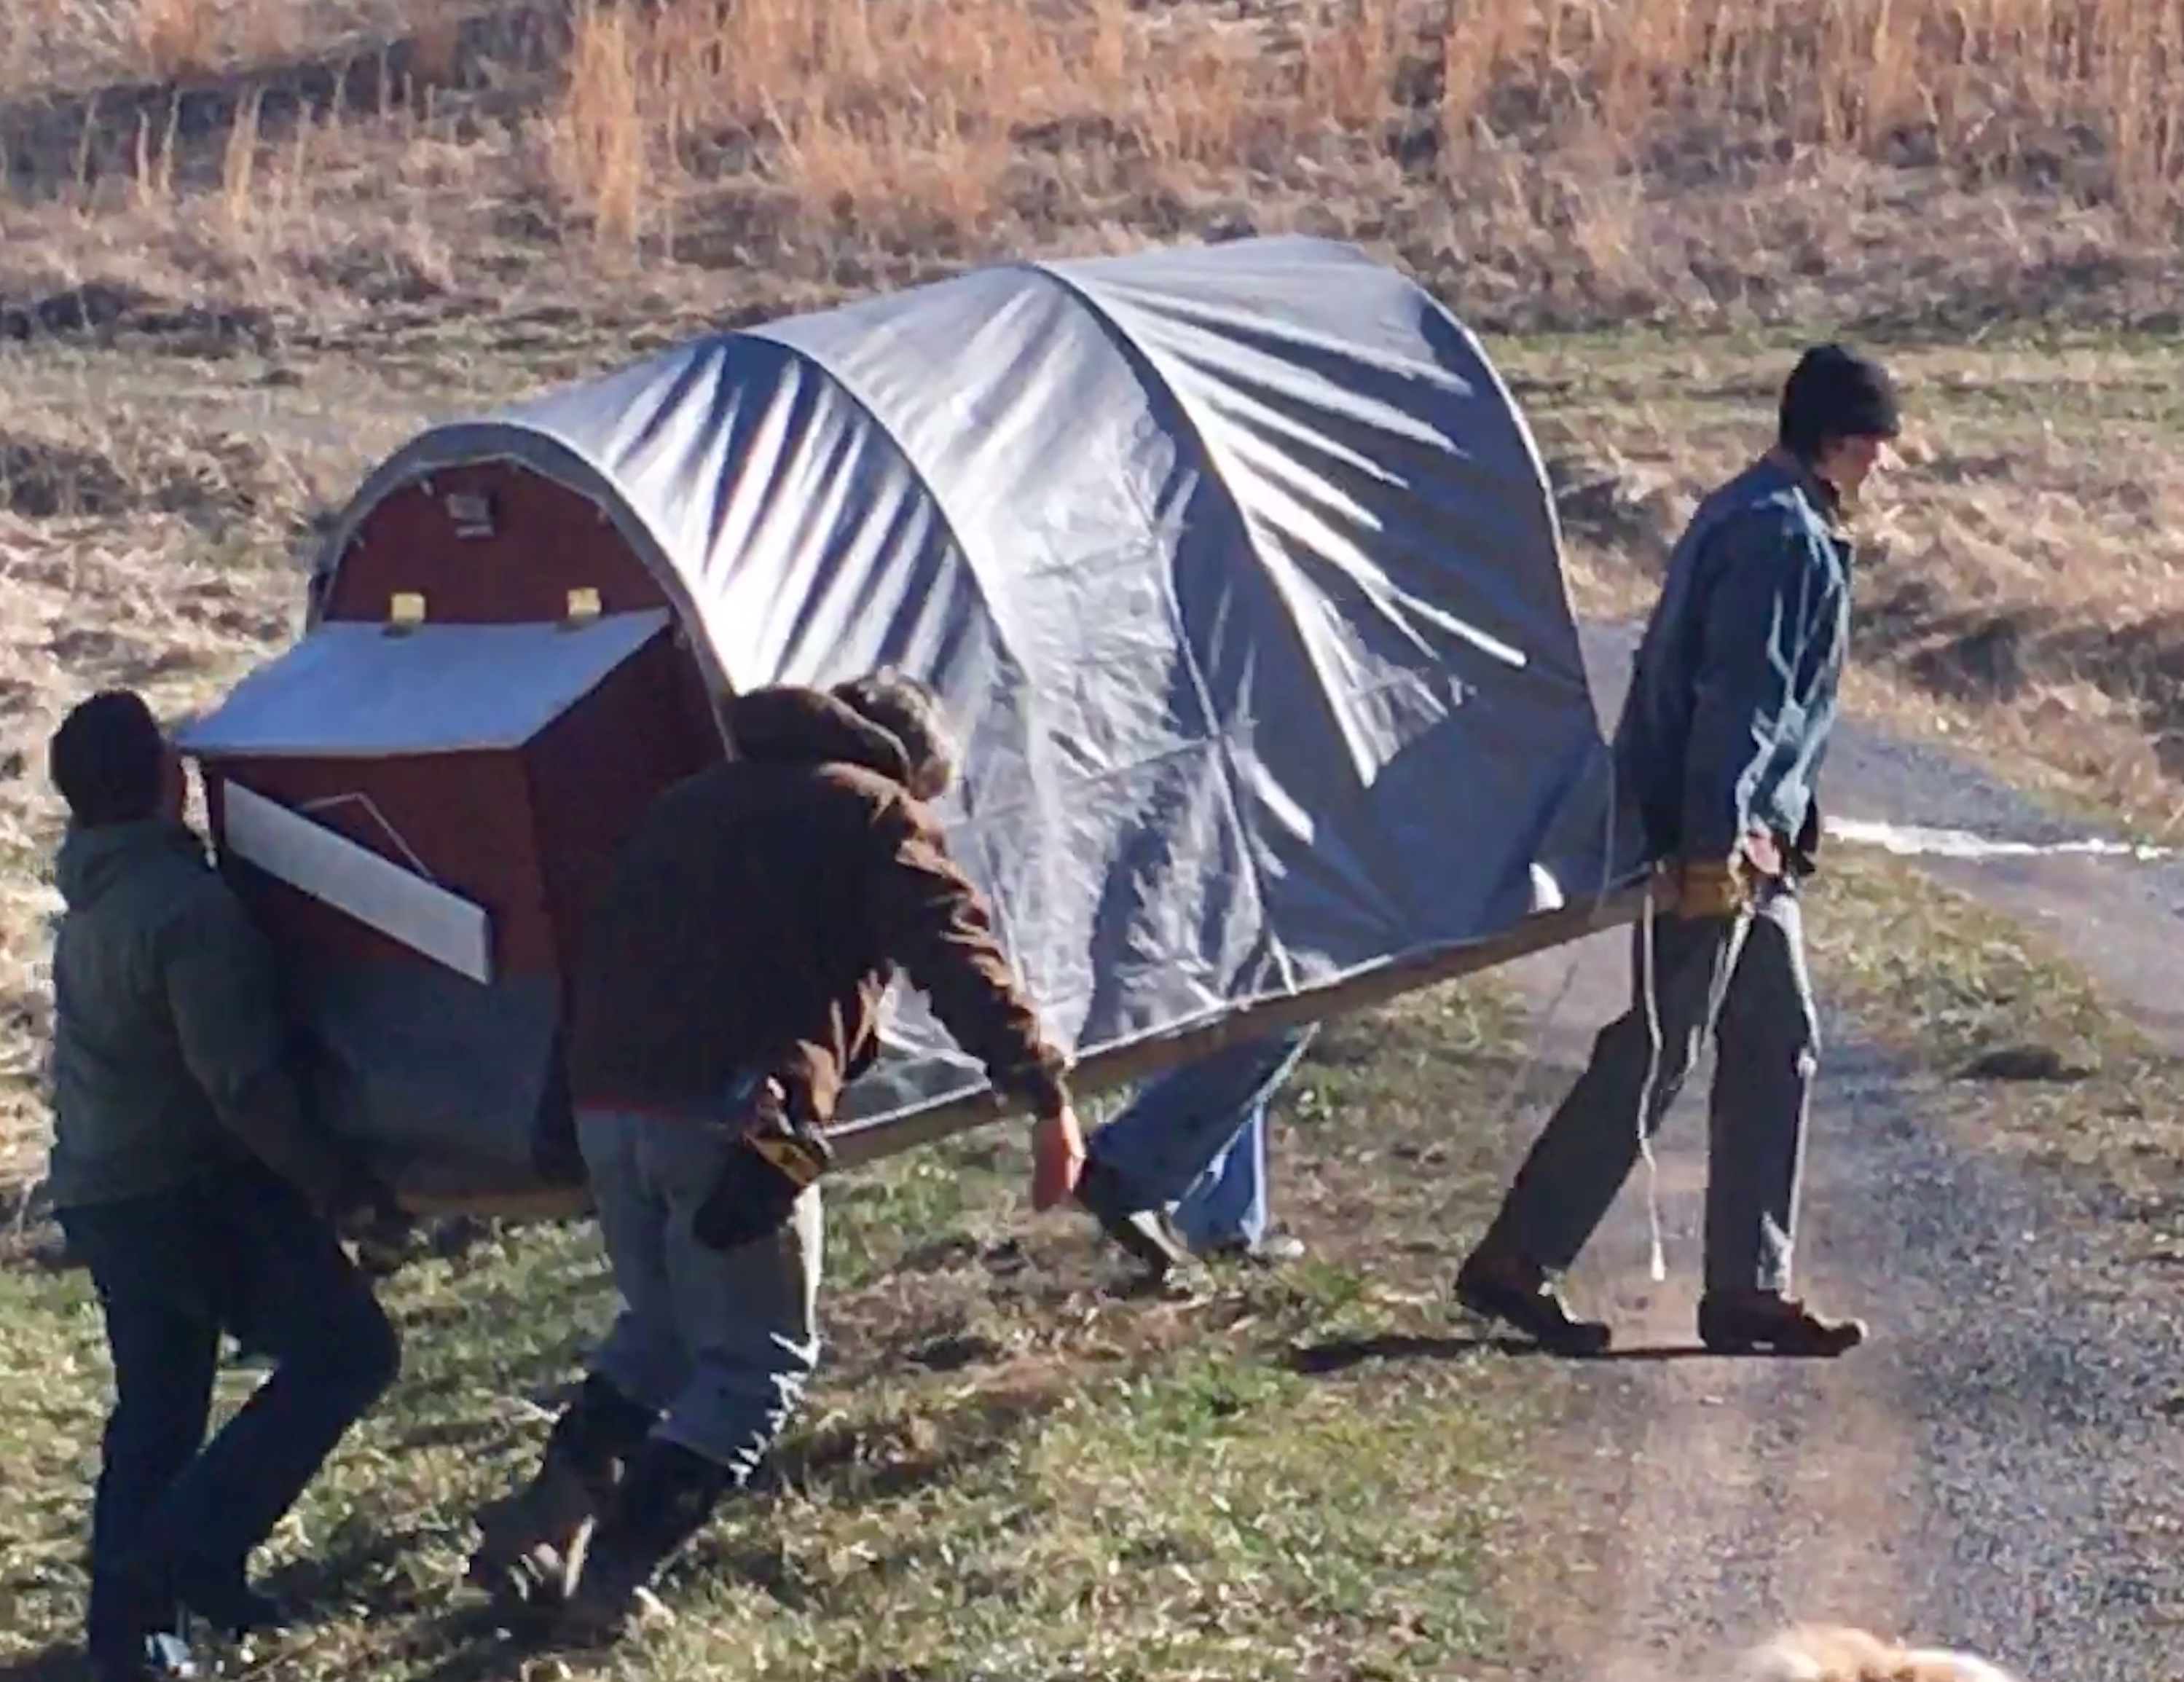
So, on Saturday morning at 9 AM, the men showed up and they moved seven 500 lb. breeding coops UPhill on Saturday morning. We decided to move the birds in their coops. The birds had already been shut in all of Friday because we had 70 mph winds here and had to keep them safe.
The men started by carrying the first two coops all the way up. Then, I got out there and saw how much they were struggling. I suggested that we use our truck for the rest of the move.
It proved a welcome suggestion! At that point, the men began carrying them each of the remaining five coops up from the garden (just about 100 feet) and then hoisting them onto the truck. Then we drove each one up the hill (pictured) in the truck, and they unloaded them at the top of the hill. We then drove back down, and moved the next one.
They were all moved by about 11 AM. Then the men had to pound in legs and level them in their new locations. That took until about 12:30 PM. At that point, most of our help had to leave.
Then we rested; exhausted but grateful that the heaviest part of the business was done.
But Wait—There Was More!
New Location
On Sunday afternoon, we decided that getting the runs built for our birds (so that they could get out of their coops after this, their 3rd day locked in) was critical enough to qualify as a “work of mercy and necessity. All we got done in the afternoon, however, was the ticklish job of relocating the pop door for our layer flock, and building a chicken tunnel out to their run, so that we could later erect the new runs around them.
On Monday, we had a slow start. We had first to clean up the area where the coops had been, taking down all the wire for seven separate runs (and their stakes, hooks, and gates). That took awhile. Then, we started to erect the new runs on sloping land, some of it with rocks jutting out. We felt pressured by the fact that the birds had been “cooped up” since Thursday night… so this was going on Day 4. But, as hard as we tried, we were able to build 4 of 7 runs, and let those birds out.
Cock Fight!
In the process of building the runs and moving the coops, we relocated some of the birds’ relative positions. As they were let out into new runs, our best Light Sussex cock and our best Silver Penciled Rock cock found themselves separated by only a wire fence, and they did not like it, not one little bit! As I worked on more runs on Monday evening, I watched these two cocks get into a massive fight through the wire that left them both bleeeding.
I broke up the fight, knowing that freezing temperatures were coming overnight, and not wanting them to get frostbite from their wounds.
When I came out on Tuesdaymorning, I found that our Light Sussex cock, Buddy, kept his left eye shut, and was hoping that he hadn’t lost it! I kept my eye on him as I finished building the last of the runs. He seemed okay, except for not opening that eye.
In the afternoon, we found time to apply warm compresses and antibiotic ointment to Buddy’s eye. We are grateful that he opened this injured eye (see picture) and it seems that it was the lid that was injured. You can see how battered he got in the fight: all the black areas are wounds!
Finishing Up
We finished all 7 runs, and new ramps, on Tuesday morning, just ahead of a new Northeaster coming through. We were so grateful to have this chore behind us, and now face cleaning up our well so we can use it again this summer.
As the fall weather has become colder, we have been modifying our Family Coops to make sure that our birds stay warm in the winter.
Our first step was to open up the tarps that protect their interiors and quickly staple in some landscaping cloth to cover the wire floor. Over this we spread about 3” of pine shavings.
Later, we mulched and added fall leaves to this bedding. (You can read details about this nifty trick in this post.) About every month, we add bedding to the coops. Up until Christmas, they have remained clean and sweet smelling!
Skirt below and flap over feed/water station
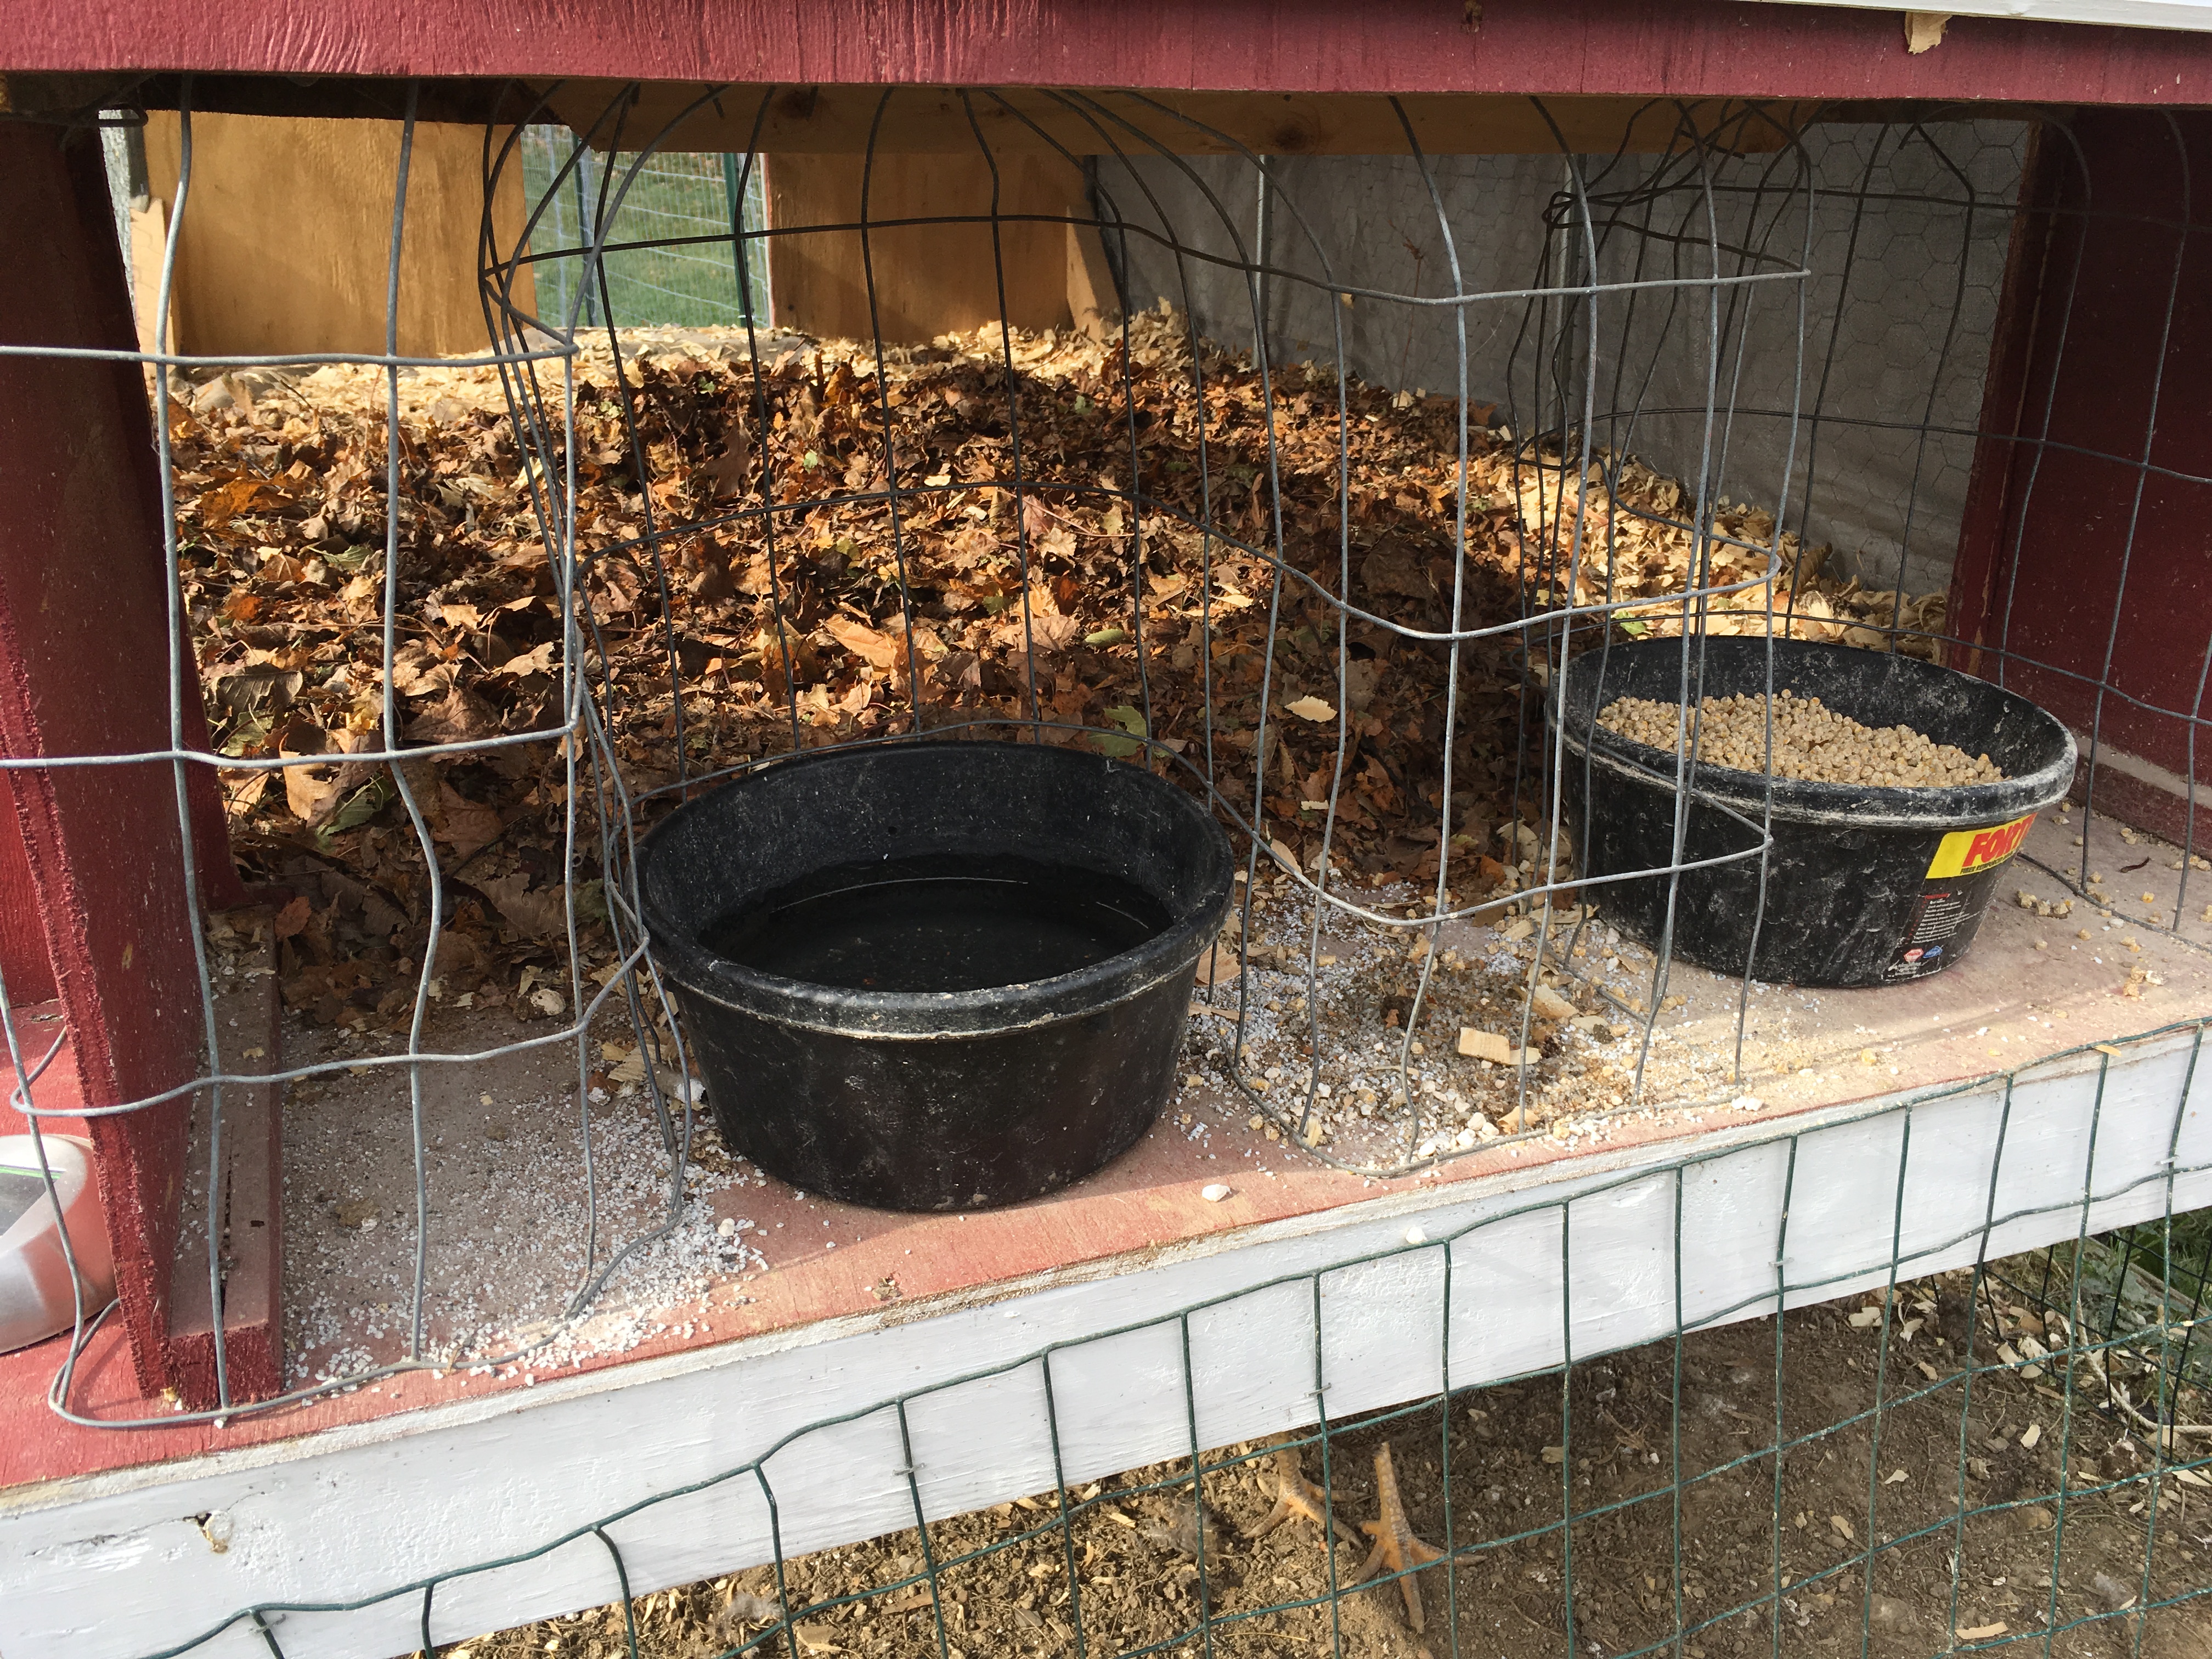
The birds were doing fine at night while temperatures remained in the 20’s, but as they began to regularly dip into the teens and below, we added simple covers to the feeding stations at the back of the coop, and a skirt to some that are most often hit by strong winds. These covers prevent cold air from blowing into the coops.
The flaps over the feeding station, in particuar, also seem to keep their water from freezing quite so fast, and keep hungry wild birds — around here, jays and crows — out of the feed, as these became more of a pest as winter came on.
Christmas lights!
As the days got darker, we also added light to the coops in order to encourage young pullets to lay reliably. Since it was the season, and we had extras, we ended up using Christmas lights. A $10 set (purchased at our local Family Dollar store) was 14’ of lighted length, and proved to be the perfect size to festoon the clear panels on our coops. We linked them with outdoor extension cords, and have them all on one timer. They light up in the early AM and evening so that the birds have 15 hours of light per day.
Then we had our first snowfall: about 3”. The birds did fine, though they did tend to huddle either inside their coops or at the very end of the runs. 🤔 Most of the day, this scene has remained fairly static.
As the winter progressed, the only trouble we had was with the bedding. On those inevitable long weeks where birds spent much more time in their coops because of freezing or blowing or snowing weather, the bedding did cake up because the landscape cloth made it very hard to stir it properly (as you should always do with deep litter).
We ended up cutting three 4’ x 2’ pieces of 1/2” plywood and lining the bottom of the coops on a warm day in January. We pulled out the caked bedding and landscape cloth, put down compressed wood pellets (like they use in pellet stoves) and shavings on top of the new wood floor panels.
Feed/water station flap
Since then, adding shavings and stirring the bedding is much easier, and we’ll be able to remove the boards come late spring, store them, and reuse them winter after winter.
Our final improvement came in late March, and we plan to add this one to our published plans. We added door flaps in place of the hardware cloth ones. These are hinged to the bottoms of the nesting boxes, and hooked on the bottom so that they stay closed, as well as hooking to an eye-screw to stay open for feeding/watering.
The reason we decided to make this permanent amendment to the design is that there’s always a concern with rodents and with wild birds getting at the chicken feed (the latter spread avian diseases). Furthermore, for the coops where water stations face east, we fought algae in our bowls a lot. This modification helps fight algae and wild birds, while adding yet another layer of protection for the birds from cold or predators. And it only took about an hour to add one to each of our coops!
It’s mid-November, and our leaves (especially around the farmhouse) have really just come down. So, naturally, we have to rake them up, right? And it’s an all-day task, right? Well, not exactly!
Sucking up those pesky leaves
About three years ago, I bought an amazingly inexpensive tool that has been such a help each fall: it’s an electric, corded leaf blower with a twist: it blows, but it also sucks leaves into a bag, mulching them on the way. This blower was under $100; one of the best tools I’ve ever invested in!
Brief Digression: Deep Litter
At Storybook Farm, we practice the deep litter method for bedding. In case you’re never heard of this, here’s a brief summary of how it works. Basically, you make compost inside your coop by combining elements that will break each other down naturally. The elements you need are three: carbon (usually shavings or other bedding elements, like pine needles or dried fall leaves), chicken poop (nitrogen), and tiny microorganisms that live in soil, leaves, and all living organic materials (these break down the combined carbon and nitrogen).
First, you put down bedding and make sure that the microorganisms are present (I had to add dirt to my wooden coop floor the first year; now I add fall leaves and they do double duty.) Then, allow chickens to poo. The carbon absorbs wet fecal materials and interacts with solid poo such that the poo dries out and (if left alone) the carbon elements will harden and cake. This is why you must turn your bedding weekly.
Each week, you add a light layer of carbon (say, shavings or dry leaves): about an inch, tops. Then, you fork it over and thus renew your bedding—or you get the chooks to do so for you by throwing treats down first, and then new shavings on top. When you put down seed treats first, your chickens will scratch and dig looking for the treats and turn the bedding pretty well for you (as long as it hasn’t been that long since it was last turned allowing it to cake badly.
Every month or so, I make sure I go in and give it a deep and thorough turning. Light and fluffy, and over the months, increasingly deeper, is this bedding. It smells great and is easy peasy for the busy chicken farmer to maintain, which is especially welcome when cold sets in. (Bonus: bored chooks in winter really get into scratching for those treats!)
With employing the deep litter method, I deep clean my chicken coops twice a year: spring and fall. In both seasons, the all of the bedding comes out of the coop and goes onto the garden, enriching our soil. (Gotta love the circle of life!) So, each fall I need to renew my deep beds in the coops.
Let’s get back to today’s fun times.
First layer of bedding getting thin
For the first the last two years, we’ve sucked up/mulched fall leaves, and then transferred them into feed sacks for use as carbon bedding through the winter. This worked great. However, today I wanted to deepen the bedding in our new Family Coops.
There are seven of these small coops. This is our first year with them, and we just winterized them about two weeks ago. In the summer, these coops have an entirely open bottom (less work for me and great ventilation) but in the winter, open flooring is too cold! So, two weeks ago we spend a couple of hours opening up all the tarps and stapling down some landscape cloth, then putting down 2” of shavings on that. After 2 weeks, though, I could begin to see the landscaping cloth (see above picture), and knew I had to deepen the beds to get that great mulching process going. (Besides, there were no microorganisms in there yet.)
Leaves going into the nesting boxes
So, today was mid-40s and sunny, and the leaves were fresh fallen, but dry (very key that they be dry or they can mold quickly) so out came the handy sucker/mulcher machine, and away I went.
I put a bag of beautifully processed leaves in each coop. Unlike when we did the winterizing and had to get inside the coops to staple down the landscaping cloth, I didn’t have to remove the tarps.
I just opened the nesting boxes and shook the bag of mulch inside. (This was an advance over previous years where we’ve had to transfer the mulch to bags and then to the coop.)
Then, I used our “grabber” tool to push them further into the coops and spread them a bit. I left a generous supply in each nesting box as well, just to make things more cozy for my hens at night.
Coop with new bed of mulched leaves
When I got done, I felt like I had made such a deal! I had gotten the fallen leaves off the lawn, I had mulched them, and then (with very little effort) I doubled the coop bedding in each of seven coops and didn’t have to do the tiresome step of putting mulched leaves into bags for storage. Woot! I call that a win-win-win, and I’m smiling as I watch the happy chickens rooting around in the new fall leaves!
When thinking about purchasing chicks for your flock, you have a range of options. This post is mostly intended to serve first-time chick buyers with information you can use as you make your buying decision.
Narrow Down Your Options
As you surf the Internet, you’re going to find a range of options — and prices — for day-old chicks. Here are some questions and topics that can help you winnow these options. If you are brand new to chickens, the best advice I can give you is to join an online group, like www.backyardchickens.com. On this forum you can ask many questions of experienced chicken keepers who are passionate about their birds, and even read reviews about different breeds.
Your first decision, of course, is about the breed of chicken you want to buy. There are literally hundreds of breeds, because down through the ages, chickens (like dogs) have been selectively bred for different purposes. Some breeders were looking for the most eggs possible per hen. Others wanted the meatiest chickens possible. Some bred for white skins, and others for yellow, feeling that table birds looked better with one or the other. Some chickens were bred for certain colors of eggs. And, more recently, chickens have been bred smaller and smaller to produce miniature versions of larger fowl breeds. These are the bantams. So, consider why you are buying your chickens. What jobs are they to perform? Will they provide pure pleasure as you watch their endearing antics, or as they sit on your lap? Will they provide eggs, or meat (or both) for your table? Will you breed them? Do you want a mixed flock, or only one breed to start?
Also consider your limits. Do local ordinances allow you to keep roosters? How many chickens are you allowed to keep? (You can keep more bantams than large fowls in the same amount of space.) How big a coop will you have? Chicken math, as we call it, offers the guideline that you should provide at least 2 square feet of floor space in your coop, with and additional 4 square feet of run space. Before you buy any chicks, have their housing totally ready to receive them, and do recognize that chicken keeping is addictive: think about providing more space than you think you’ll initially use.
Are you interested in breeding chickens? A major positive movement among backyard poultry keepers has been the preservation — and, in some cases, the rescue — of heritage breeds that were once the mainstay of the American poultry industry but have been in danger of extinction, and thus being lost forever. Do consider joining others in preserving these beautiful birds!
About the Costs of Chicks
Chick prices (for any chosen breed) will vary widely, and the first-time buyer might wonder why this is so. Here are some factors that go into pricing baby chicks:
First, there is a great divide between chicks from large hatcheries and those from smaller, private breeders. Here are reasons why.
Large Hatcheries
Typical Hatchery Breeding
As with most sectors of agriculture and farming today, big hatcheries are big business. Their methods tend to lead to lower quality birds and (in some) inhumane conditions. Because they handle large numbers of chicks, and serve larger retail chains that sell the spring chicks you may have seen in stores, their breeding and sales practices are modified for the greatest possible profit at the lowest possible costs. I want to be careful here: I am not condemning all large hatcheries wholesale, but if you’re interested in details (some are disturbing) you can read these two articles:
Chicks from larger hatcheries are thus not necessarily the healthiest or best looking representative of a given breed of chickens. They may be compared to the puppy mills of the dog world, with which reputation and cautions you may already be familiar.
Private Breeders
Smaller, private breeders (such as ourselves) take the time and absorb the labor that selective breeding of parent stocks require. Often these breeders seek to improve the breeds they keep (some with an eye towards winning prizes at chicken shows—which is a world unto itself that you may never have dreamed existed)! As the Mother Earth article states above, most smaller breeders are looking to improve not only breed types, but their health, overall productivity (in whatever sphere that is, whether for meat or eggs or foraging or broodiness, or a combination of these), etc.
Juvenile French Black Copper Marans
In order to make selections for breeding, private breeders must hatch and raise hundreds of chicks. Why? Serious breeders typically keep for the next generation’s breeding only 1/10 of hens hatched and 1/100 of roosters hatched. Year by year, these breeders raise many, many chicks to maturity so that they can select only the finest, and pair them with mates that promote the qualities in the breed that they are looking to improve or sustain. In raising so many birds, breeder incur costs: feed, housing, and labor. Typically, too, the conditions under which birds are raised are more natural to the birds, and humane.
In Summary
So, the pure economics of your choice are these: you will typically get more vigorous, healthier, more beautiful, and more productive stock from private breeders than you will from larger hatcheries, but it will cost you more initially.
One more consideration: as is true when we “buy American”, buying from private breeders supports the work (and practices) of private breeders, ensuring the ongoing efforts to raise rare breeds and/or healthier, more productive stock.
Finding Private Breeders
Once you have narrowed down your choice of breeds, and decided to go the route of private breeders, there are several ways to find private breeders.
Best, probably, is to find the national organization for that breed (all heritage breeds have these). Such organizations will typically have a breeder’s directory or a Facebook group (or both) where you can connect with top breeders and purchase stock.
Another approach is to simply Google your breed of choice + “for sale” and see which websites come up.
Note that the best breeders know their bloodlines! Typically, in their descriptions of the chicks they offer, they will name those lines. This is a sure indication that you are getting top birds within the given breed.
A Word About Shipping Costs
Common Shipping Crate
In purchasing chicks from private breeders, don’t be thrown by shipping costs. The only game in town for all of us is the USPS, and their rates are high.
Most breeders simply charge what it actually costs them: often a flat rate of $50/shipment to ensure a speedy delivery and healthy chicks on arrival. You may be able to find a breeder near enough to you to pick up your stock personally, so again, use the above resources to search out all your options, but remember: in buying chicks, you do get what you pay for.
Remember…
You are making an investment in livestock: you’ll be housing, feeding, eating the eggs from, and be concerned about the health of the chicks you purchase for years to come once they’re in your care.
For all that they give us, we think it’s well worth it to purchase the best stock we can find. Most private breeders are committed to offering you that stock. Here at Storybook Farm, we are one such private breeder working to provide such quality chickens for you.
This is post #2 of 2 in a series on keeping chickens with children.
Post #1 focused on the research you should do, and decisions that you as the adult should come to, before you introduce the idea of a chicken-keeping project to your child. If you take the time to narrow down options, and identify your goals for this adventure, you have more options and a greater chance of success.
1. From the list you’ve narrowed down, help your child to choose his breed(s).
He might want to specialize in one breed if he’s thinking of breeding and showing in the future, but most kids will want an assortment of breeds when starting out. This gives a rainbow egg basket, and variety in the hens’ appearances. There’s always time to specialize later if you become interested in breeding more seriously.
2. From your earlier research, with your child, choose your breeder.
There are large hatcheries that provide (how to put this?) basic chicks inexpensively. (Read a good article on this here.) These chicks would not be exhibition quality and, more importantly, as the article states, large hatchery chicks tend to be weaker, watered down versions of the terrific birds of yesteryear. Large hatcheries usually allow random breeding (many roosters among many hens in large poultry houses), whereas those who breed heritage birds for exhibition or simply to improve their breeds use selective mating. The difference here is similar to buying a puppy from a pet store vs. a breeder. Generally, the rule is you get what you pay for with chicks. I wrote a whole blog post on this, if you want even more food for thought.
In case you’re wondering: I put this step here because involving your child in this decision gives him experience in cost/benefit choices that we all make in the adult world. However, you may want to narrow down his choices ahead of involving him, so as to not get his hopes pinned on one gorgeous picture that a hatchery happens to post. After you make this choice together, you’ll need to read details about how to order chicks from your breeder (all are different) and when to expect them after you do. But — before you order — read on!
3. Purchase (or build with your child) a coop for your chicks well ahead of their arrival.
Some people start chicks in a simple brooder — it can be a box or baby’s wading pool with a light for heat, food, water, and shavings that starts in your house, but quite quickly you want to move the chicks to their permanent coop.
Note well, please: chicks produce dust after about a week or two that can be dangerous to humans, especially if it gets into food. Always keep chicks in the house for as short a time as possible, and don’t brood them in your kitchen ever.
There are as many plans for making coops as there are people keeping chickens. In this post, I talk about the best coop I’ve ever worked with, and sell plans for it here. In this post, I talk about general features to look for in any coop plans. Check them out, discuss their features with your child, and be sure to get that coop (and all needed equipment, like food, water, and feeders/waterers, as well as grit, perches, etc.) in place before ordering any chicks or hatching eggs! (If you plan to hatch eggs, you’ll need an incubator as well!)
4. Now you can order your peeps (or hatching eggs)!
Again, I’m not a fan of starting with hatching eggs as a beginner, but if that’s your choice, then order hatching eggs at this point. Otherwise, order your peeps and start talking with your child about feeding and watering practices.
As stated above, you and your child can both access online communities where you can learn about rearing chicks. We, at Storybook Farm, sell four different breeds of large fowl, heritage chickens. All of them are excellent choices as dual purpose, gentle, friendly birds. (They are grandchild tested, so we know for sure! 🤗 ) If you are interested in learning about our French Copper Marans, our Silver Penciled Plymouth Rocks, our Light Sussex, or our Blue Wheaten Ameraucanas, click here.
This article should get you started. Do you have any questions? Feel free to post comments and I’ll do my best to answer. Good luck!
We have been happily building our cute little family coops all summer. How I have loved to watch each one be completed and established around our former garden’s perimeter. I’ve been loving the look, the ease of tending, and the happiness of my birds.
Until last week, that is, when I had a vivid dream — a nightmare, actually.
I dreamed that a black bear came out of the nearby woods (where we know for certain that they do live) and exerted her awesome strength to claw open my tarped coops and ravage my chickens. In my dream, the coops lay scattered on the lawn, overturned and broken. Chicken feathers were everywhere. Some chickens escaped into nearby woods; others were bloody casualties scattered on the lawn. It was horrendous; I could not return to sleep for hours.
In the clear light of day the next morning, my husband and I discussed the dream, and its implications. We are serious about finding the best possible breeding stock and doing highly selective breeding. We are investing time, love, and dollars into this endeavor. Whether now — when investments are relatively modest — or in the future — when years of effort have produced very expensive, high quality birds — we do not want to lose out to a wandering black bear in search of a meal.
So, we read up on this topic. We learned that black bears do indeed attack chicken coops, and with devastating results. However, bears will respect electric fences (yay!). One sets hot lines at about 24″ above ground (as well as higher or lower). The best scheme involves multiple strands, since bear paws are well insulated. We also read that it’s a good idea to slather the line with honey, so that a wandering bear will lick the line. Apparently, once a bear has registered the shock, they typically won’t try again.
Before: coops outside garden; runs inside
Our problem then became how to electrify our perimeter. We had placed the family coops outside the garden fence, with runs extending inward. There was no good way to place electric fence around these coops and still maintain 1) the ability to mow easily, 2) create a pleasing look, or 3) create an easily-operated gate.
With a groan, we came to the conclusion that we needed to rotate our scheme 180 degrees. Our plan is to have 12 family coops in all, housing 4 breeds, divided into three families each. We had built and mounted five of these so far. We would now move all five of these family coops to the interior of the garden, mounting them back-to-back down the center, and have the runs extend outward, towards the perimeter. Then, we would electrify that perimeter.
We were grateful that the coops had been designed to be mobile, but they are still heavy. When we finish each one, it takes a minimum of two strong people to move it (using a heavy-duty wagon) to the garden area from the garage workshop. In this case, it meant disassembling the coop’s supportive legs (which had been well pounded into the ground), removing the wire that allows chickens to go under the coop), moving each coop up, around, and down over stepped garden terraces, re-pounding in supportive legs, re-leveling the coops, and finally, reworking the runs (which involved repairing openings in the garden fence perimeter and making new openings near the coop doors) and finally, rewiring the underside of each coop. We also had to reverse the tarps, since we want south-facing sun to pour into those clear vinyl panels that we incorporated. Whew!
After: coops in center; runs go outward
I was no help in the heavy lifting part of the endeavor. I’m not strong, and had recently injured my back. But, in God’s special providence, my strong and willing son called a couple of days after my nightmare (and our decision to move the coops) to announce his decision to visit us with his family.
With his help, we moved the coops in two days, but it’s going to take at least a week to accomplish all of the above-listed tasks, and still longer to electrify the garden. In the picture at the right, you can see the coops moved, and the patches that were under three of the coops when they were outside of the garden fence. Chickens sure can eat green stuff down to nothing in a short amount of time. In hot weather, they love hanging out under these coops: shade and breezes! You can also see the progression of eaten-down vegetation in the runs (that have been created as each coop was erected). The lowest coop (far left in the picture) is the most recent. The only reason that there wasn’t a bare patch for the far right one is that we never cut a door for those birds to go under that coop.
As all five coops are moved now, a hidden blessing has emerged: they are even easier to tend! Before, when the plan was to line opposite sides of the 1800 sq. ft. garden with six coops each, I would go down one side, tending six coops, then truck across to the other side, and then go down it, tending the other six coops. Now, instead of my needing to go down each outside wall of our garden, the new placement will put them back-to-back in the center of the garden. Thus, I will walk down the center aisle of 12 coops in order to tend them daily: six on my left and six on my right. This will be especially welcome in winter, as I water and feed with snow on the ground. So far, as you can see, five coops are in place that will be on my left as I walk down the row.
So, even though the electric fence isn’t up yet, we sleep better at nights now, and are grateful for the added benefits of easier tending of our little flock! 🐔


 When there is no blue gene present in the pair, any black markings will be normally colored (i.e. they will appear black)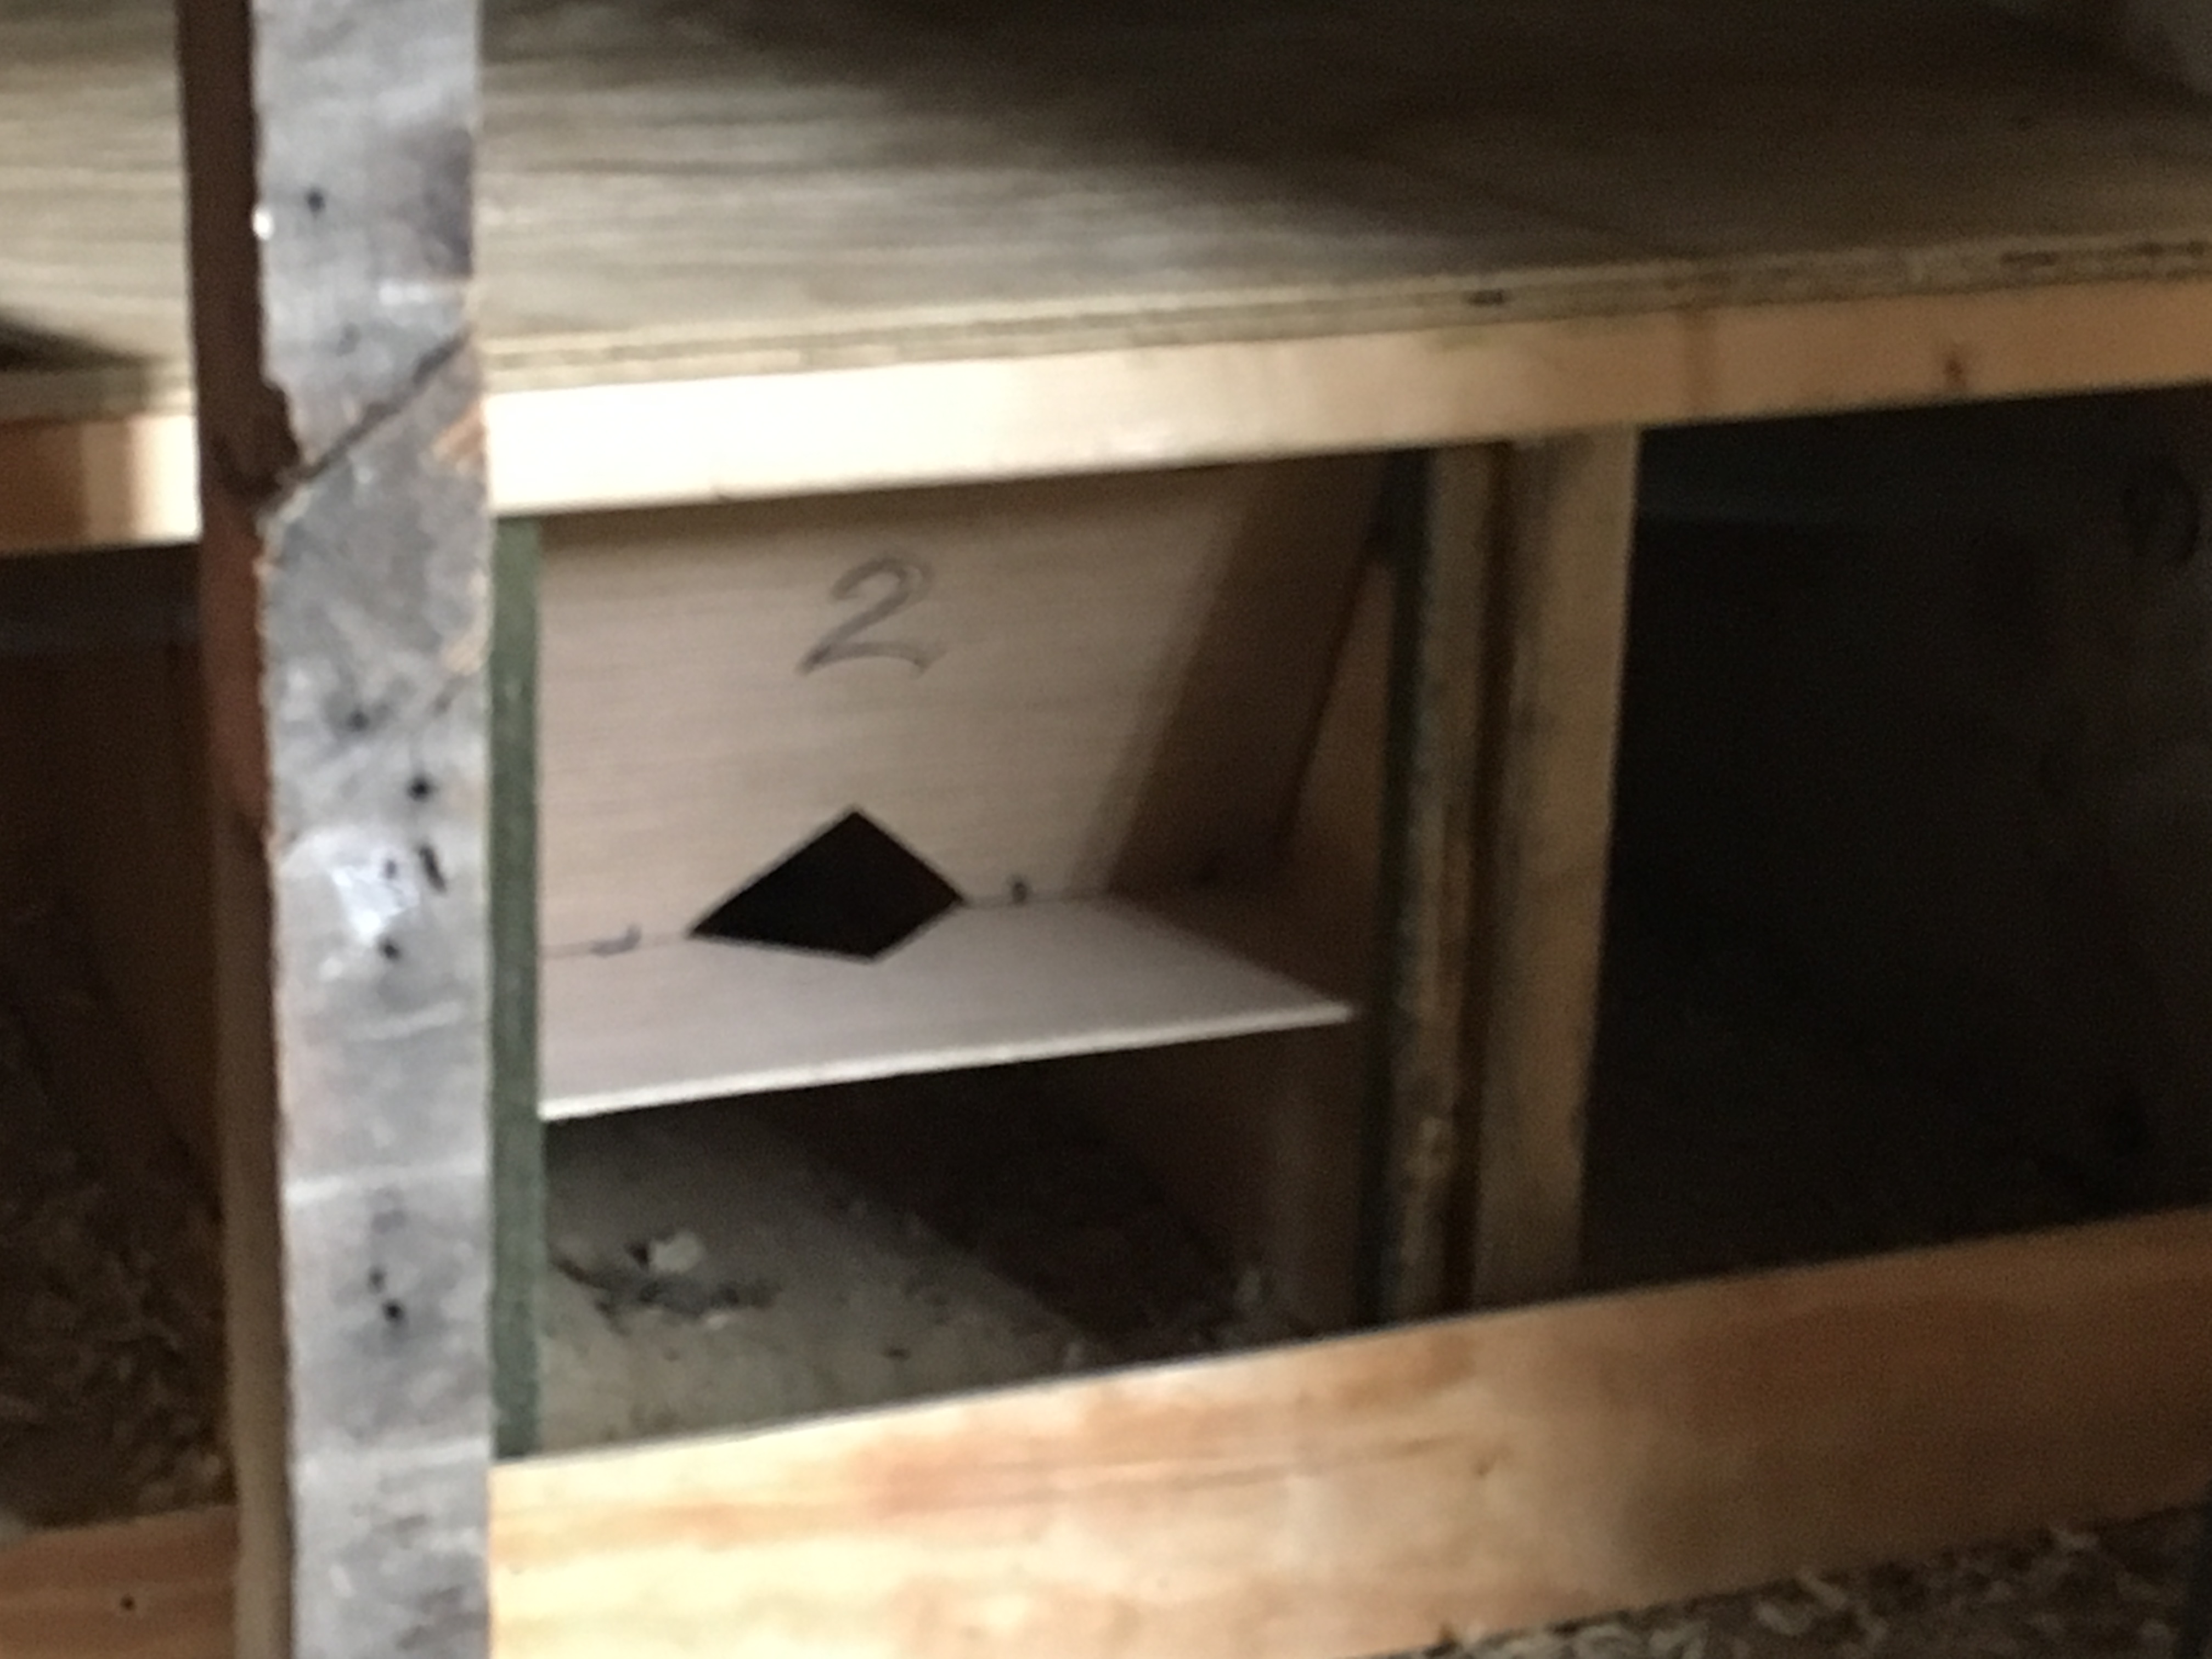





 So, on Saturday morning at 9 AM, the men showed up and they moved seven 500 lb. breeding coops UPhill on Saturday morning. We decided to move the birds in their coops. The birds had already been shut in all of Friday because we had 70 mph winds here and had to keep them safe.
 In the process of building the runs and moving the coops, we relocated some of the birds’ relative positions. As they were let out into new runs, our best Light Sussex cock and our best Silver Penciled Rock cock found themselves separated by only a wire fence, and they did not like it, not one little bit! As I worked on more runs on Monday evening, I watched these two cocks get into a massive fight through the wire that left them both bleeeding.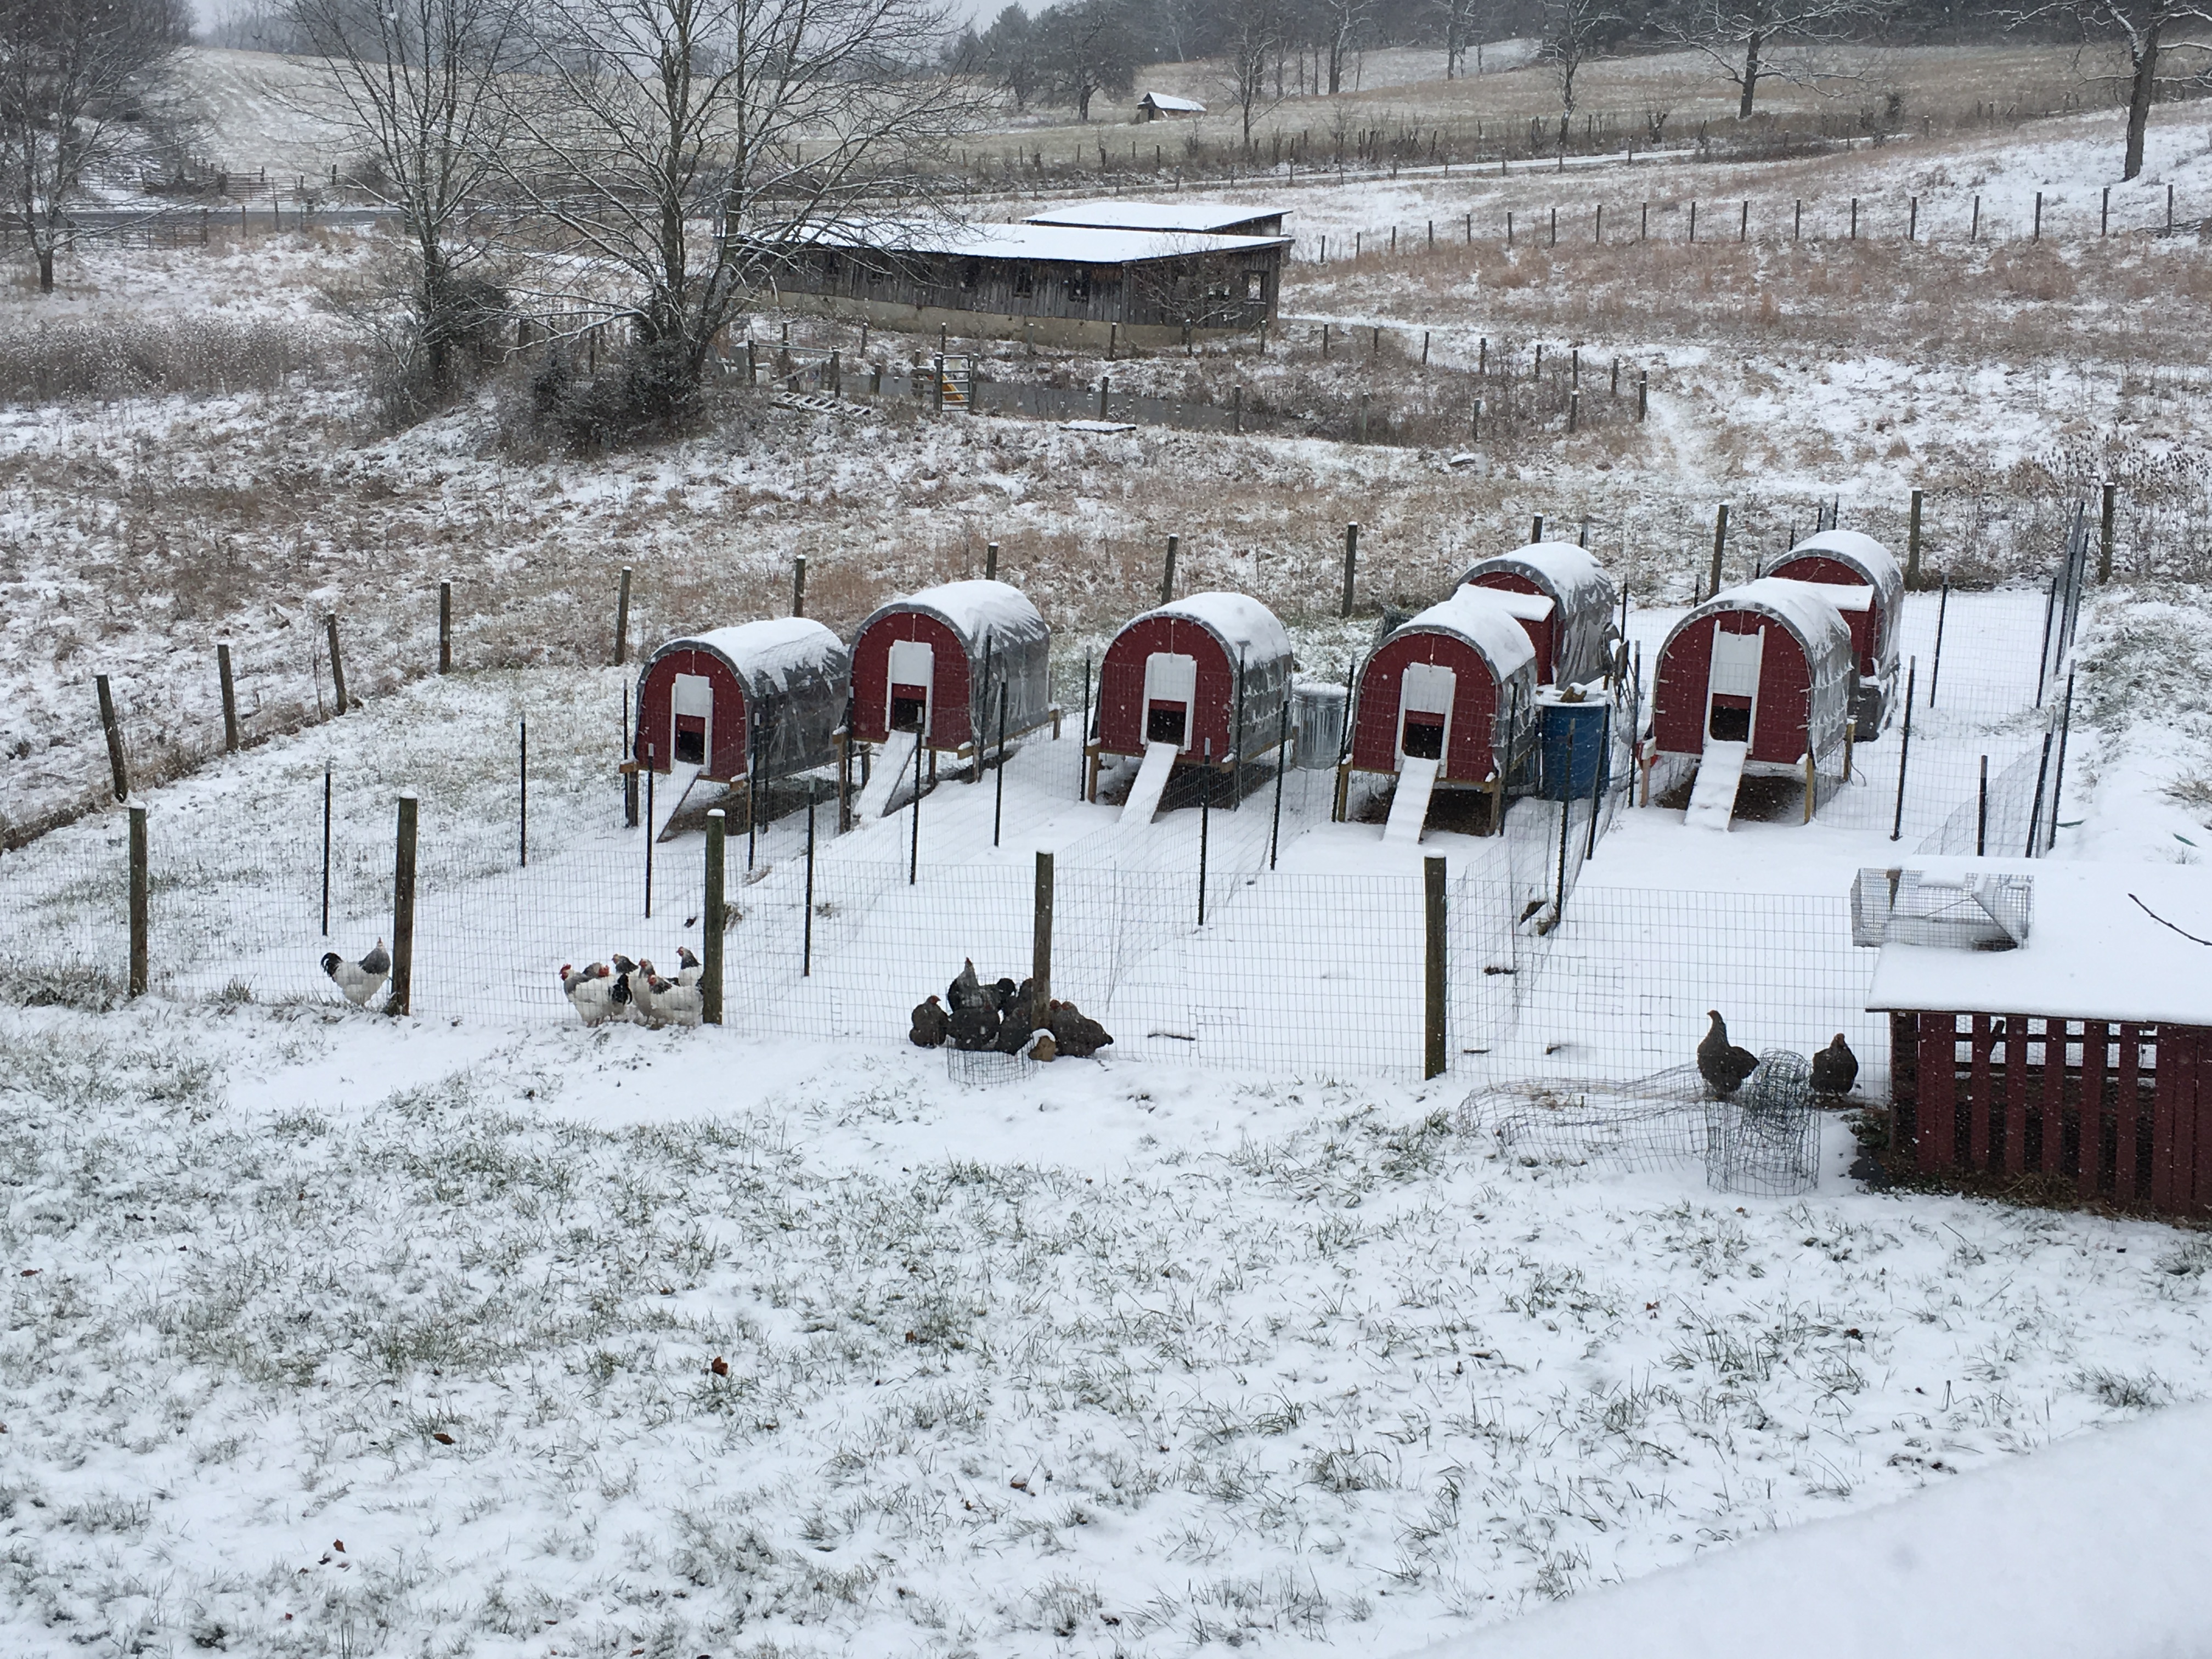




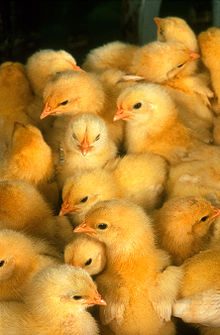
 As you surf the Internet, you’re going to find a range of options — and prices — for day-old chicks. Here are some questions and topics that can help you winnow these options. If you are brand new to chickens, the best advice I can give you is to join an online group, like